How to Draw Pokémon
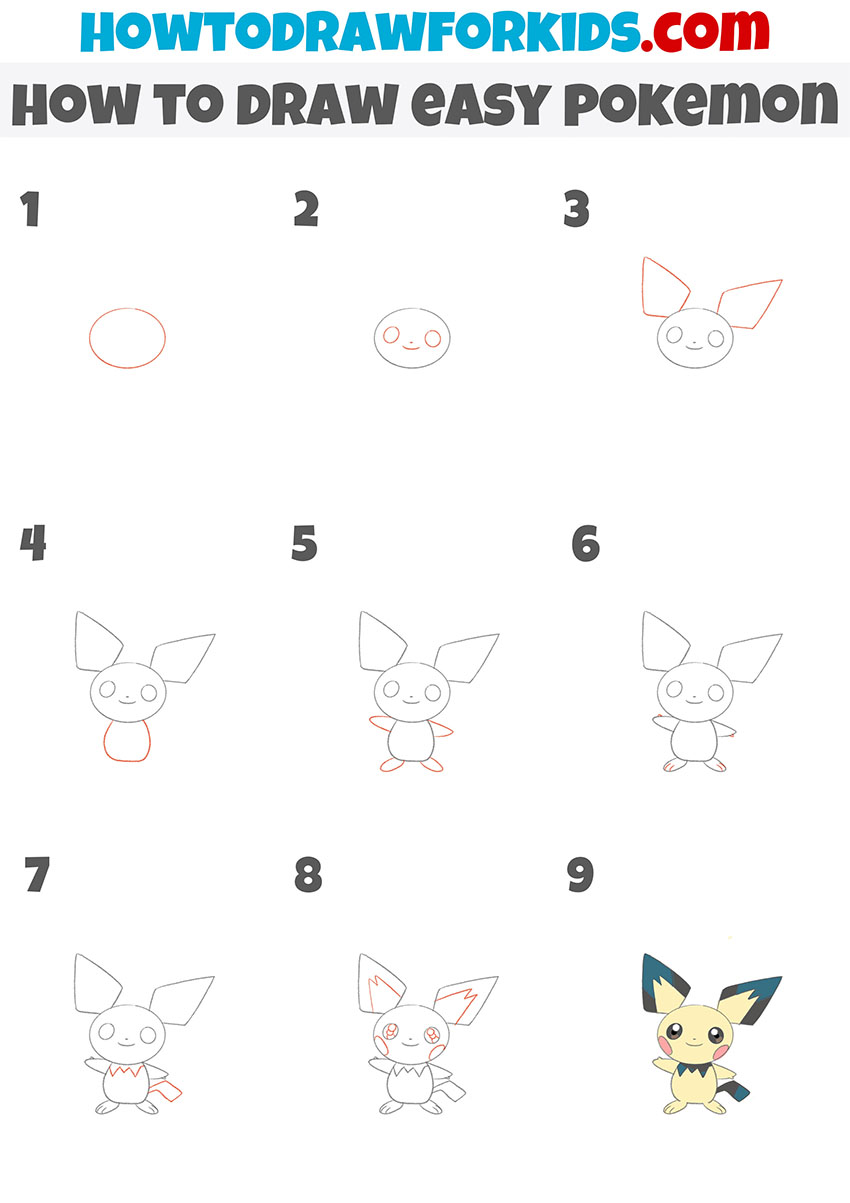
If you love Pokémon, this new guide on how to draw Pokemon will be very useful for you. I used the appearance of Pichu as an example, but this sequence of steps can be applied to drawing any small Pokémon.

How to Draw Pokémon: Basic Information
We are drawing one of the youngest Pokémon. If I’m not mistaken, this is the earliest form of Pikachu. Therefore, it is essential to use several techniques for drawing small children in a cartoon style.
First and foremost, this involves a large head and a small body. Another important feature is the large eyes and a friendly facial expression. Finally, since this is an Electric-type Pokémon, we will be sure to reflect the characteristics of this species in the drawing.
As we wrap up, you’ll see how the techniques you’ve learned allow you to draw Pokémon with a charm and energy that’s true to the character. This isn’t just a drawing lesson; it’s a way to connect with the Pokémon world through art. So let’s get those pencils moving and bring your very own Pokémon to life!
Pokémon Drawing Tutorial
Materials
- Pencil
- Paper
- Eraser
- Coloring supplies
Time needed: 30 minutes
How to Draw Pokémon
- Draw the outline of the head.
Begin by drawing an oval shape for the head. This simple shape will serve as the foundation for Pichu’s head. The oval doesn’t need to be perfect; a slightly rounded shape works well, capturing the soft and friendly appearance typical of small Pokémon.

- Add elements of the face.
Draw two circles for the eyes, positioned symmetrically on either side of the face. Then, draw a small curved line for the mouth, situated below the eyes. The line of the mouth is located very high, almost at the same level with the lower edges of the eyes.

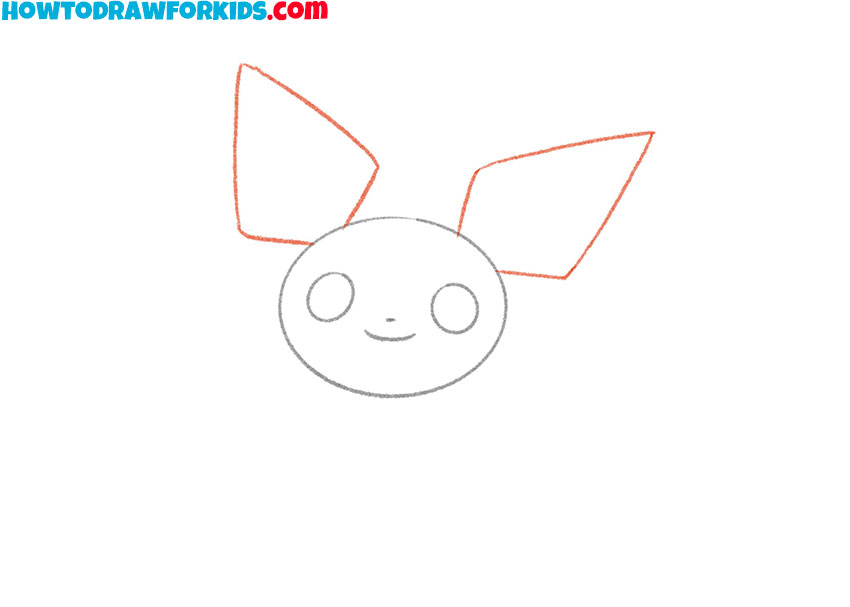
- Sketch out the ears.
Next, sketch the large ears. Pichu’s ears are triangular and very large compared to its head, contributing to its expressive appearance. Draw two triangles on either side of the head, with the base of each triangle connecting to the head. Ensure the triangles are angled slightly outward.
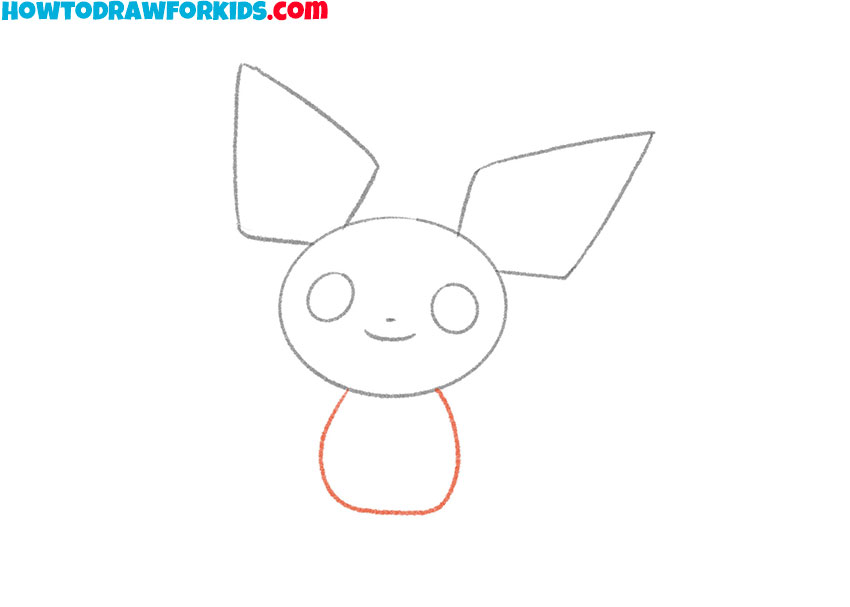
- Depict the torso.
Now, draw the body. Pichu’s body is small and simple, shaped like a rounded rectangle or bean. Attach this shape directly under the head, keeping it proportionally smaller than the head to maintain the character’s youthful look.
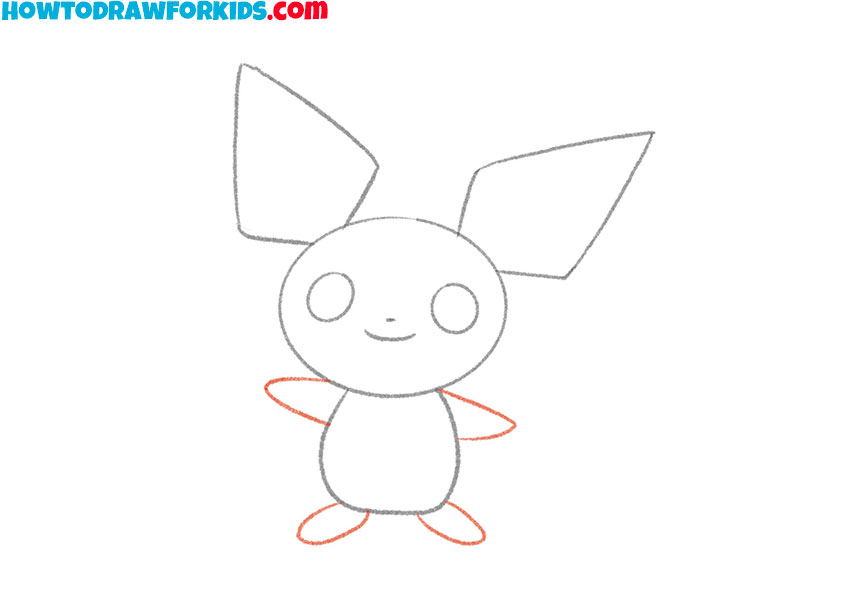
- Draw the arms and legs.
Add the arms and legs. Pichu’s limbs are short and stubby, contributing to its cute and approachable appearance. So, draw two small ovals on either side of the body for the arms, and two more at the bottom for the legs.
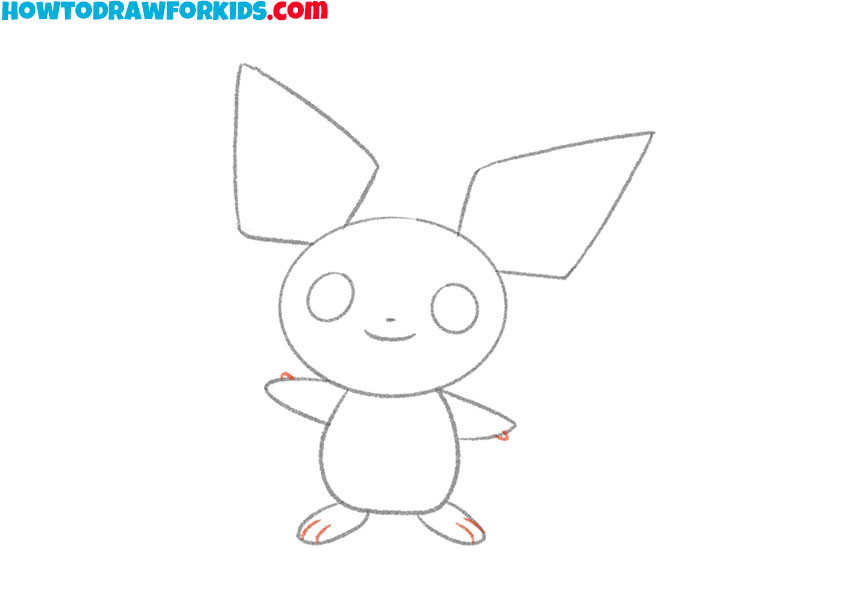
- Sketch out the fingers.
Probably few people will notice these details, but it is important for a coherent, recognizable image. Draw small indentations on the hands of our Pokemon – these will be the thumbs. On the lower limbs, add longitudinal lines to represent the toes.
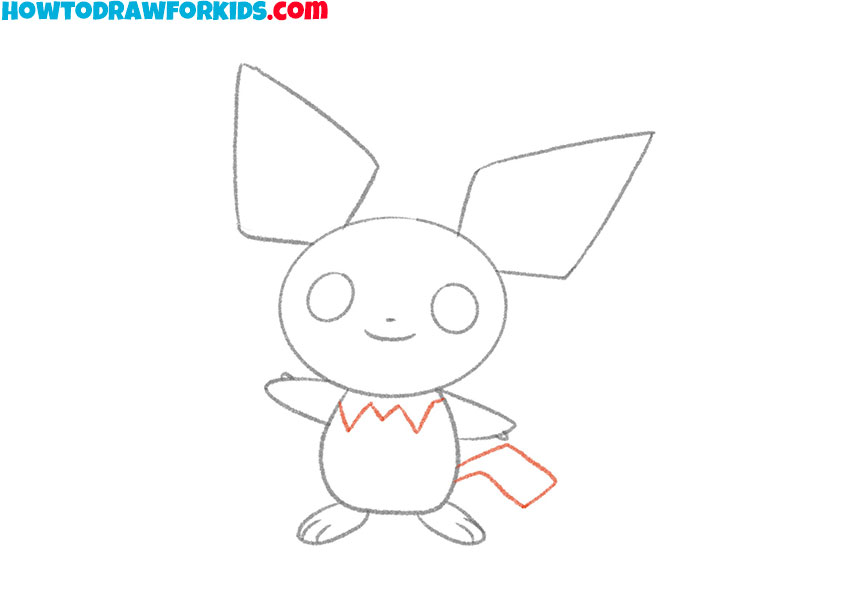
- Depict the tail and detail the color.
Draw the tail. Pichu’s tail is small and shaped like a jagged lightning bolt. Draw this at the bottom right of the body, ensuring it is proportionate and fits with the overall design. Then, add the outline of a jagged line on the neck, which is also associated with electricity.
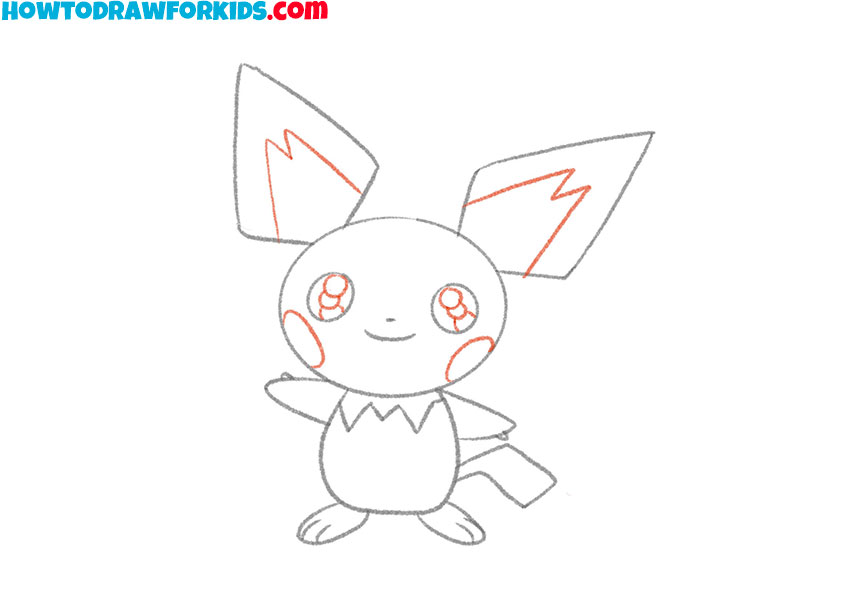
- Add the rest of the elements.
Add details to our Pokémon’s face and head. First, draw the outlines of the black areas on the ears. Use angular, jagged lines to evoke the sense of electricity. Next, add some highlights to the inside of each eye. Complete this step by drawing blush marks on Pichu’s cheeks.
- Color the Pokémon.
Finalize the drawing by adding color. Pichu is predominantly yellow, with black ear tips, red cheeks, and light brown accents. Use these colors to bring your drawing to life, ensuring the shades are vibrant and true to the character.

Additional Content
Moreover, I understand the importance of having reliable and accessible resources for practice. That’s why I’ve created a downloadable PDF version of this Pokémon drawing lesson. It’s a distilled version of the full tutorial, focusing on the key elements that will help you perfect your Pokémon sketches.
This PDF is designed for convenience, enabling you to keep practicing even when you’re away from the screen, fostering your skills in the physical world. With this handy guide, you can drawing on the go, practicing in the park, on a road trip, or in the comfort of your own backyard.
Top Tips for Perfecting Your Pokémon Art
Here, I offer some tips and tricks to enhance the experience of our recent lesson on how to draw Pokémon.
- Proportions are Key: Pay close attention to the proportions of your Pokémon. Even in a simplified form, maintaining the correct ratio of head to body will keep your character balanced and recognizable.
- Expressive Eyes: Eyes are the windows to a Pokémon’s soul. Spend time perfecting them, as they can define the character’s expression and personality.
- Practice Makes Perfect: Repeating the drawing multiple times is the best way to improve. Each iteration will help you understand the shapes and lines better.
- Use References: Don’t hesitate to use reference images from various angles to better understand the 3D form of your Pokémon.
- Embrace Mistakes: Every mistake is a lesson. Analyze what went wrong and why, and use that knowledge for your next attempt.
By incorporating these tips and tricks, you’ll find that your skill in crafting Pokémon characters will swiftly improve. Keep these points in mind as you continue to draw and explore the vast universe of these charming creatures.
Conclusion
Congratulations on completing this Pokémon drawing lesson! Don’t forget to follow me on social media to stay in the loop with all our artistic adventures. And if there’s a particular lesson you’re eager for, let me know in the comments below. Your feedback is my guiding star, leading us to our next creative destination.


i am happy
Pokemon
I love it its so easyyy