How to Draw a Poppy Flower
This simple tutorial on how to draw a poppy flower will show you that drawing flowers doesn’t require advanced artistic skills.

How to Draw a Poppy Flower: Introduction
When drawing a flower like a poppy, it helps to begin with a general understanding of how floral shapes are structured. Most flowers are organized around a center point, and that applies to poppies as well. This makes them a good subject for practicing radial subjects.
In stylized floral drawing, you don’t need to follow nature exactly. The most important thing is to convey the general structure and shape of the flower, although using simple techniques. If the drawing looks good and clearly reads as a flower, it works for this kind of simplified flower drawing.
Once you understand the basic form of the poppy, you can try drawing it in different sizes, or as part of a bouquet with other stylized flowers. Practicing in this way helps build up familiarity with common floral forms, which appear in many types of simplified illustrations. To help you with this, I have supplemented this tutorial with three additional instructions at the very bottom of the page.
Poppy Flower Drawing Tutorial
Materials
- Pencil
- Paper
- Eraser
- Coloring supplies
Time needed: 30 minutes
How to Draw a Poppy Flower
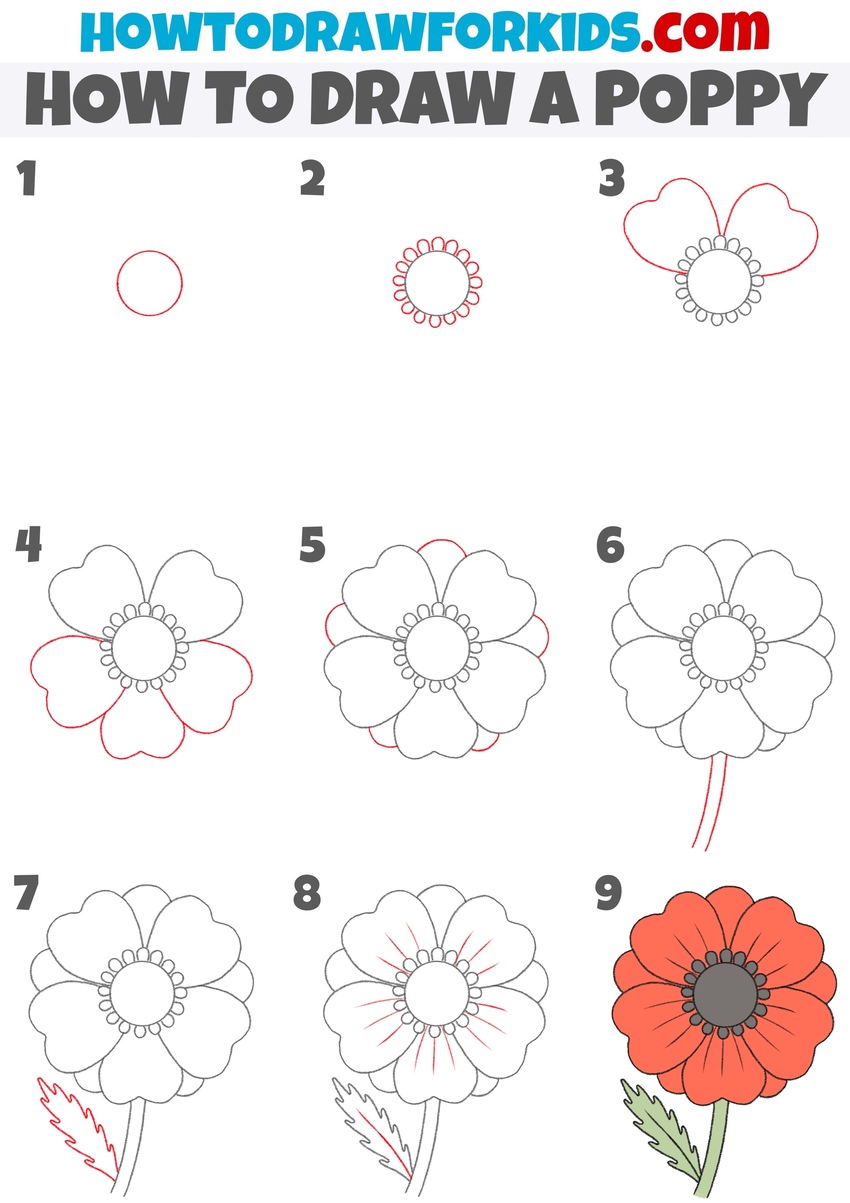
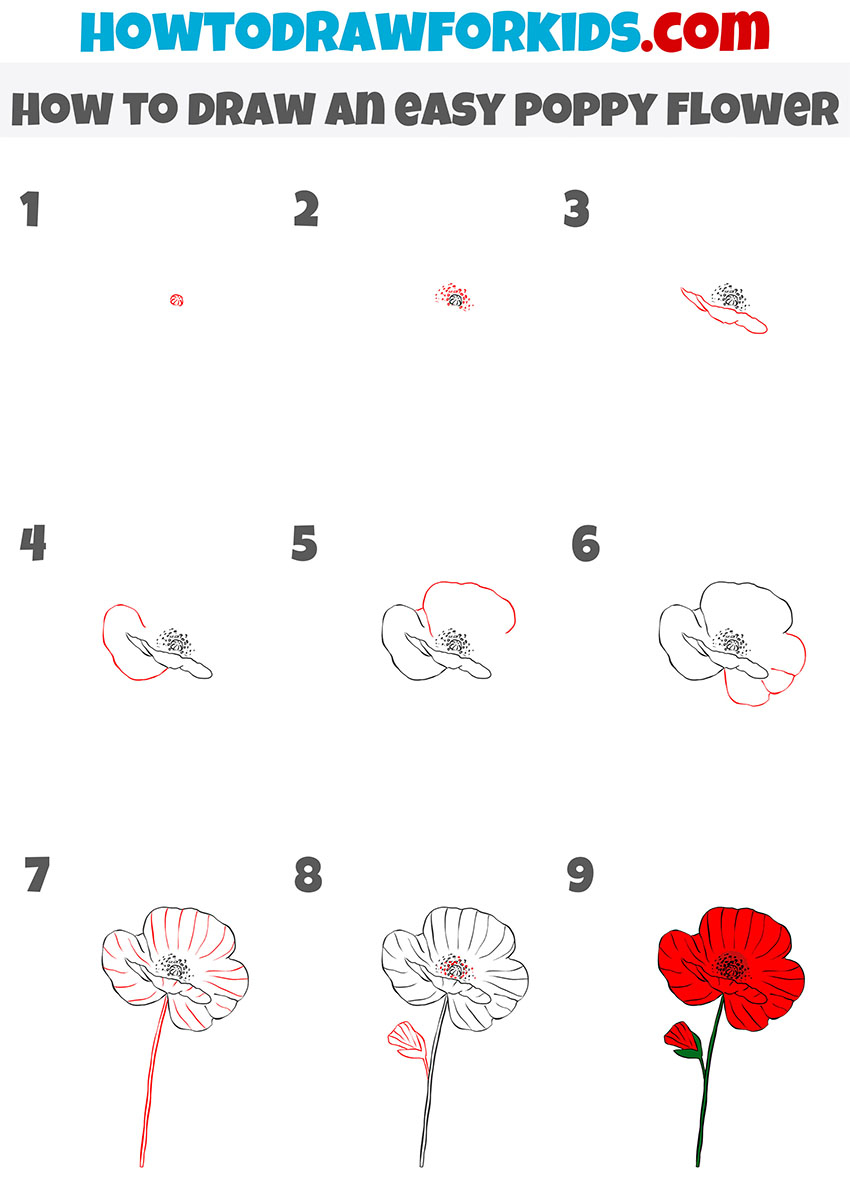
- Sketch the center of the flower.
First, draw a smooth round shape for the center of the poppy. Place it slightly above the middle of your sheet to leave space for the stem and leaves later. If you want to make this lesson perfectly straight and smooth, you can use a compass.
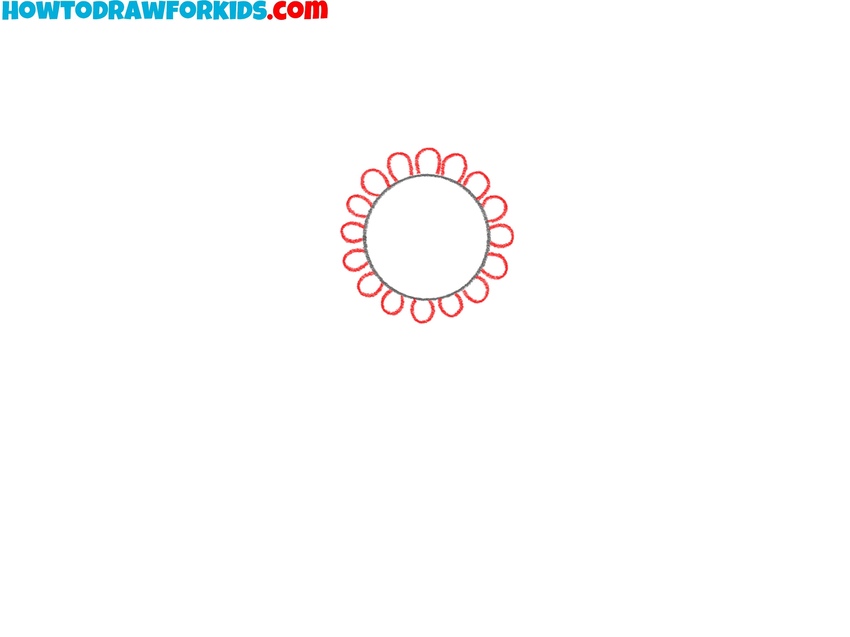
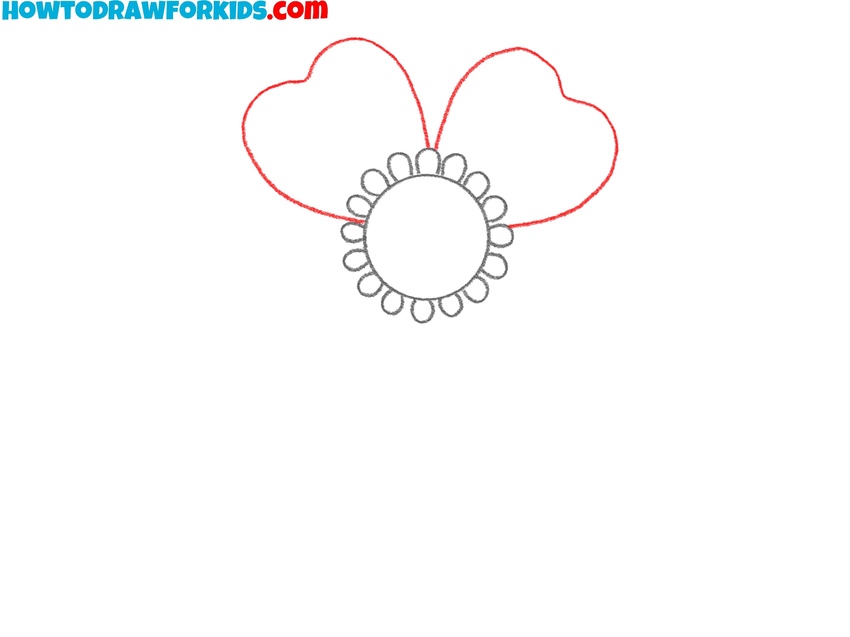
- Sketch the stamen ring.
Around the central circle, draw a neat ring of small oval shapes. These represent the poppy’s stamen details. Keep the ovals evenly spaced and similar in size. A common mistake is to crowd them too tightly – leave enough space between the ovals.
- Draw the poppy’s upper petals.
Draw two large, rounded petals extending upward from the center. The top edges can be gently wavy. Both of these petals should be approximately the same size and shape. You can vary their height slightly for a more natural look.
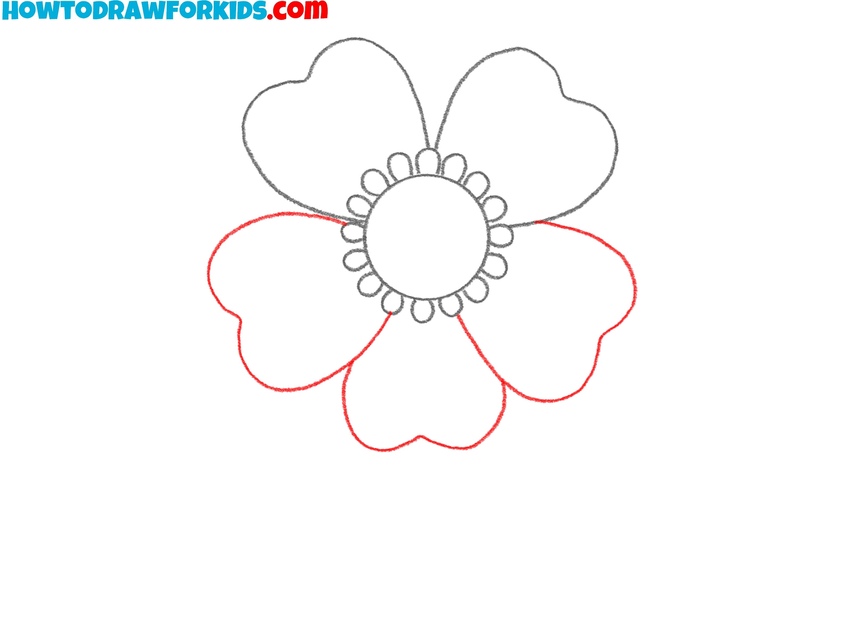
- Finish the first layer of petals.
Now draw the side and bottom petals to complete the shape of the bud. Position them below the top two petals, making sure they follow a similar wavy structure and overall size. The outer edges of the petals should be evenly spaced from the central circle
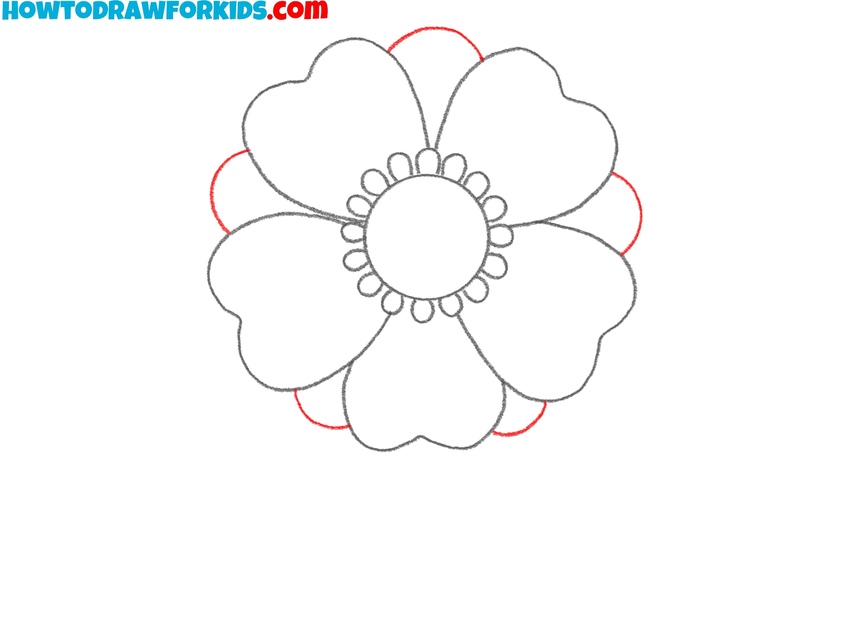
- Add the second layer of the petals.
Now let’s give the poppy flower drawing a more voluminous look by sketching a row of petals on the back. To do this, draw small curved lines between the top edges of the petals from the previous steps. The sizes of these lines should also be approximately equal to each other.
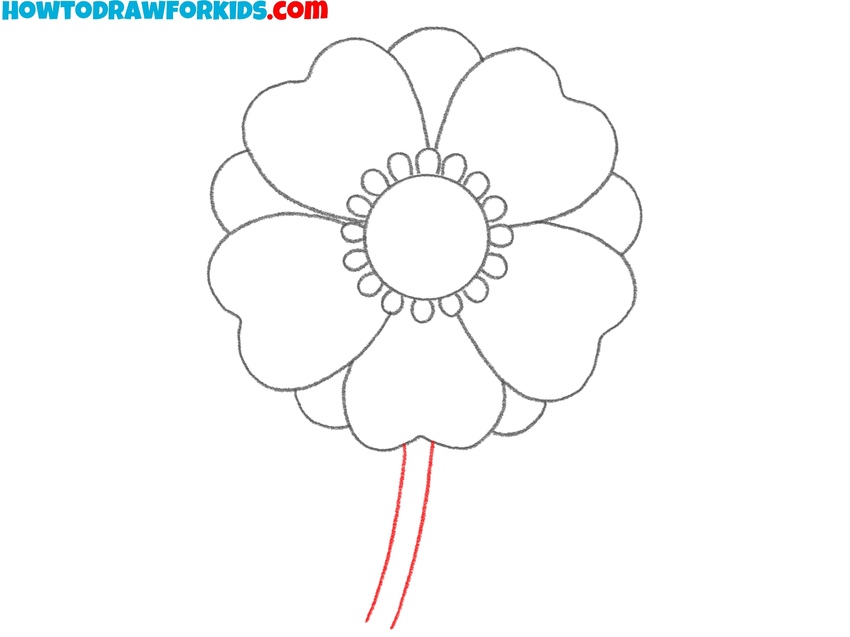
- Draw the poppy flower’s stem.
From the bottom of the flower, draw two long, parallel curved lines to form the stem. Poppy stems are usually thin and delicate, so avoid making them too thick. In some stylized versions, the stem can be drawn straighter or even include gentle waves.
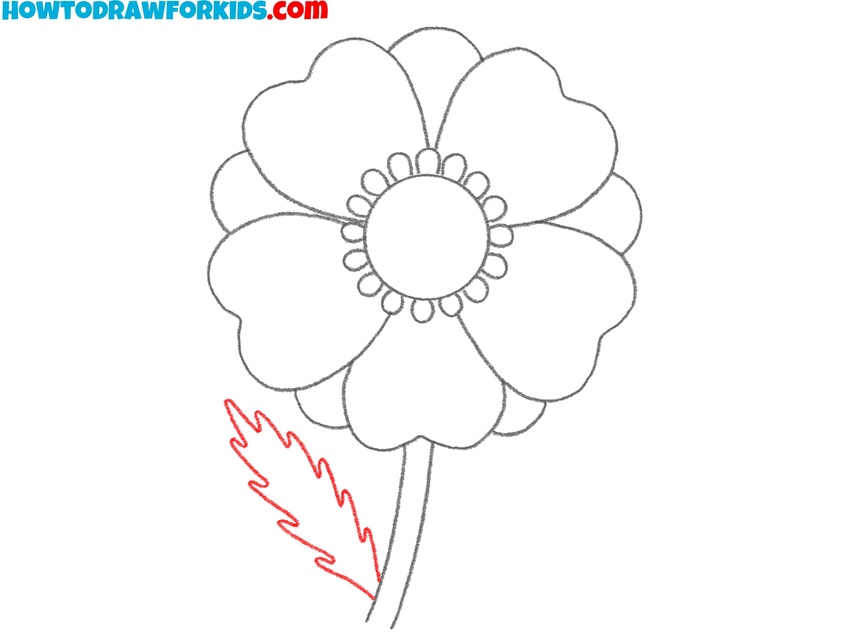
- Draw the flower’s leaf.
Add a long, narrow leaf to the left of the stem. The leaf should be drawn with a wavy outline to represent the toothed shape of real poppy leaves. Try to keep the size proportional compared to the flower. If you want to vary this part, you can draw another leaf on the opposite side of the stem.
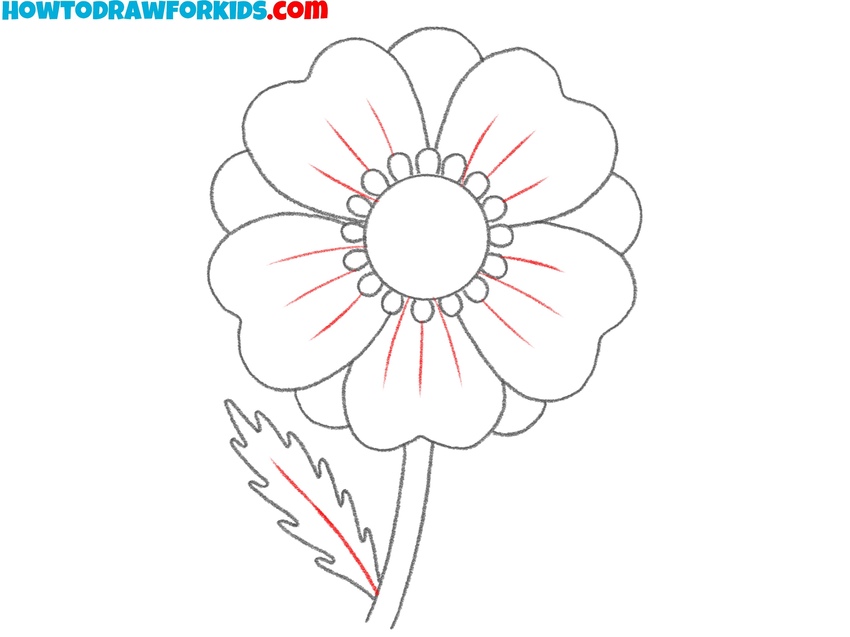
- Add texture to the petals and leaves.
Draw several short lines radiating outward from the center of the flower toward the edges of the petals. These lines represent the delicate creases and texture often seen on poppy petals. Vary the length of each line to avoid an unnatural look. Also, draw the vein on the leaf with a smooth line.
- Add final details and colors.
Color the petals of the flower in a rich red or orange color depending on the type of poppy you’re drawing. The center circle should be dark gray or black. The small ovals around the center can also be black or a slightly lighter tone. Color the stem and leaves light or muted green.

How to Draw a Poppy Flower: Alternative Techniques
This lesson will use your ability to draw smooth, rounded lines to draw the outline of each petal. The next step is to draw wavy lines to detail the edges of the petals.
First use thin lines, then make a clear outline. Take your time during the lesson and try to draw the same lines as shown in the instructions.
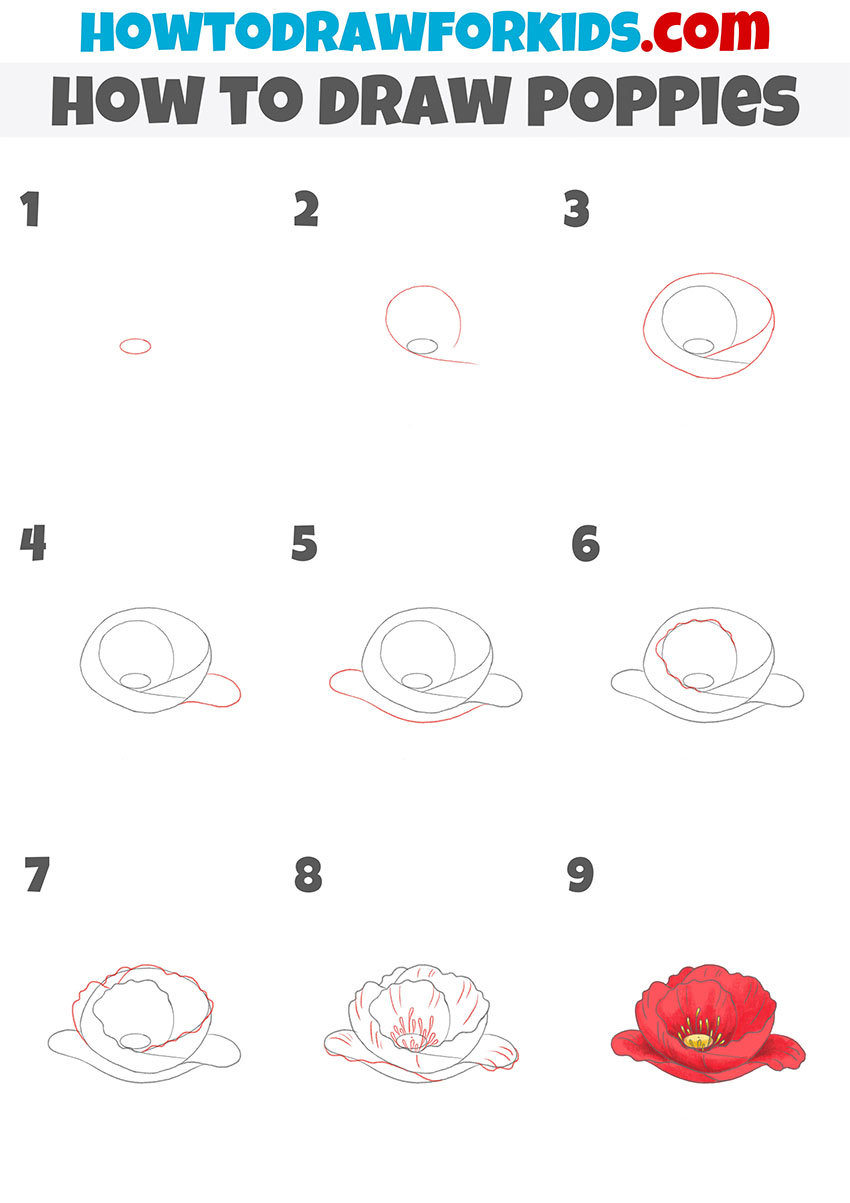
Poppy Bud Drawing Tutorial
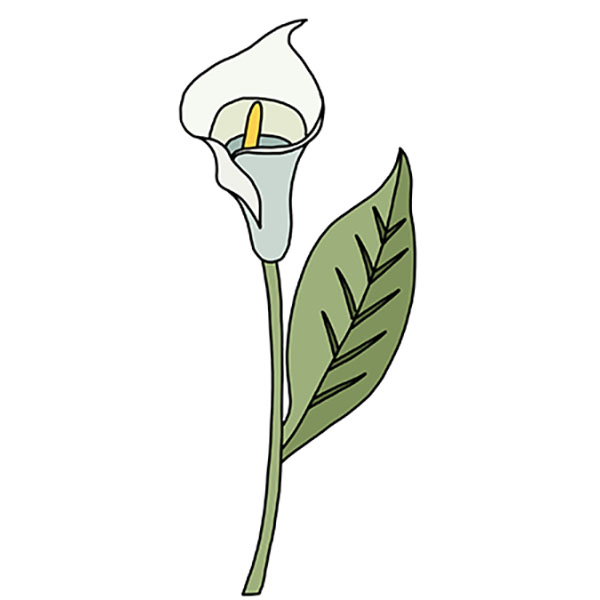
This poppy bud drawing tutorial uses a spiral-based approach to build the center first, then adds petals in layers from the inside outward. Now let’s focus on the main part of the poppy – that is, the bud. Here I will try to show you how to draw a poppy bud and give the image a fairly realistic look.
To start this poppy bud drawing tutorial, make a small oval near the center of the page. Add a curved line spiraling outward to start shaping the center of the poppy. Enclose this shape with another curved line that wraps around it in a spiral form. From this base, start building the outer petals by drawing rounded forms that extend from both sides. Add another longer curved petal below the first set to make the flower look open and full.
Continue adding petal shapes behind the front layers. Use wavy edges to give each petal a natural and slightly uneven appearance. Draw a few short curved lines around the inner circle to show stamen details. Once the main shapes are finished, add smaller lines inside the petals to create folds. Color the poppy flower red with a dark center and yellow stamens.
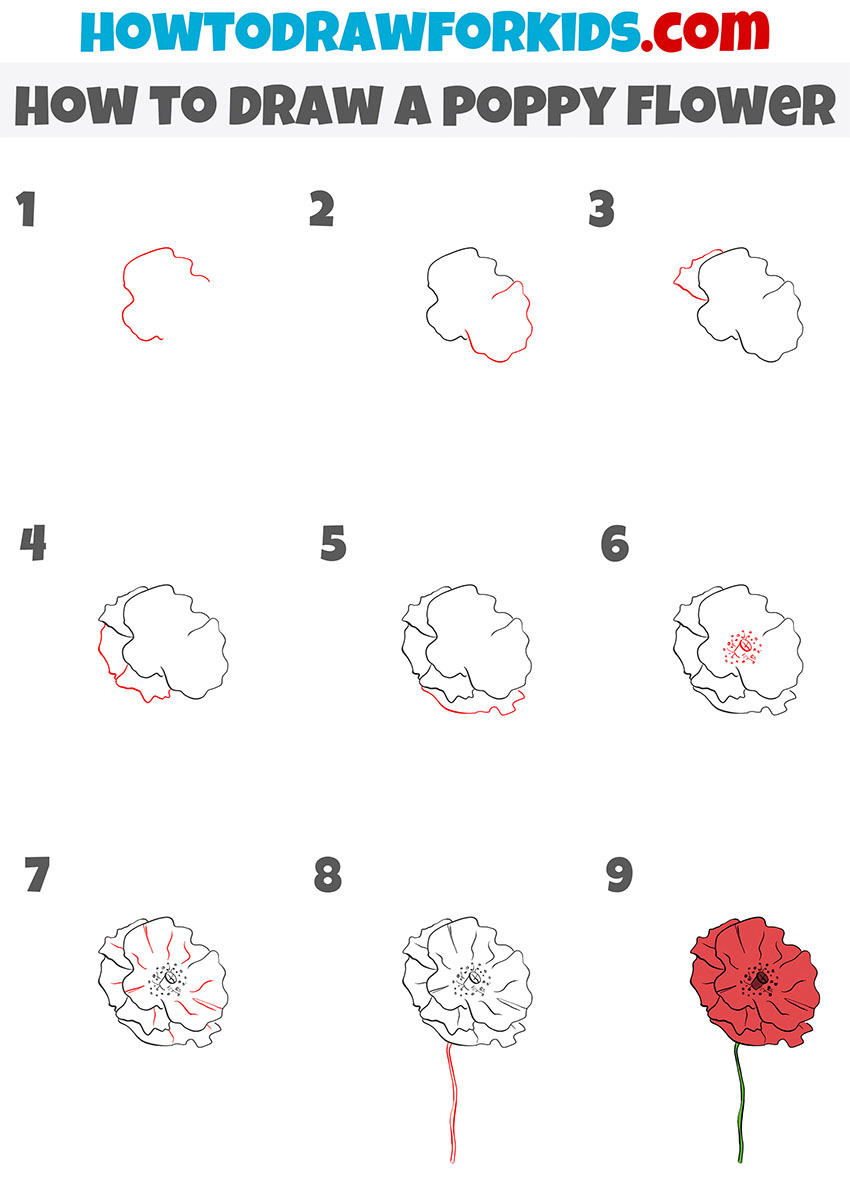
Simple Poppy Flower Drawing Tutorial
Now let’s try drawing a poppy flower again, but using a more simplified style and a completely different approach. This simple poppy drawing tutorial builds the flower petal by petal using uneven, wavy lines from the start, giving the drawing a more simple but natural look.
First, sketch a large uneven wavy shape for the first petal. Add another wavy-edged shape attached to it, forming the second petal. Continue building the flower by drawing the third and fourth petals one by one, each overlapping slightly with the previous ones and varying in edge shapes. Keep the outlines loose and irregular to match the natural look of a real poppy.
Once all main petals are completed, draw a small circular shape in the center of the flower. Inside it, add small dots and tiny stamen lines going outward. Draw lines from the center toward the petals to indicate creases. Finally, sketch a narrow, wavy stem going down from the bottom center of the flower. Use red for the petals, black for the center, and green for the stem.
Cartoon Poppy Flower Drawing Tutorial
Let’s now look at another option for drawing a poppy. Here you can see a slightly different set of steps. For example, unlike the first lesson, we will draw a poppy from the central part, and not from the petals.
To draw this version of a poppy, sketch a small circle for the center. Add a few short lines and dots around it to indicate the stamens. Then sketch the first petal below the center, using a long curved line with a small bump in the middle. Add a second petal to the left side, curving up and around. Draw a third large petal over the top, keeping the edge rounded and smooth.
Continue with two more petals – one on the right and one near the bottom. Make sure all petals have the same style. Draw several lines inside each petal to show folds. Add a straight stem extending from the bottom. Then draw a small side bud with a curved stem and a few simple sepals. Color the flower with red petals, a black center, and a dark green stem.
Conclusion
This tutorial on how to draw a poppy helped you understand the basic structure of this flower using simple lines and clear steps. You practiced drawing a very simplified yet recognizable flower, and the skills gained in this tutorial are useful in drawing other types of flowers as well.
You can now apply the same method to draw a daisy, sunflower, or any other similar plant, adjusting petal count and shapes accordingly. For a more varied look, try drawing poppies with different petal sizes, alternate leaf styles, or add more poppies around to create a bouquet.
If you found this lesson helpful, feel free to share it with others and leave your feedback in the comments section. You can also subscribe on social media to see upcoming flower drawing lessons.