How to Draw Stitch
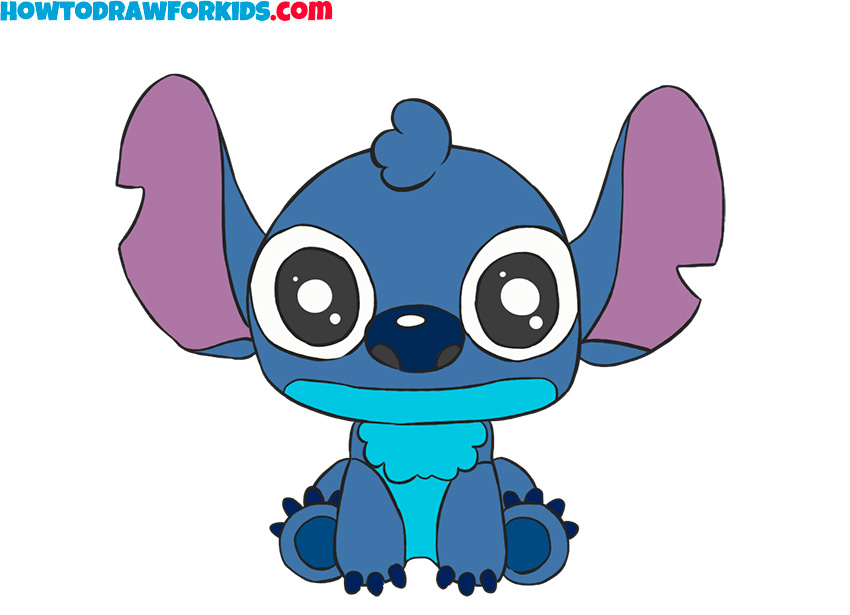
Welcome to this step-by-step tutorial where I will teach you how to draw Stitch, the clever alien from a distant galaxy and Lilo’s friend.
How to Draw Stitch: Basic Information
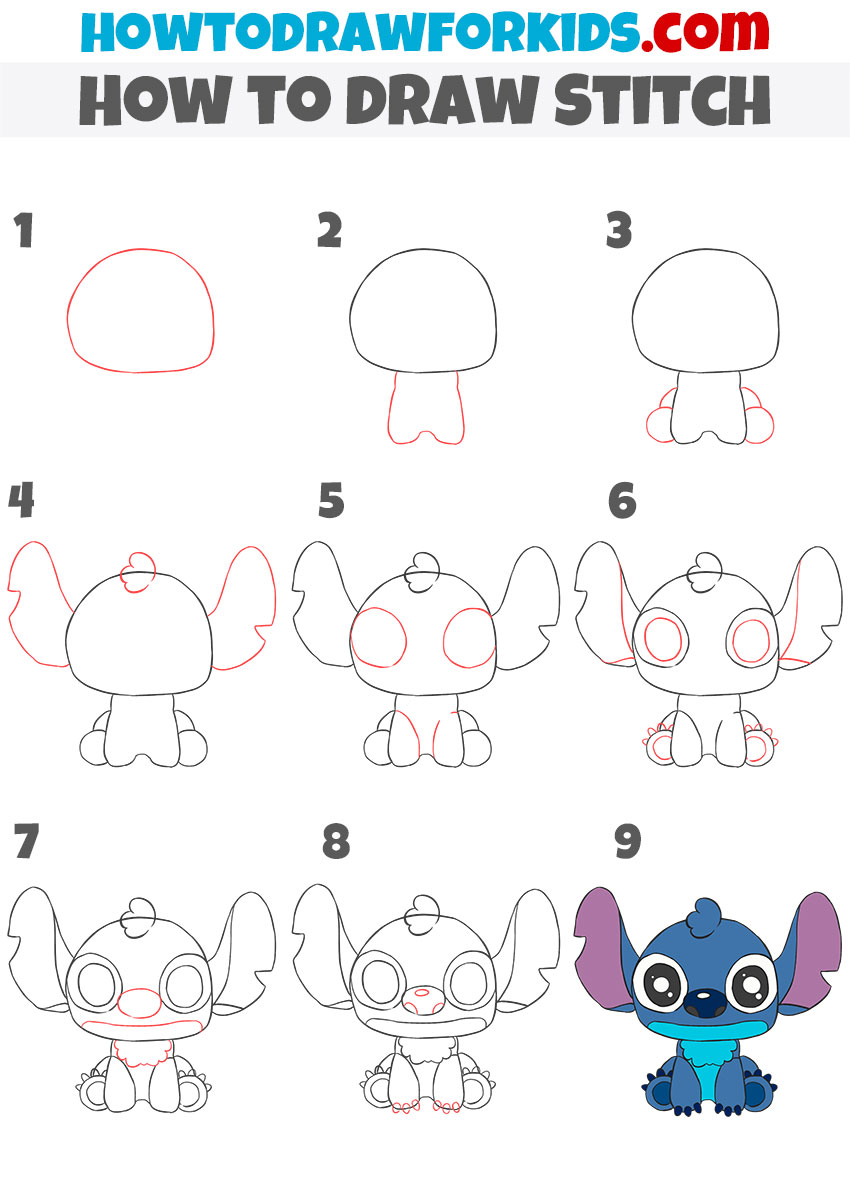
This tutorial provides a step-by-step guide on drawing Stitch, a popular animated character known for his distinctive features. Through these steps, you will learn to use basic shapes and lines to structure Stitch’s body and convey his unique appearance.
By following the steps of this tutorial on how to draw Stitch, you will learn how to sketch his oversized ears, expressive eyes, and other notable features that make him recognizable.
Additionally, the tutorial will highlight fundamental concepts in cartoon proportion and symmetry, helping you achieve an accurate representation of Stitch without overwhelming complexity.
In addition to the main Stitch drawing instruction, this lesson includes additional instructions at the end to help you practice your skills and reinforce the knowledge gained. Although both lessons are similar, they each have unique features and differ slightly in style.
Stitch Drawing Tutorial
Materials
- Pencil
- Paper
- Eraser
- Coloring supplies
Time needed: 35 minutes
How to Draw Stitch
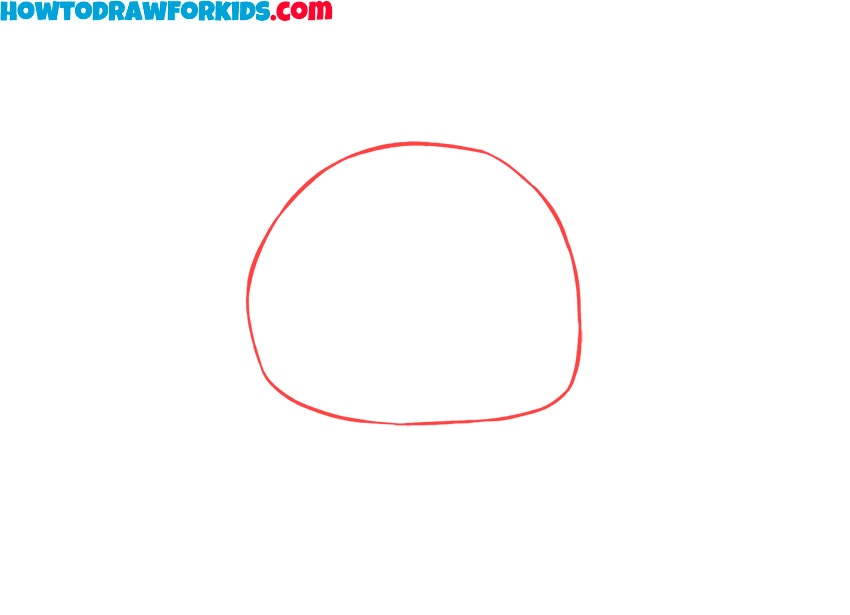
- Sketch the basic shape of the head.
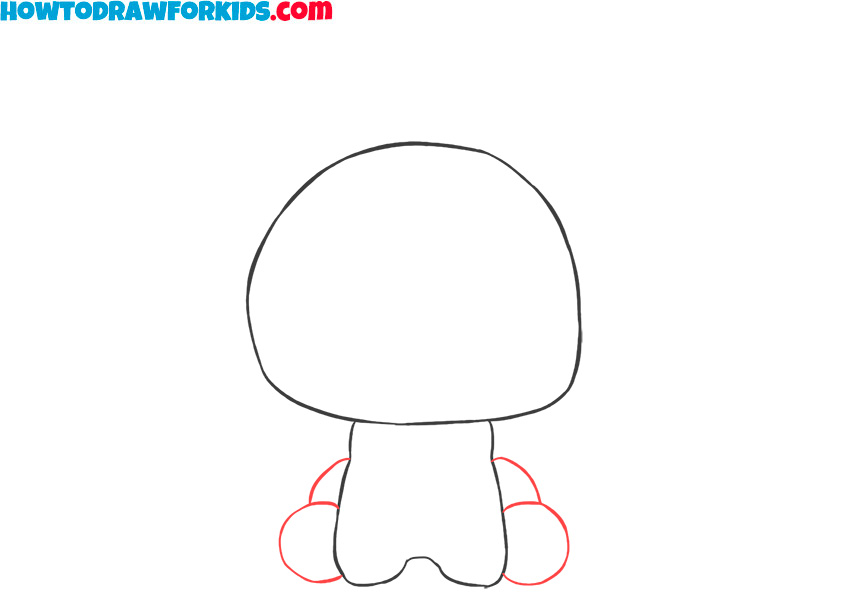
Begin by drawing the basic shape of Stitch’s head, creating a large, rounded oval at the top of your paper. This shape should resemble an irregular oval. Stitch’s head is large in comparison to his body. Keep the lines light, as you may need to make adjustments in later steps.
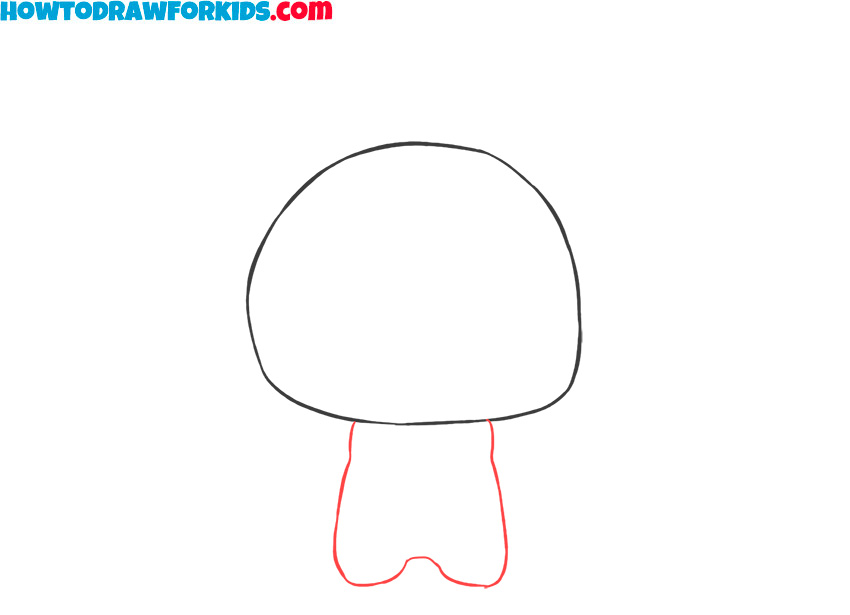
- Draw Stitch’s body and arms.
Below the head outline, add Stitch’s body shape. Draw a shape resembling a long “W” for the body and arms of Stitch. This body shape should be small compared to the head, as Stitch’s proportions are meant to be very simplified and cartoonish.
- Add the legs and feet.
On each side of the lower body, draw two rounded, oval shapes to represent his legs and feet. These ovals should be small and give the character a seated appearance. These leg shapes will eventually be refined to include details like his claws.
- Draw the ears and tuft on the head.
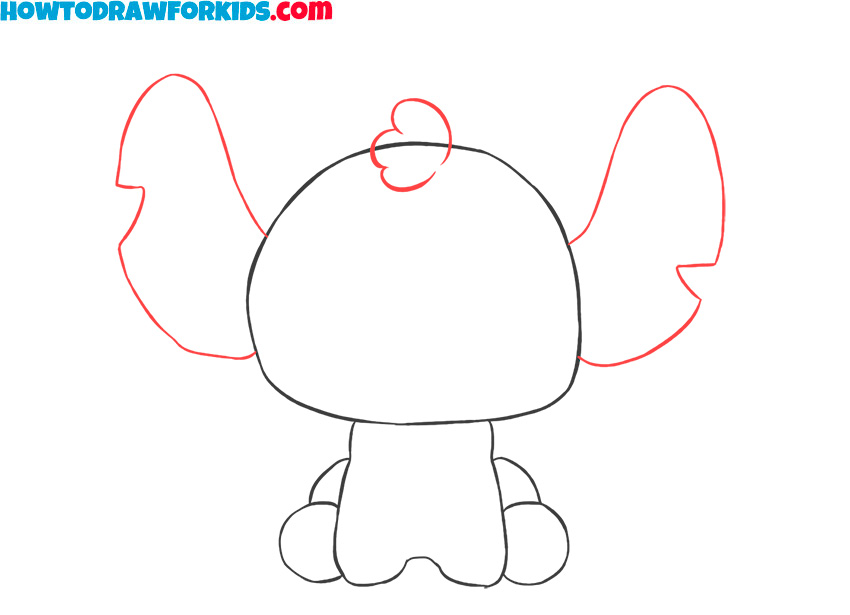
Start each ear at the side of the head, extending outward in a curved, somewhat triangular shape. The ears are wide at the base and narrow slightly as they stretch outward, with rounded ends. They should be roughly as tall as the head itself.
- Draw the eyes of Stitch.
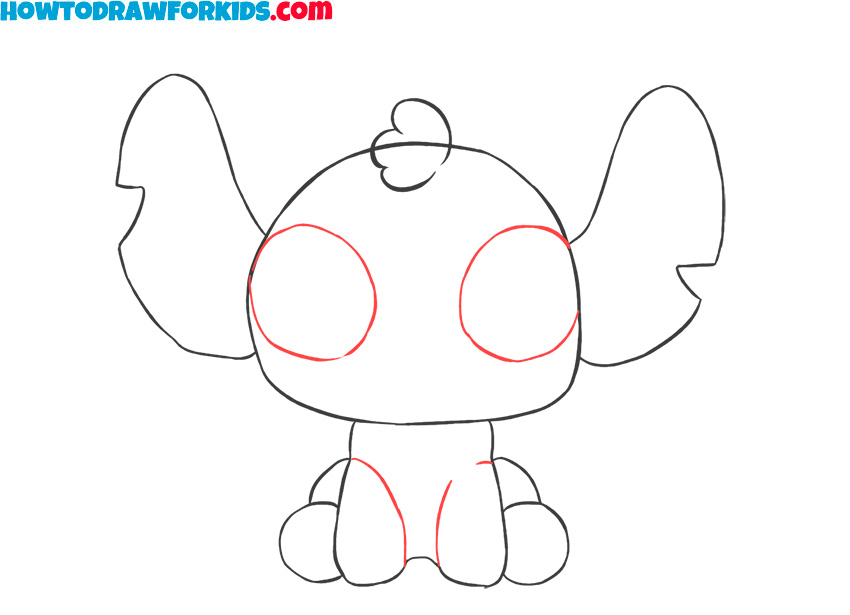
Draw the cartoon eyes as two big circles positioned in the middle of his head. Place them symmetrically on the head, leaving enough space between them to fit his nose. These eye outlines will later be filled with pupils. With a couple of lines define the arms.
- Detail the eyes, ears, and legs.
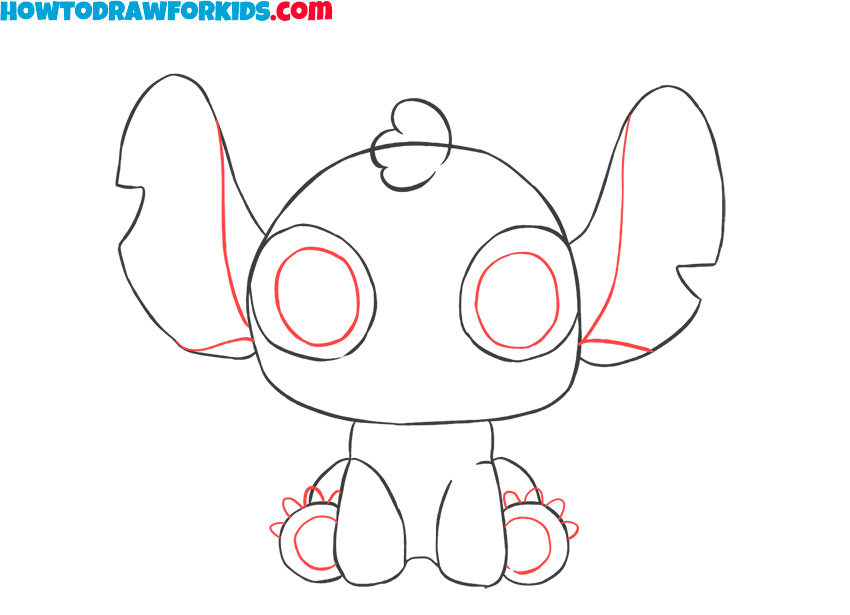
On the feet, add small oval shapes for his claws, creating a more detailed look. Use a couple of simple lines to draw the pupils inside the eyes. Detail the ears, drawing lines inside them. Draw circles on the bottom of the feet to make them look more detailed.
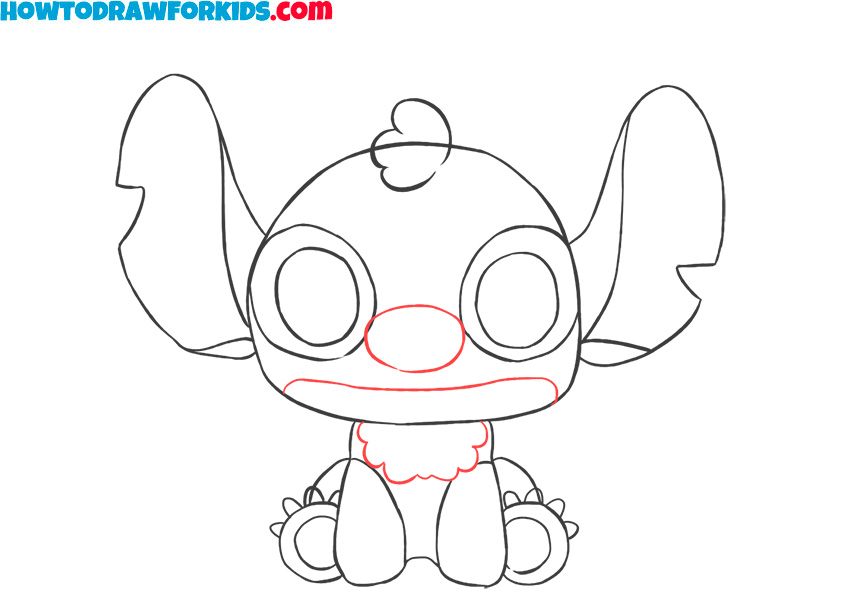
- Draw Stitch’s nose and mouth.
Start with his nose, placing an oval shape between the eyes, centered on the face. Then, add his mouth right below the nose, forming a long, curved line that stretches across his face. Next, detail the torso by drawing the fur on the upper chest in the form of a small, uneven circle.
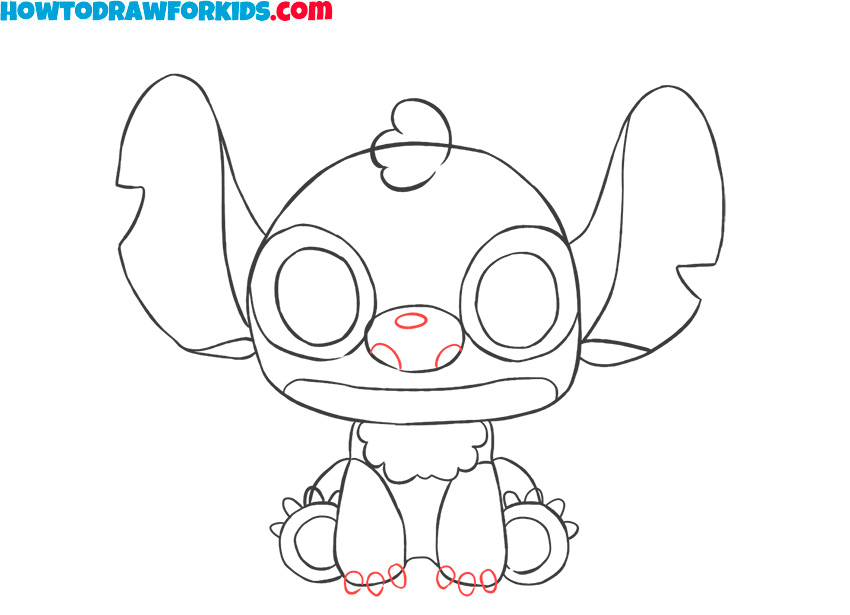
- Erase the guidelines and add finishing touches.
Draw the nostrils with a couple of curved lines, and use a small oval to depict a highlight on the nose. Next, draw the claws on the hands with small ovals. This is also a good point to clean up any stray lines and adjust shapes as needed. The additional details and refinements make the drawing look finished.
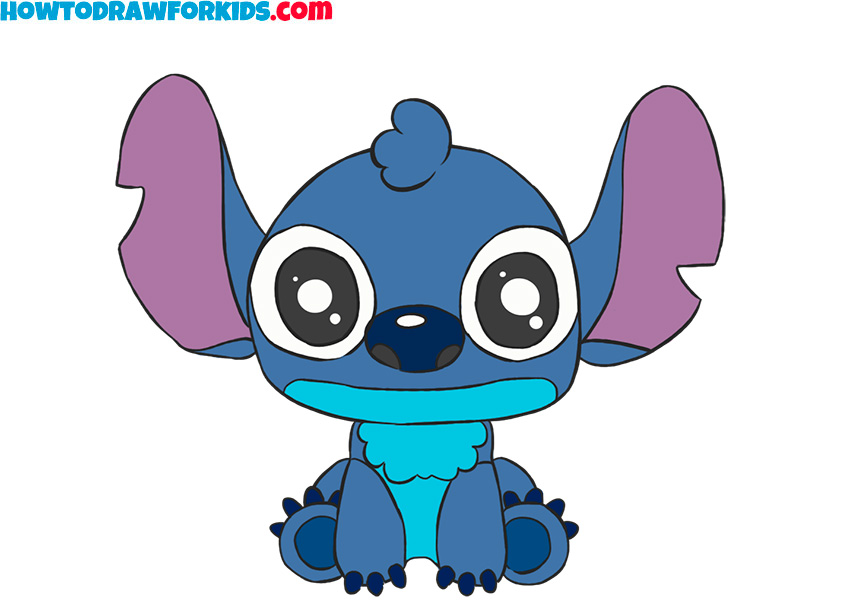
- Color Stitch.
Use a dark blue for his body and a lighter blue for his chest and chin. Color his large ears with a purple shade, and add black for the pupils in his eyes. Leave the highlights on his nose and inside eyes white. Stitch’s unique color scheme is an important part of his look, so try to replicate it accurately.
How to Draw Stitch: Video Tutorial
Additional Content
In addition to this Stitch drawing tutorial, a free PDF file is available, providing a simplified and condensed version of the lesson for convenient use anywhere. This downloadable resource includes extra materials created to boost your drawing skills.
How to Draw Stitch: Additional Tutorial
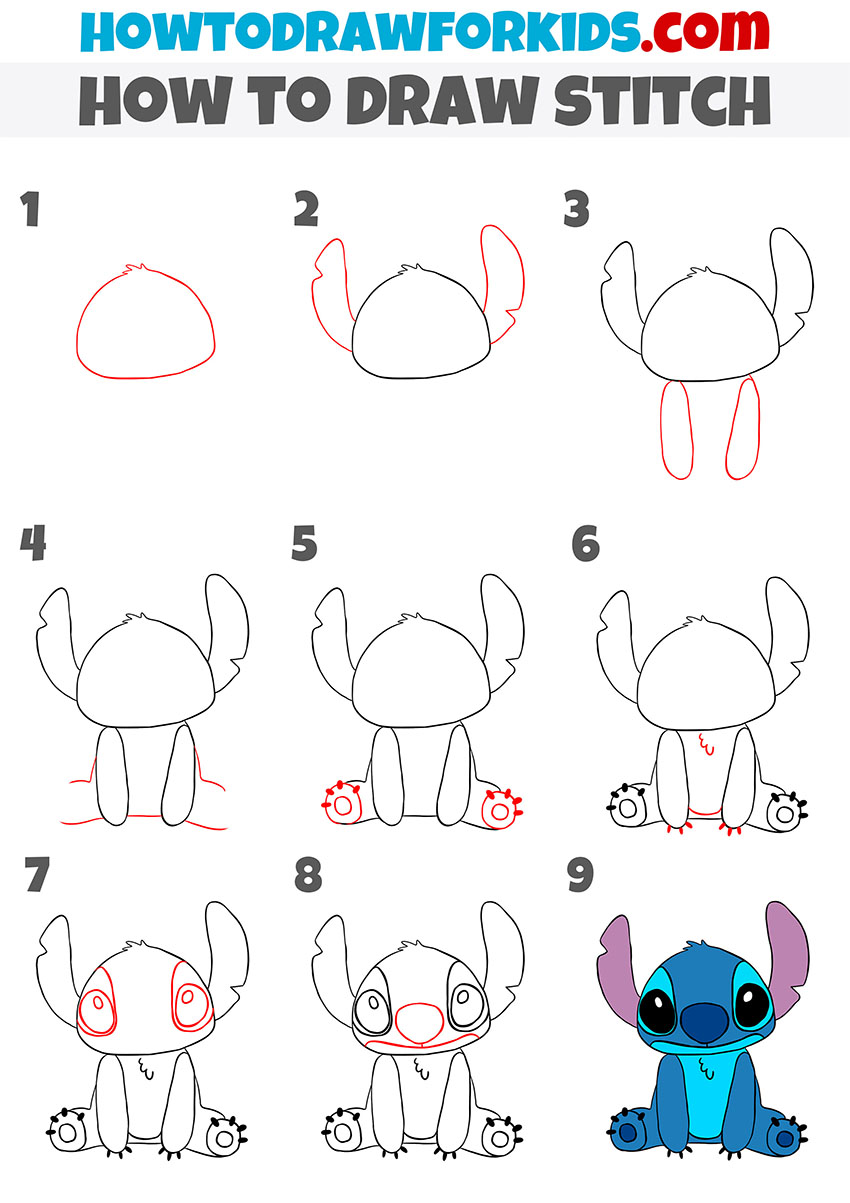
In addition to the main Stitch drawing tutorial, I’ve devised a subtle alternative sketching technique for Stitch. This variation, while not vastly different from the original method, is created to refine your skills further. This nuanced approach reinforces the foundational steps you’ve already mastered, yet it introduces slight adjustments in the drawing process.
In this version of the tutorial on how to draw Stitch, the main differences include a simpler approach to the body and limbs. Here, the legs are drawn as long ovals attached directly to the body. Additionally, this tutorial demonstrates a different sequence of steps.
To draw Stitch with this method, start by sketching a rounded head shape, adding a few small lines for the fur texture. Attach large ears to each side, giving them a pointed shape with slight curves. Next, draw his body below the head, adding elongated oval shapes for the arms on each side.
Then sketch the legs with simple lines at the sides of the body. Draw his paws at the ends of the legs, adding small circles for the toes and claws. Continue by adding facial features, including large oval eyes, a small rounded nose, and a wide, curved mouth. Finally, color your Stitch drawing, using shades of blue and purple for the skin and inner ears.
Conclusion
The Stitch drawing tutorial has now reached its conclusion, but there are many more lessons available on my website. My site offers a variety of tutorials, including the guide on how to draw a cat or a tutorial on how to draw a dragon. Each tutorial provides an opportunity to expand your drawing skills.
To stay updated on new lessons, coloring pages, and drawing tips, follow my social media pages. Your feedback is valuable; feel free to share your thoughts and suggestions for future tutorials in the comments.


call stitch
Is stitch real?
yesssssss… hell no
I Love stich! (it’s my sister’s birthday & stich is her favorite character hope she likes it)! What are your favorite Disney princesses leave me a comment down below thanks!
I love stitch
me too