How to Draw The Joker
Learn how to draw the Joker from the DC Universe, one of the most infamous and well-known supervillains and Batman’s main enemy.
How to Draw Joker: Introduction
Welcome to this lesson, where we will transform Gotham’s notorious villain into a simplified cartoon character. This tutorial provides an easy method to show you how to draw the Joker.
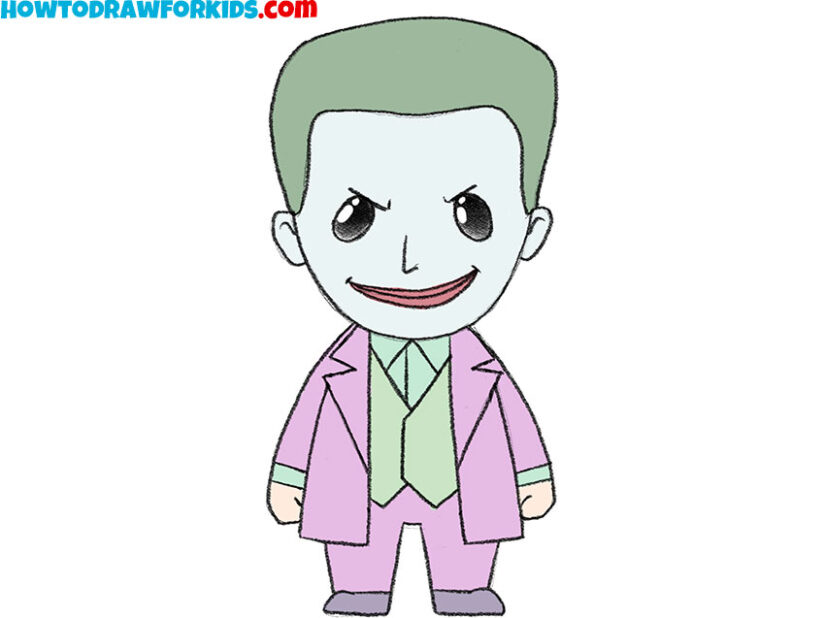
The Joker has highly recognizable features, such as his sinister smile, pale skin, green hair, and purple costume. The main goal for a young artist is to convey these features in the drawing without overcomplicating the image. This tutorial will guide you through achieving this.
Additionally, this Joker drawing tutorial will demonstrate how to draw comic book villains and other characters. Here, you will develop basic skills in creating convincing images of supervillains in a simple style.
To make the training process more interesting and varied, I have created another tutorial on how to draw the Joker in an even more simplified way, based on the appearance of the Joker from Nolan’s movie. Completing both tutorials will provide you with a more detailed experience in drawing comic book villains.
Joker Drawing Tutorial
Materials
- Pencil
- Paper
- Eraser
- Coloring supplies
Time needed: 20 minutes
How to Draw Joker
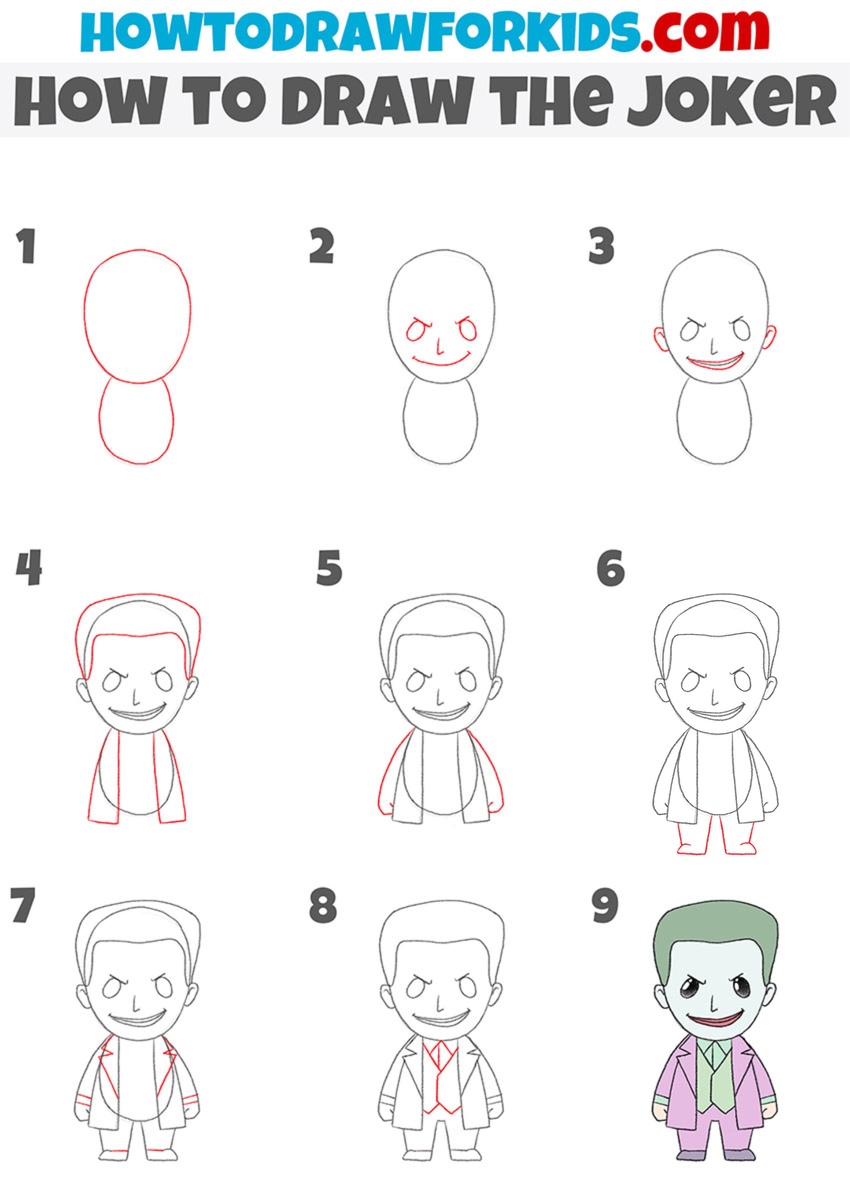
- Sketch the Joker’s head and body.
Sketch a large oval for the head, positioned above a smaller oval for the body. These two simple shapes will serve as the basic shapes for the Joker’s cartoonish form. Keep the ovals lightly sketched, as they’ll help guide you in placing his facial features and clothing details in the following steps.

- Draw the Joker’s facial features.
Now, draw the eyes of the Joker as two ovals. Above the eyes, add frowning eyebrows. Below the eyes, sketch a curved line to form his sinister grin. Between the eyes and mouth, draw the nose. The combination of the intense eyes and wide smile gives the Joker a recognizable villainous expression.

- Add the ears and detail the mouth.
Now, draw the ears of the Joker on each side of the head, aligned with the eye level. Then, refine the mouth shape by adding two lines above and below to represent the clown makeup. The recognizability of comic book characters relies on bright and noticeable details, and for the Joker, it is his smile.

- Sketch the villain’s hairstyle and suit shape.
Draw the outline of the Joker’s hair, creating a high, slicked-back style that extends from the top of his head. This hairstyle is iconic to the Joker’s look. Next, add basic shapes for his suit jacket by drawing lines on each side of his body.

- Sketch the arms and hands.
Sketch the Joker’s sleeves by adding curved lines that extend down from his shoulders, forming the outline of his arms. Additionally, draw the hands at the ends of the arms, keeping them simple and in proportion to the overall cartoonish style of the drawing. This step establishes the Joker’s arm position.

- Draw the legs of the Joker.
To draw the Joker’s legs, sketch two rectangular shapes at the bottom of his body. At the bottom of the legs, sketch horizontal shapes to indicate the feet of the character. Keep the legs short to maintain the cartoonish proportions of the drawing.

- Start drawing the Joker’s costume.
Draw the details of the jacket. Sketch ] horizontal lines on the sleeves to indicate cuffs, and add a line down the front of his jacket to show the opening. Then, draw the lapels, giving them symmetrical look. For the lower body, sketch a small line at each foot to represent his shoes.

- Detail the costume of the villain.
To complete the costume, draw a vest underneath the suit jacket, with V-shaped lines to create the neckline. Next, draw the shirt collars under the chin and a line down the center to give this part of the suit a more convincing look. Also, erase the guidelines from your drawing of the Joker.

- Color the Joker.
Use green for his hair, pale white for his skin, purple for his suit, and a light green for his shirt. These colors are classic to the Joker’s look, instantly making him recognizable. To make his face even more recognizable, paint the area around his mouth red to illustrate clown makeup.

How to Draw Joker: Video Tutorial
Alternative Joker Drawing Method
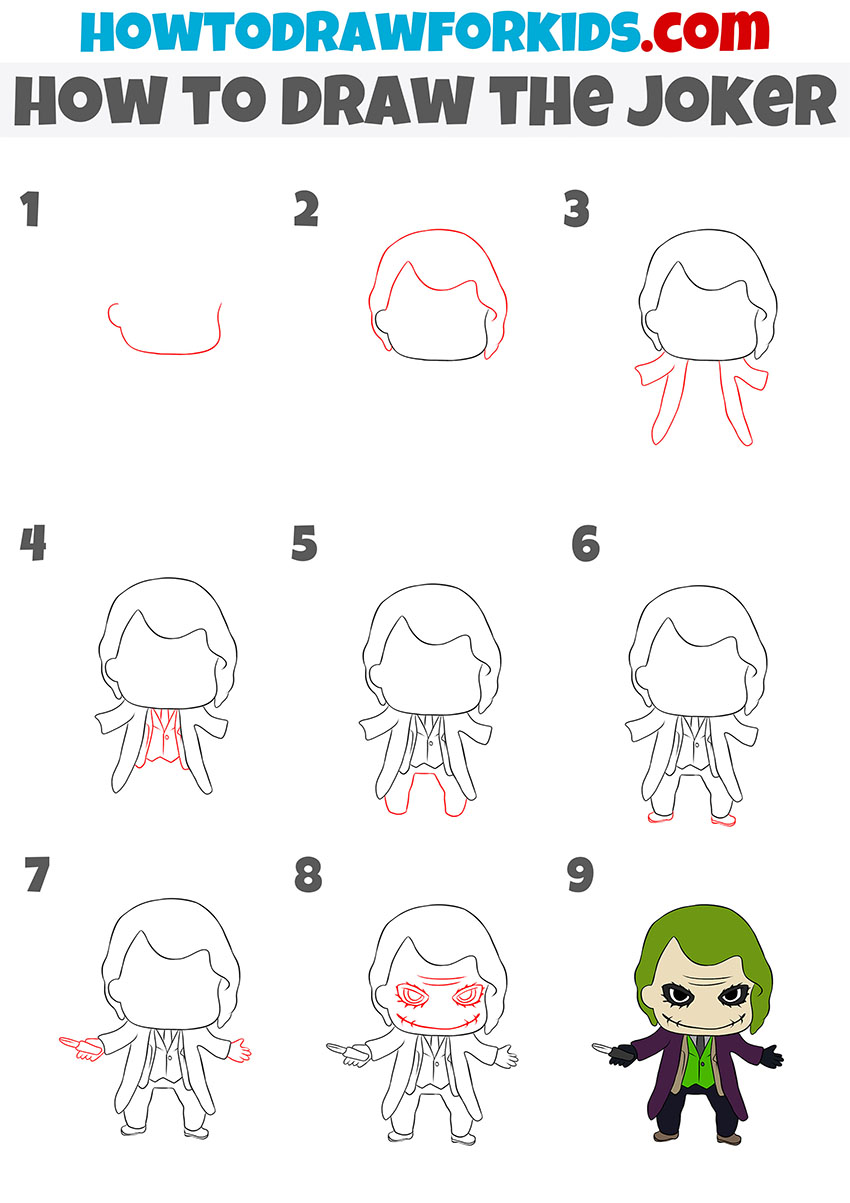
I’ve also created an alternative method for drawing the Joker to help broaden your skills and focus on different aspects of his design. The main difference between this and the first drawing tutorial is the Joker’s appearance and style.
This tutorial portrays the Joker with longer, messy hair, a more detailed expression with sharp eyes and a wide scar-like grin, and adds items like a knife in his hand, which give a more intense and sinister look compared to the simpler, cartoonish style of the first tutorial.
To draw the Joker from the Nolan’s movie, start with the outline of his face, focusing on a simple curved shape. Add the hair outline above, giving it a messy look to match the Joker’s iconic hairstyle. Draw the collar and lapels of his jacket, adding broad lines to form his coat. Sketch the arms, positioning one hand extended outward, as if holding a knife. By the way, you can learn how to draw a knife with my simple tutorial.
Next, draw the torso of the Joker with a vest and shirt underneath, followed by the villain’s legs, adding simple shoes at the bottom. Add the knife in one hand, emphasizing the menacing stance. Now, focus on the Joker’s face: draw the intense eyes with curved lines above them to form the frown, and add a wide, jagged grin. Finally, add colors—green for his hair, purple for his coat, and dark shades for the rest of the attire. This completes your drawing of the Joker, capturing his recognizable villainous appearance.
Conclusion
Once you develop the skill of drawing the Joker, you can create more complex drawings featuring this villain. For example, you could draw Batman next to him in a battle scene. Additionally, you can learn to draw Superman or other comic book characters to further build your abilities as a comic book artist.
To continue boosting your skills, follow my social media for updates on new content. Your feedback helps shape my future content, so please share your thoughts and suggestions for coloring pages and tutorials.