How to Draw Vision Face
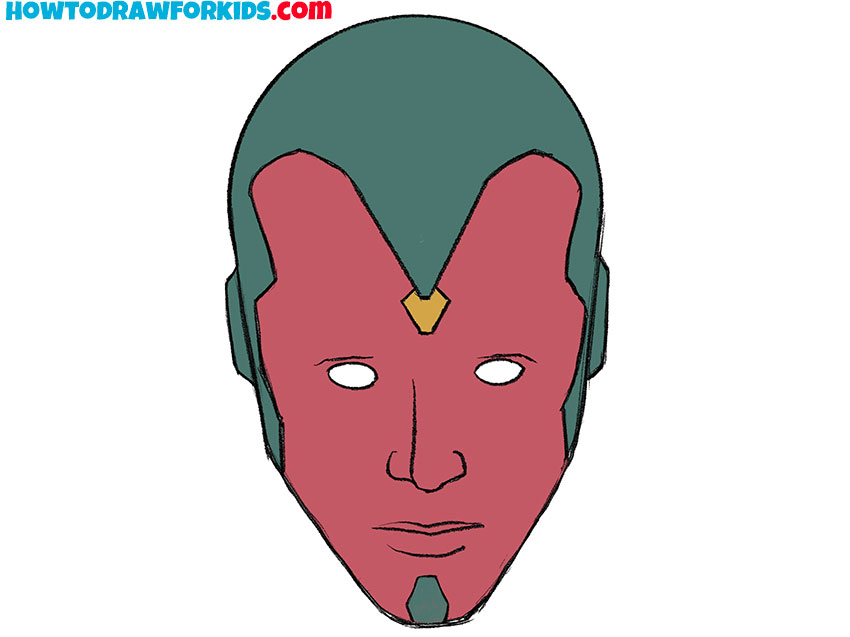
Let’s bring Vision’s face to life with a drawing lesson on how to draw Vision face. Focusing on his unique attributes, like the mind stone and expressive eyes, this guide transforms superhero complexities into simple, engaging steps. Ideal for kids, it offers a creative pathway to exploring the Marvel universe through art.
How to Draw Vision Face: Introduction
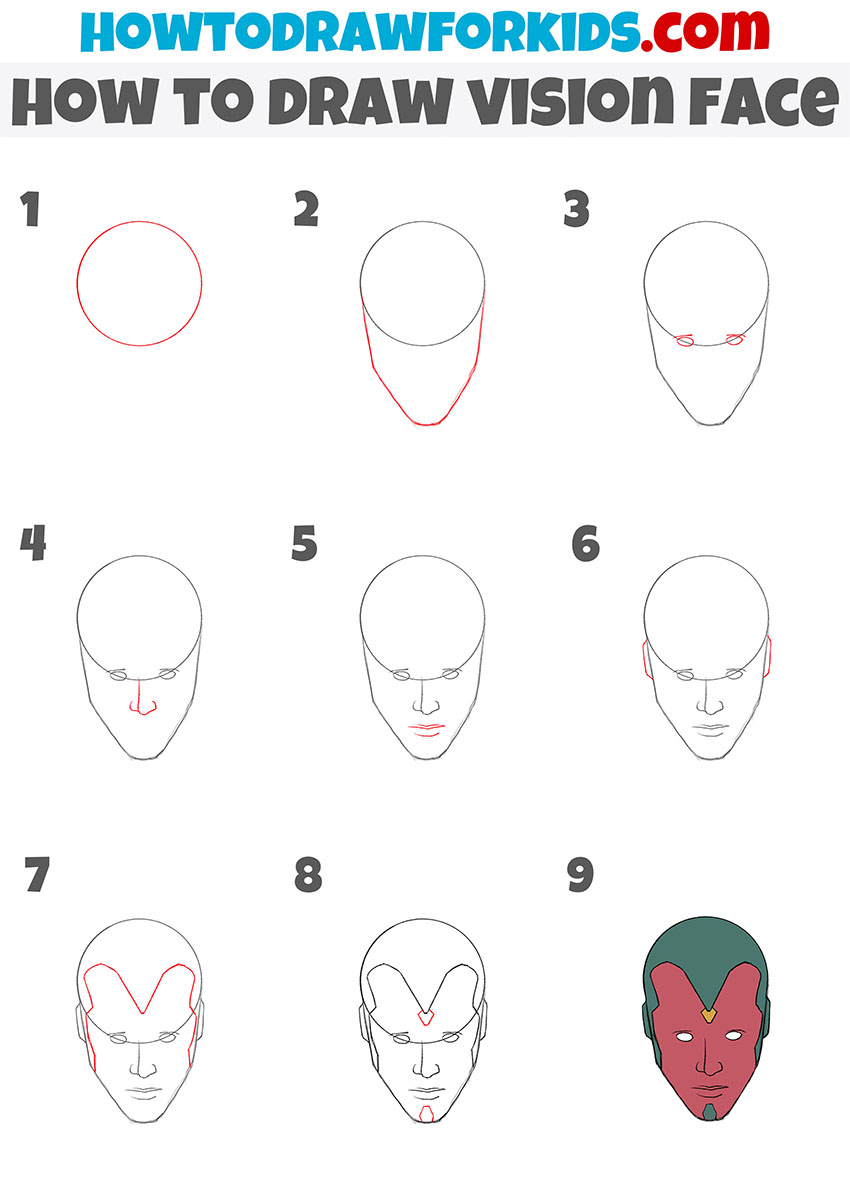
Begin your artistic mission with how to draw Vision face, a character of profound wisdom and digital elegance. This tutorial breaks down his features into simple, manageable parts, starting with the oval of his face and moving to his serene, powerful eyes. Step by step, we will delve into the subtleties that make Vision truly unique.
The focus is on Vision‘s signature elements: the solar jewel, subtle metallic sheen, and harmonious features. Decomposing his image into basic shapes and lines allows accurate capture of Vision’s likeness, blending the mechanical with the organic and reflecting his unique blend of technology and humanity.
At the end of this lesson, you’ll have the skills to draw Vision face and the understanding of what makes a character’s portrayal resonate with viewers. Your drawing will not only showcase Vision’s physical attributes but will also embody the character’s serene and intelligent aura.
Vision Face Drawing Tutorial
Materials
- Pencil
- Paper
- Eraser
- Coloring supplies
Time needed: 30 minutes
How to Draw Vision Face
- Draw the top of the head.
To do this, sketch out a straight circle. This is the upper part of Vision’s face, which forms the top outline of his head and forehead.

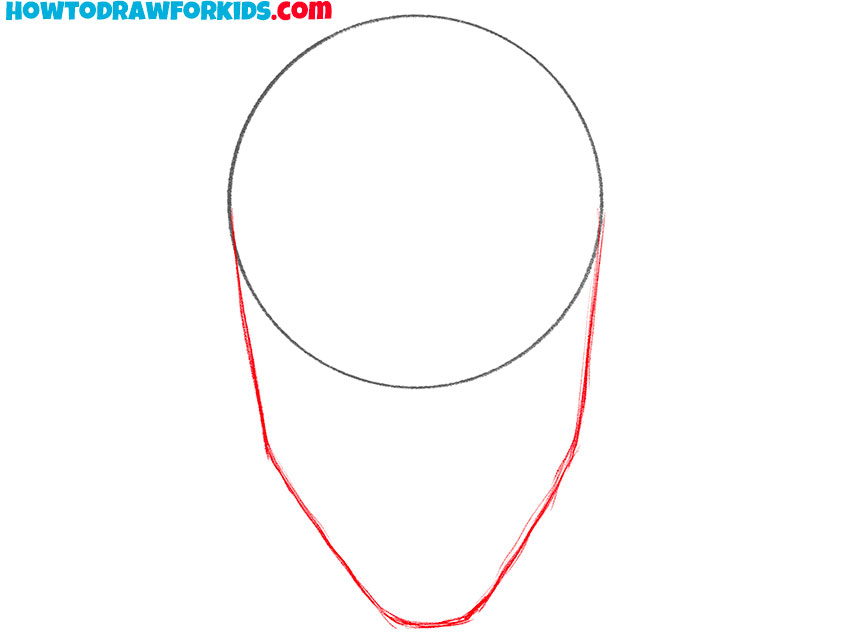
- Add the bottom of the face.
So, continue drawing the basic outline of the face. Extend the circle into an oval by adding a curved line below, creating the chin and jawline of Vision’s face.
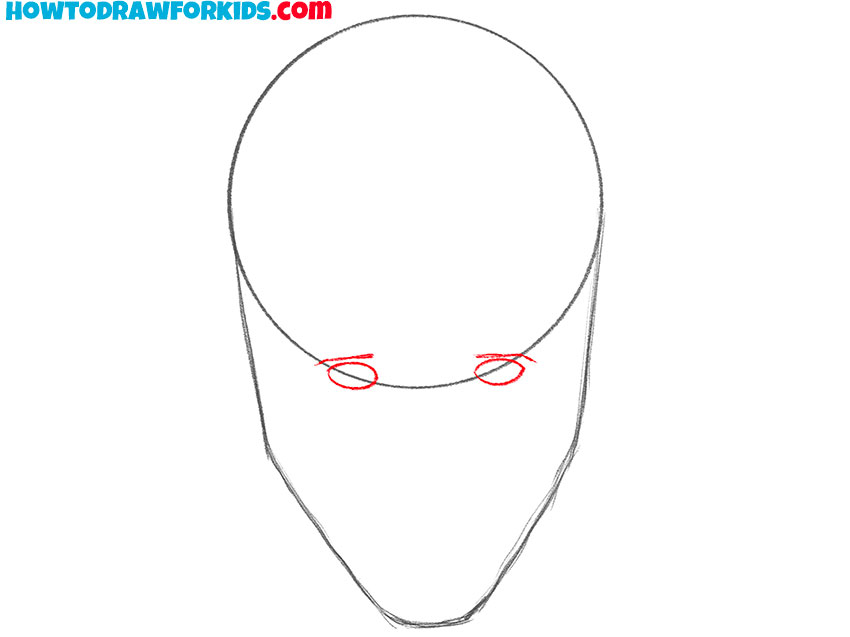
- Depict the eyes.
Sketch in the eyes by placing two small ovals for the eyes, ensuring they are evenly spaced in the top half of the face. Next, add eyebrow contours.
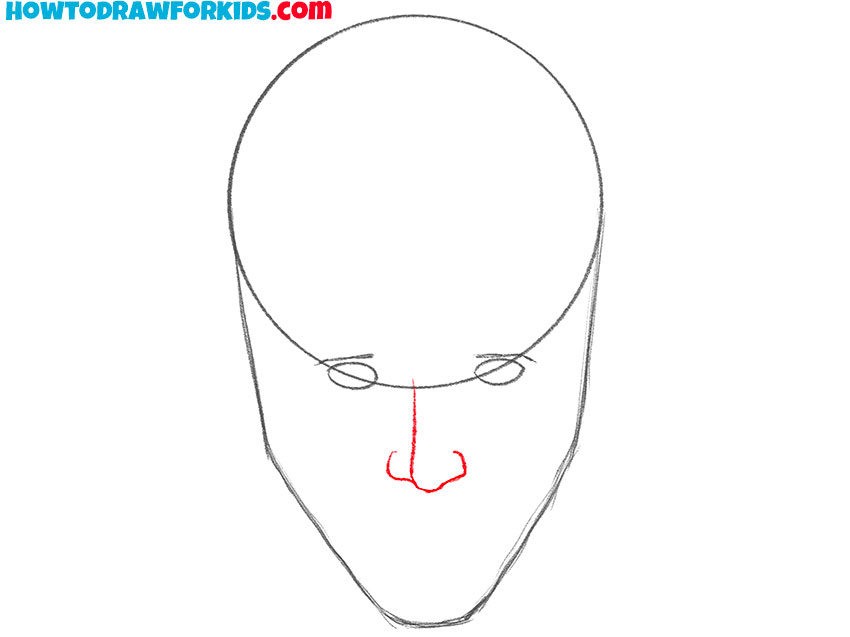
- Sketch out the nose.
Draw a thin, even line to depict the top of the nose and add nostrils to the sides. It should look a little asymmetrical.
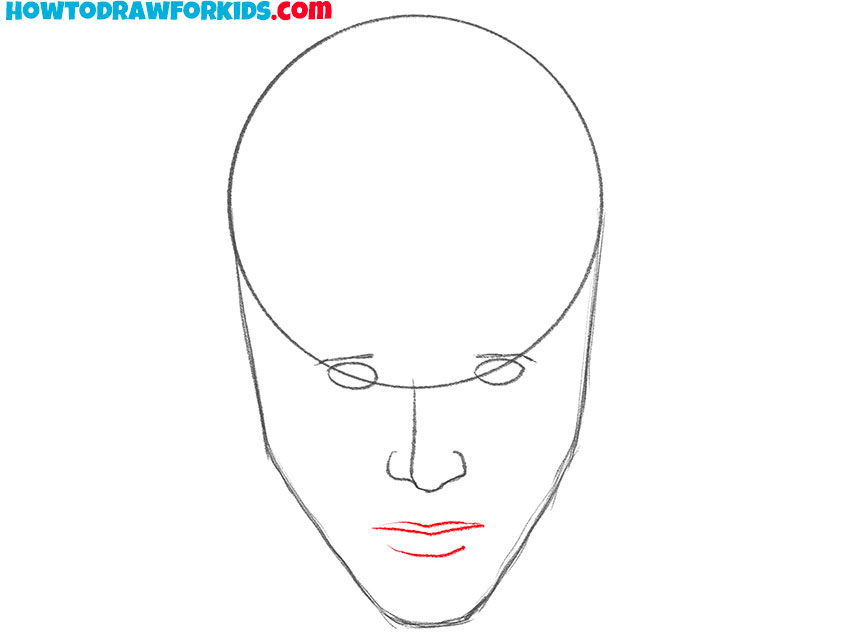
- Draw the mouth.
These are just three horizontal lines, which are located approximately halfway between the nose and chin. The distance between the first and second line is much less than between the second and third.
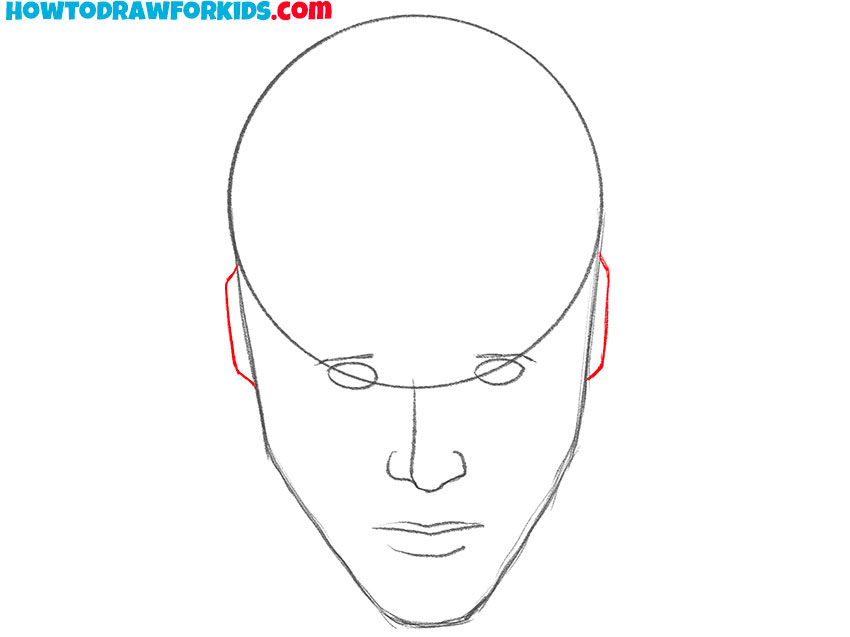
- Add the ears.
Vision’s ears are not anatomically similar to human ears. It looks much simpler than the auricle – just draw a couple of flat trapezoids on the side of the head.
- Detail the top of the head.
Illustrate the superhero’s prominent brow line and high forehead with a bold, inverted ‘V’ shape that frames the top of the face.
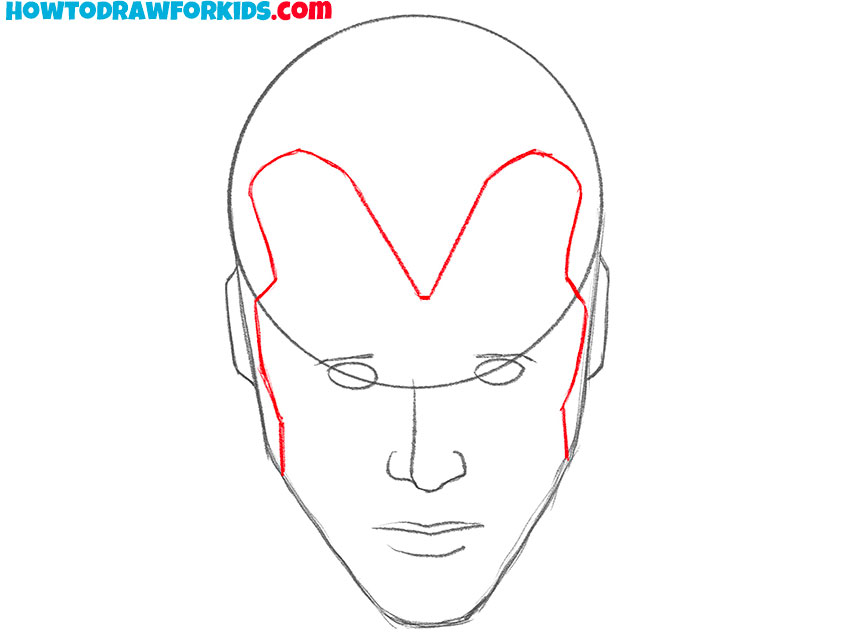
- Add the rest of the elements.
Draw two figures that are similar in shape but very different in meaning. So, below is just a decorative piece of armor on the chin, and at the top is the Mind Gem, an incredibly powerful thing.
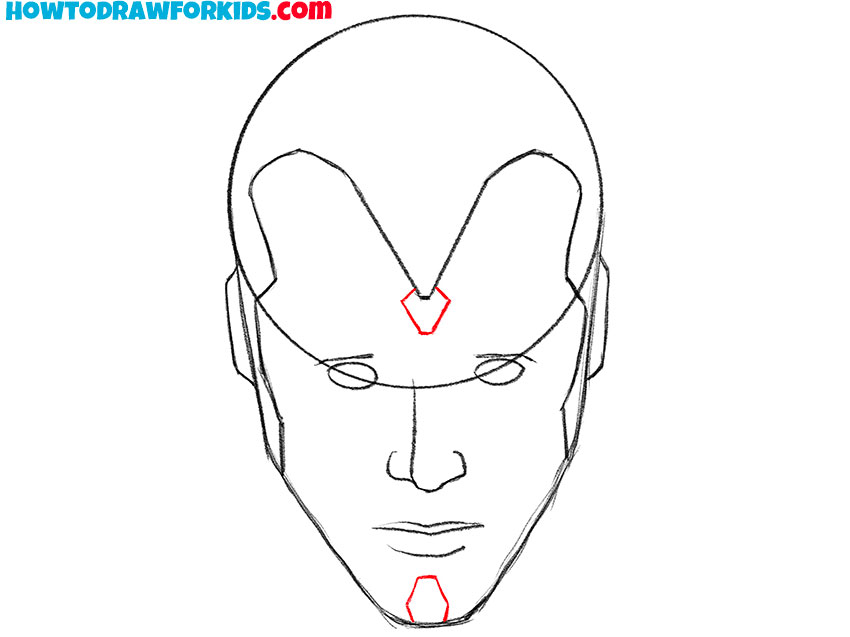
- Color the drawing.
Finalize the drawing with color, filling in Vision’s face with a rich red, green for the upper part of the head, and yellow for the Mind Stone.

Additional Content
For those eager to dive deeper into drawing Vision face, I’ve created a free PDF guide that summarizes the entire lesson. This streamlined version provides an overview of the crucial steps, making it easier for you to practice drawing Vision’s iconic features without needing to be online.
The guide is intended to be a convenient reference, allowing you to hone your drawing skills at your leisure. Whether you’re on a long car ride, at the park, or in the comfort of your home, this PDF is your go-to resource for practicing and perfecting your drawing abilities.
FAQs for Drawing Vision Face
All right, future art stars! You’ve just taken a big leap by mastering Vision’s face with your artistic superpowers. Feeling good? You should! Now, let’s boost those skills even higher. Here’s the inside scoop on some cool tips and tricks to make your Vision drawings stand out from the crowd:
- My Mind Stone doesn’t look shiny. How can I fix it? Add some sparkle with highlights! Use a white pencil or eraser to add bright spots where the light hits the stone.
- How do I make Vision’s face look more metallic? Metallic magic is all in the shading. Use a blend of light and dark tones to create a shiny effect.
- What if my proportions look off? Proportions can be tricky. Try using reference lines to divide the face into equal parts, it’s like a roadmap for accuracy!
- My colors look flat. How can I improve them? Layers, my friend! Start with a light base, add darker shades for depth, and finish with highlights for that pop.
Don’t forget, practice makes perfect, and questions are the stepping stones to learning. Keep asking, keep drawing, and soon, you’ll be answering FAQs from your friends!
Conclusion
You’ve completed the Vision face drawing lesson, and your artwork is nothing short of heroic! Don’t pack away those drawing tools just yet – there’s a universe of lessons on my website, from barnyard animals like sheep to geometric shapes like spheres, all designed with budding artists like you in mind.
And to make sure you’re always in the loop with the latest and greatest from our drawing community, be sure to follow me on social media. Draw on, friends – the sky’s the limit for your new skills!

