How to Draw a Horse
I bring you four detailed tutorials on how to draw a horse, making the beauty of these creatures accessible to every artist.
How to Draw a Horse: Basic Information
Horses are among the most beautiful and graceful creatures on Earth, and this tutorial will guide you in drawing a horse in a cute and simplified style. As always, this tutorial offers you the opportunity to learn more than just how to draw a horse.
Familiarizing yourself with basic horse anatomy is crucial when drawing. Horses have unique body structures, including long necks, strong legs, and distinctive heads. By understanding the basics of horse anatomy, you’ll be better equipped to draw a horse.
This knowledge will help you create more anatomically accurate drawings, providing a solid foundation for both realistic and stylized illustrations, allowing you to depict the horse’s movements and posture convincingly.
And in order to deepen your knowledge and tell you about drawing a horse in the most comprehensive way, I have supplemented this lesson with several additional instructions that you will find at the very end.
Horse Drawing Tutorial
Materials
- Pencil
- Paper
- Eraser
- Coloring supplies
Time needed: 1 hour
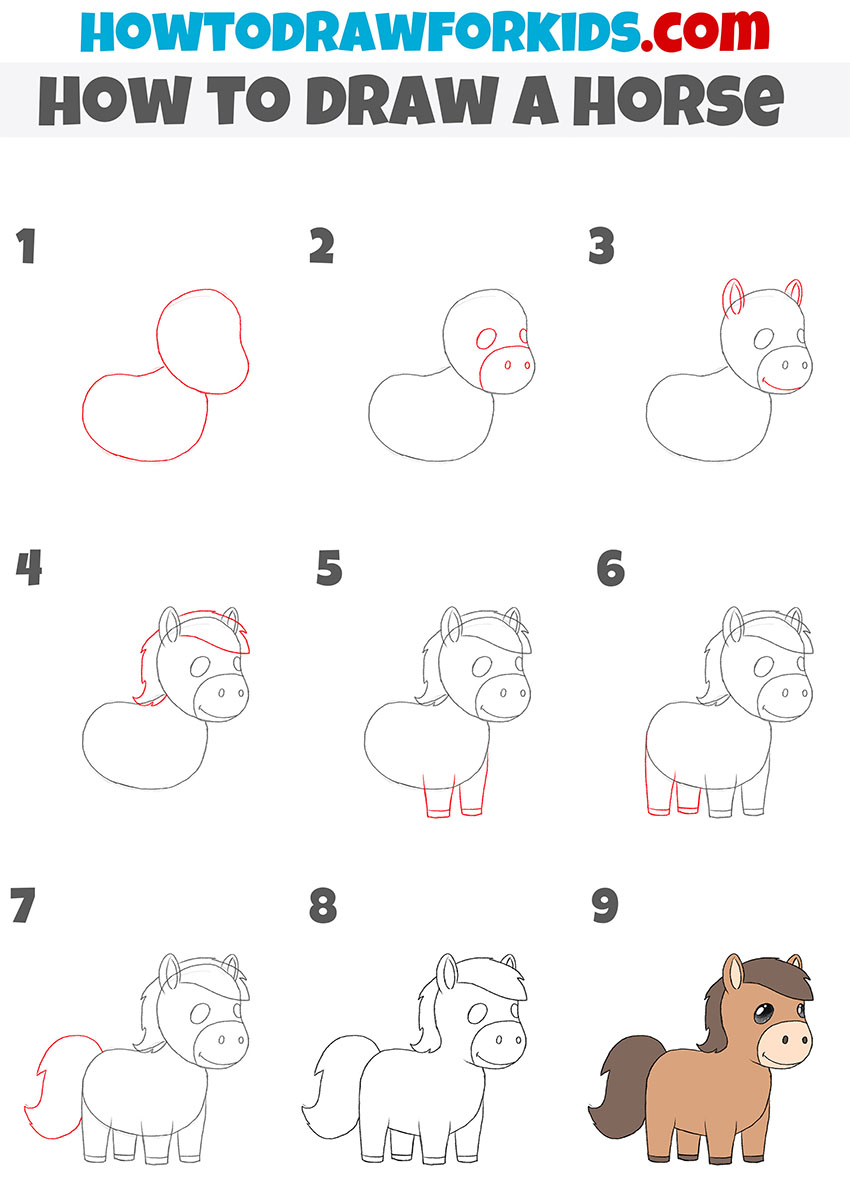
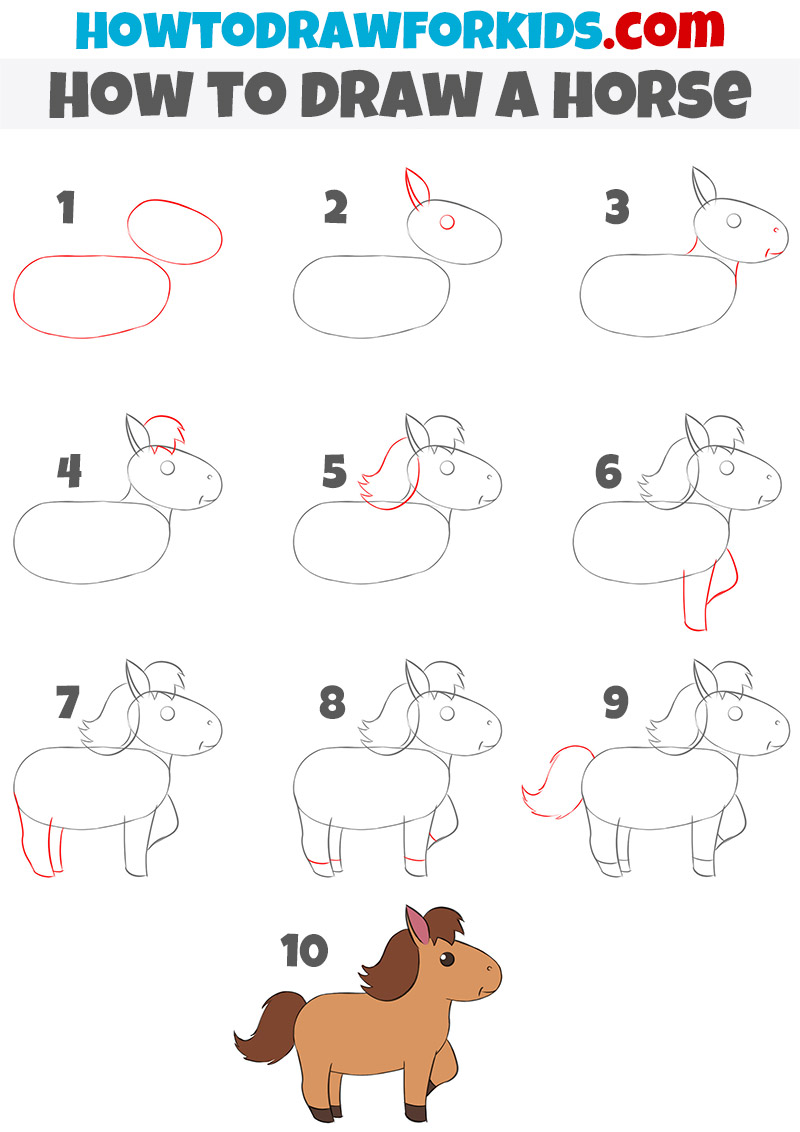
How to Draw a Horse Step-by-Step
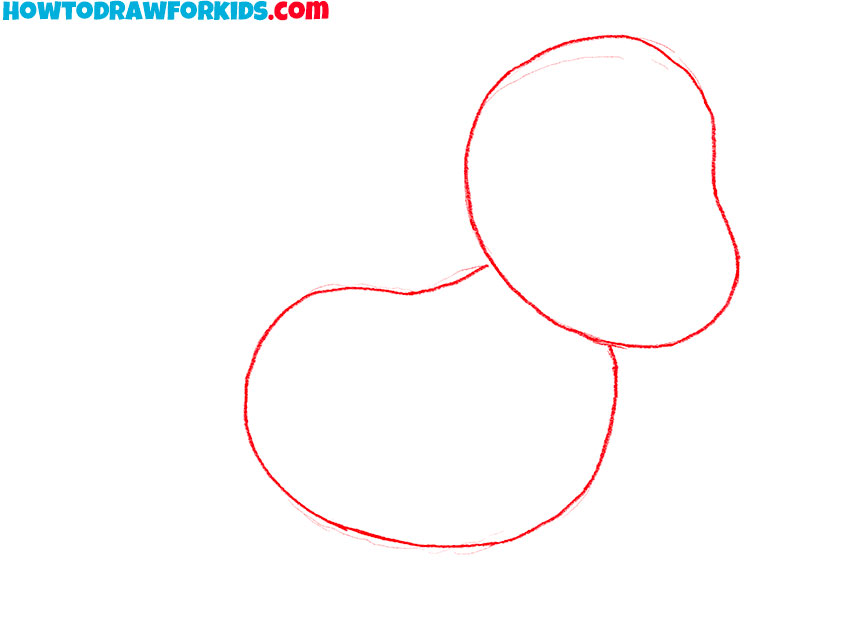
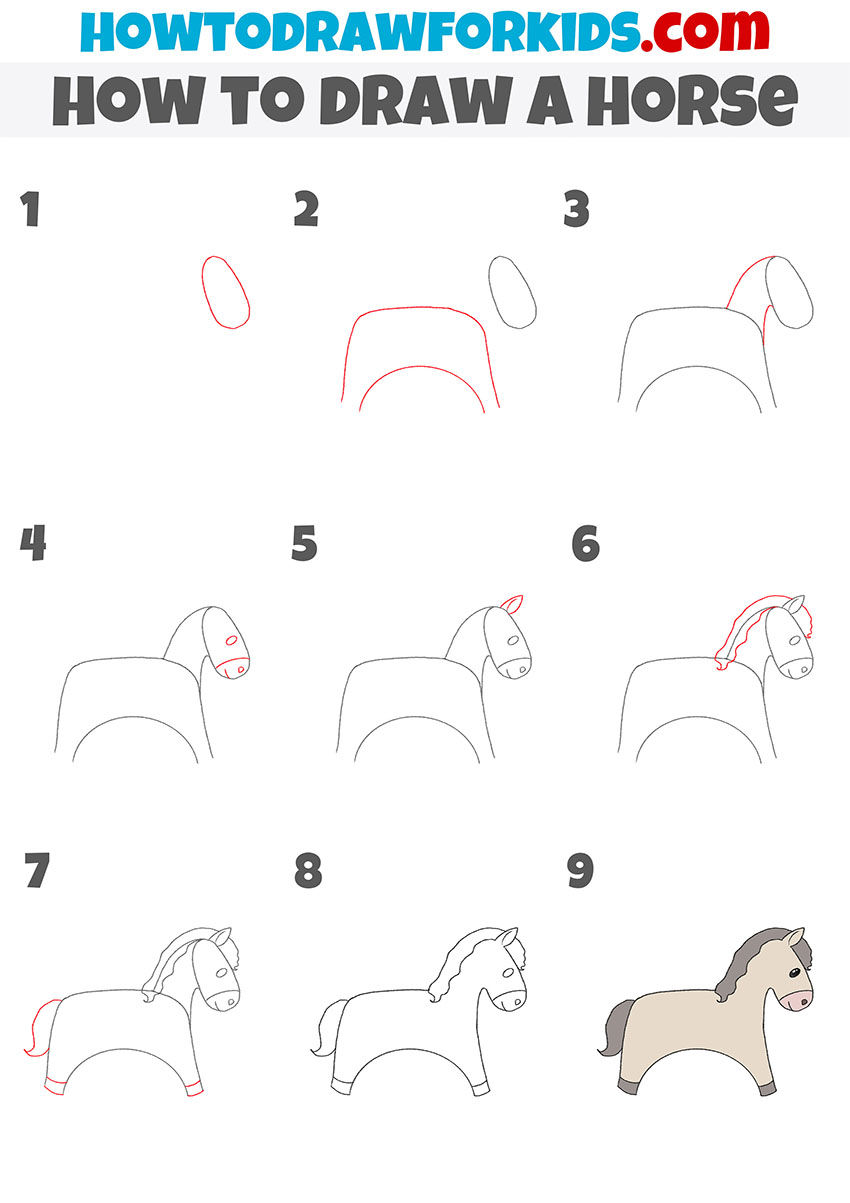
- Draw the basic shapes of the horse.
Draw two overlapping ovals-one larger for the body and a smaller one for the head. These shapes should resemble a snowman with an oversized bottom half. The goal is to create a foundation that will guide the placement of the horse’s features.
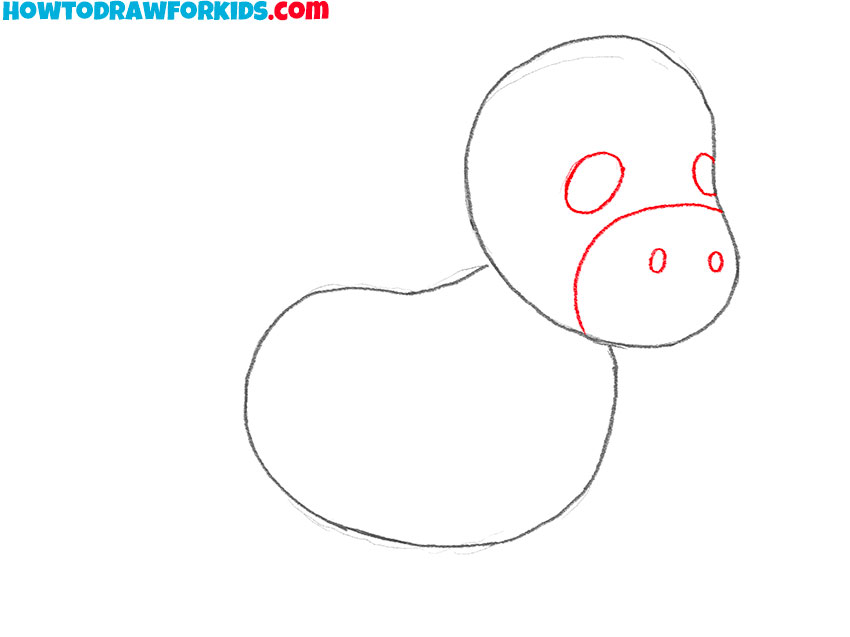
- Add the facial features.
Draw two small circles near the top for the eyes, positioning them symmetrically to give the horse a friendly expression. Below the eyes, sketch a curved line to represent the muzzle. Within this muzzle, draw two small circles to form the nostrils, giving the horse its characteristic nose.
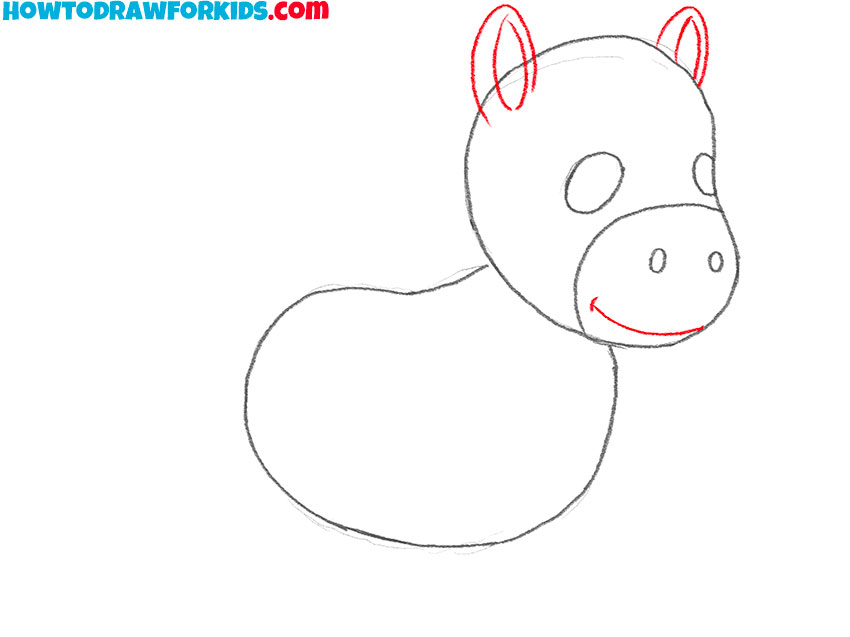
- Draw the ears and smile of the horse.
On top of the head, sketch two almond-shaped ears, making them point slightly outward. These ears should be positioned above the eyes. Next, draw a gentle curved line below the muzzle to form a friendly smile. This smile will give your horse a welcoming and cute look.
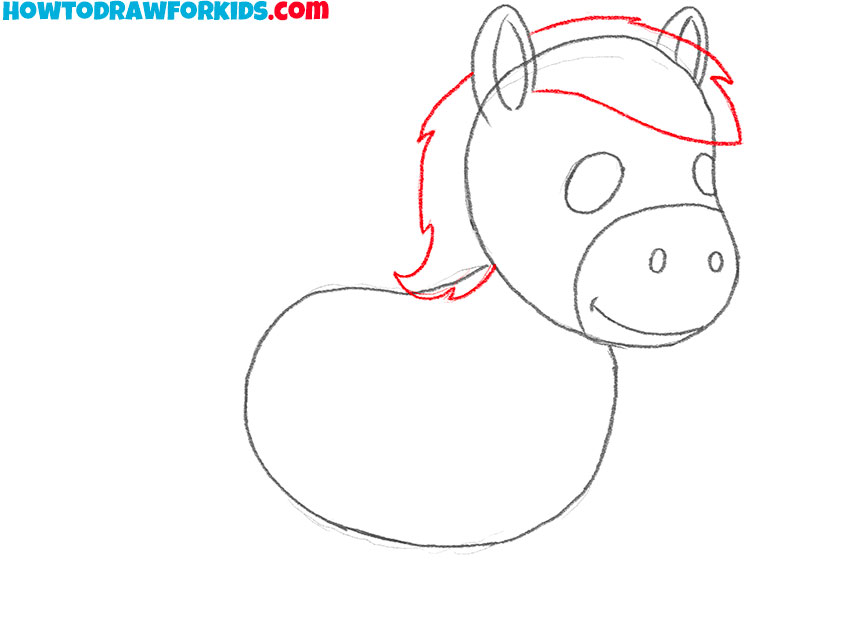
- Sketch the mane.
Start at the base of the ears and sketch a series of wavy lines that flow down along the neck. The mane should have a flowing appearance. Use curved, overlapping lines to suggest volume and texture. To give the mane a more voluminous look, you can draw hair lines inside the outline.
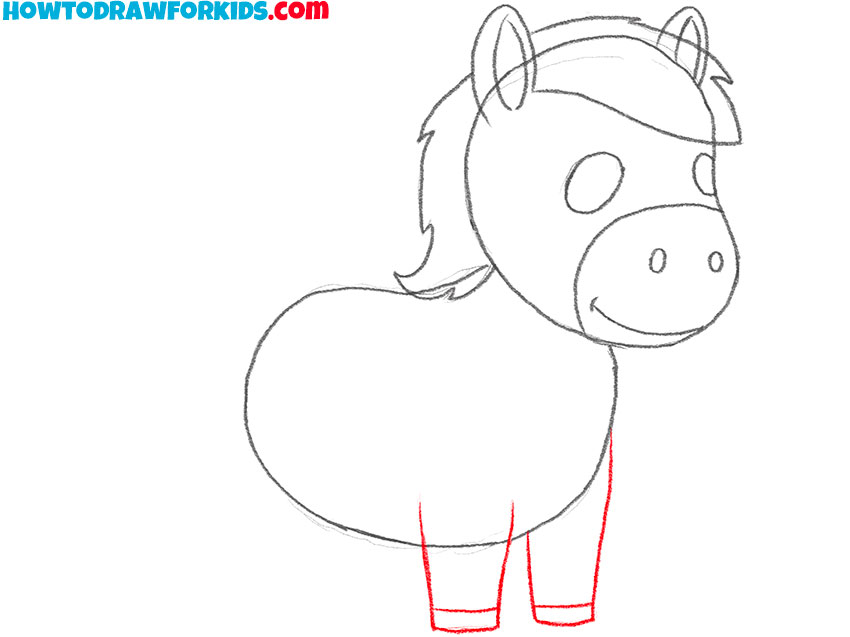
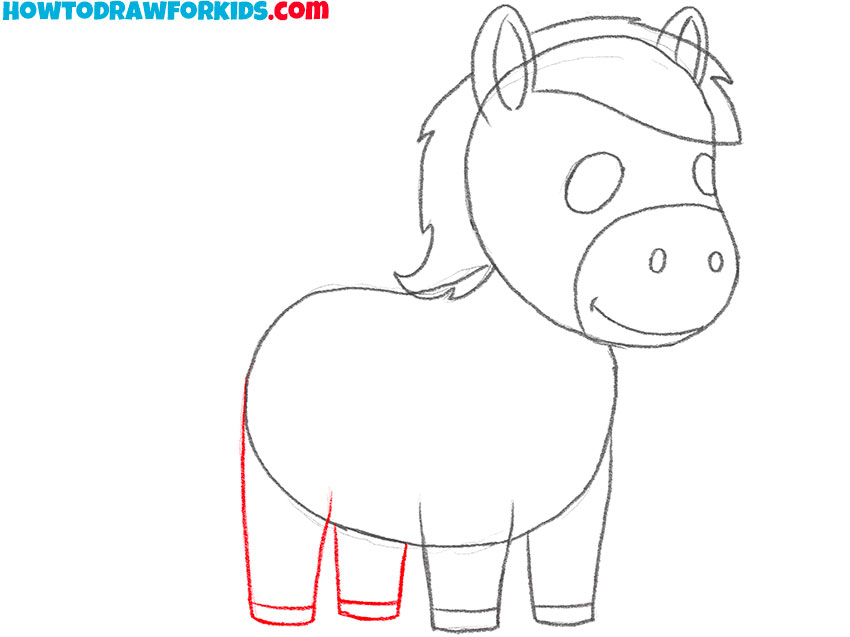
- Draw the front legs of the horse.
Begin by sketching two rectangular shapes extending downward from the body, slightly angled to create a natural stance. These legs should be of equal length and thickness. Make sure they are spaced appropriately apart to indicate a solid foundation.
- Draw the back legs.
Draw two more rectangular shapes extending downward from the body, positioned toward the rear. Like the front legs, these should be equal in length and thickness, maintaining the balance and proportion of the drawing. The back legs can be a slightly thicker than the front legs.
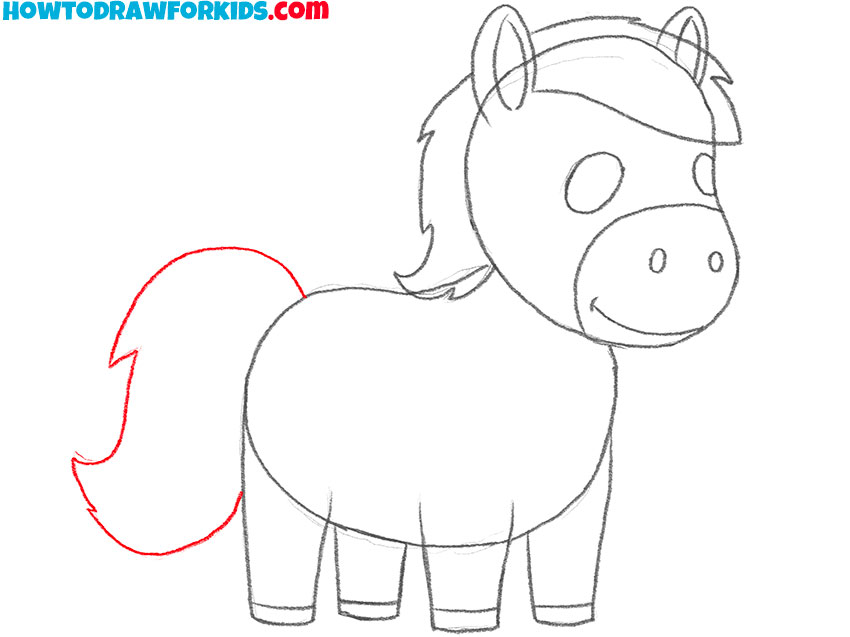
- Add the tail.
Begin where the body curves into the rear and draw a series of wavy lines that extend backwards. Make the tail full and slightly fluffy to match the style of the mane. As with the mane, you can add a series of lines of varying lengths inside the outline to give this part more realism.
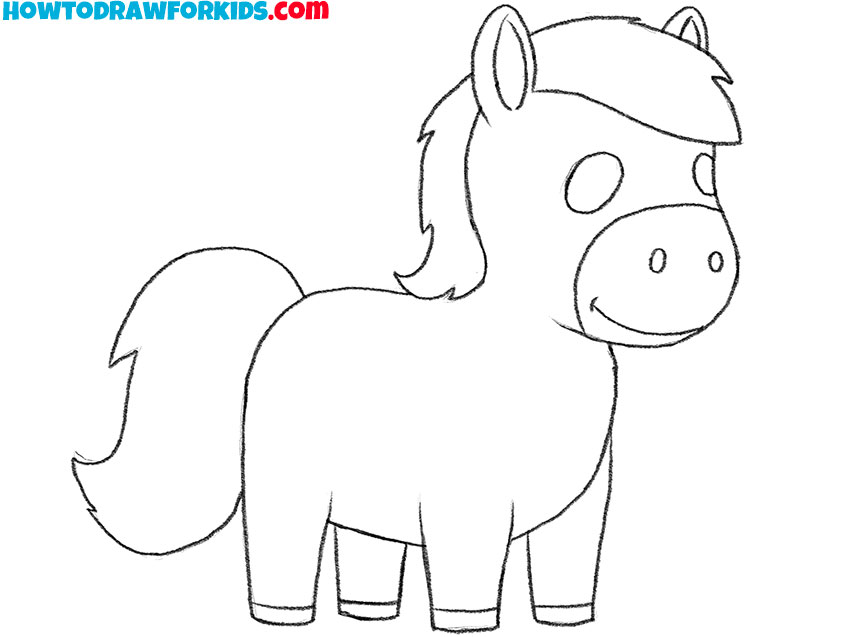
- Refine and clean up the horse drawing.
Carefully go over each part of the horse, ensuring all elements are clearly defined and proportionate. Check the alignment of the facial features, the symmetry of the legs, and the flow of the mane and tail. A clean and refined drawing will make the character ready for the final touch of color.
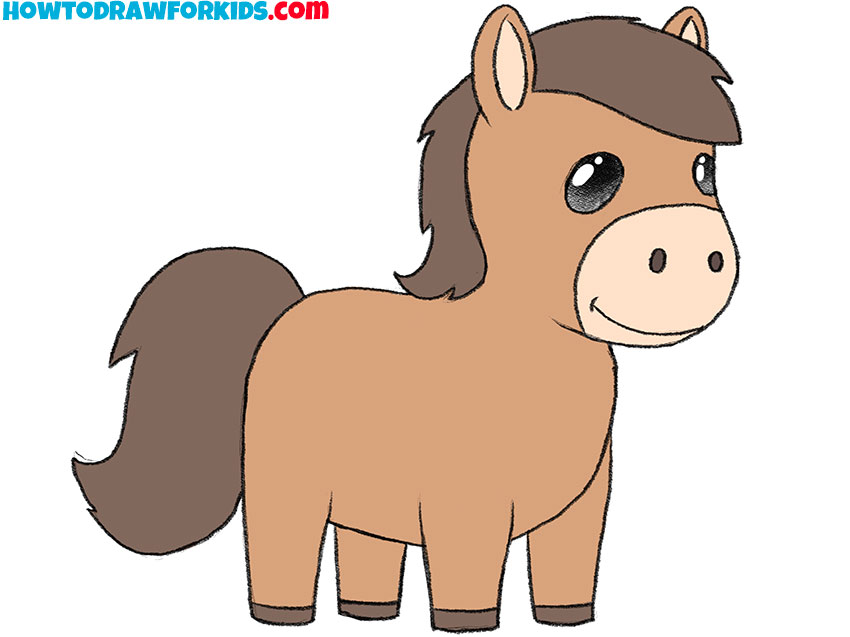
- Add color and final details.
For a classic look, consider a brown body with a darker mane and tail. Use a soft pink for the muzzle and ears, and add a touch of white to highlight areas like the eyes for a sparkling effect. You can make the mane and tail more realistic with varied shades to illustrate texture.

Additional Content
To complement your skills of drawing a horse, I’ve prepared a free PDF file for you. This resource serves as a succinct version of our lesson, designed for easy download and use anywhere, even offline. It’s crafted to ensure your continued practice and growth in drawing.
How to Draw a Horse: Additional Methods
In complement to our foundational drawing lesson, I’ve created a series of alternative techniques specifically designed to draw horses.
In these instructions I will show you drawing methods that are quite different from the one you may have seen above. In addition, I will demonstrate one of the simplest ways to draw a horse for those who have just started drawing, a little more complex for advanced artists.
Alternative Horse Drawing Tutorial
The first additional method will guide you through drawing a simple cartoon horse in 10 steps. Although this lesson is similar in complexity to the previous one, it employs a different drawing technique.
Begin by sketching two overlapping ovals, one for the horse’s body and the other for the head. In the second step, add a small circle for the eye and two triangles on top of the head for ears. Next, connect the head and body with a curved line, and draw the nostrils and mouth on the face. In the fourth step, draw a tuft of hair on the horse’s head.
Then, add a mane extending down the back of the neck. After that, sketch the front leg by drawing a long, slightly curved rectangle attached to the body. Continue by drawing the hind leg and defining the shape of the horse’s body. Add hooves to the legs, ensuring they have a rounded shape.
Draw the tail, giving it a wavy appearance. Finally, color the horse, using brown for the body and dark brown for the mane and tail.
Horse Drawing Tutorial for Kindergarten
This tutorial serves as an additional guide to the first one, offering a simplified approach to drawing a horse. While the initial tutorial focuses on creating a little more detailed horse, this tutorial illistrates a more straightforward, minimalistic sketch. It features fewer steps and simpler shapes, making it ideal for beginners or younger artists.
In this tutorial, you begin by drawing basic shapes for the head and body, followed by connecting them smoothly. The head is an oval, and the body is drawn with simple, rounded lines. Facial features like the eyes and mouth are minimal and easy to replicate. The mane and tail are depicted with gentle, flowing lines that add character without complexity.
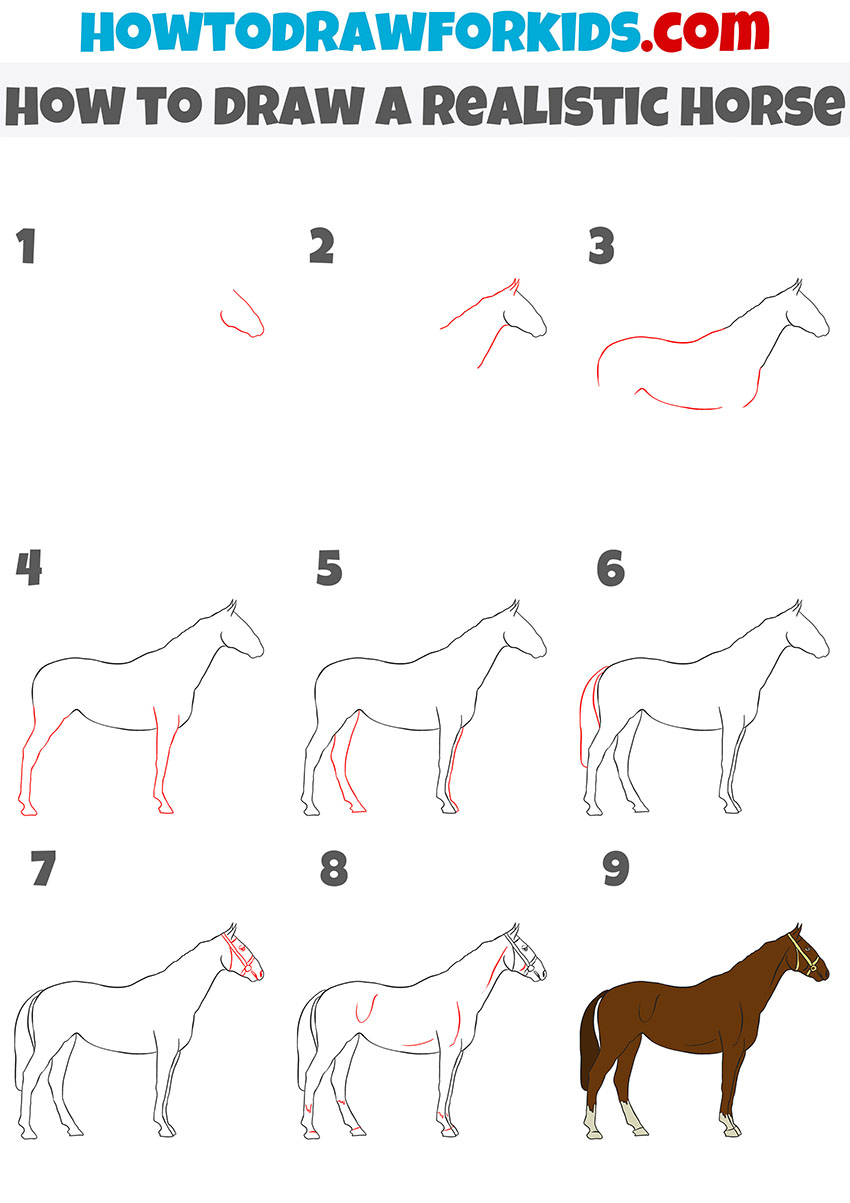
Realistic Horse Drawing Tutorial
This method for drawing a realistic horse pays homage to the animal’s true form and poise. Unlike the first tutorial, which illustrates a cute, simplified style, this tutorial creates a bit more anatomical accuracy and detailed structure of a horse.
We begin by carefully constructing the head, noting the gentle curves. From there, the lines flow to form a neck that melds seamlessly into a robust body.
With a focus on the subtler aspects of the horse’s visage and stature, we’ll then detail the alert ears, the gentle gaze, and the soft nostrils, along with the distinct contours that define a horse’s muscular neck and back.
Conclusion
So, dear artists, in this article I showed you how to draw a horse using several really simple methods. The first method is basic, and is suitable for all beginner artists. In the second method, I showed you an alternative approach of drawing a horse using a different set of steps and details. Next, I demonstrated a more simplified method that is suitable for the most inexperienced. And in the last method, I showed you a slightly more complex and detailed way of drawing a horse.
All these methods and techniques are aimed at making it possible for even the most inexperienced artist to depict this beautiful animal without much effort. Try all the methods in turn and find the one that suits you perfectly.
Also, make sure to share your thoughts about this lesson with me. I’m always eager to know how my lessons benefit you, so feel free to share your drawings with me on social media platforms, such as Pinterest.