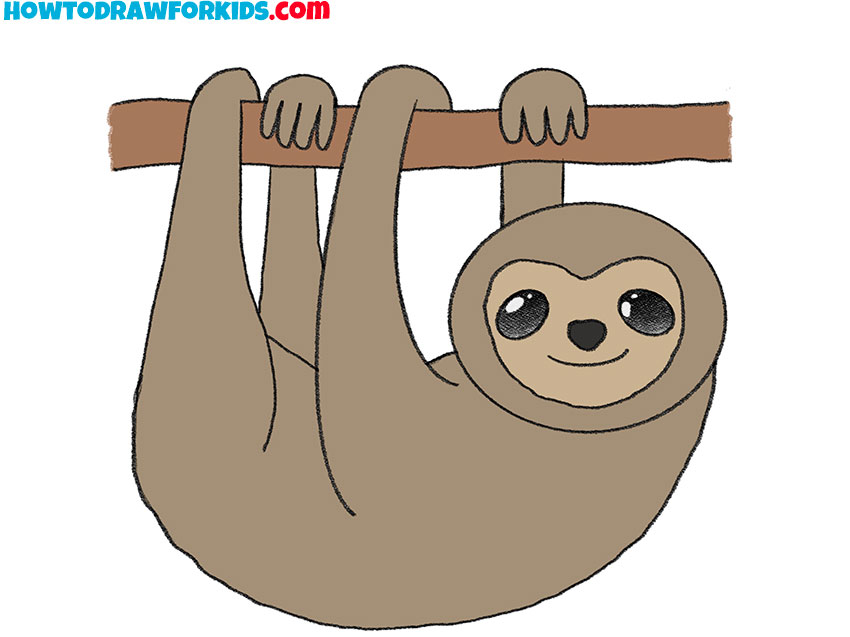
How to Draw a Sloth
Budding artists, I’m thrilled to guide you through how to draw a sloth with two distinct, creative methods. Together, we’ll carefully add each line and detail, giving life and personality to our sloth drawings. It’s guaranteed to be an exciting, fun experience, and I’m confident you’ll be delighted with your charming sloth artwork.
How to Draw a Sloth: Basic Information
Welcome, young artists, to our fun drawing journey! Today’s challenge is to master how to draw a sloth with just a few easy steps. Sloths are known for their slow pace and peaceful demeanor, and that’s exactly the vibe we’ll capture in our artwork.
In our drawing lesson, we will pay special attention to the sloth’s distinctive features – from its round, gentle face to its embracing arms that seem to hang onto trees in their natural habitat. Through easy-to-follow instructions, we’ll bring these elements together, turning simple shapes into a friendly sloth character.
By the end of our lesson, you’ll have mastered how to draw a sloth and have a charming sloth of your own creation.. Remember, it’s not about speed; it’s about enjoying the process and bringing this adorable creature to life on your paper. So, let’s start drawing and embrace the chill pace of our sloth friend!
Sloth Drawing Tutorial
Materials
- Pencil
- Paper
- Eraser
- Coloring supplies
Time needed: 20 minutes
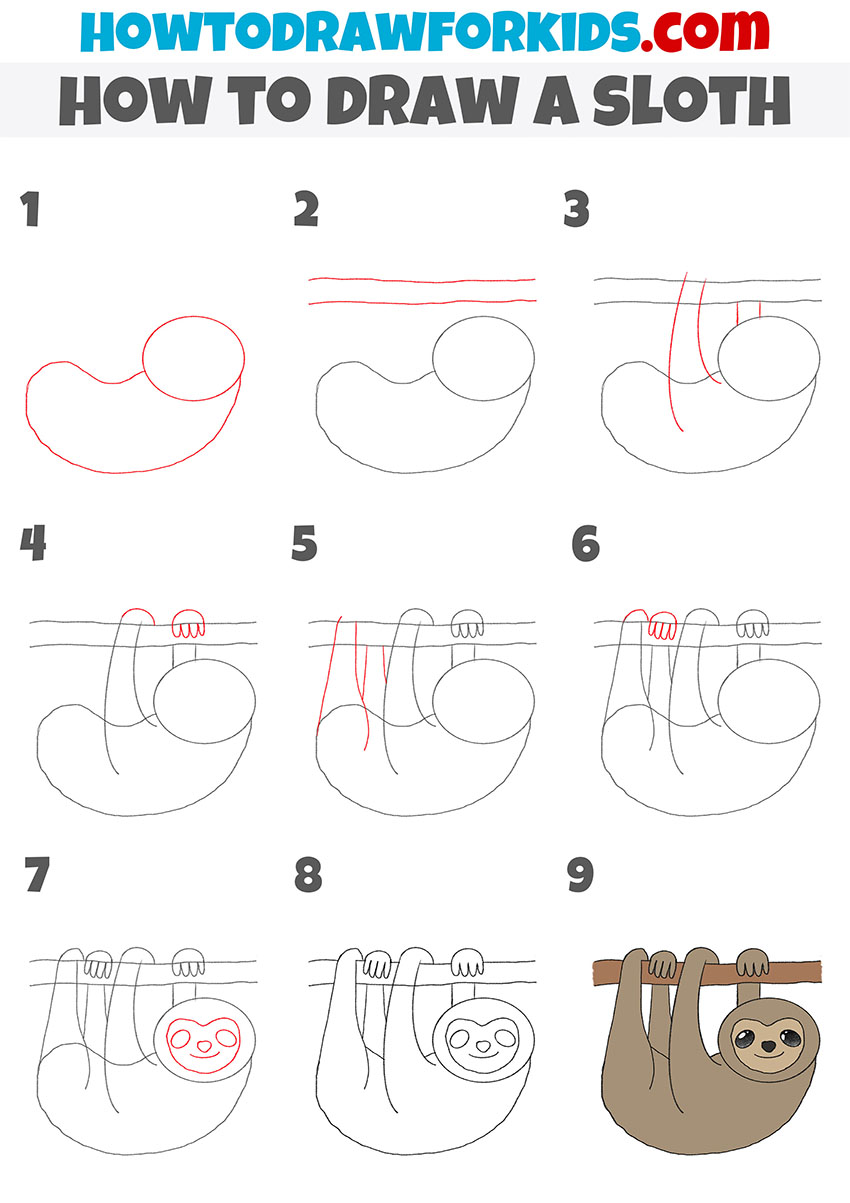
How to Draw a Sloth
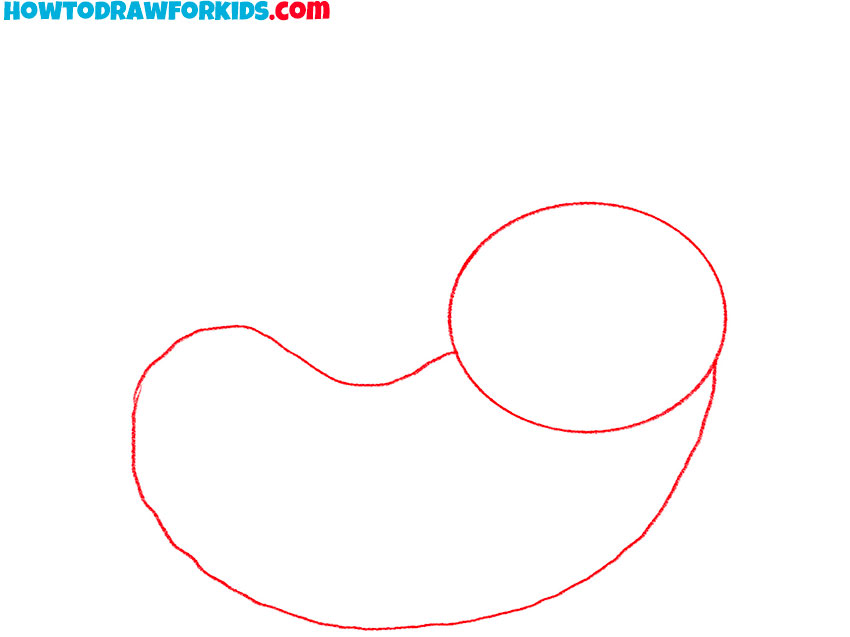
- Draw the outline of the sloth’s head and torso.
Firstly, draw a large, irregular bean-like shape that will become the sloth’s body. Next, add a smaller, round shape above the larger one on the right side to outline the head.
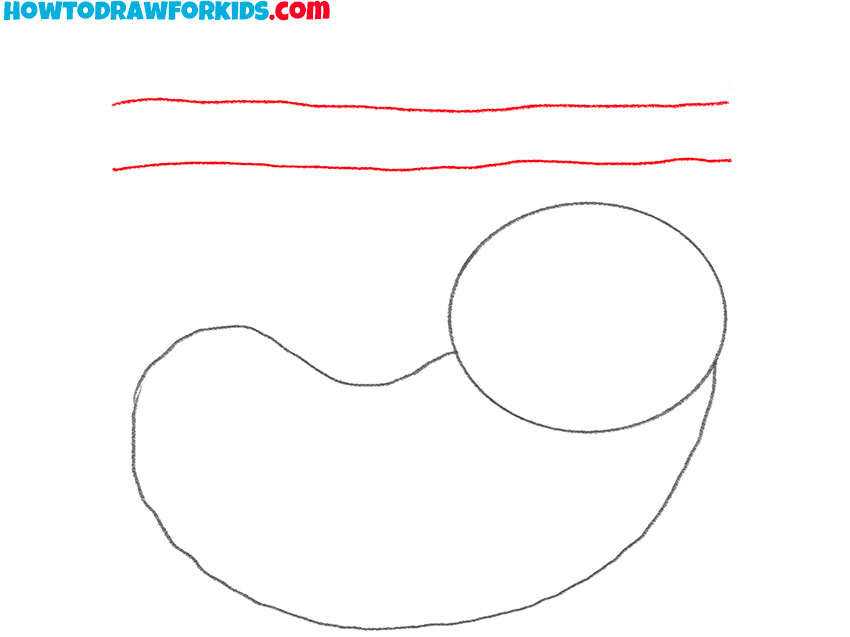
- Depict the outline of the liana.
So, this step focuses on establishing the sloth’s environment by drawing the vine it will hang from. Start by sketching two long curved horizontal lines, that should be parallel and spaced evenly.
- Draw the sloth’s paws.
From the body, extend two sets of curved lines upward to form the shape of the sloth’s upper arms. These lines should wrap around the vine lines, indicating that the arms are encircling the vine.

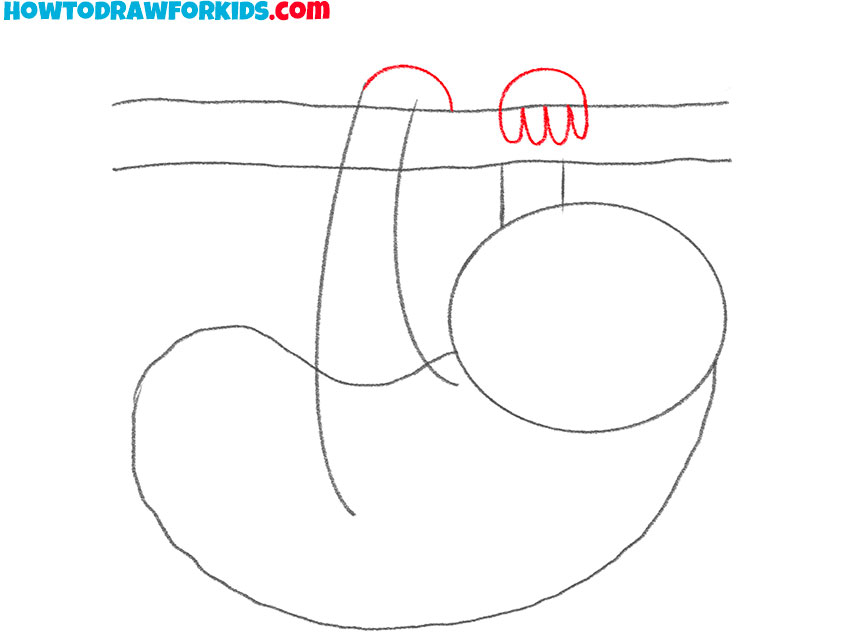
- Outline the ends of the sloth’s paws.
At the end of right arm, draw four elongated, curved shapes to represent the sloth’s fingers. The fingers should be placed directly on the vine that we drew a little earlier.
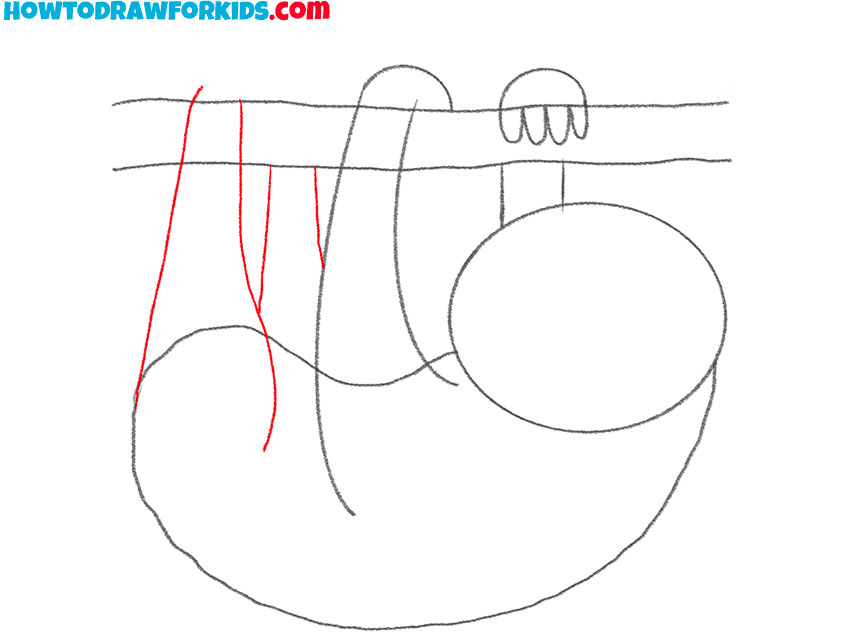
- Add the second pair of paws.
Starting from the lower part of the body shape, draw two sets of lines to form the upper part of the legs. These lines should be shorter and more curved than the arms.
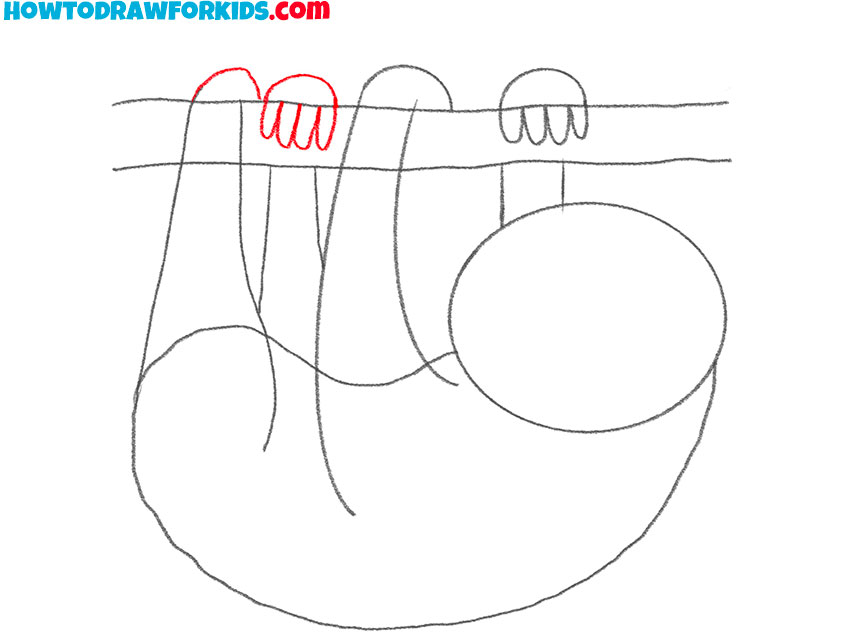
- Add the toes of these paws.
The feet, like the hands, should feature four long, curved toes ending in rounded claws. The shape of the feet should mirror the hands but appear slightly less elongated due to the sloth’s curled-up posture.
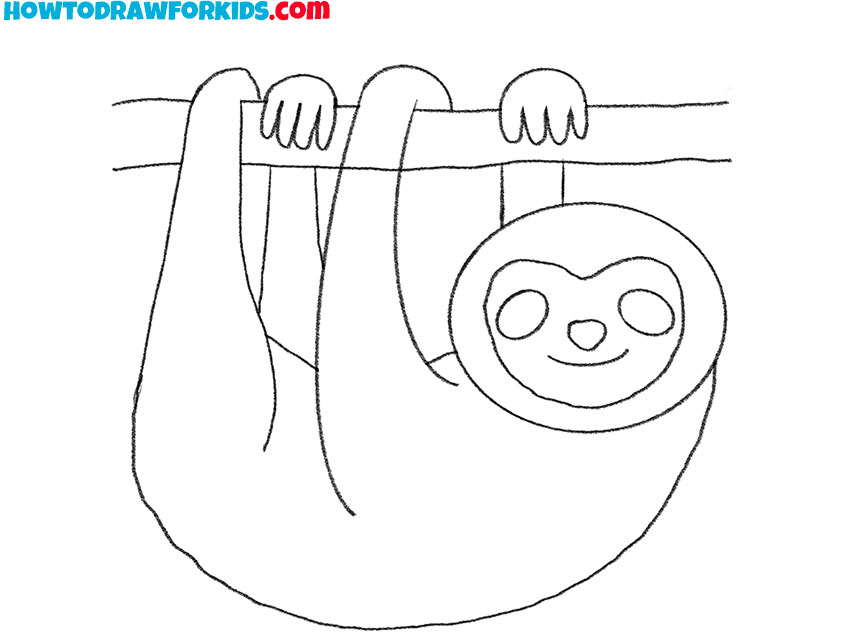
- Picture the facial features.
Place two oval shapes for the eyes, making them wide and endearing. Below the eyes, add a small, curved line for the mouth and a small inverted triangle for the nose.

- Erase unnecessary lines.
t’s time to clean up your drawing and solidify the sloth’s form. Carefully examine the entire illustration to identify any construction lines that are no longer needed. Gently erase these guidelines.
- Color the drawing.
To complete your artwork, color the sloth in appropriate shades, typically browns and greys, blending them smoothly to create a realistic look.

Additional Content
As an added bonus to our drawing adventure, I’ve crafted a complimentary PDF file for this lesson. It’s a concise version, perfect for quick reference. Whether you’re on the go or offline, you can download this handy guide to practice drawing a sloth anytime, anywhere.
This PDF distills the essence of the lesson into easy-to-follow steps, ensuring you can continue to refine your skills without the need for constant internet access. So, grab your pencils, and let’s keep the creativity flowing, even when the Wi-Fi doesn’t!
Alternative Drawing Method
Additionally, to ensure you have a comprehensive set of tools at your disposal, I’ve introduced one more sloth drawing method into our lesson. It’s a wonderful opportunity to practice, learn, and see your artistic talents flourish as you bring these lovable creatures to life on your canvas.
Drawing Sloth: Extra Practice
This drawing method for the sloth may seem reminiscent of the first, with subtle differences that may not be immediately apparent. Yet, these slight variations are intentionally designed to reinforce the artistic concepts we’ve covered and to solidify your understanding of sloth anatomy.
Our objective with this approach is to strengthen your artistic skills, building on the foundation we’ve established and encouraging consistent practice. By revisiting similar techniques, we aim to enhance your confidence in drawing sloths and deepen your appreciation for the nuances that make each sketch unique.

Perfecting Your Sloth Sketches
Ready to elevate your sloth sketches to new heights? Here are some artistic strategies to enhance your drawings and make them stand out. Whether you’re drawing for fun or to improve your skills, these tips will add that extra pizzazz to your slothy creations.
- Go Slow with the Sloth: Take your time with each line, just like a sloth would. Slow drawing helps improve precision.
- Color it Cool: Sloths might look similar, but they can have different shades! Experiment with browns, grays, and even greens for mossy fur.
- Texture Triumph: Give your sloth’s fur some texture with light strokes of your pencil for a fluffy look.
- Hanging Around: Sloths love to hang out on trees. Draw some branches to make the picture complete.
- Branching Out: Don’t just stop at a branch; add some leaves or even a jungle background to show where your sloth lives.
You’re on your way to becoming a drawing pro! Keep practicing these tips and tricks, and soon you’ll be inventing your own. Remember, every artist was first an amateur, and practice makes progress.
Conclusion
Wow, what a ride we’ve had drawing that sloth, friends! You did an awesome job! If you enjoyed this, there are tons more fun lessons waiting for you, like how to draw a whale or a yummy strawberry.
Hop over to my website to pick your next creative adventure, and don’t forget to follow my socials to stay updated on all the new content I post. Keep those pencils moving and your imagination flowing!
bad not good
good
i LOVE SLOTHS YOU GUYS ARE THE BEST!!!!!!!!!!!!!!!