How to Draw a Ninja
In this really simple tutorial, I’ll demonstrate you how to draw a ninja in three different ways and provide some useful additional tips.

How to Draw a Ninja: Basic Information
In this lesson, you’ll learn how to draw a ninja in a simplified, step-by-step manner. First I will introduce you to the main detailed tutorial, then I will show you two additional ninja drawing lessons and at the very end I will give you some very important tips to improve your skills.
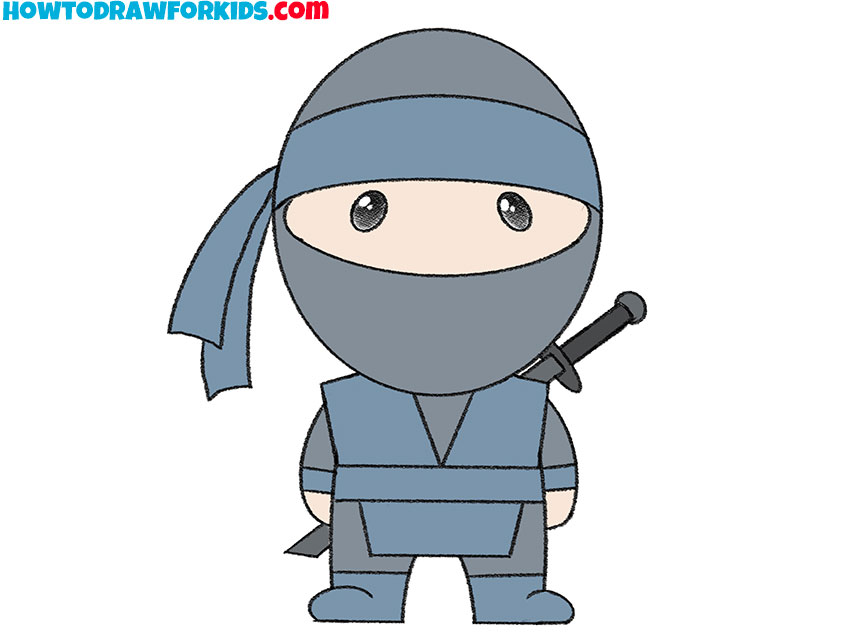
The ninja in this tutorial is drawn in the chibi style, featuring a large head and small body. This style combines the ninja’s traditional look with a playful, cartoonish charm.
By the end of the tutorial, your ninja will have the typical clothing and weapons, along with the fun appearance that comes from the simplified design.
Ninja Drawing Tutorial
Materials
- Pencil
- Paper
- Eraser
- Coloring supplies
Time needed: 20 minutes
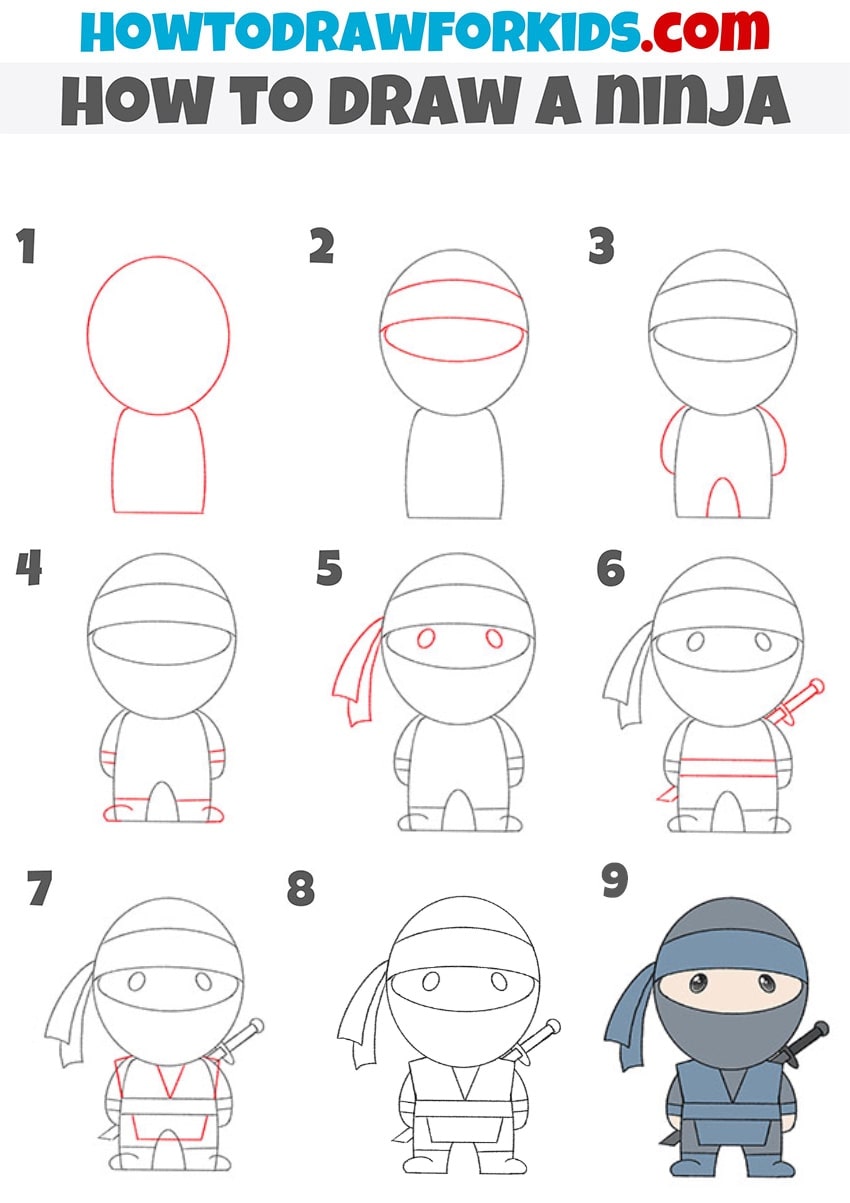
How to Draw a Ninja
- Draw the outline of the head and torso.
Start by drawing a large circle at the top of your paper to represent the ninja’s head. Below the circle, sketch a slightly curved rectangular shape for the torso. The rectangle should be narrower at the top where it meets the head, giving the ninja a sturdy, compact appearance.

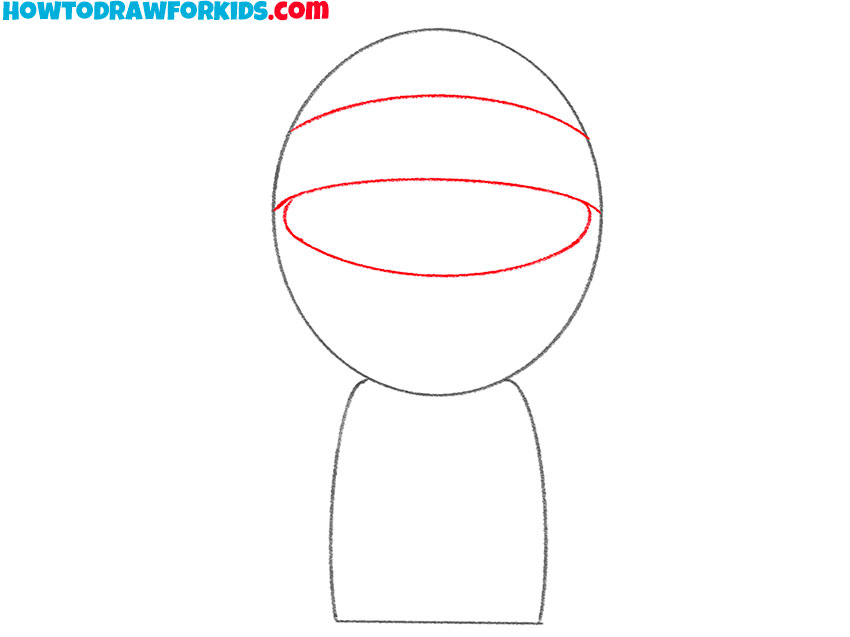
- Illustrate the headband and mask of the ninja.
Add two parallel horizontal lines across the top third of the ninja’s head, illustrating the headband. Below the headband, draw a slightly curved line just above the center of the head, outlining the ninja’s mask. Ensure the mask occupies the bottom half of the face, leaving space for the ninja’s eyes above.
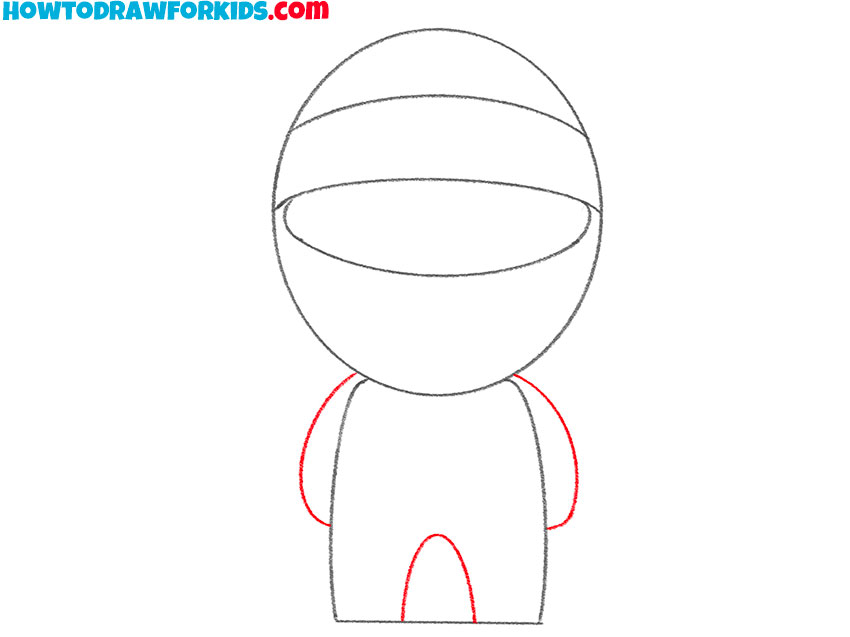
- Outline the ninja’s arms and legs.
Draw two rounded shapes on either side of the torso for the arms, positioning them slightly below the head. For the legs, create a small arched line at the centre of the body rectangle. This line will divide the bottom of the rectangle into two separate legs. These shapes should be small and simple.
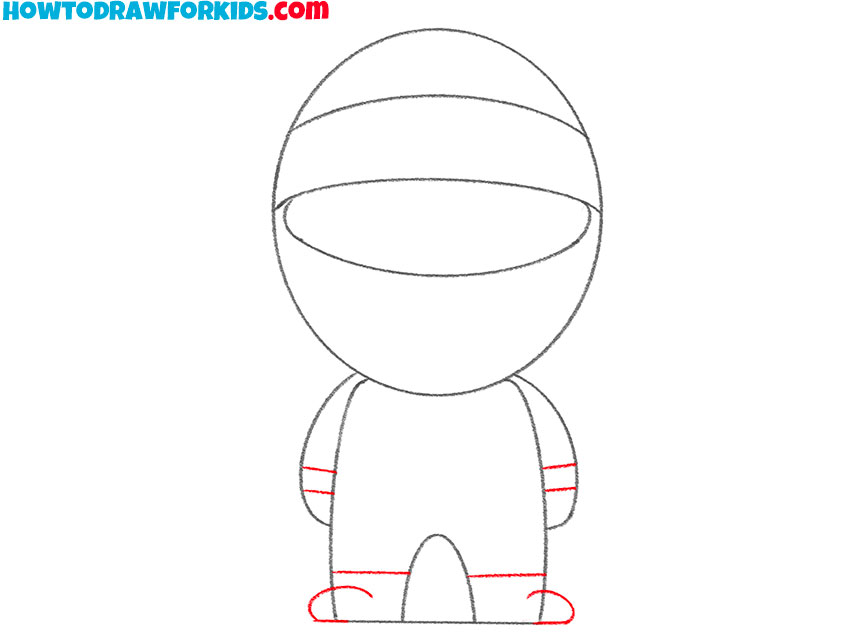
- Add the shoes and bands on the wrists.
In this step, refine the ninja’s hands and feet. Begin by drawing small lines at the ends of the arms to illustrate the bands on the wrists and form simple, mitten-like hands. Next, draw two small ovals at the bottom of the legs for the feet, keeping them aligned with the body.
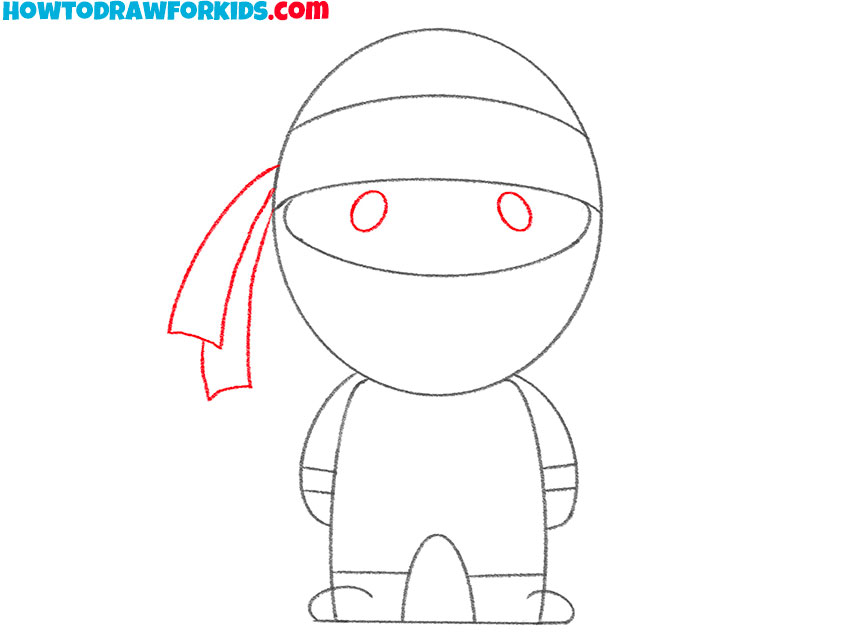
- Draw the eyes and headband ties.
Now, it’s time to add the finishing touches to the ninja’s headband and eyes. Draw two curved, ribbon-like shapes extending from the side of the head to represent the ties of the headband. Next, inside the oval mask area, draw two small circles for the eyes.
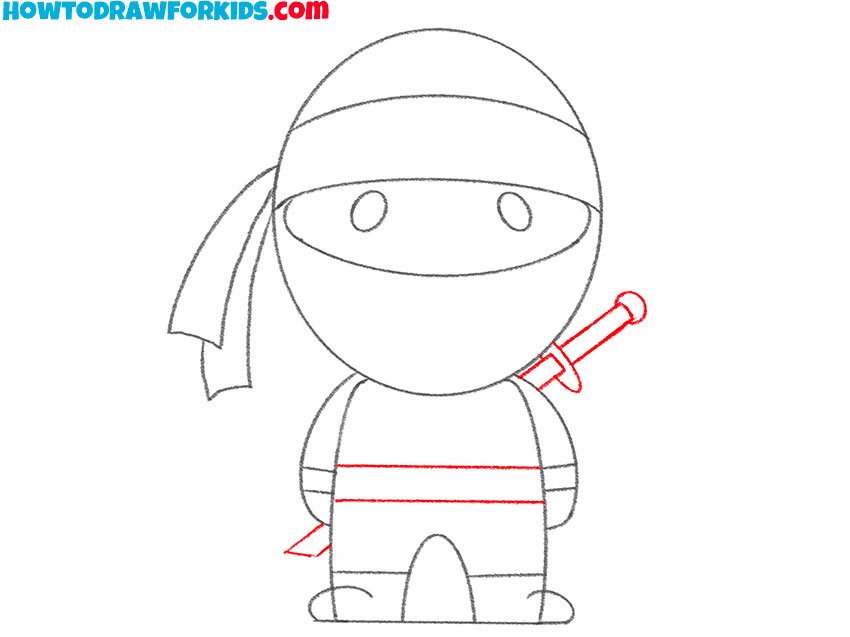
- Add the sword and the belt of the ninja.
Start by drawing a horizontal line across the middle of the torso to represent the belt. You can make the belt slightly thicker by adding another line below it. Next, draw a small rectangle extending from behind the ninja’s back, just above the belt, to depict the sword’s handle.
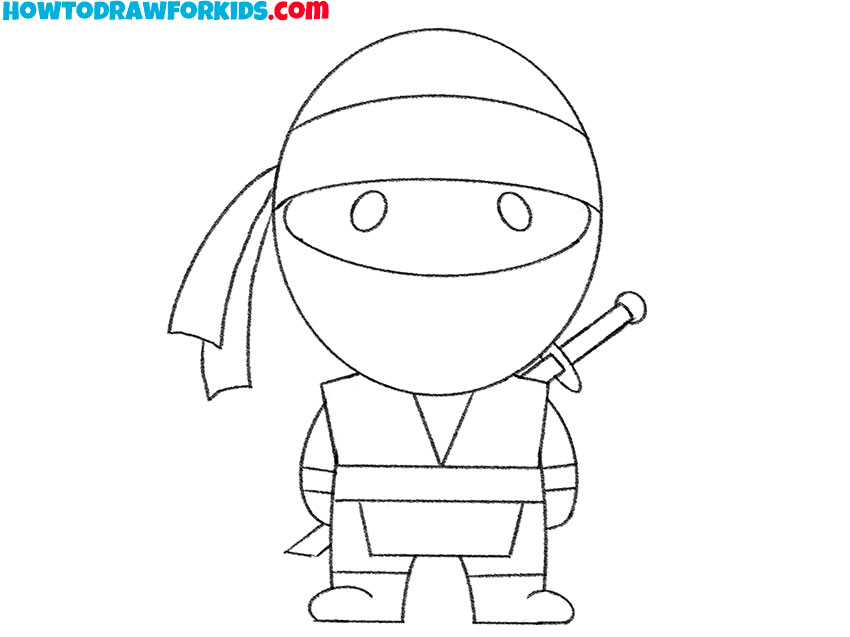
- Refine the clothing and details.
Start by drawing a V-shaped line just below the head, representing the ninja’s vest or kataginu. Then you can add a few small lines on the arms and legs to indicate the folds and creases in the fabric, giving the outfit a more realistic appearance.

- Erase the guidelines and refine your ninja drawing.
Now, go over your drawing of the ninja with a darker pencil or pen to define the final outlines. Erase any unnecessary lines from the earlier steps to clean up your drawing. Once you’re satisfied with the outlines, you can add color to your ninja.
- Add colors to your artwork.
Use shades of dark blue or black for the ninja’s outfit, and lighter colors for the belt and headband. You can also add some shading to give the character more realistic look. Also, you can add highlight to the eyes of the ninja to make him look more alive.
Additional Content
I’ve created a free PDF file to go along with the simplified ninja drawing lesson. This file is a simple summary that you can download and use whenever you need it, even without internet access.
The PDF doesn’t just repeat the steps but offers additional materials to help you improve your skills once you’ve completed the main lesson. It includes challenges designed to further develop your chibi ninja drawing abilities.
This guide serves as a handy tool for practicing your art, helping you master the techniques and make drawing ninjas feel natural.
Alternative Drawing Techniques
I’ve created several alternative drawing techniques for the ninja, giving you different approaches to improve your skills. Each method offers a new way to work with shadows and lines, helping you to illustrate the ninja in various styles.
These methods include different poses and tools, motivating practice that improves your abilities. They are designed to help you better depict the ninja’s movements and features.
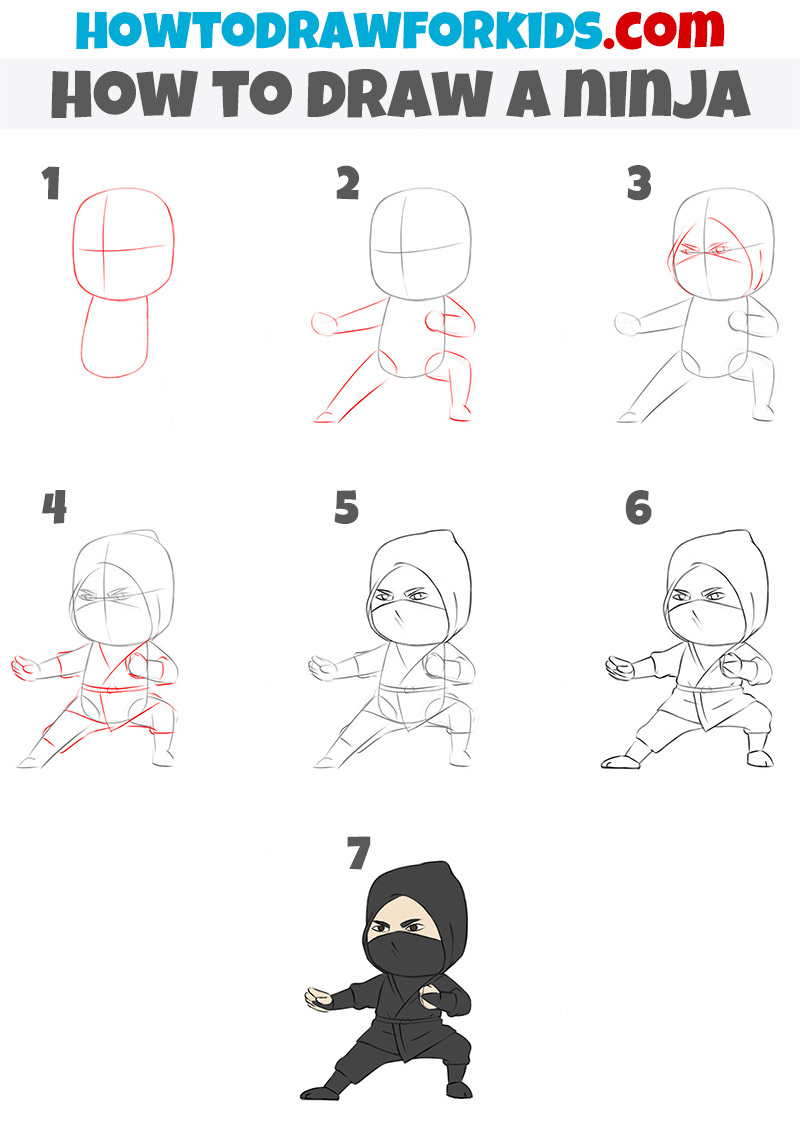
How to Draw Ninja in Fighting Position
Earlier, I showed you how to draw a ninja in a static pose, and now I’ll demonstrate how to illustrate this Japanese shadow warrior in a fighting stance. The guide remains simple, but this time, I’ll use a different sequence of steps and a slightly different style.
Start by sketching an oval for the head and a slightly curved shape for the torso. Draw guidelines on the head to mark the face’s center. Add the limbs, positioning the arms in a fighting stance and the legs in a wide, stable pose. Next, outline the facial features and the hood, making the ninja’s expression intense.
Refine the body by adding details like the mask, clothing, and fists. Continue by cleaning up the lines and adding any final details. Finally, color the ninja, using dark shades for the clothing and lighter tones for the skin and eyes.
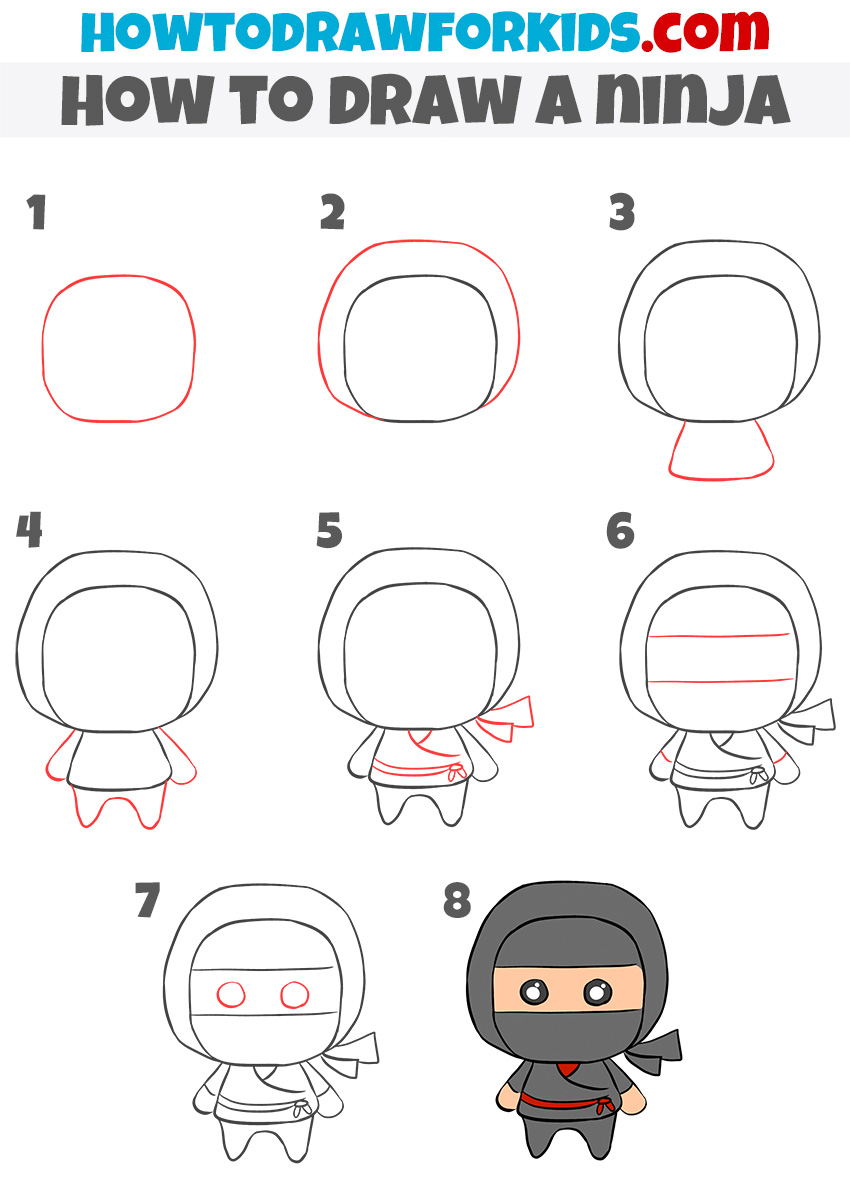
How to Draw a Ninja for Kindegarten
This drawing method is designed for young children, making it simple and easy for kindergarteners to learn how to draw a ninja. We start by drawing a basic circle for the head, creating a friendly ninja that children can easily draw themselves.
Start by drawing a rounded square for the ninja’s head. Inside it, draw a smaller rounded square to create the face area. Below the head, sketch a trapezoid shape for the body. Add two curved lines for the arms and two more for the legs, keeping the shapes simple.
Draw a small rectangle on the side of the head for the headband tie. Then, draw two horizontal lines on the face for the mask. Add two small circles for the eyes. Finally, outline the entire drawing with a pen, erase the guidelines, and color your ninja.
How to Draw a Ninja: Common Mistakes
Drawing a ninja can be challenging, and common mistakes are part of the learning process, especially for beginners. Below are some frequent errors to be aware of:
- Overlooking Proportions: Keep the ninja’s proportions balanced. The head shouldn’t be too big compared to the body, and the limbs should be proportionate.
- Rigid Poses: Ninjas are known for their agility. Avoid stiff poses by slightly bending the arms and legs.
- Uniform Lines: Varying line thickness can make a drawing more dynamic. Avoid using the same line thickness throughout the drawing.
- Forgetting the Mask’s Purpose: The mask should appear functional, as if it could realistically cover the face.
- Ignoring Fabric Movement: The ninja’s outfit should resemble fabric, not armor. Pay attention to how it drapes and moves on the body.
- Overcomplicating the Sword: Keep the sword simple. Often, a straight line for the blade is sufficient.
- Skipping the Sketching Phase: Starting with final lines without a preliminary sketch can cause mistakes. Light sketching helps plan the drawing.
In conclusion, these mistakes are learning opportunities. Each one teaches an important aspect of drawing, from proportions to line variation. With practice, patience, and attention to detail, young artists can improve their skills and create drawings of ninjas that are really cool.
Conclusion
On my website, you’ll find a really large collection of drawing lessons available for you. Whether you want to draw a tiger face or a knight, each lesson helps you improve your skills as an artist.
Follow me on social media to stay updated on new lessons. Your feedback is important, so feel free to leave comments with your ideas for future tutorials. Your suggestions might influence the next lesson.