How to Draw a Dream Catcher
Ever wanted to learn how to draw a dream catcher? I’ve prepared a simple guide for you that will result in an amazing piece of art. Follow my tips and become a drawing pro!

How to Draw a Dream Catcher: Basic Information
Drawing has always been a way for me to connect with different cultures and symbols. Among them, the dream catcher holds a special place in my heart. Have you ever wondered, “How can I draw a dream catcher?” Well, you’re in the right place.
As an art teacher, I understand the importance of trining your drawing skills through structured and detailed exercises. Drawing a dream catcher is a great way to boost your abilities, as it involves various key aspects such as symmetry, intricate detailing, and a blend of geometric and organic shapes.
The main aspects to pay attention to while drawing a dream catcher include maintaining symmetry, especially in the webbing, and ensuring that your lines are clean and precise. Symmetry is crucial in achieving the traditional look of a dream catcher, as it reflects the harmonious and balanced appearance of this cultural artifact.
The intricate detailing of the webbing and decorative elements like beads and feathers will challenge you to focus on precision and patience, skills that are really important for any artist.
Dream Catcher Drawing Tutorial
Materials
- Pencil
- Paper
- Eraser
- Coloring supplies
Time needed: 35 minutes
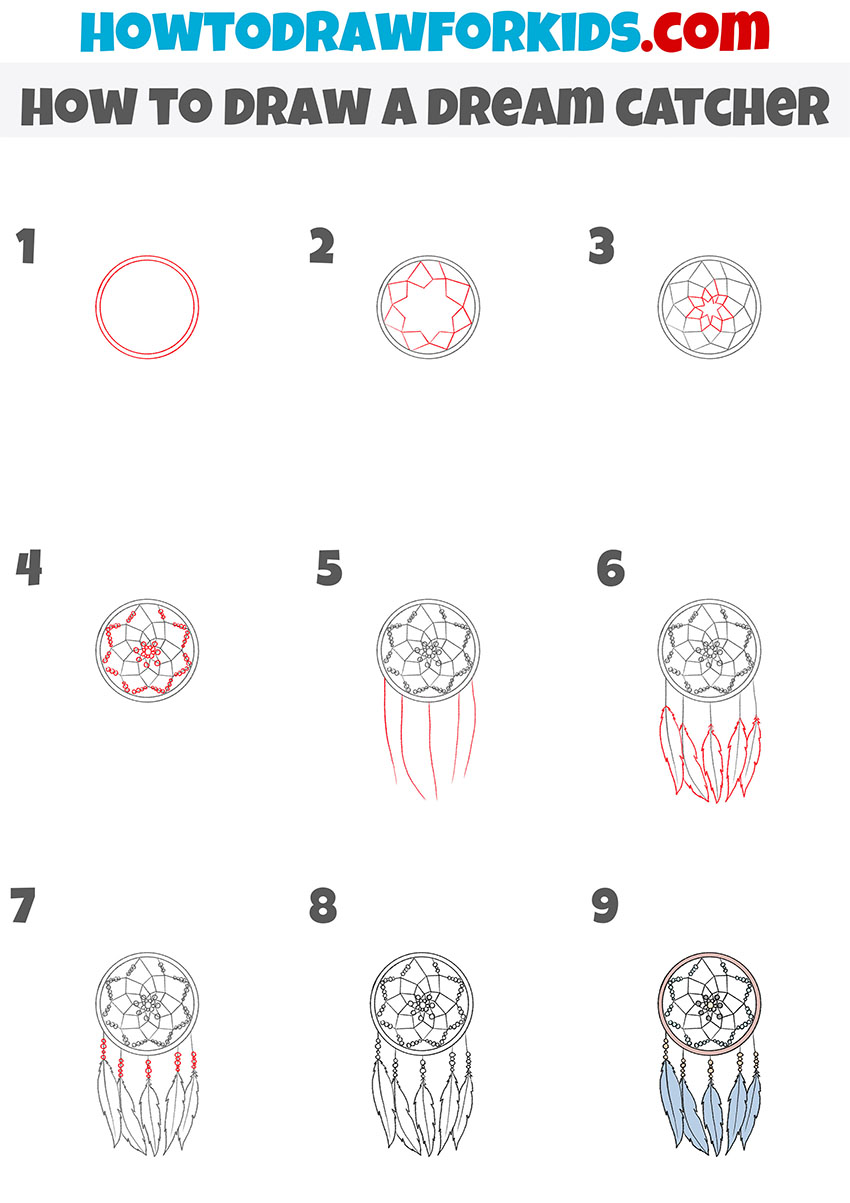
How to Draw a Dream Catcher
- Start with the basic shapes of the dream catcher.
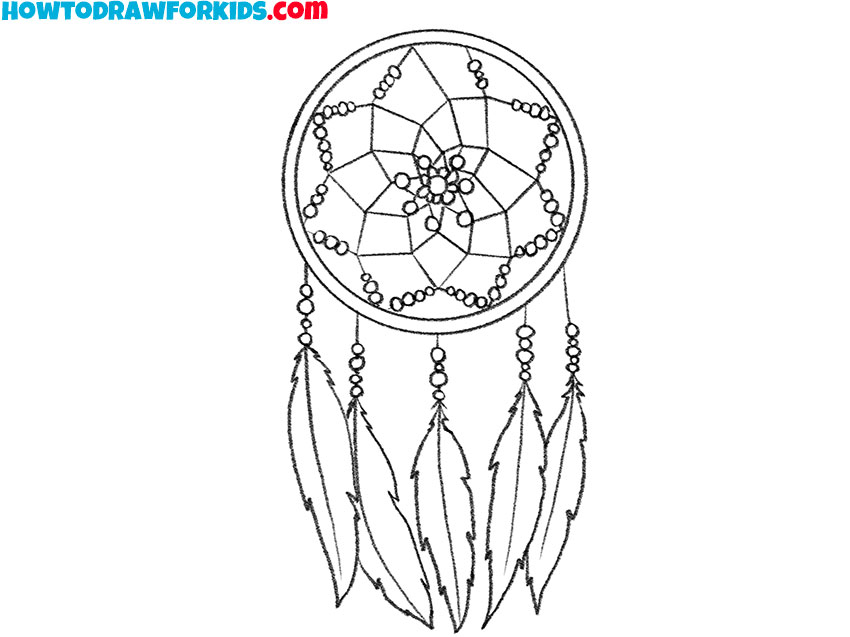
Begin by drawing a large circle to form the outer boundary of the dream catcher. This circle represents the hoop that holds the intricate webbing. Use a compass or any round object to trace a perfect circle. Ensure the circle is smooth and even, as it serves as the foundation for the entire drawing.

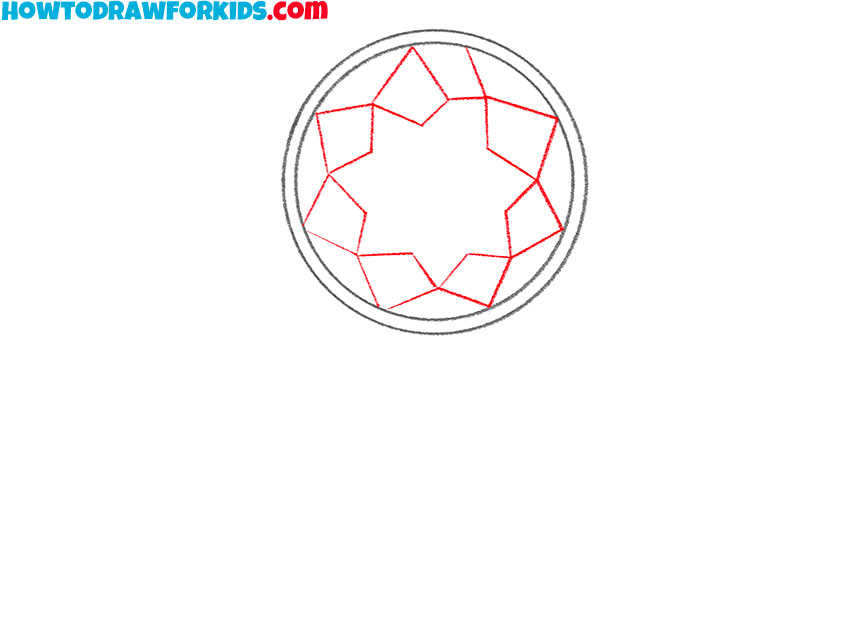
- Add the outer webbing.
Inside the outer circle, draw the outer webbing by creating a star-like pattern with lines connecting various points along the inner circumference of the circle. These lines should intersect and form a symmetrical geometric design, mimicking the traditional structure of a dream catcher.
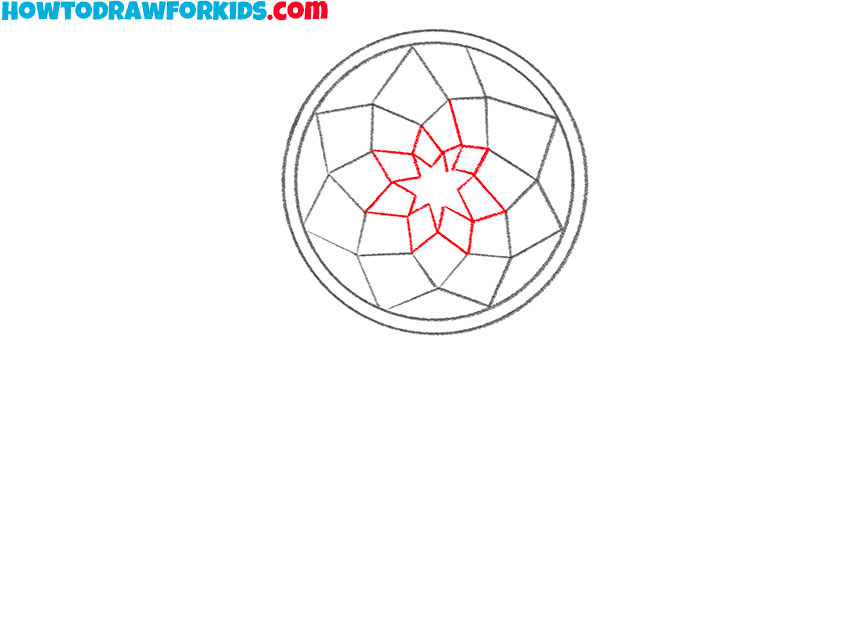
- Add the inner webbing.
Expand on the outer webbing by adding more lines that radiate inward, forming the inner webbing. These lines should intersect the outer lines and each other, creating a more complex, interwoven web. The inner webbing should be detailed and symmetrical.
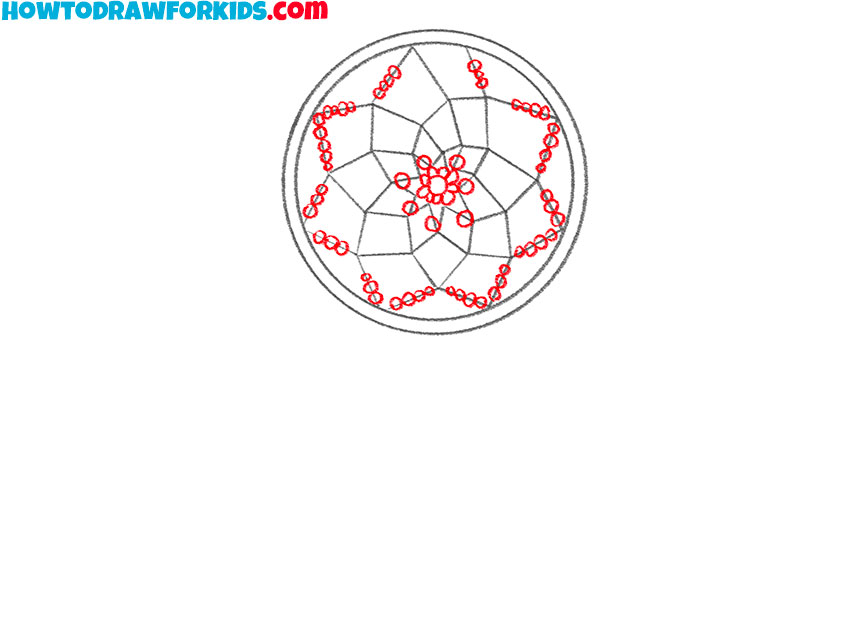
- Add the decorative beads.
Draw small circles along the intersecting lines to represent decorative beads. Place these beads at various junctions within the web to add visual interest and traditional elements to the design. The beads symbolize the good dreams that pass through the web.
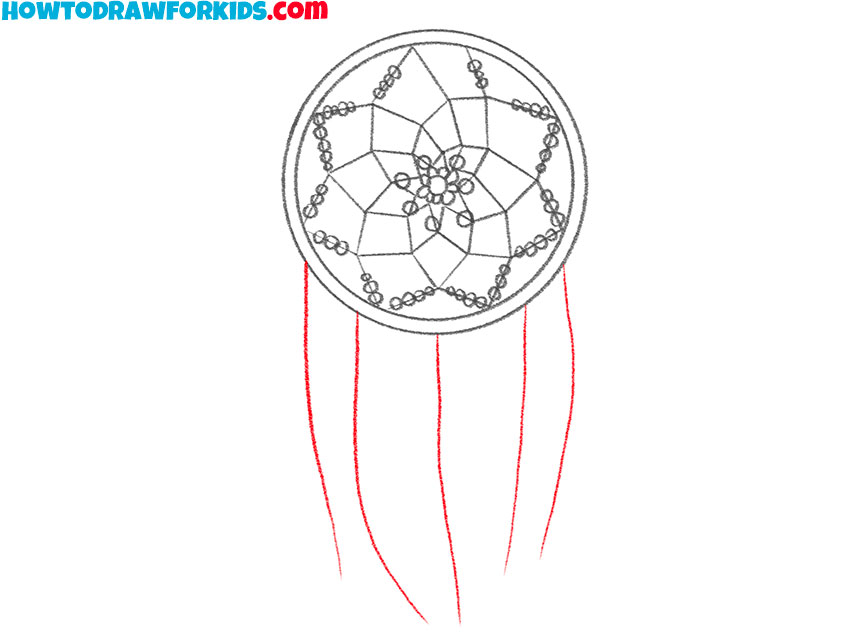
- Illustrate the central lines of the feathers.
Draw several lines downward from the bottom of the outer circle to form the central lines of the hanging feathers. These lines should be slightly curved to mimic the natural flow of hanging strings. Space them evenly and ensure they are long enough to accommodate the feathers and additional beads.
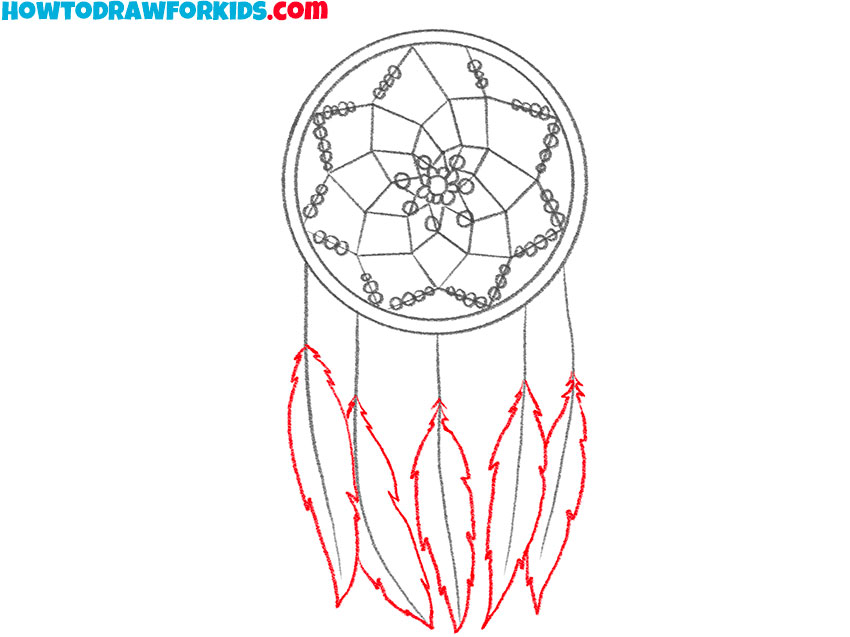
- Detail the feathers of the dream catcher.
Attach elongated, curved shapes to the ends of the hanging lines to represent feathers. These outlines should taper to a point, resembling natural feathers. Each hanging line should have one feather, varying slightly in size and orientation for realism.
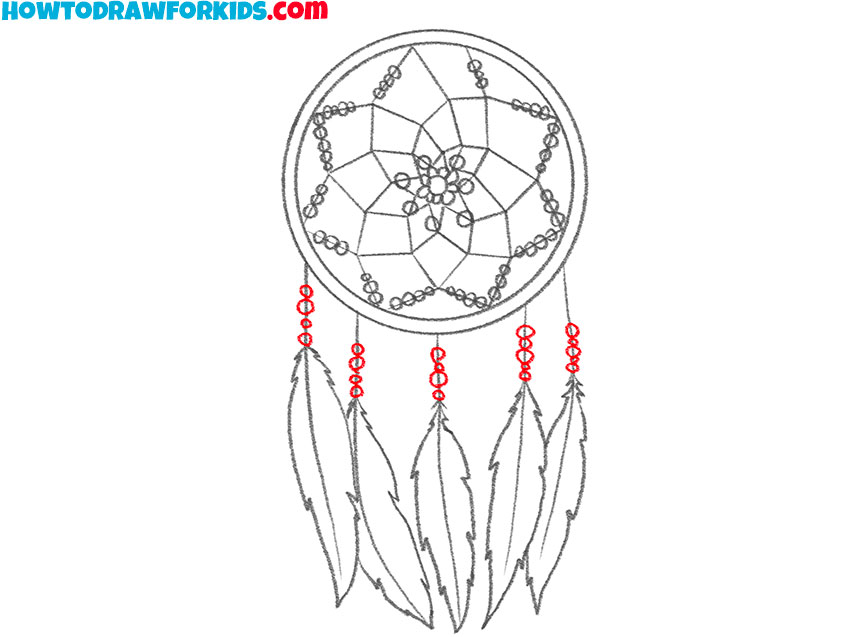
- Add more beads.
Add small circles along the hanging lines above the feathers to represent beads. Place multiple beads on each line for a decorative effect. Additionally, you can detail the feathers by drawing lines along their lengths to indicate feather strands.
- Review and correct the sketch.
Refine your drawing by cleaning up any stray lines and enhancing the details. Make sure the webbing is neat and symmetrical, the beads are evenly distributed, and the feathers are well-defined with clear lines indicating their strands.
- Color the dream catcher drawing.
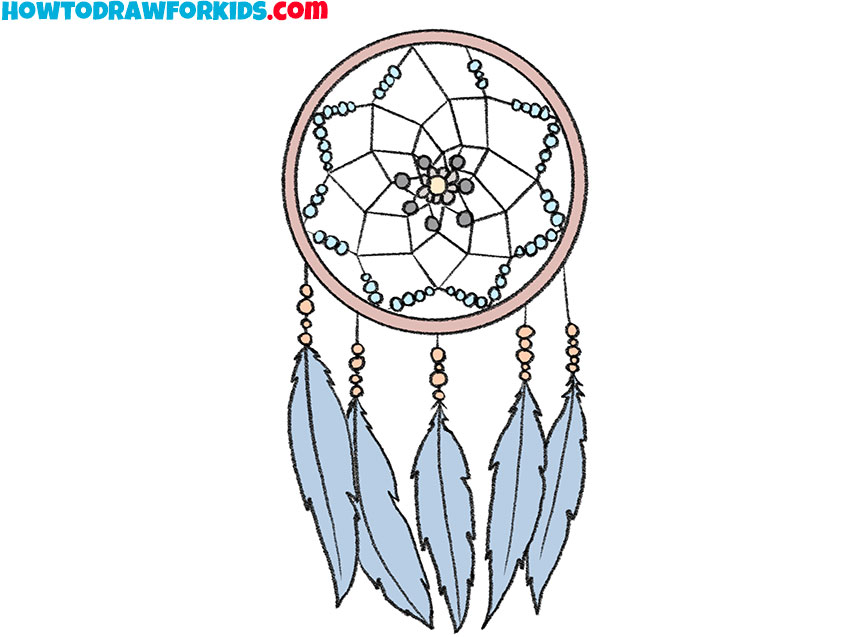
Use traditional colors like browns and earth tones for the hoop and webbing, and vibrant colors for the beads and feathers. The hoop can be a warm brown, the webbing a neutral tone, and the beads and feathers can be in shades of blue, red, and white.
Additional Materials
Thank you for following my step-by-step tutorial on how to draw a dream catcher. To give you an opportunity to train your skills, I have included a PDF file that you can download and use at your convenience. This PDF contains several valuable resources.
Firstly, you will find detailed illustrations of each step in the tutorial, from the initial outline to the final touches. Secondly, the coloring page features a finished dream catcher drawing, ready for you to add your own colors.
Thirdly, the tracing worksheet includes a faint outline of the dream catcher, allowing you to trace over it and practice your line work, improving your hand-eye coordination and control. Lastly, the grid drawing worksheet provides a grid overlay to help you break down the dream catcher into simple sections, improving your proportion and scale accuracy.
How to Draw a Dream Catcher: FAQ
To help you further in your learning process, I have compiled a Frequently Asked Questions (FAQ) section. This section addresses common questions and provides additional tips and insights related to drawing a dream catcher. I hope it answers any lingering questions you might have and enhances your understanding of the drawing process.
To make the feathers look realistic, draw them with a slight curve and add detailed lines to represent the feather strands. Shading can add depth and dimension, making the feathers appear more lifelike. Practice varying the pressure on your pencil to achieve different shades.
Beads in a dream catcher symbolize the good dreams that pass through the web and slide down the feathers to the sleeper. Including beads in your drawing adds authenticity and enhances the traditional look of the dream catcher.
Using the grid drawing worksheet can help you break down the dream catcher into simple sections, ensuring that each part is correctly sized and positioned. This method helps maintain accurate proportions and overall balance in your drawing.
Yes, feel free to customize your dream catcher with different patterns, bead placements, and feather arrangements. Personalizing your drawing allows you to express your view while still respecting the traditional elements of the dream catcher design.
To make your dream catcher drawing look more three-dimensional, add shading and highlights. Pay attention to light sources and how they affect the appearance of the webbing, beads, and feathers. This technique adds more realism to your drawing.
To prevent smudging, avoid resting your hand directly on the paper where you’ve drawn. You can place a piece of clean paper under your hand as a shield while you work on other parts of the drawing. Using a fixative spray after completing your sketch can also help set the pencil lines.
Conclusion
In this dream catcher drawing tutorial, we’ve sharpened our skills and touched on the background of this subject. You have also mastered various techniques that allow you to draw the complex details of the dream catcher – from the delicate weaving of the web to the gentle feathers and beads.
Before we part ways, I’d like to invite you to visit other lessons on my website. Each tutorial is created to train your skills with new techniques and tips. Also, don’t forget to follow me on social media for regular updates and tips.