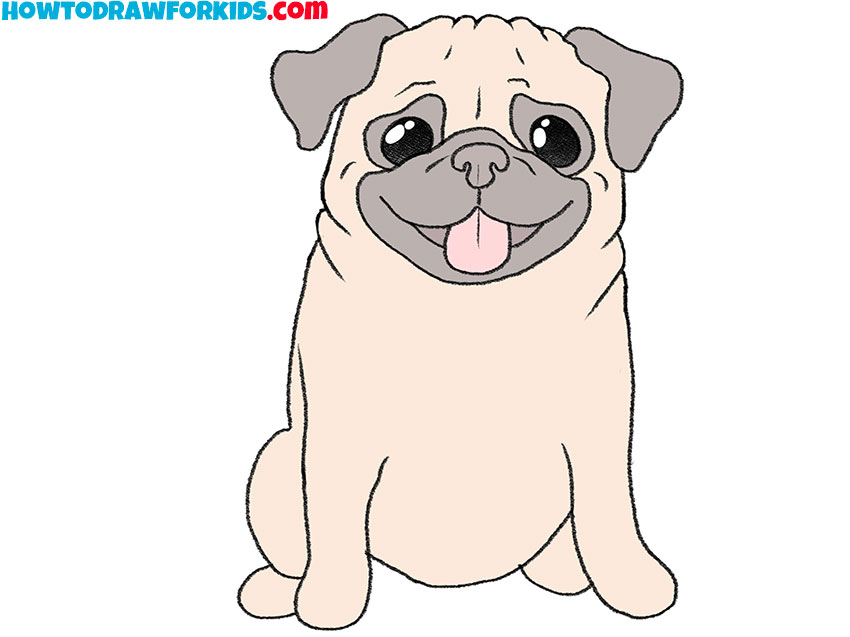
How to Draw a Pug
Eager to sketch a lovable pug? So, just use my tutorial and learn how to draw a pug with ease. Perfect for all art enthusiasts!

How to Draw a Pug: Basic Information
Grab your pencils and paper because today you’re going to learn how to draw a pug – one of the most delightful dog breeds out there. In this pug drawing lesson, I’ve simplified the process into simple, understandable steps, conveying the appearance of this adorable pug in a cartoon way.
Pugs are known for their expressive faces and compact, muscular bodies. We’ll start with the basic shapes to form their characteristic round head and squat body.
Special attention will be given to their big, soulful eyes and distinctive, wrinkled face, which are key to a pug’s appearance. Their small, curled tail is another feature we’ll focus on, and in this guide I’ll show you how to illustrate it correctly.
By the end of the pug drawing lesson, you’ll have a cute, cartoon-like pug looking back at you from the page. So, let’s start this tutorial and learn how to draw a pug in 9 simple steps.
Pug Drawing Tutorial
Materials
- Pencil
- Paper
- Eraser
- Coloring supplies
Time needed: 30 minutes
How to Draw a Pug
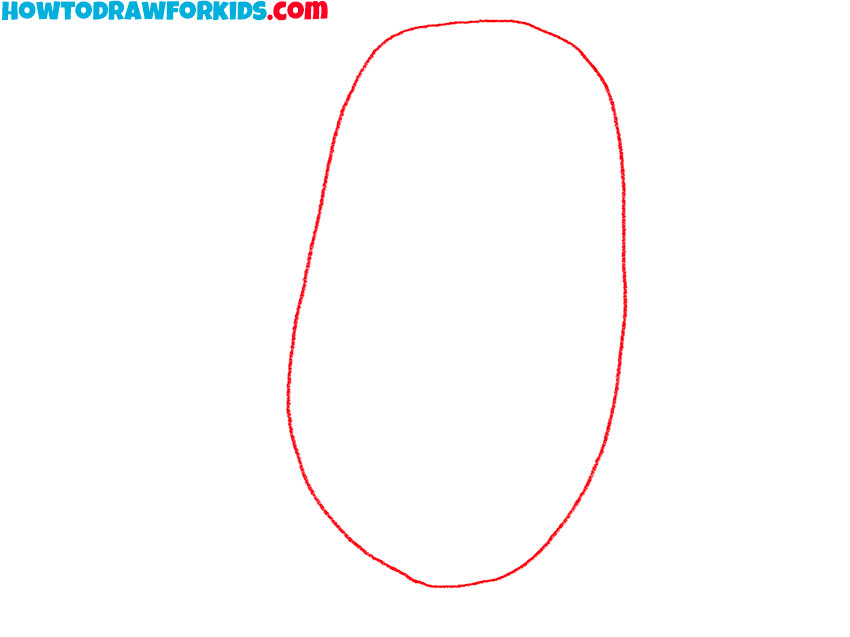
- Sketch the basic shaped of the pug.
Outline a large vertical oval. Due to the fact that the pug does not have a noticeable neck, this shape combines both the head and body of the dog. In this step, the figure can be asymmetrical, the main thing is to draw a slight extension at the bottom of the oval.
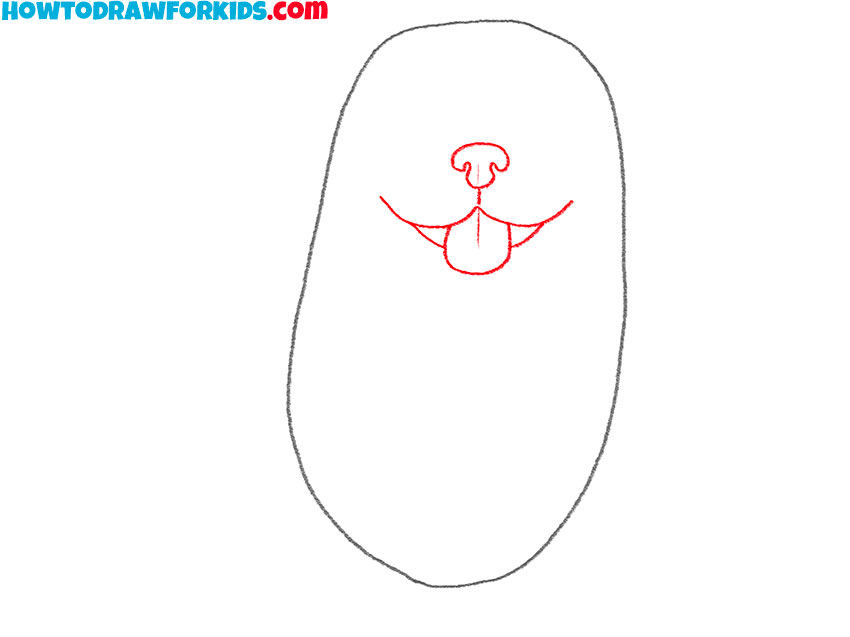
- Start detailing the face.
Pugs have T-shaped noses. This is especially noticeable in a frontal position, like ours now. It also looks a lot like a small mushroom. Draw this figure, and then, add the contours of the symmetrical cheeks, tongue, and bottom edge of the mouth.
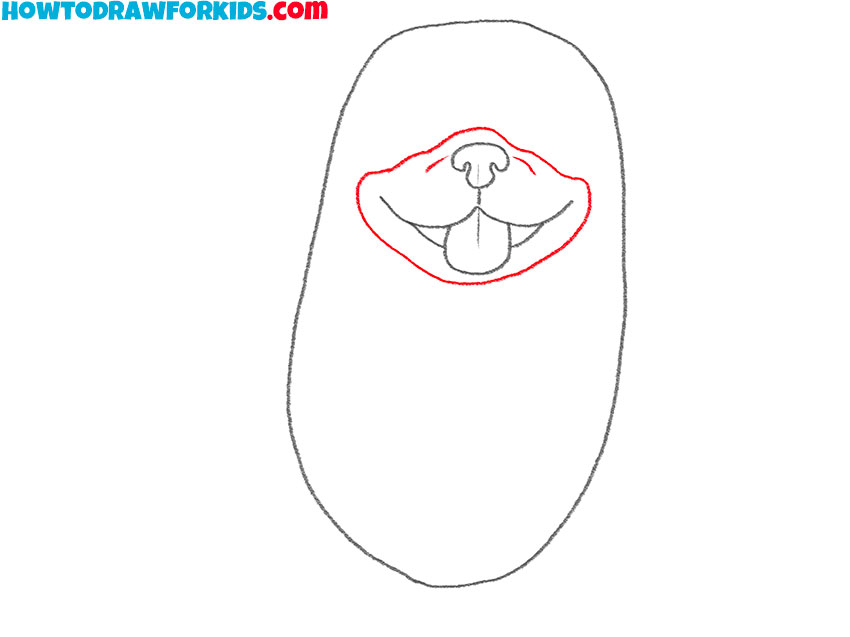
- Draw the outline of the muzzle.
Now, outline the hairless portion of the pug’s face. It’s very important to draw these boundaries with uneven, wavy lines to ensure they resemble large skin folds in subsequent steps. Pay attention to the small folds near the nose.
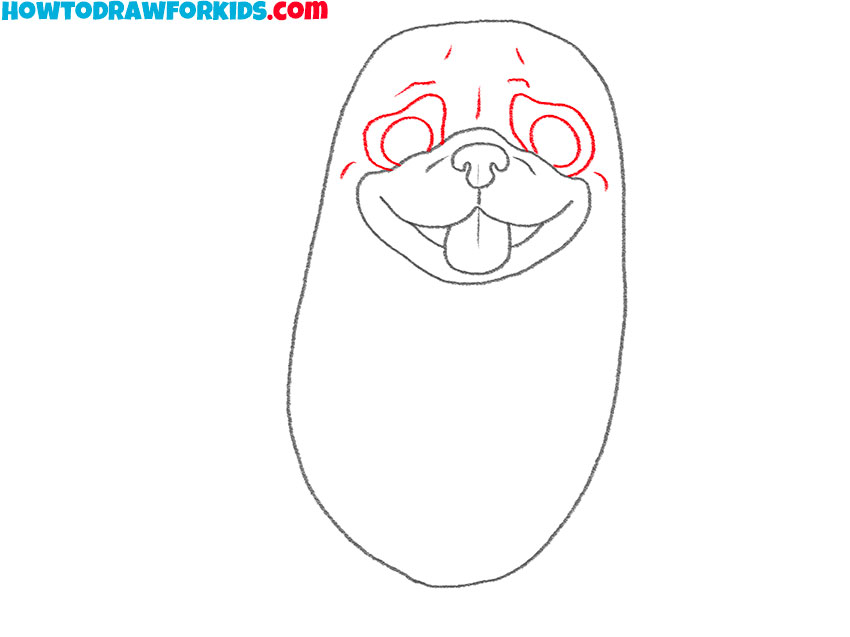
- Draw the pug eyes and brows.
Have you ever seen a live pug? If so, you’ve likely been captivated by that uniquely endearing expression on its face. To illustrate this expression in your drawing, sketch large eyes with truncated top edges. These should appear smooth and seamless. Adding a few wrinkles will make your pug more realistic.
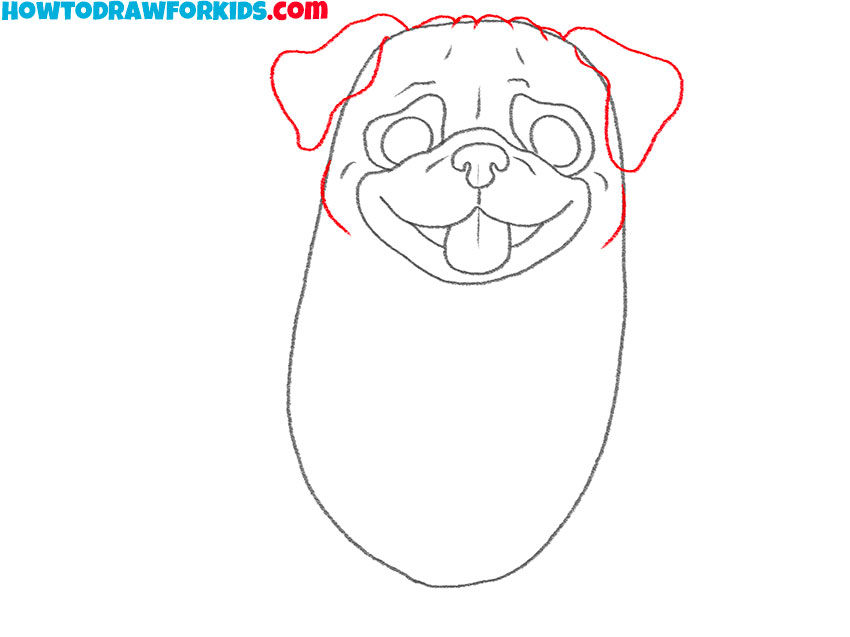
- Sketch the ears.
At this point, add the pug’s ears, which are small, soft, and fold over beside the head. The ears should have a slight roundness at the tips, reflecting the soft, velvety texture typical of pug ears. Create the relief of the skin folds on the pug’s head and cheeks with smooth, rounded lines.
- Draw the pug paws and neck folds.
Begin drawing the pug’s front legs, ensuring they appear sturdy and proportionate to support the body. Position the legs directly under the body. Since we are drawing a cartoon version of a pug, we don’t need to draw all the details too carefully. Just try to correctly convey the shape of the dog’s legs.

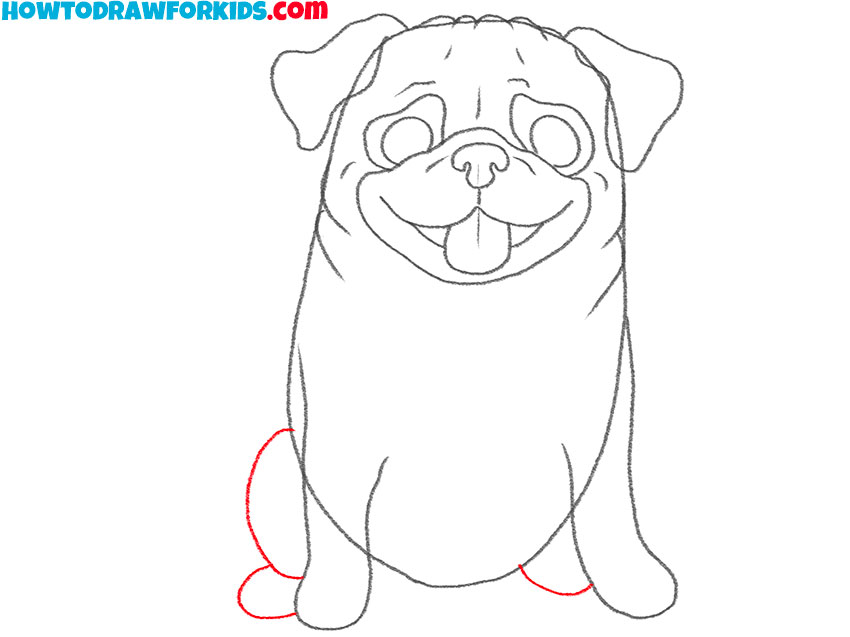
- Outline the hind legs.
From this perspective, the pug’s hind legs appear quite simple. The rounded, protruding belly of the pug nearly conceals the entire left leg. The right leg, visible and distinct, resembles two rounded figures of differing sizes.
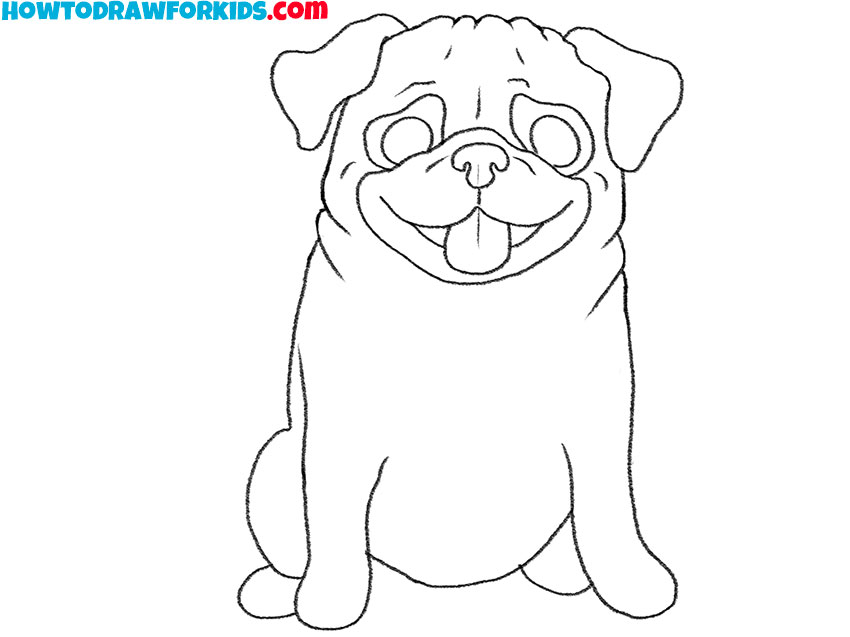
- Review the drawing and erase the guidelines.
Refine your drawing by erasing any unnecessary lines that were used as initial guides but are no longer needed in the final piece. Make sure all parts are symmetrically balanced and the typical features of a pug, such as the facial wrinkles and the body’s stoutness, are correctly represented.
- Apply colors to the pug drawing.
Choose colors typical of a pug’s coat, such as shades of fawn, apricot, or black, and apply them evenly across the body. Carefully color around the eyes, ears, and the muzzle, where darker shades often accentuate the pug’s adorable expression.

Additional Content
I’m happy to share that I’ve prepared a complimentary PDF file containing a condensed version of this pug drawing lesson, ensuring you can enjoy learning to draw even when you’re not connected to the internet.
Additionally, this means you have the flexibility to continue training your drawing skills in a variety of settings, be it while traveling or relaxing at home. Furthermore, this downloadable resource has been meticulously crafted to assist you in easily revisiting each step of the drawing process at your leisure.
Moreover, having this PDF allows for uninterrupted practice, specifically aimed at reinforcing the steps to draw a pug, and further ingraining these techniques into your artistic repertoire. Consequently, this focused practice can lead to noticeable improvements in your ability to draw a pug.
How to Draw a Pug: Common Mistakes
As we venture into the pug drawing session, remember that the smallest details can significantly improve the overall look of your artwork. Now, let’s meticulously review some common mistakes to avoid:
- Firstly, avoid making the body too long: Pugs have a compact, square physique. Make sure the body is stout and not elongated.
- Secondly, don’t oversize the ears: Their ears are small and delicate. Draw them proportionally to the head.
- Thirdly, be cautious with the eyes: Pugs have distinctive, large eyes. However, in a pug drawing, they shouldn’t touch the muzzle or be too far apart.
- Additionally, do not ignore the wrinkles: Pugs are known for their wrinkles. Make sure to include these signature folds, but also ensure they’re not too deep or sparse.
- Finally, be careful with the tail: Their tail curls over the hip, so don’t forget to give it a proper spiral shape.
Conclusion
As this pug drawing lesson comes to a close, it’s been a pleasure guiding you through the simple steps to illustrate such an endearing dog breed. I hope you’re leaving this tutorial with not only a delightful pug illustration but also with a deeper appreciation for the art of drawing dogs.
If you’ve enjoyed this process, I invite you to explore more on my website, where you’ll find a variety of drawing tutorials featuring different dog breeds. Each tutorial is designed to help you illustrate the unique appearances of these canine companions.
And for those of you who are always on the lookout for new and exciting drawing lessons, make sure to follow me on social media platforms. By following, you’ll get the latest updates on new tutorials and tips for training your technique.