How to Draw The Joker Face
This lesson will demonstrate how to draw the Joker face, one of the most charismatic comic book characters and Batman’s main enemy.

How to Draw Joker Face: Basic Information
In this drawing lesson, we will learn a simple but effective way to draw the Joker’s face. For this lesson, we will use the image of the Joker from the animated cartoon series of the 1990s.
However, the techniques covered in this lesson can be applied to drawing the Joker’s face from any adaptation, including films, comics, cartoons, and other works.
To draw the Joker’s face in a different style, it is only necessary to modify certain features, such as the hairstyle, eyes, or face shape. In this drawing lesson, we will use the same techniques introduced in the basic face drawing tutorial, with the only difference being the addition of the Joker’s distinctive features that make him recognizable.
So, in this Joker face drawing tutorial we will practice the process of drawing the face again and gain some very useful skills in drawing the Joker in full body.
Joker Face Drawing Tutorial
Materials
- Pencil
- Paper
- Eraser
- Coloring supplies
Time needed: 30 minutes
How to Draw the Joker Face
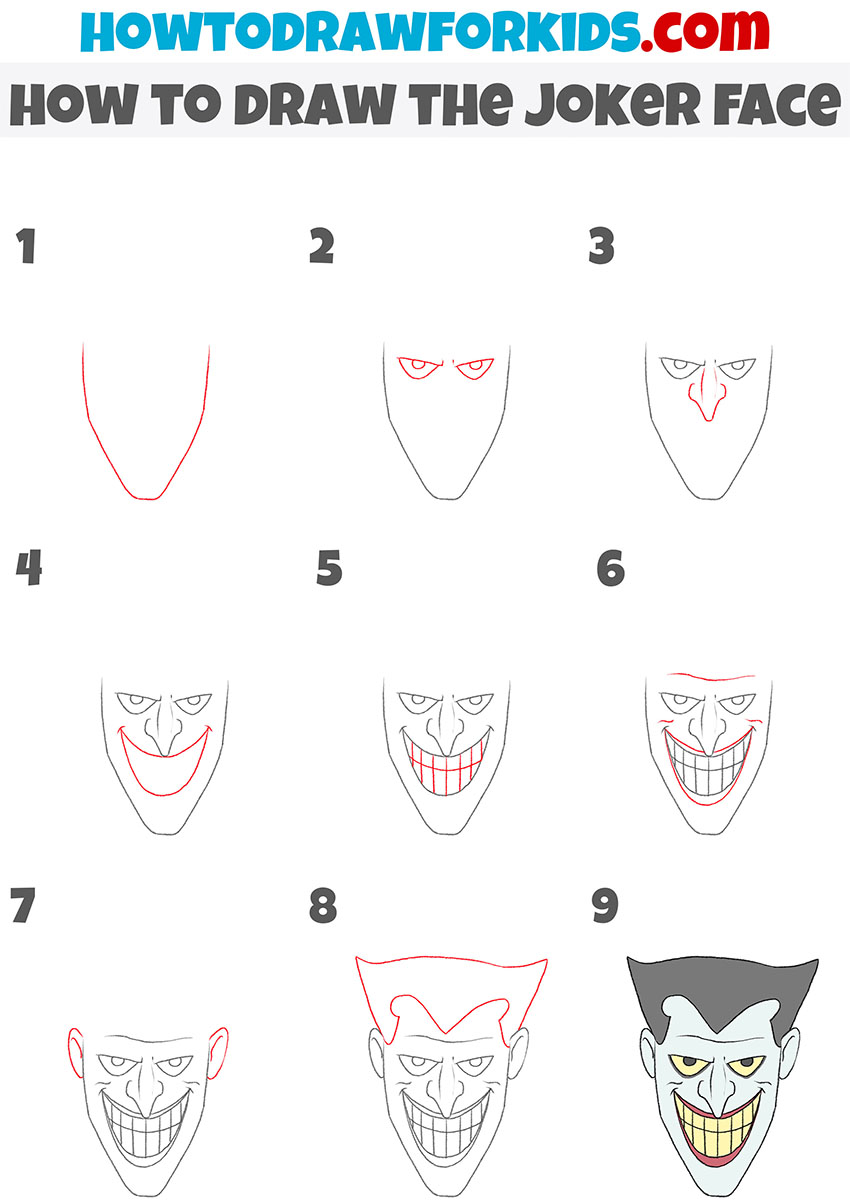
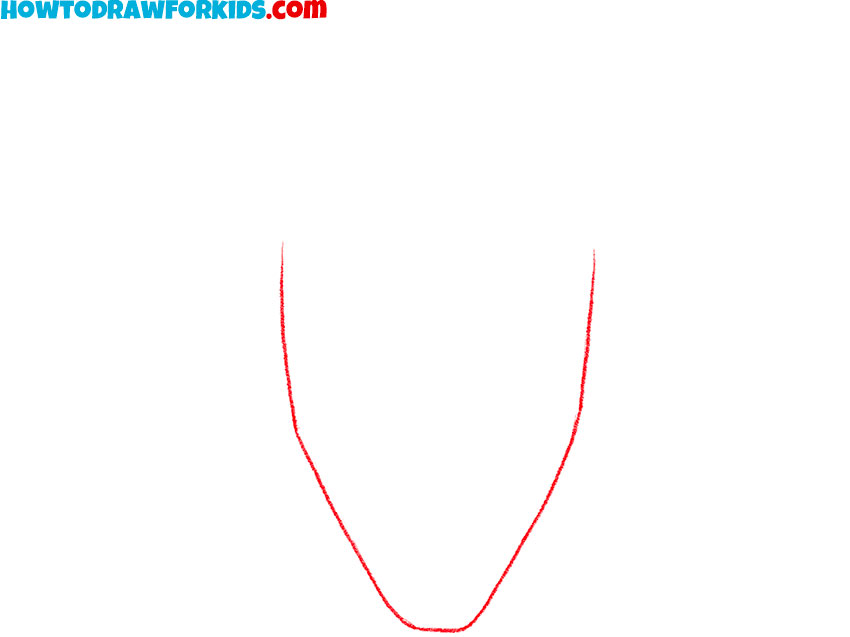
- Draw the outline of the face.
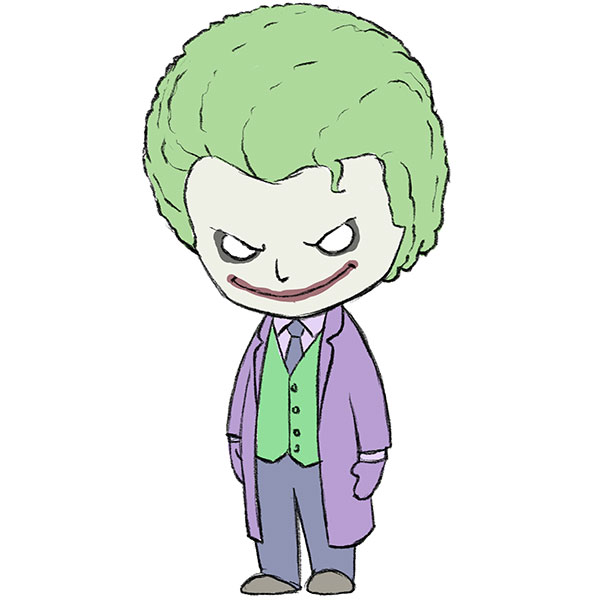
To begin this tutorial on how to draw the Joker face, start by sketching the shape of the villain’s head. The Joker’s face has a long and narrow structure with a pointed chin. Draw an elongated oval that tapers at the bottom, forming the outline of his jaw and chin. Keep the lines light.
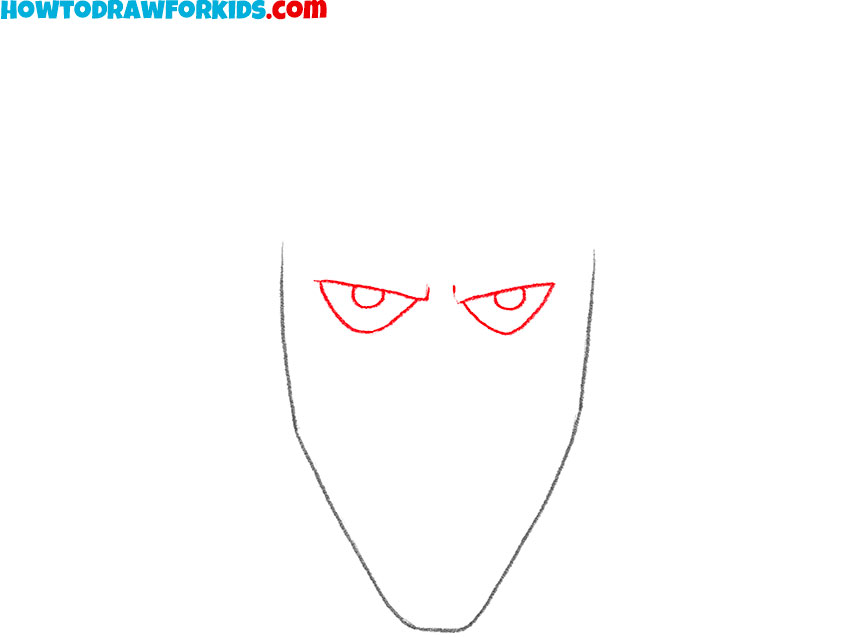
- Sketch the eyes.
Start drawing the eyes by skethcing two angled lines for the upper eyelids. Then, draw the lower eyelids using two curved lines. The Joker’s eyes are usually narrow and sharp, so avoid making them too large. Inside each eye, sketch the pupils close to the upper eyelids.
- Draw the nose of the Joker.
The Joker’s nose is often long and pointed. Begin drawing the nose by creating a vertical line at the top center, right between the eyes, shaping it into a long, narrow bridge. At the bottom, form the nostrils by sketching two curved lines that flare slightly outward. The tip of the nose should be slightly angular.

- Draw the mouth shape.
One of the most recognizable features when learning how to draw the Joker face is his wide, unnerving smile. To create this, start by sketching a large, curved line for the upper lip. Then, draw a matching lower curve, forming the outline of the mouth.

- Add the teeth.
Start by drawing vertical lines within the mouth to create individual teeth. After that, draw a long line at the center of the mouth. This line should have a slight less pronounced curve than the lines of the upper and lower lips. The Joker’s teeth should look like elongated rectangles.

- Detail the face of the villain.
Thicken the outer edges of the lips, making them more prominent. Then, add creases at the corners of the mouth, to exaggerate the sinister expression of the Joker. After that, draw the wrinkle on the forehead of the Joker using a long and curved line.

- Draw the ears of the Joker.
The ears of the Joker should be positioned at the same height as the eyes. To draw the ears, start by sketching two curved lines on either side of the head. The ears should be slightly pointed at the top. Next, add the inner ear details by sketching simple curved lines to represent the ear folds.

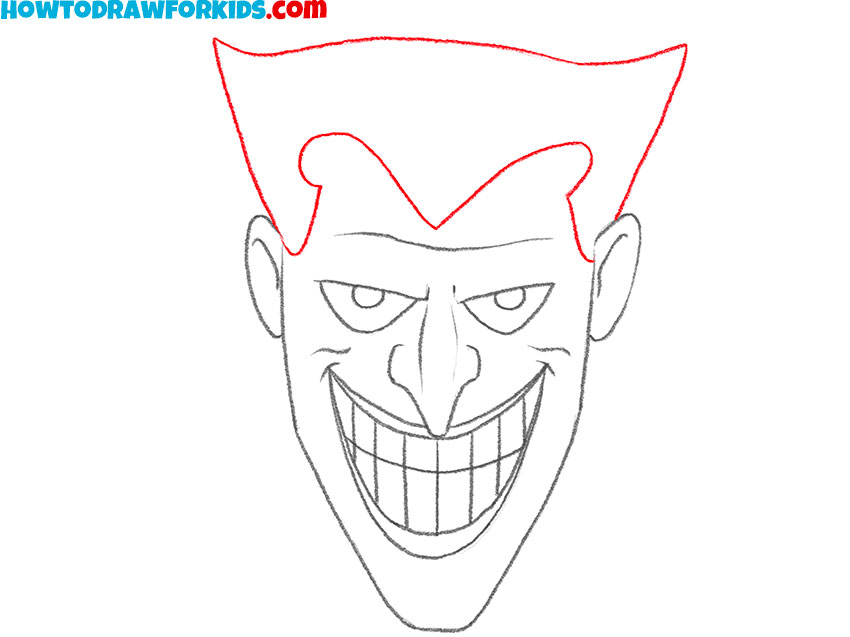
- Sketch the hair of the villain.
The Joker’s hair is typically sharp and exaggerated, with large, pointed tufts. Draw a wavy hairline just above the forehead. Then, extend the hair upward in large, angular spikes. Also, erase any unnecessary lines from your Joker face drawing to prepare your sketch for coloring.
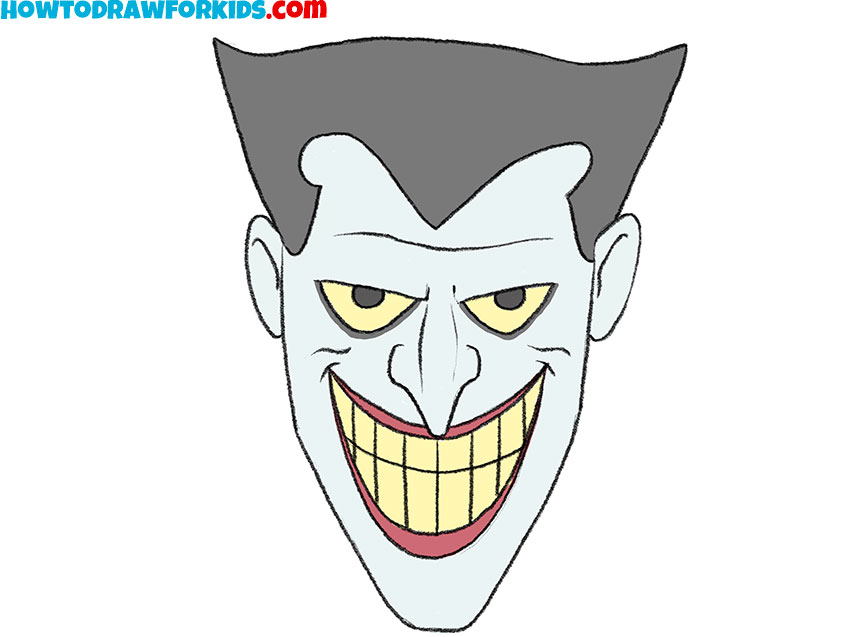
- Add color to the Joker face.
Color the skin of the Joker a pale, almost white tone. Next, color the hair a deep green, black, or gray. The eyes should have yellow sclera. Fill in the lips with a deep red. For the teeth, use an off-white shade, avoiding pure white to create a more authentic effect.
How to Draw the Joker Face: Video Tutorial
Comic Book Style Tips
Comic book art relies on strong, confident lines. Use bold outlines for the face and hair while keeping interior details-like wrinkles and shadows-lighter. Varying line weight will make your Joker face drawing look more like a comic book art.
The Joker’s face should look extreme and unnatural. Stretch his grin wider than a normal mouth, raise the cheekbones high, and tilt the eyebrows for a crazed look.
To learn how to draw the Joker face in more comic book style, instead of rounded or soft forms, use sharp angles for the cheekbones, jawline, and nose. These hard edges make the Joker look more menacing and authentic.
The Joker’s grin is his most defining trait, so make it pop with heavy inking. Use thick black lines inside the mouth and between the teeth for contrast. A darker outline around the lips can also help separate the grin from the rest of the face.
High-contrast lighting can make your Joker face drawing look more like a comic book art. Draw the Joker face using more contrast lines and sketch the outlines of the shadows. Then, fill these shadows outlines with black. You can shadow one side of the face or add thick under-eye shading to make the Joker appear more menacing.
Conclusion
We have gone through a simple lesson on how to draw the Joker face, created in the style of the animated series from the 1990s. I hope this lesson was really interesting and informative. If so, leave a comment on this article. If not, and you found the lesson too difficult, you can also write about it in the comments.
To learn how to draw other comic book characters, visit the corresponding category on my website. There, you will find lessons on drawing Batman, as well as other characters such as Superman and Wonder Woman. I also recommend subscribing to my social media accounts to stay updated on new content and website updates.