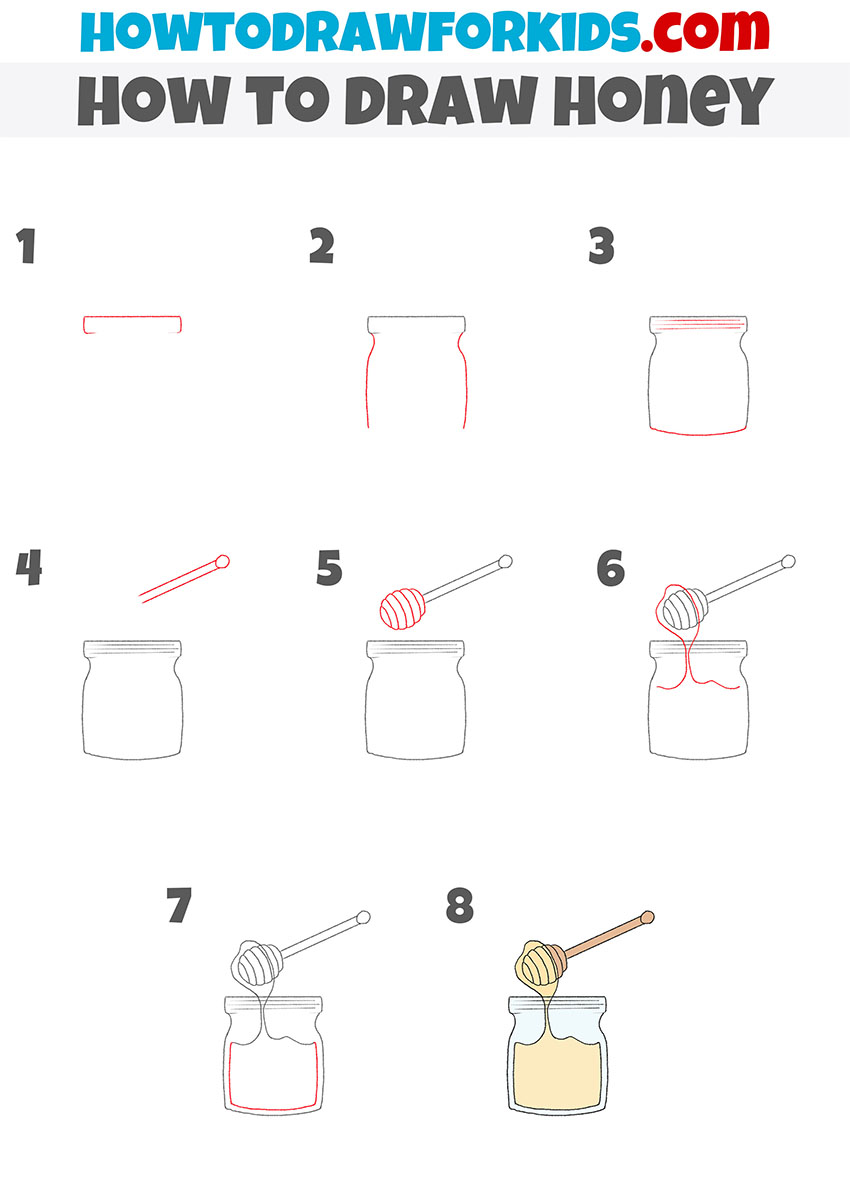
How to Draw Honey
With this lesson you will learn how to draw honey in a jar, as well as how to illustrate transparent and flowing objects. In addition, I will tell you how to make your honey drawing more interesting and unique and how to weave it into an interesting art project.

How to Draw Honey: Basic Information
I’m super excited to share with you my newest lesson: learning how to draw honey! Now, you might think, “How sweet can this be?” and I’m here to tell you, it’s as sweet as the honey itself!
In this tutorial, I will show you the process of drawing a jar of honey, complete with a honey dipper – an exercise that will boost your drawing skills and provide insight into the depiction of transparent and viscous textures in two-dimensional art.
The placement of the honey dipper, its interaction with the jar, and the flow of honey dripping from it introduces young artists to concepts of dynamic composition. They learn how to position elements within a frame to guide the viewer’s eye and create a sense of movement and depth.
Additionally, this lesson demonstrates how to illustrate transparent objects, using a honey jar as a prime example. Throughout the lesson, I will guide you through simple techniques to effectively render the transparency of a jar.
Honey Drawing Tutorial
Materials
- Pencil
- Paper
- Eraser
- Coloring supplies
Additional Content
Time needed: 30 minutes
How to Draw Honey
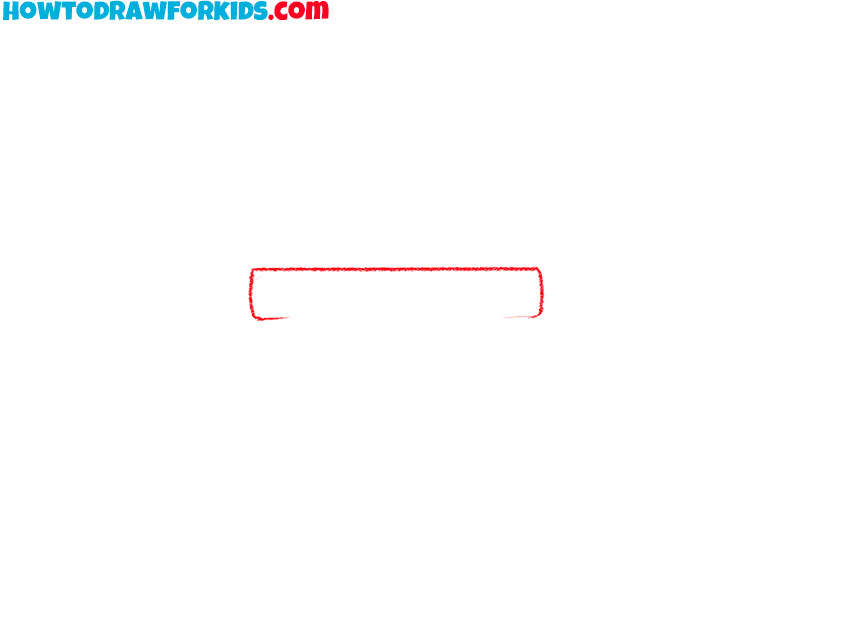
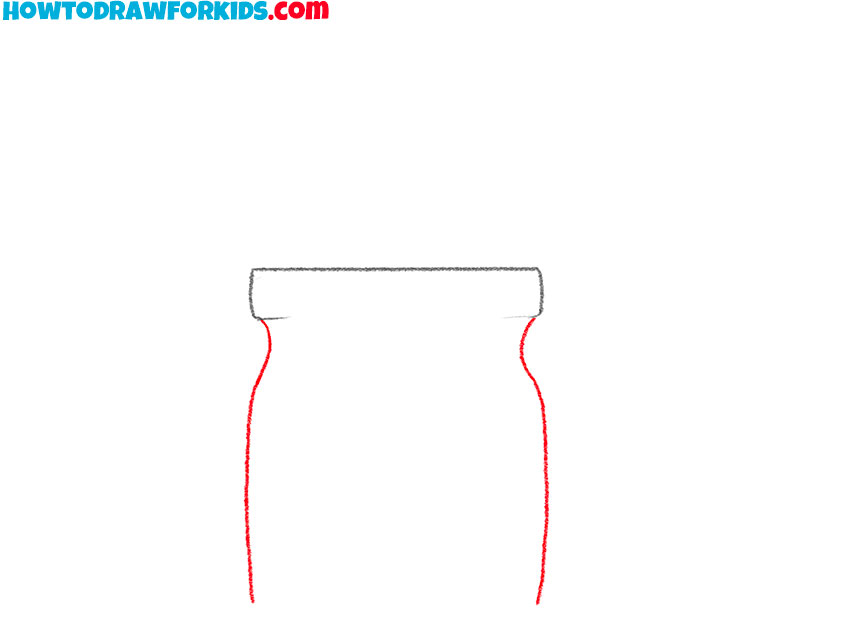
- Draw the neck of the honey jar.
Begin by drawing a short horizontal line in the center of your page. This line will represent the top edge of your honey jar’s lid and will serve as the foundation for establishing the jar’s proportions. Ensure the line is straight and well-positioned at a suitable height on your page.
- Draw the sides of the jar.
From each end of the initial horizontal line, extend two short, slightly curved lines downward. These lines should gently taper inward to form the upper part of the honey jar’s lid. This step is really important for shaping the lid and adding dimension to it.
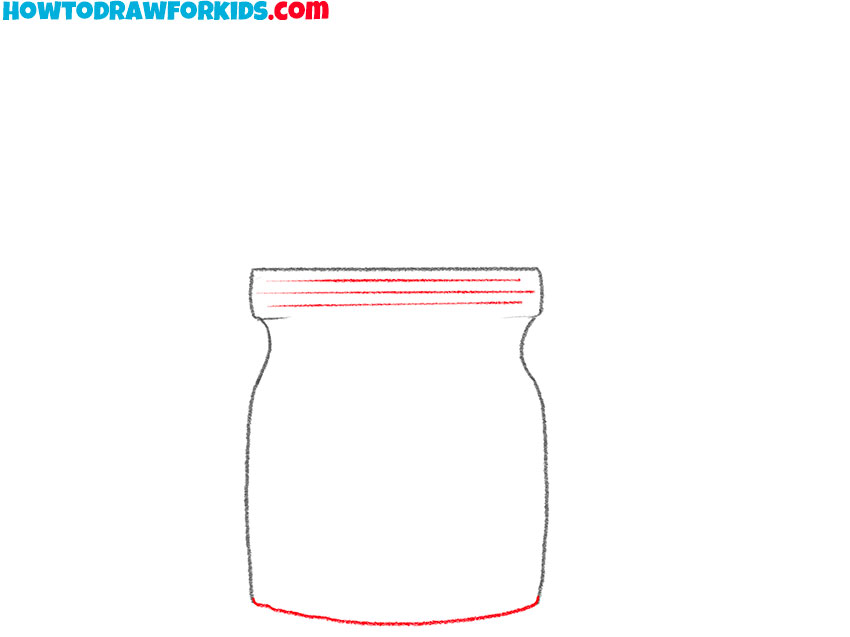
- Add the bottom of the jar and detail the top.
Connect the two downward-curving lines from Step 2 with another curved line that mirrors the curve of the initial horizontal line, though with a slightly longer radius. This action completes the circular outline of the jar. The shape should now resemble a typical jar, slightly wider at the top and narrowing towards the base.
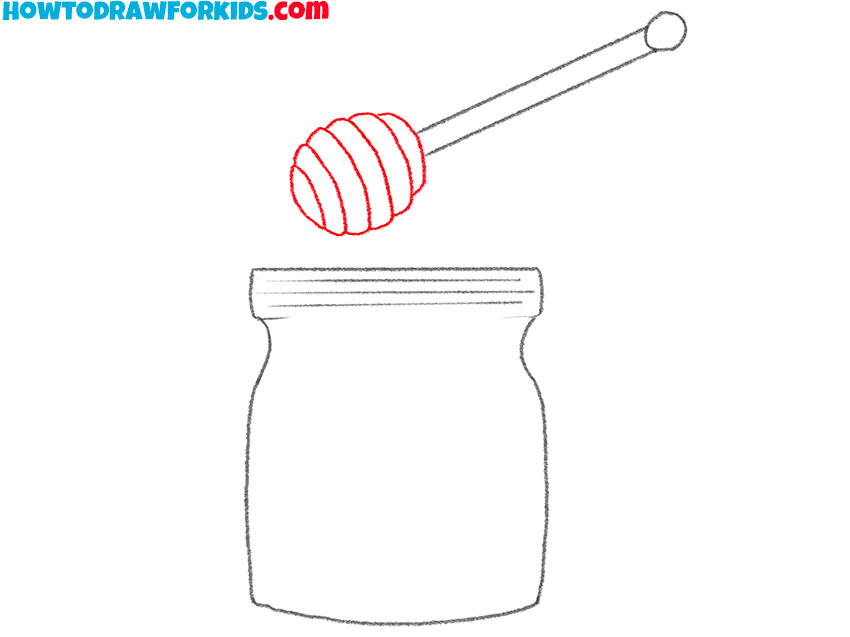
- Sketch the dipper’s handle.
Position it diagonally to suggest movement or an angle of entry into the jar. This dynamic positioning contributes to the overall composition of the drawing, preparing the viewer’s eye for the interaction between the dipper and the jar, which is a central element of the scene.

- Add the rest of the dipper.
At the end of the handle sketched in Step 4, add the rounded, ridged head of the honey dipper. Illustrate a series of overlapping circles to achieve the ridged effect that is characteristic of a honey dipper’s head. The lines should be approximately the same distance from each other.
- Draw the honey dripping from the dipper.
Draw multiple curved lines that extend from the dipper head, reaching down into the top of the jar, simulating thick, flowing honey. This visual representation brings vitality to the scene and shows the connection between the dipper and the jar.
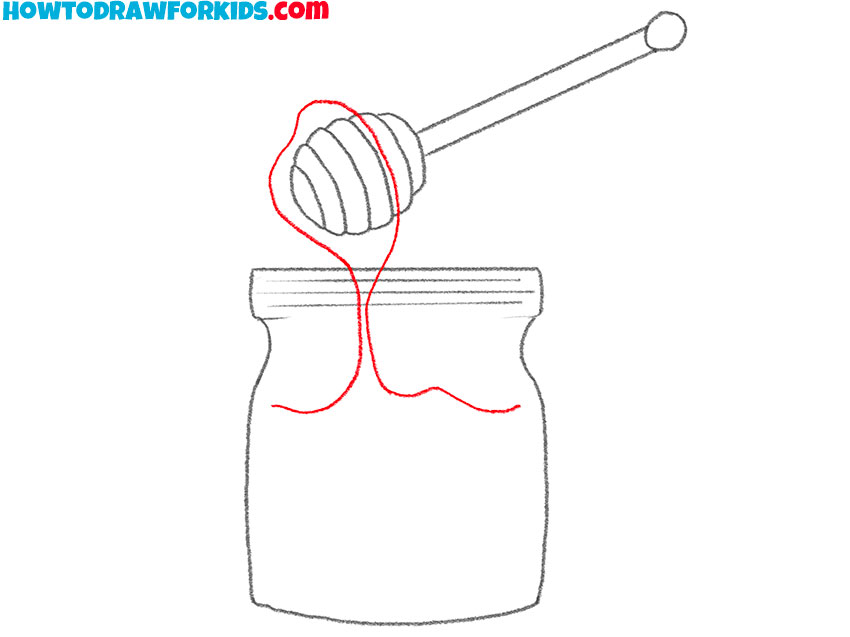
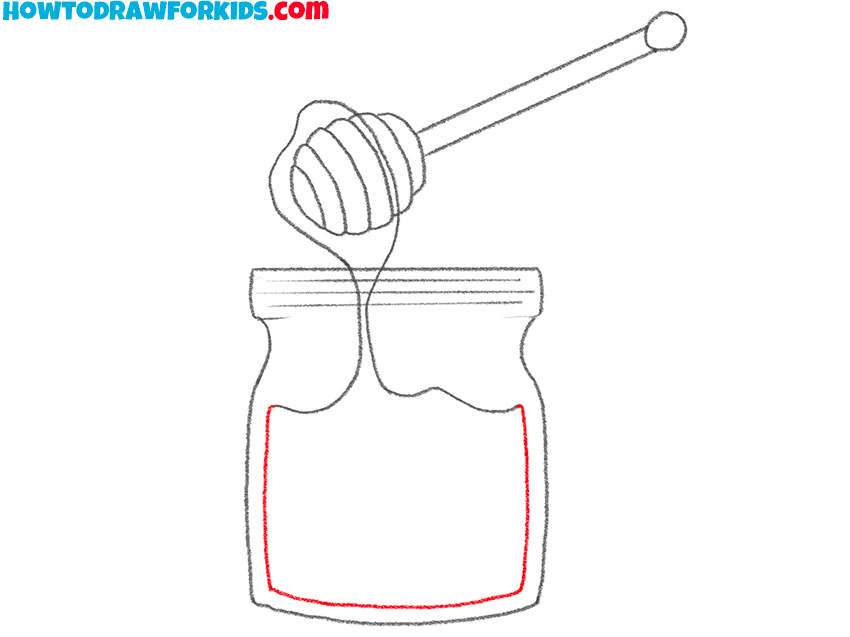
- Sketch the honey inside the jar.
Now extend two horizontal lines down and connect them with a horizontal line. These lines should be inside the outline of the jar and exactly follow the outline of the jar itself. The distance from the outline of the honey and the outline of the jar should be the same on all sides.
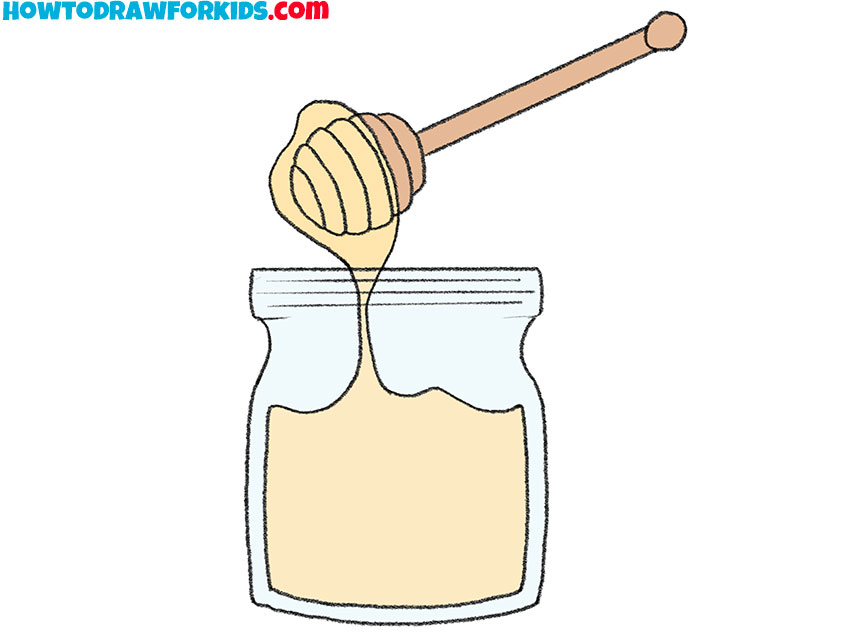
- Color the honey drawing.
Use a warm, golden yellow to depict the honey, both dripping from the dipper and pooled inside the jar, to show its sticky texture. Paint the jar light blue or light gray to show the transparency of the glass and paint the dipper with a wooden brown.
Additional Materials
I have prepared a PDF document for your convenience that offers a concise version of this honey drawing lesson. This document is intended to serve as a useful reference that you can download free of charge.
Once you have the PDF, you will appreciate its value as it allows you to access the lesson’s content offline.
How to Draw Honey: Tips and Tricks
As you continue to refine your drawing of a honey jar, consider integrating additional elements to expand the complexity of your composition. Below is an instructional outline designed to guide you in adding more intricate and thematic components to your drawing:
- Introduce a few bees hovering around your honey jar. Vary their sizes and positions to illustrate movement and activity. You can on the detailed portrayal of their wings and striped bodies to refine your skills in rendering intricate biological details.
- Place flowers such as sunflowers, daisies, or clovers around the jar. These serve as a natural setting for bees and provide an opportunity to practice drawing organic forms and textures.
- Envision the honey jar on a kitchen table surrounded by items like pancakes or bread. This setting allows you to show the contrasts between the sticky honey and soft breakfast foods and challenges you to depict various materials like fabric or glass.
- Set your scene in a garden picnic, complete with a checkered blanket and a spread of foods.
- Introduce a bear character in a serene setting, overseeing the jar amidst flowers.
Now that you’ve got these fun ideas, your drawing is going to be sweeter than ever! Your drawing can be as simple or as detailed as you like. The most important thing is to have fun and let your heart guide your art.
Art Projects With Honey Jar Drawings
As you continue to refine your skills and explore new artistic techniques, you might be looking for ways to apply what you’ve learned in practical and creative projects. The following section offers a range of art project ideas that incorporate the techniques and themes from this honey jar drawing lesson.
- Develop an informative poster that highlights the vital role of bees in our ecosystem. Position your honey jar amidst a lively scene of bees and flowers, and include educational captions about honey production and bee conservation efforts to raise awareness and foster environmental stewardship.
- Craft a collection of greeting cards for various seasons, featuring the honey jar as a recurring theme. For spring, illustrate the jar among vibrant flowers; for summer, depict it with bright sunshine and buzzing bees; for autumn, show it surrounded by harvest fruits and fall foliage; and for winter, pair it with indoor elements like warm drinks or holiday decorations.
- Transform your drawing into a template for fabric-based DIY projects, such as printing it on cushions, kitchen towels, or even tablecloths. These homemade items can beautifully decorate a home or be given as personalized gifts that carry a touch of the artist’s hand.
- Turn your honey jar illustration into a series of digital wallpapers for phones and computers. Each variant could feature different backgrounds, perhaps seasonal themes.
- Design a collection of culinary posters showcasing different uses of honey in cooking and baking. Each poster could feature the honey jar alongside other ingredients with a finished dish.
Conclusion
We have successfully completed this detailed drawing tutorial. If you found this lesson engaging and wish to continue learning art, I encourage you to visit my social media pages and consider following for more updates and insights. Additionally, my website hosts a variety of lessons that are created to further boost your drawing skills.
If you enjoyed this tutorial, consider inviting others to join you in these drawing exercises. Collaborative art making not only doubles the fun but also fosters a communal learning environment where you can form your own art club.
If you have any particular subjects or themes you are interested in drawing next, please feel free to leave a comment or send a message.