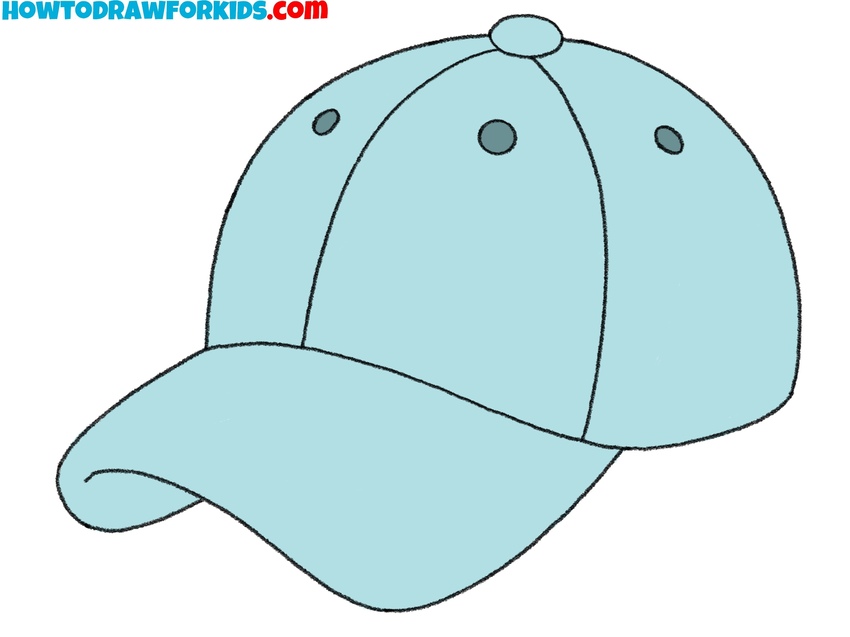
How to Draw a Baseball Cap
Now I’ll teach you how to draw a baseball cap – one of the most popular headwear styles today – using two very simple methods.
How to Draw a Baseball Cap: Introduction
This tutorial is part of my clothing drawing series, along with tutorials on how to draw a shirt, jeans, and other pieces of clothing and a logical continuation of a more basic cap drawing tutorial. Today, we’ll learn how to draw a baseball cap in a way that makes it instantly recognizable and easy to follow. For that, we’ll use two very simple methods that approach the drawing process from different angles.
The first method is the main one. It shows how to draw a baseball cap that closely resembles a real one. It’s designed to give you a result that looks realistic in shape and proportion while still being extremely simple to draw. This version is great for beginners who want something accurate but manageable.
In the second method, I’ll show you a different way to draw a baseball cap using an alternate set of lines, a new step sequence, and a completely different approach. The final result will look very different from the first cap, and the structure of the drawing will feel unique too.
I created these two contrasting methods on purpose – to show that clothing can be drawn in more than one way. Each method leads to a different outcome and reflects a different style. Understanding this flexibility is a helpful part of learning to draw clothing with confidence.
Baseball Cap Drawing Tutorial
Materials
- Pencil
- Paper
- Eraser
- Coloring supplies
Time needed: 20 minutes
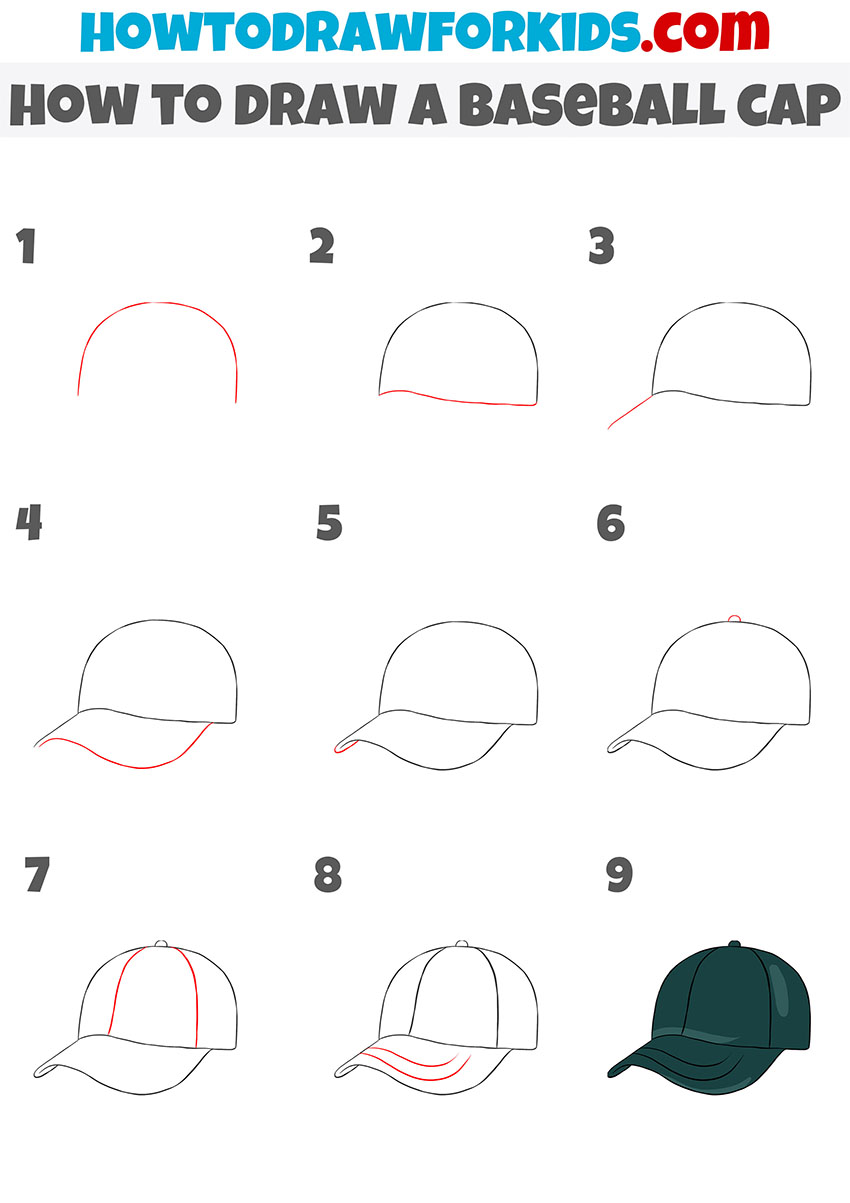
How to Draw a Baseball Cap
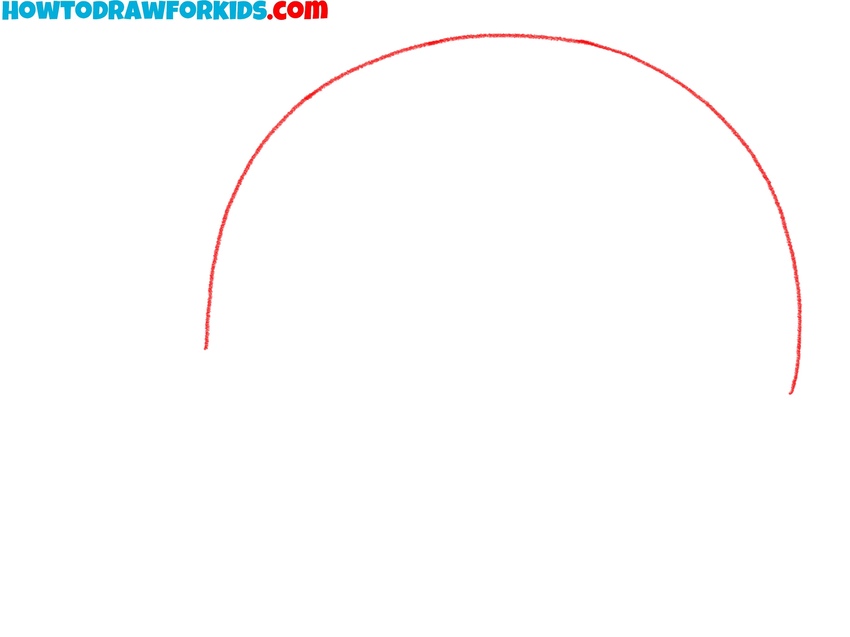
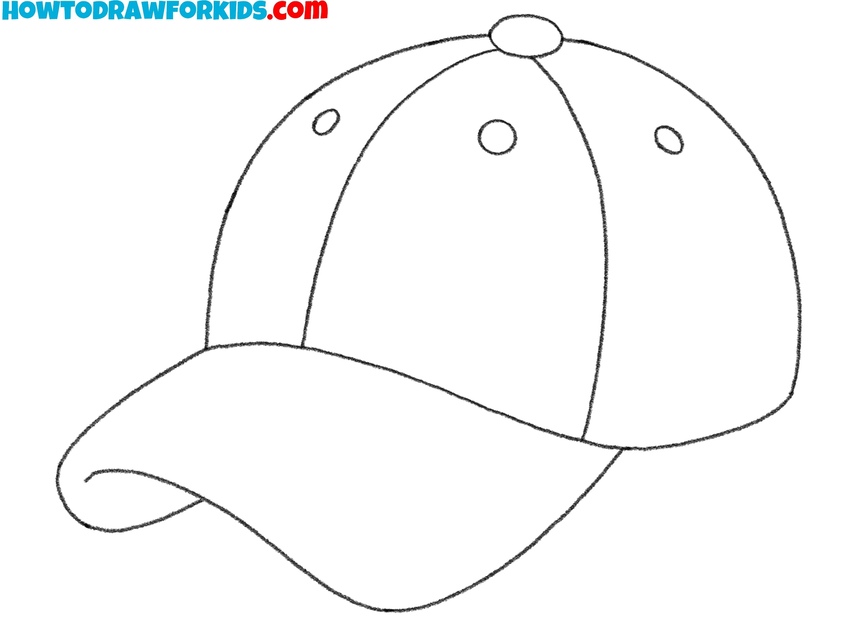
- Draw the top curve of the baseball cap.
Start your baseball cap drawing by creating the top portion of the crown. Draw a smooth, wide arc that curves downward like a half-circle. This will be the upper part of the baseball cap that sits on the top of the head. Try to keep your curve symmetrical on both sides.
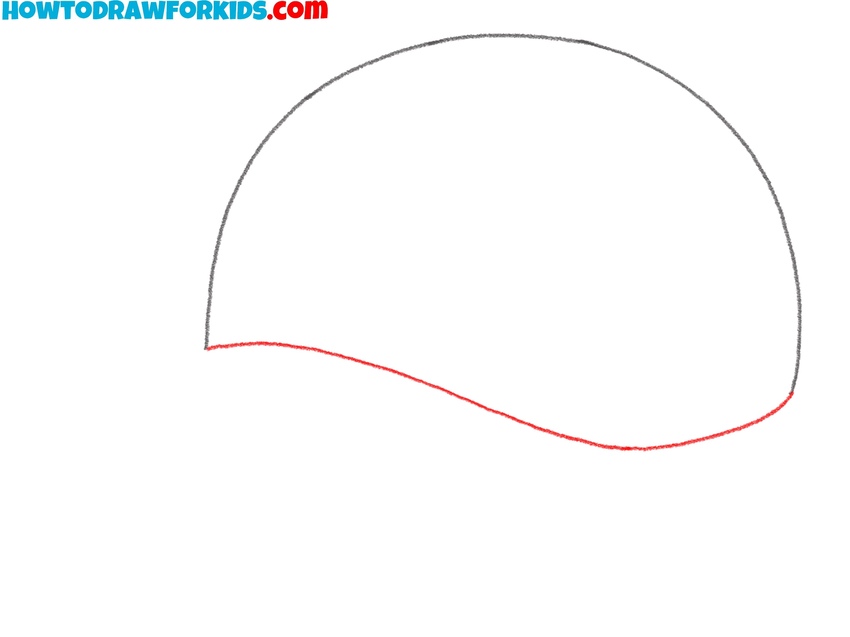
- Add the bottom of the crown.
Now draw the lower edge of the crown to complete the full shape of the top part of the baseball cap. Starting from the ends of the arc you drew in Step 1, sketch a gently curved horizontal line connecting both sides. This line should dip slightly in the middle, creating the rounded shape that wraps around the head.
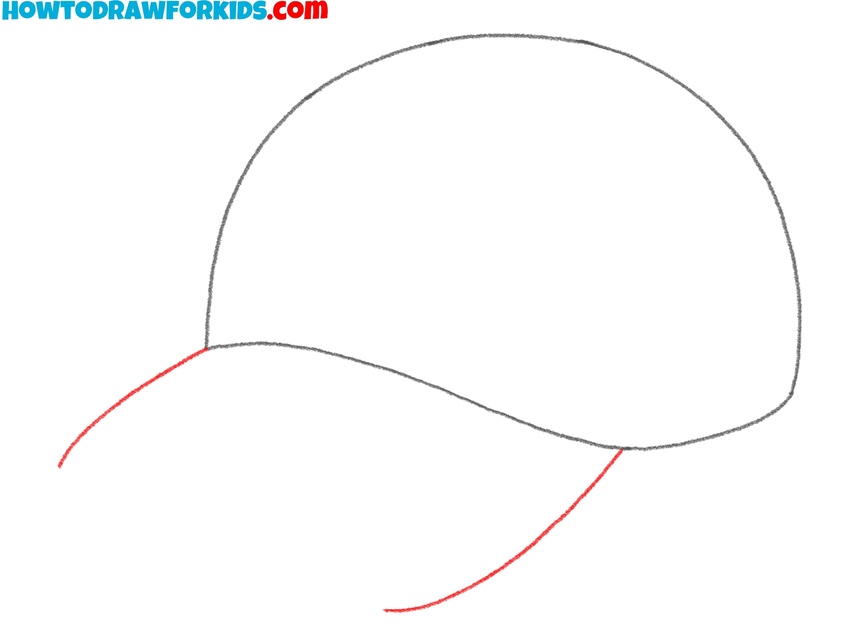
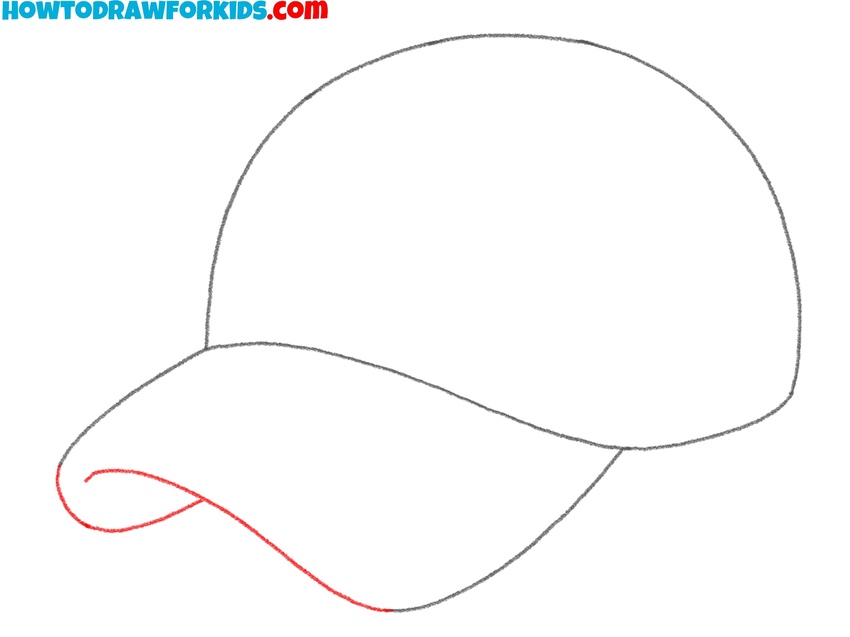
- Begin drawing the brim.
Next, draw the upper edge of the brim, which extends from the front of the crown. Then, draw a second curve to form another edge of the brim. Keep your curves soft and flowing. This prepares the drawing for the next step where the front edge of the brim will be added.
- Complete the brim shape.
In this step, finish drawing the brim by connecting its outer edges. Use a curved line that connects the lines you drew in the previous step. The result will be a complete, rounded brim that looks like it’s slightly bent downward at the edges, just like a real baseball cap. You can adjust the curve of the brim.
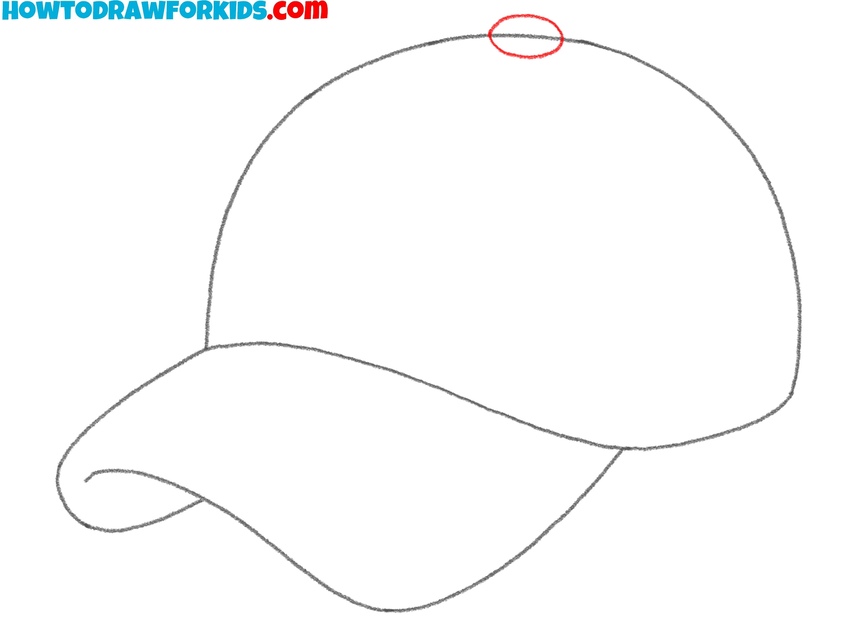
- Add the button on top.
Now draw a small oval or circle on the very top center of the baseball cap’s crown. This little shape represents the button often found at the peak of a baseball cap. It’s usually a fabric-covered disc that holds the cap panels together. Place it right in the middle of the crown, where the seams would typically meet.
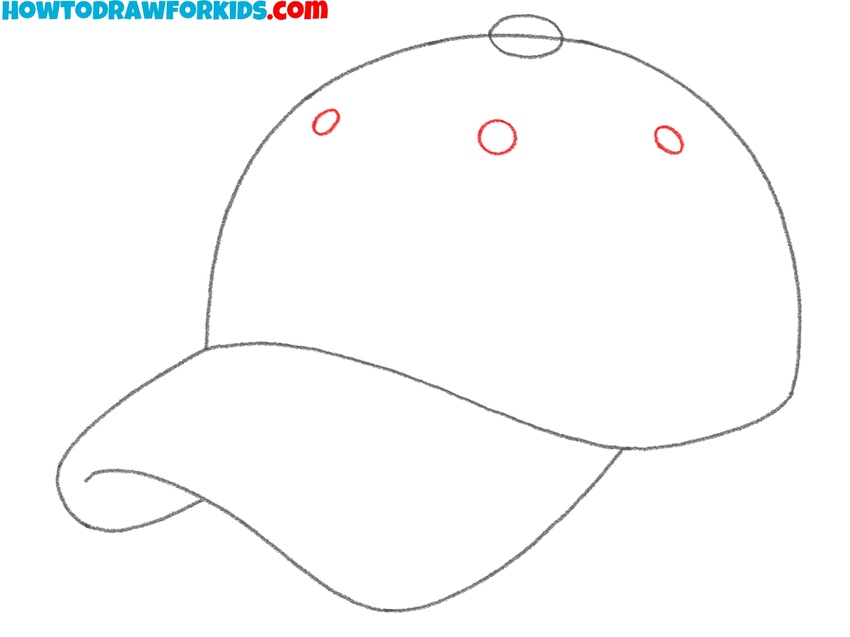
- Draw the ventilation holes.
Add four small circles around the top part of the crown to represent the ventilation holes of the baseball cap. These holes are usually stitched eyelets that allow air to circulate through the cap. You can make the ventilation holes larger or smaller than in my example.
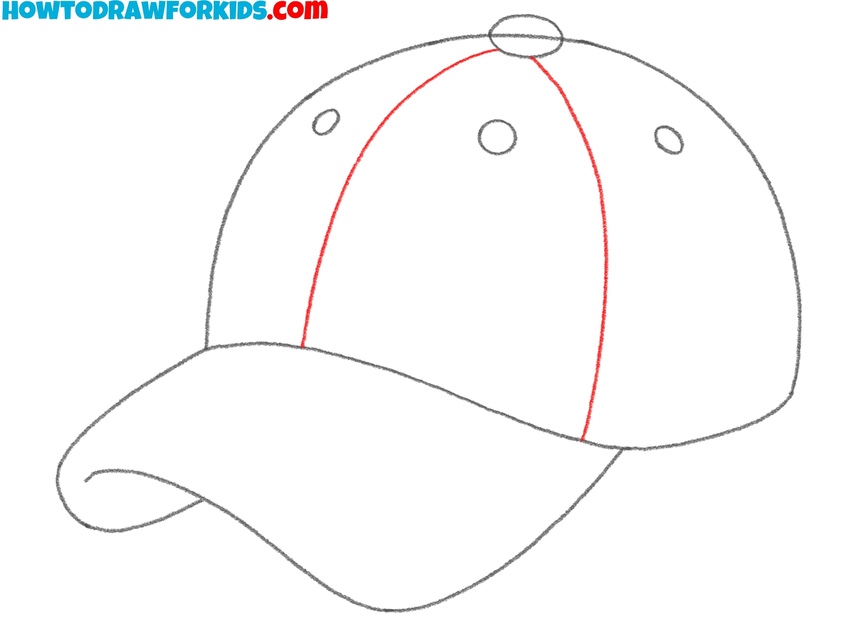
- Draw the panel seams on the baseball cap.
First, add a curved vertical line from the top button down to the middle of the front, just above the brim. This line represents the central seam that divides the front two panels of the cap. Then, draw another curved line from the top button downward toward the side of the crown.
- Erase the guidelines from the headwear.
At this stage, go back and carefully erase any extra or overlapping construction lines from the earlier steps. These might include connecting lines that helped you shape the crown or define the brim. Be careful not to erase the main outline or the details like the top button, ventilation holes, or seams.
- Add color to the baseball cap.
You can use any color you like for the crown and brim – classic colors like blue, red, black, or green work well, or you can use a custom shade to match your favorite cap. For the button and ventilation holes, use a slightly darker or lighter version of the main color to create contrast. You can also add a shadow under the brim.

Simple Baseball Cap Drawing Tutorial
This baseball cap drawing tutorial uses a different structure and drawing flow compared to the first method. The shape of the brim is more curved and angular, and the cap itself is drawn with sharper lines, creating a more stylized look. Another noticeable difference is the addition of brim stitching in the final steps.
To begin this version of the tutorial on how to draw a baseball cap lesson, sketch the top of the crown using a smooth arc. Close the bottom of the crown with a gently curved line. Add the brim by drawing a slanted outer curve and connecting it with a longer inner curve to form the underside. Draw a small oval button on top of the baseball cap.
Add curved seam lines from the button down to divide the cap into panels. Then draw two curved lines across the brim to show the stitched sections. Keep the lines clean and proportionate. Erase any extra guides and color the crown and brim of the baseball cap using dark tones to complete the drawing.
Conclusion
Like any other piece of clothing, a cap is not usually drawn on its own. Most of the time, the skill of knowing how to draw a baseball cap is needed when you’re drawing clothing on a person. That’s why it’s a good idea to continue practicing by drawing a person wearing a cap. This will help you better understand how clothing items fit and interact with the human figure.
Drawing a person with a cap on their head gives you a clearer sense of proportion, perspective, and placement, especially when combining clothing elements with different poses or angles.
To build on this knowledge, be sure to visit the “Clothing” section of my website, where I’ve collected drawing lessons for every part of the human wardrobe – from shirts and pants to shoes and accessories. These lessons are designed to give you a well-rounded foundation in drawing all kinds of clothing on people.