How to Draw a Christmas Ornament
This sitep-by-step festive drawing lesson will show you how to draw a Christmas ornament in three simple, yet very different ways.

How to Draw a Christmas Ornament: Introduction
Holiday-themed lessons are some of the most popular on my site among readers. You may have already tried drawing Santa Claus using my step-by-step tutorial or practiced drawing Christmas trees with the various methods I’ve shared.
In this tutorial, you’ll learn how to draw a Christmas ornament, and we’ll be using three different methods to do so. Each approach provides a unique way to draw a Christmas ornament, giving you variety while still keeping things really simple and easy to follow.
As with most tutorials on my website, this one focuses on a basic and accessible drawing process. You don’t need any advanced skills to get started.
Once you’ve completed the lesson, you can always customize your Christmas ornament drawing. Add your own patterns like stripes, zigzags, or circles. This gives you a chance to practice your drawing skills while making your drawing more unique and unusual.
Christmas Ornament Drawing Tutorial
Materials
- Pencil
- Paper
- Eraser
- Coloring supplies
Time needed: 20 minutes
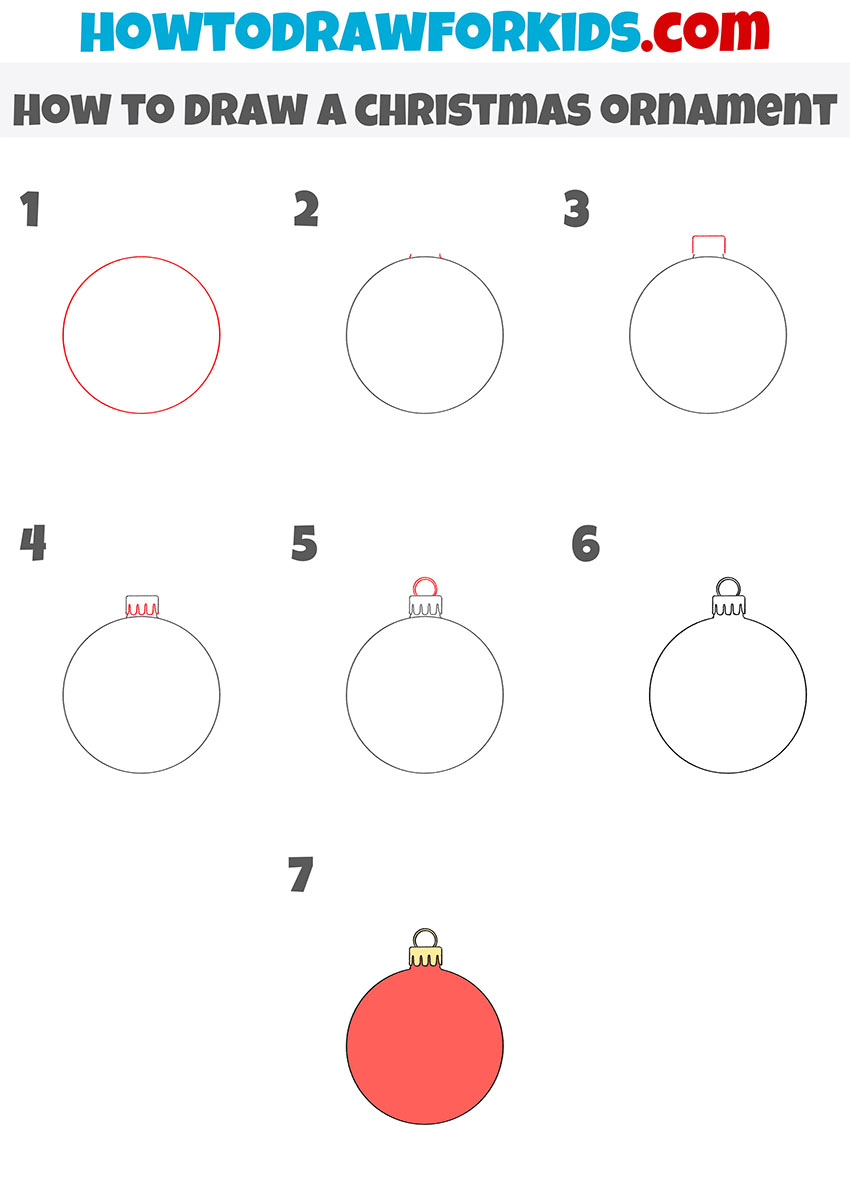
How to Draw a Christmas Ornament
- Draw the shape of the ornament.
Begin by drawing a perfect circle. This will form the main body of your Christmas ornament. Try to make the circle as round and smooth as possible. You can use a compass, a round object, or trace something circular to help you get the shape right.

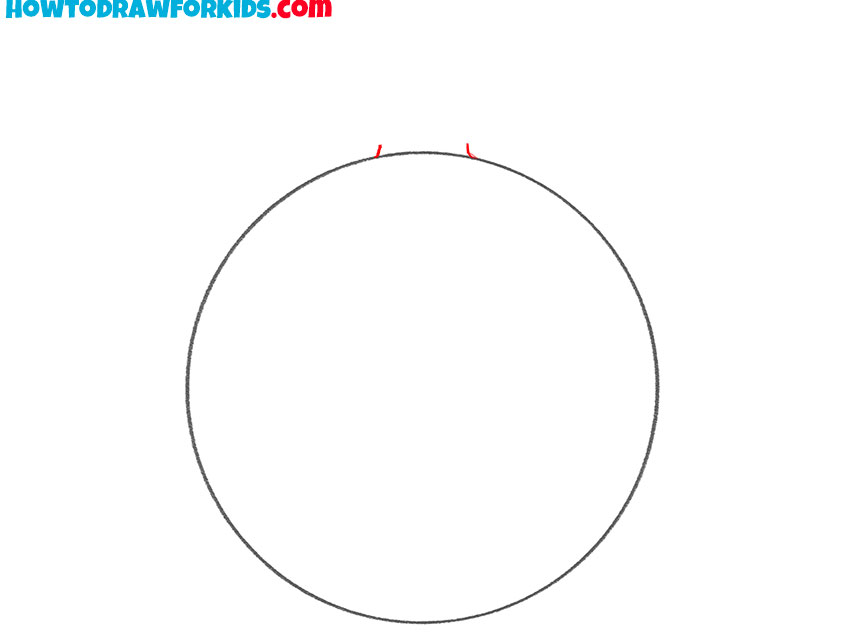
- Mark the placement for the cap.
Now add two small, short vertical lines at the very top of the ornament to mark where the cap will attach. These lines help guide the shape of the cap and ensure it’s centered on the ornament. Keep them close together. Though subtle, these small lines are important for the structure of your Christmas ornament.
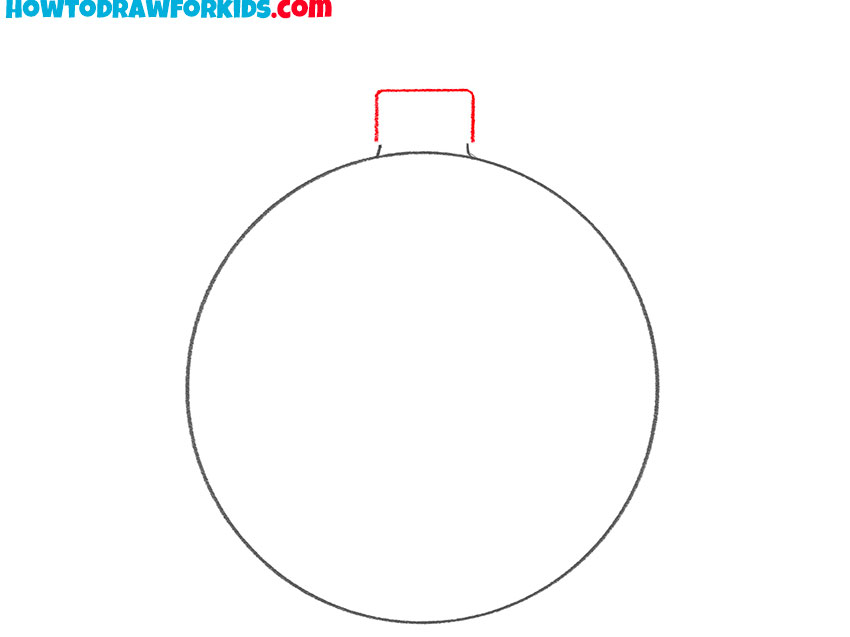
- Draw the top part of the ornament.
At the top of the lines from the previous step, draw a small rectangular shape. This shape represents the metal cap that attaches the ornament to the hook or tree branch. Keep your lines clean and straight. It should be flat on top and symmetrical on both sides.
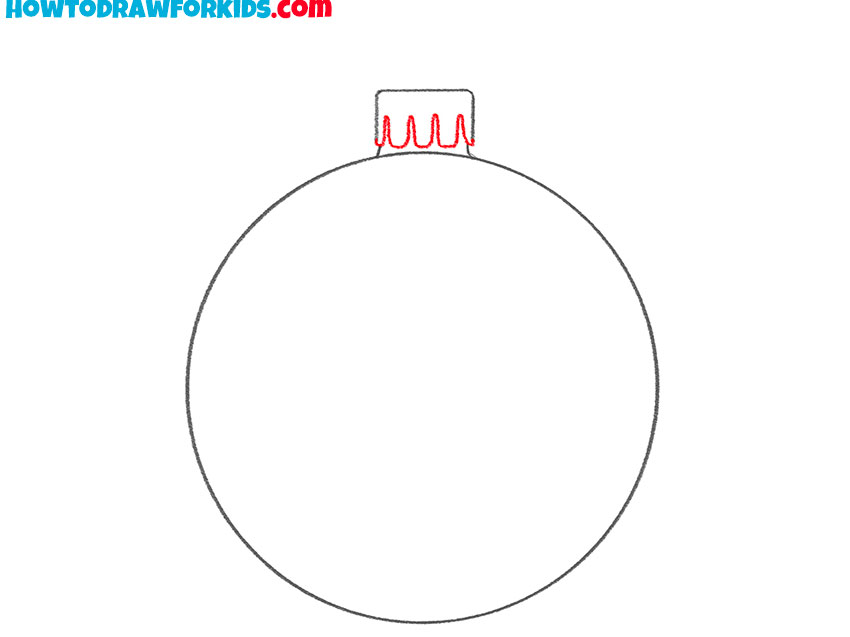
- Add details to the cap.
Now draw small, curved lines along the bottom edge of the cap to give it a more decorative and realistic look. These short U-shaped lines represent the metal tabs or notches that grip the ornament. You can fit about five or six of these across the width of the cap.
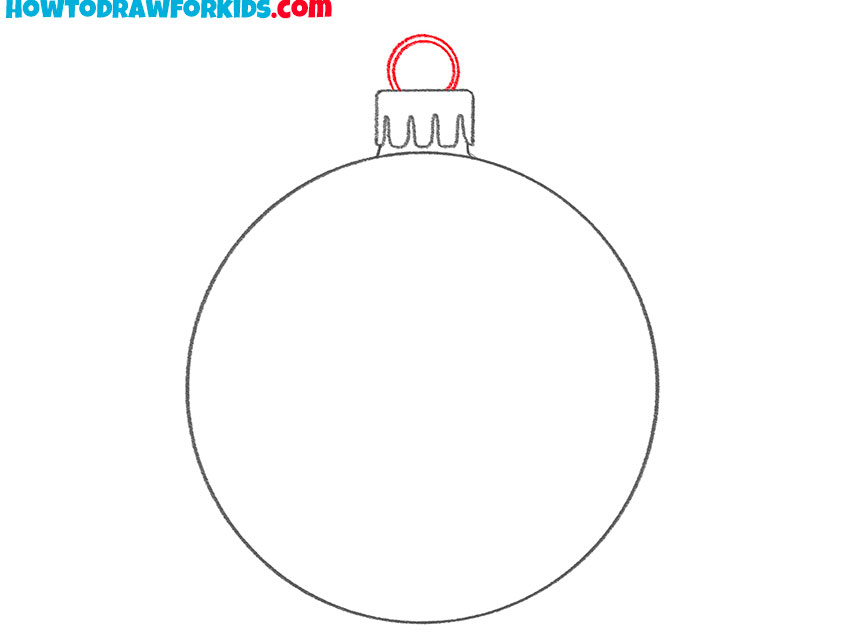
- Draw the ornament hook ring.
Add a small loop at the top of the cap. This loop is what the ornament hook would go through to hang it on the tree. Draw a small, thin oval or half-circle centered above the cap. This tiny ring helps complete the structure of your Christmas ornament and makes it look more ready for decoration.
- Smooth the Christmas ornament drawing.
At this point, go over your entire Christmas ornament drawing with clean lines. Erase any guide lines or sketchy shapes that you don’t need anymore. Also, you can add some details. For example, you can draw patterns or add some inscriptions to the Christmas ornament.

- Add color to the ornament.
Choose a bright and festive color to fill in the ornament. Red, gold, green, or blue are popular choices. If you want, you can add highlights or shading to make it look glossy, like a real glass ornament. You can also decorate it with patterns like stripes or stars.
Additional Content
A PDF file is also available for this Christmas ornament drawing tutorial. It includes a brief version of the tutorial and additional practice materials. You can download and use it without an internet connection.
The file contains extra tasks and exercises for those who have completed the basic Christmas ornament drawing and want to continue practicing. This material is intended to support further skill development and provide more drawing practice based on the same theme.
How to Draw a Christmas Ornament: Additional Tutorials
If you’ve completed the main tutorial on how to draw a Christmas ornament and want to try more variations, I’ve prepared two additional methods for you. In the first, you’ll learn how to draw a bauble with a decorative stripe and hanging string. The second shows how to draw a Christmas bulb with a scalloped top and bold, simplified design. Both versions use the same general approach but give you different looks to practice and build on.
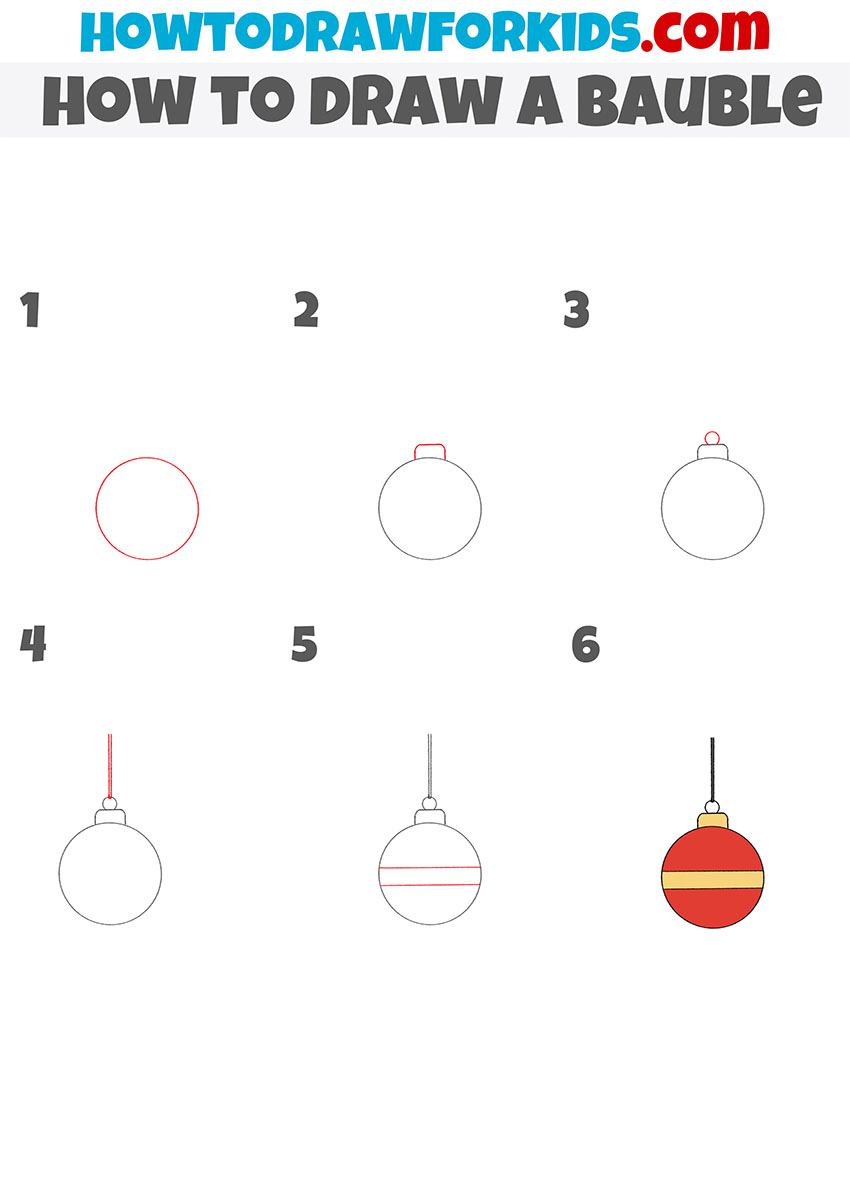
Christmas Bauble Drawing Tutorial
This version of the tutorial on how to draw a bauble differs from the first Christmas ornament lesson by using a different sequence of steps. The overall shape remains simple, but the added linework make the bauble appear a bit more detailed.
To follow this method and learn how to draw a bauble, begin by sketching a clean circle in the center of your page. This will be the base shape of the bauble. Add a small cap at the top using a short rectangle with slightly curved edges. Then draw a small circle on top of the cap to create the loop.
Add a vertical line extending upward from the loop to represent the string the bauble hangs from. Next, draw two parallel curved lines across the center of the bauble to form a decorative stripe. After completing the outline, use a dark color for the string and alternate colors for the body and stripe of the bauble.
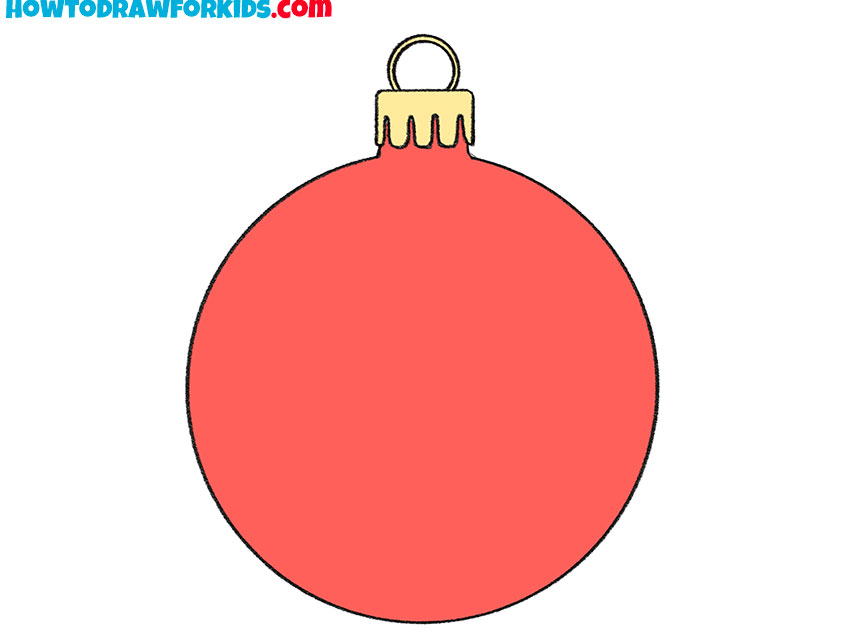
Simple Christmas Bulb Drawing Tutorial
This is another version of the tutorial on how to draw a Christmas bulb, and it introduces a more simplified approach compared to the previous bauble and ornament lessons. This method also uses fewer steps, which makes it especially useful for beginners or anyone looking for a quick and clear way to draw a holiday ornament.
First, draw a large, smooth circle for the main body of the bulb. Above the circle, add two vertical lines to mark the base of the top. Connect those lines with a series of three small curved bumps to form a scalloped edge. On top of that, draw a rectangular shape to complete the cap.
Then place a small circle above it to represent the loop used for hanging. After completing the outline, trace over the lines and erase any extra marks. Use red for the bulb and a light gold or beige for the top section. The Christmas bulb drawing is now ready for display or additional decoration.

Conclusion
Today you learned how to draw a Christmas ornament using a very simple method suitable for beginners. Let me know if this lesson was helpful and if you tried drawing one of the variations shown on this page.
Also, be sure to visit my collection of Christmas ornaments coloring pages to continue working on your holiday-themed art. And if you want to expand your winter drawing skills even more, try my lesson on how to draw a fireplace, which pairs perfectly with this topic.