How to Draw a Buffalo
Learn how to draw a buffalo in a simple and cute style using this easy step-by-step tutorial with basic shapes and reduced details.

How to Draw a Buffalo: Introduction
The buffalo is a large hoofed animal. This type of bull is widespread in Africa and Asia. The buffalo has a powerful build, a large head, short legs, large horns, and long hair. These features are clearly visible in my drawing.
In this simple step-by-step tutorial, I’ll show you how to draw a buffalo in a very cute and simplified style, with reduced details. We’ll start with very basic shapes and gradually add elements until we create a finished buffalo drawing.
This simple buffalo drawing tutorial is designed so that anyone with no drawing experience can complete it easily. Be attentive at every stage of the process and follow the instructions carefully – you’ll be satisfied with the result.
If you’ve already learned how to draw a bull or other similar animals, this tutorial will feel very familiar. The steps are based on simple shapes and follow a similar structure and sequence.
Buffalo Drawing Tutorial
Materials
- Pencil
- Paper
- Eraser
- Coloring supplies
Time needed: 40 minutes
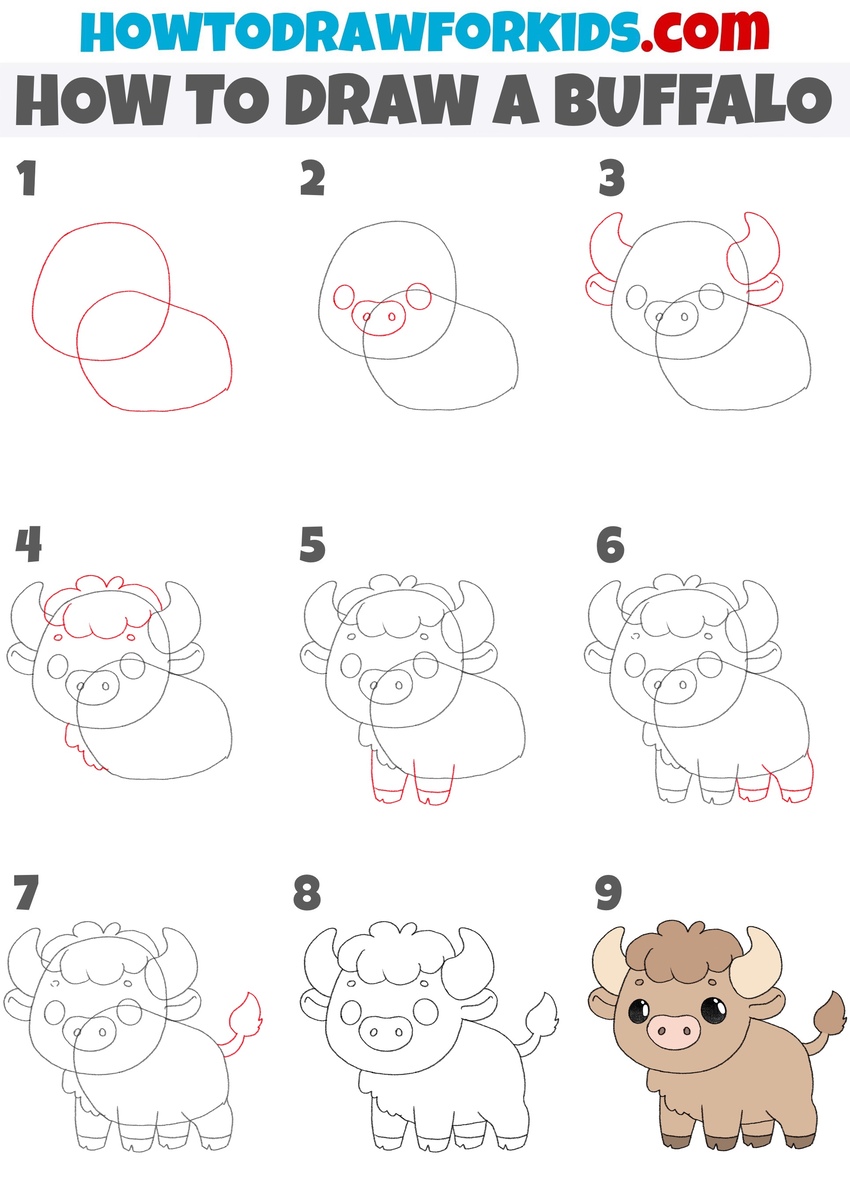
How to Draw a Buffalo
- Build the basic head and torso shapes.
Sketch two overlapping ovals to build the foundation of the buffalo’s body. These base shapes are similar to those used when drawing other hoofed animals like cows or yaks, so if you’ve drawn those before, this structure will feel familiar. You can also experiment with changing the body length or head size.

- Sketch the snout and eyes.
Inside the buffalo’s head oval, draw two small circles for the eyes. In between the eyes, add a rounded horizontal oval to form the buffalo’s nose. Inside the nose, draw two small circles for the nostrils. You can adjust the eye shapes – larger eyes will make the buffalo look cuter.

- Draw the buffalo’s horns and ears.
Add the horns by drawing two large, curved shapes coming out from the sides of the head, just above the eyes. The horns should curve upward and outward in a rounded “C” shape. Below each horn, draw small oval shapes attached to the sides of the head for the ears.
- Sketch hair and fur texture.
Now draw a fluffy patch of hair on top of the buffalo’s head using a series of small rounded bumps or wave shapes. Place it between the horns, slightly overlapping the top of the head. Then add a curved line along the chest to illustrate the long, textured fur. Add two oval eyebrows above the eyes.
- Sketch the front limbs.
Draw two front legs underneath the buffalo’s body. Each leg should be made up of two vertical shapes that slightly taper and end with a flat horizontal line for the hoof. These thick, sturdy legs are typical for hoofed animals, so you can reuse this same structure when drawing animals like oxen or reindeer.
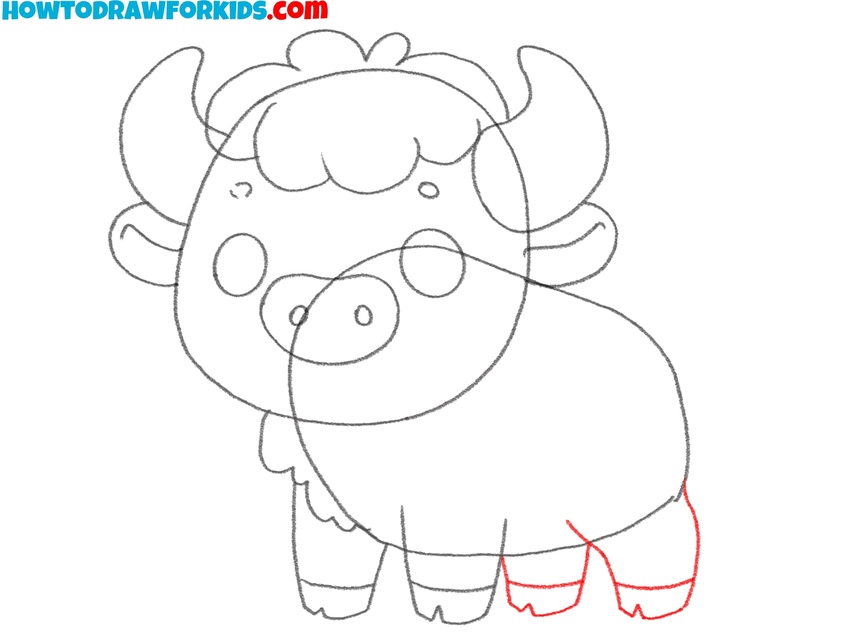
- Draw the buffalo’s rear legs.
Now draw the two back legs in the same style as the front legs. Just like with the front legs, include a hoof division line near the base of each leg. If you want, you can bend one leg or lift it off the ground to create a walking or grazing pose, a tip that can help you draw more active ungulate poses.
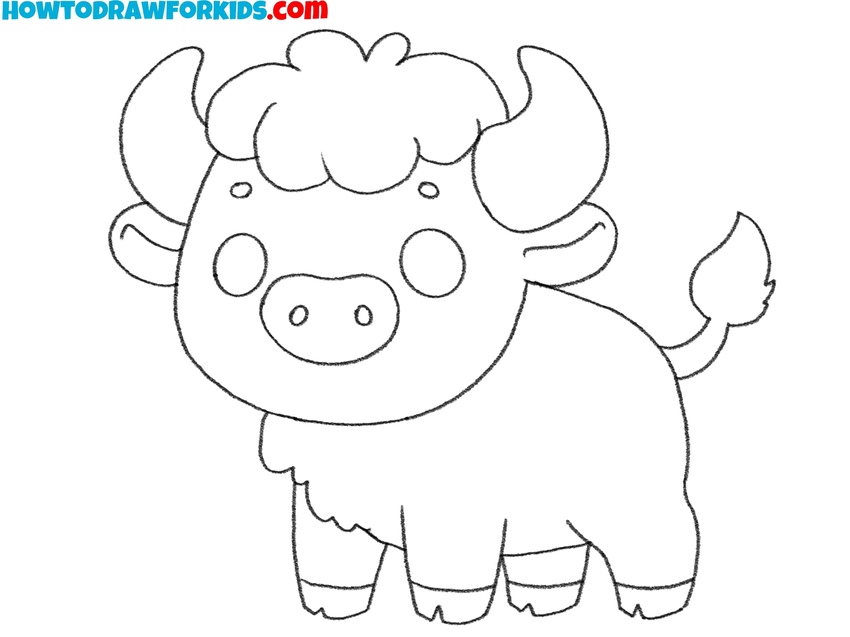
- Sketch the curved tail.
Sketch a small tail extending from the back of the buffalo. Create a slightly curved line going out and then draw a small teardrop-shaped tuft at the tip. The tail placement and style can easily be varied – add more curls or a longer tail for a fantasy-style creature, or draw a short, stubby tail for a younger buffalo.

- Finalize and clean lines.
Erase any unnecessary construction lines from your buffalo drawing, especially where the head and body ovals overlapped. Check symmetry and spacing one last time, and make minor adjustments if needed. As a tip, vary your line thickness to highlight certain areas, or add extra details like spots or stripes.
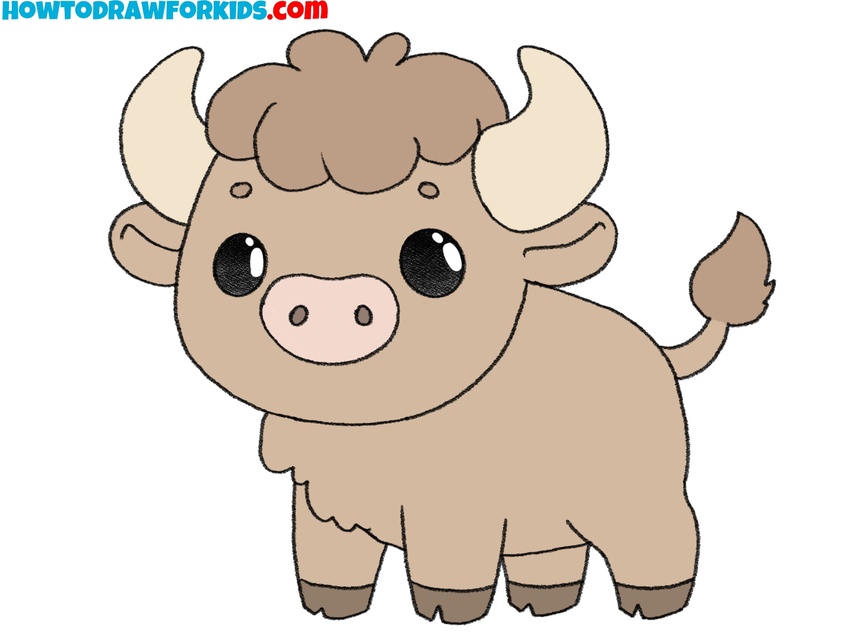
- Add color to the buffalo.
To paint this animal, you can use brown shades for the buffalo’s body, lighter cream or tan for the horns and snout, and black or dark brown for the hooves and nostrils. For variation, try giving your buffalo a darker coat, white patches, or even cartoon-style color schemes like blue or purple if you’re designing a character.
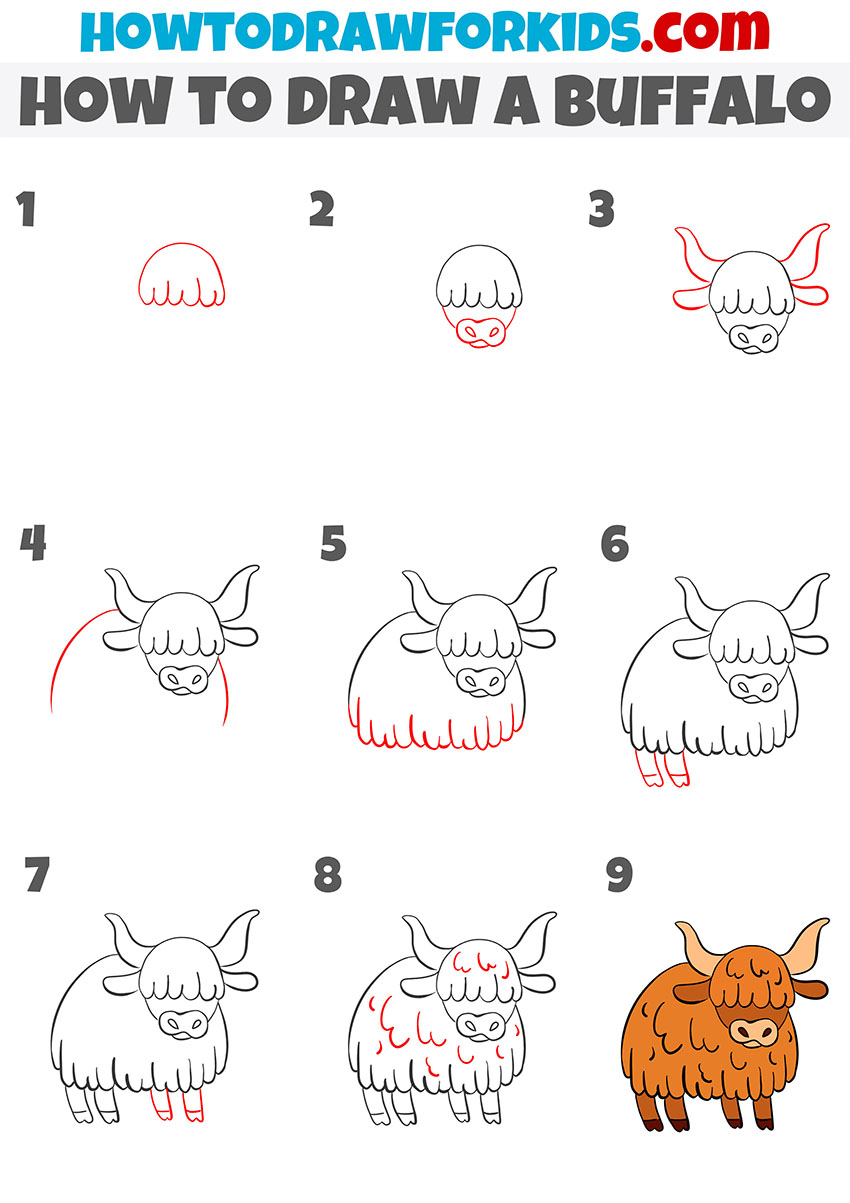
Alternative Buffalo Drawing Tutorial
This version of the tutorial on how to draw a buffalo is built in a slightly different way compared to the first tutorial. Instead of starting with base shapes, here we begin directly with the head, moving downward through the body and legs. This version will also be a good option if you want to practice drawing animals with shaggy coats.
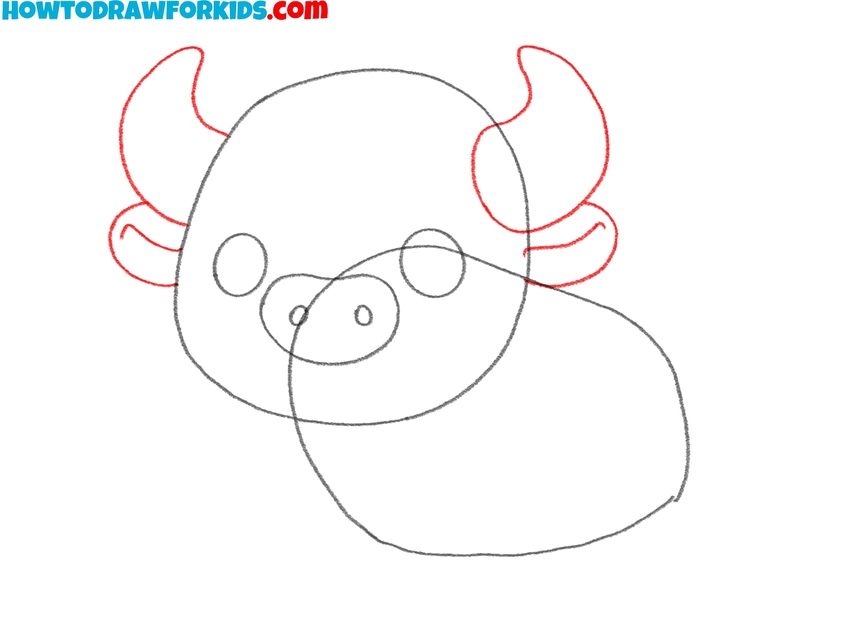
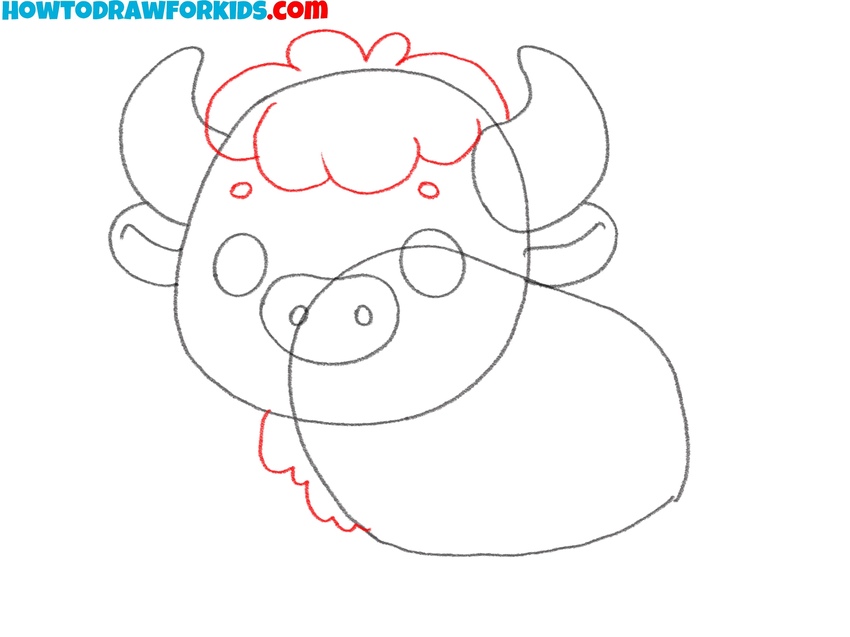
To draw a buffalo using this alternative method, start by sketching the top of the head with a series of curved lines to create thick wool. Add the lower part of the face with the nose and nostrils just underneath. Next, draw the horns stretching out to the sides and slightly up, and place the small ears just below them.
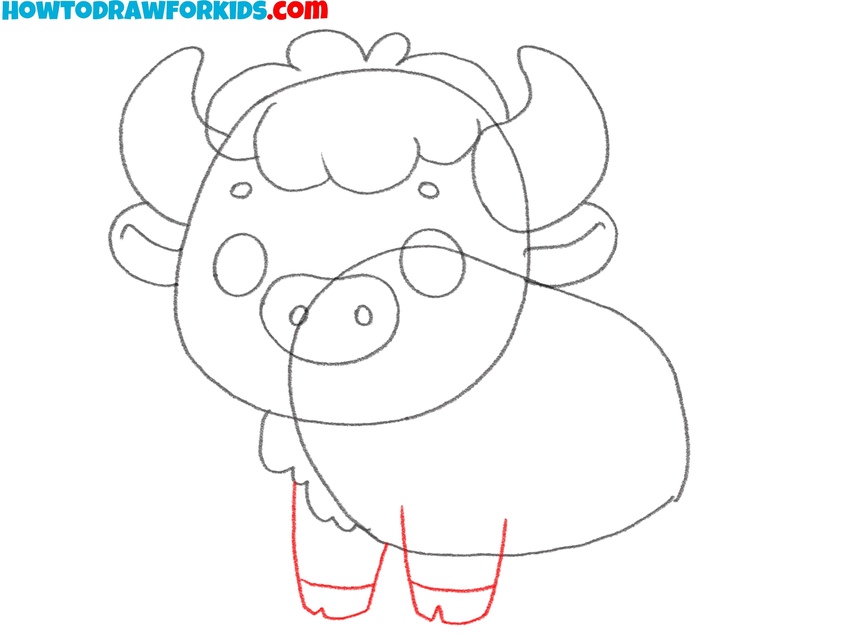
After that, outline the body using a long curved line and draw the wool along the bottom with a row of short, rounded bumps. Add the front legs, then the hind legs. Complete the drawing by adding curved fur lines across the body. Color the buffalo drawing in warm brown tones with beige horns and darker legs.
Conclusion
This buffalo drawing tutorial is now complete, and you’ve learned how to sketch a fluffy cartoon-style buffalo with simple steps and basic lines. You can reuse this approach for drawing other animals with thick fur, or try changing the shape of the horns and tail to create your own character.
If you want to place your buffalo in a setting, check out the tutorial on how to draw grass – it’s a great way to build a simple background without adding too much detail.
If you’re interested in drawing more animals with similar proportions and structure, try to draw a reindeer. It has a similar overall layout and works well as the next step in building your animal drawing skills.
Don’t forget to visit other drawing tutorials and coloring pages, and if you’re following along regularly, be sure to subscribe so you don’t miss new guides and printables.


It’s emo