How to Draw a Chibi Face
Unlock the secrets of chibi art with my engaging guide on how to draw a chibi face. Perfect for artists of all ages, these three methods make drawing simple and enjoyable, ensuring you can create those iconic, wide-eyed expressions that make chibi characters irresistibly cute.
My kid-friendly tutorial on how to draw a chibi face is designed to delight and instruct, presenting three methods that simplify the chibi drawing process. This guide is perfect for young artists looking to add a splash of cuteness to their repertoire, offering a fun way to practice drawing while creating adorable chibi characters.
How to Draw a Chibi Face: Basic Information
Are you ready for a fun and adorable art adventure? Today, we’re going to learn how to draw a chibi face with big sparkling eyes and a cute expression that’s sure to make everyone go “Aww!” Chibi characters are all about exaggeration and simplicity, and this lesson simplifies the process into easy-to-follow steps.
We’ll start with a simple curved line for the chin, add circles for those signature large eyes. Step by step, we’ll add details like the hair, ears, and facial features. My method is designed to help you depict a chibi face with just the right amount of cuteness without any of the fuss.
By the end of this lesson, you’ll be able to draw a chibi face that could melt the heart of even the grumpiest troll under the bridge. So grab your pencils, and let’s give life to the cutest chibi face ever! Remember, practice makes perfect, and with my simple technique, you’ll be mastering chibi art in no time!
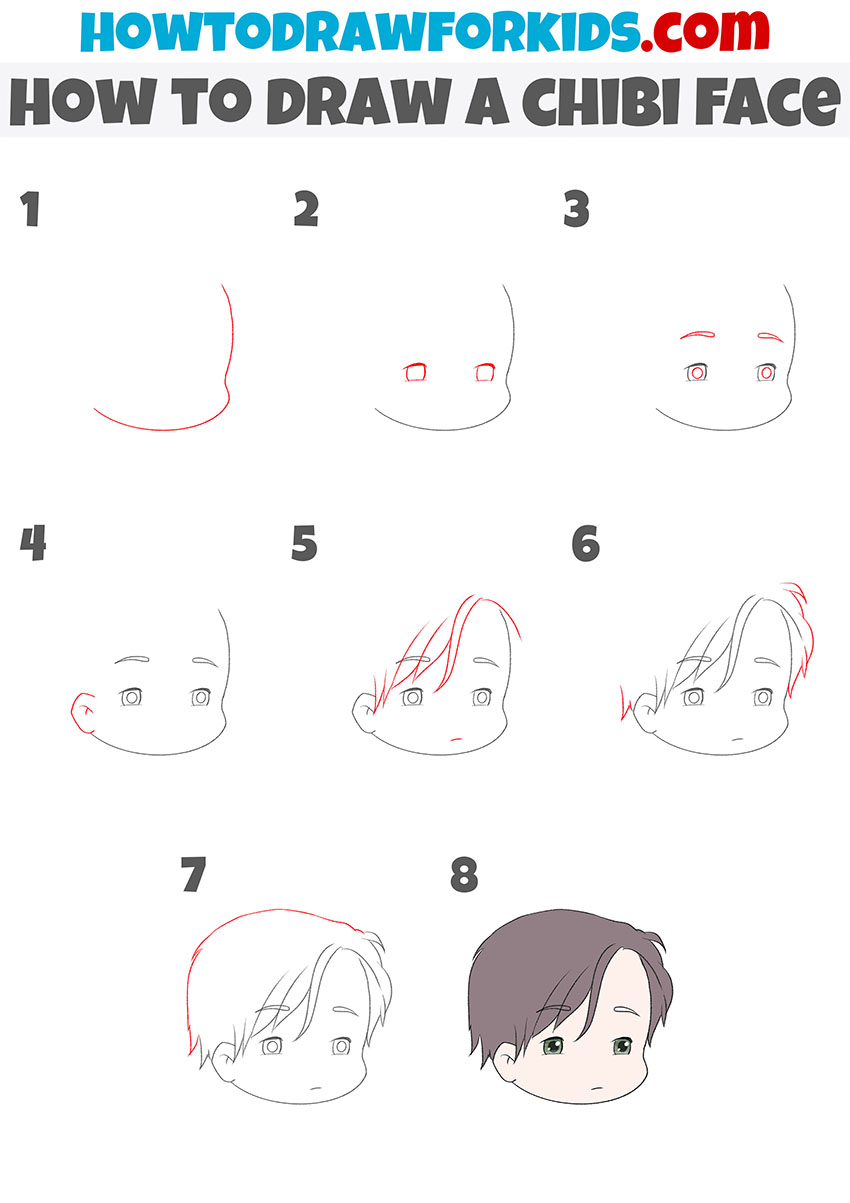
Chibi Face Drawing Tutorial
Materials
- Pencil
- Paper
- Eraser
- Coloring supplies
Time needed: 30 minutes
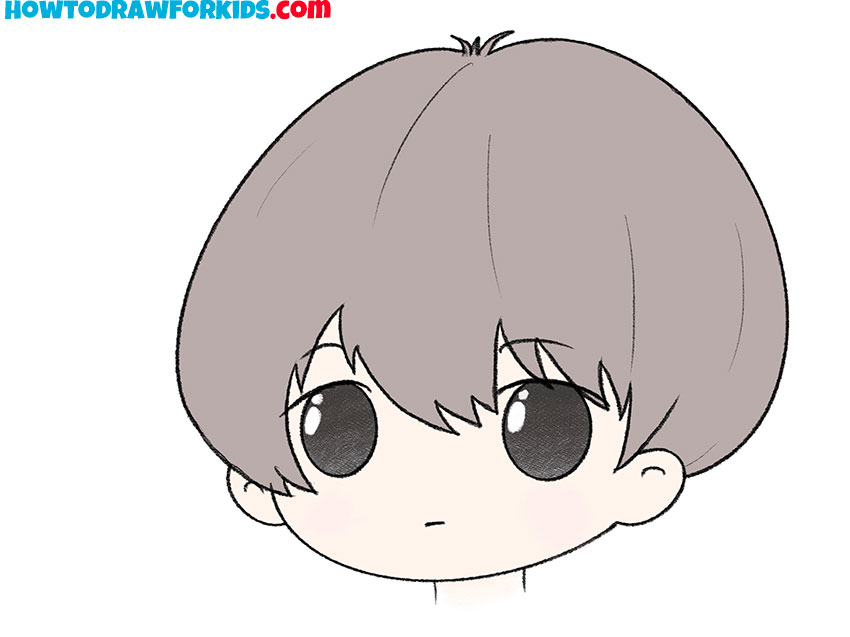
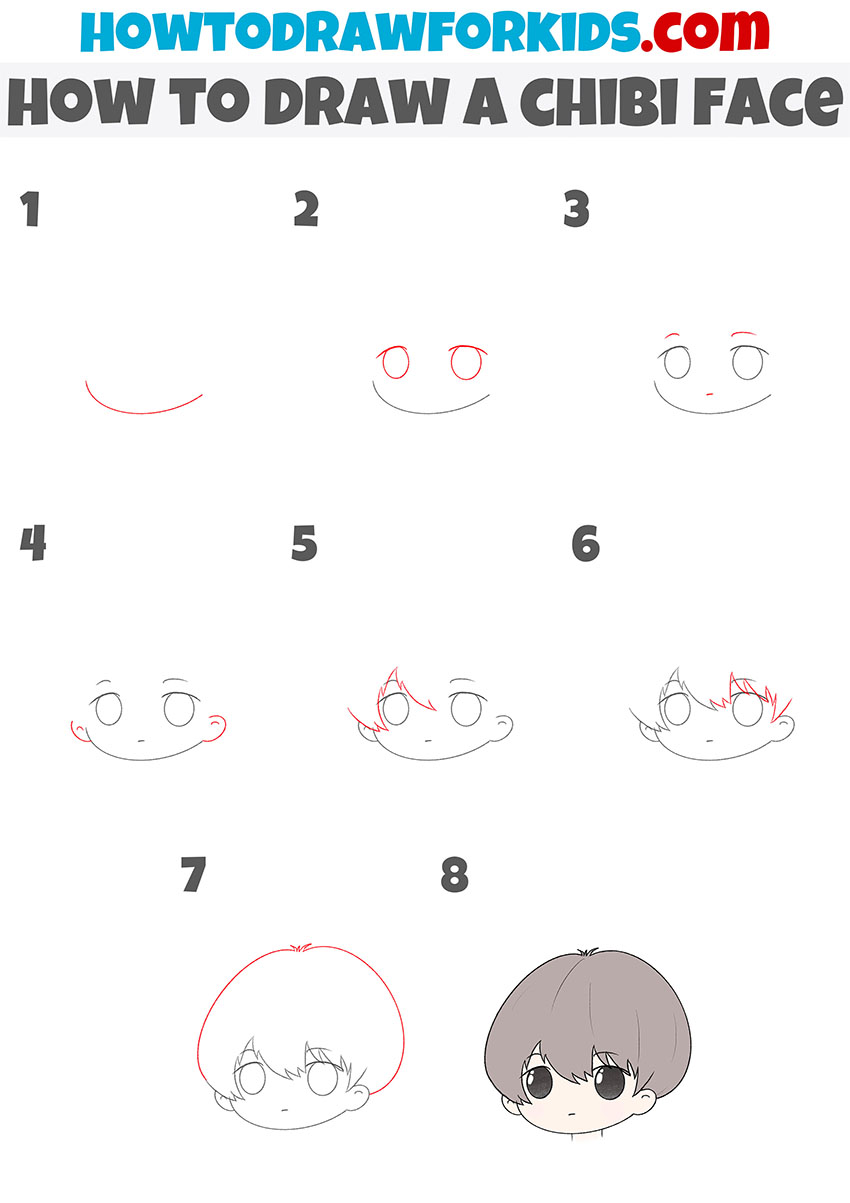
How to Draw a Chibi Face
- Draw an oval for the face.
This is a very simple step in which you should draw one smooth line.

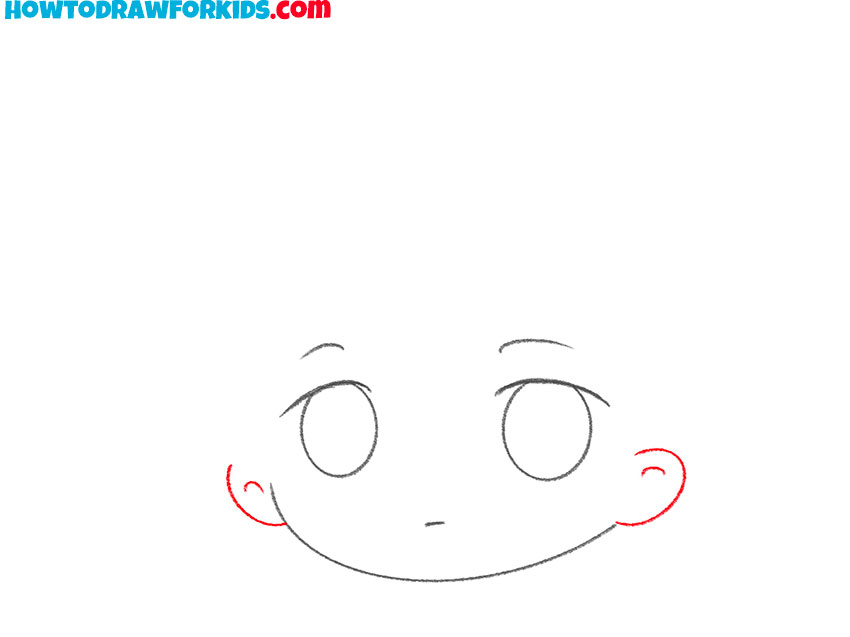
- Depict the eyes.
To do this, draw two ovals and at the top add short lines to depict the upper eyelids.
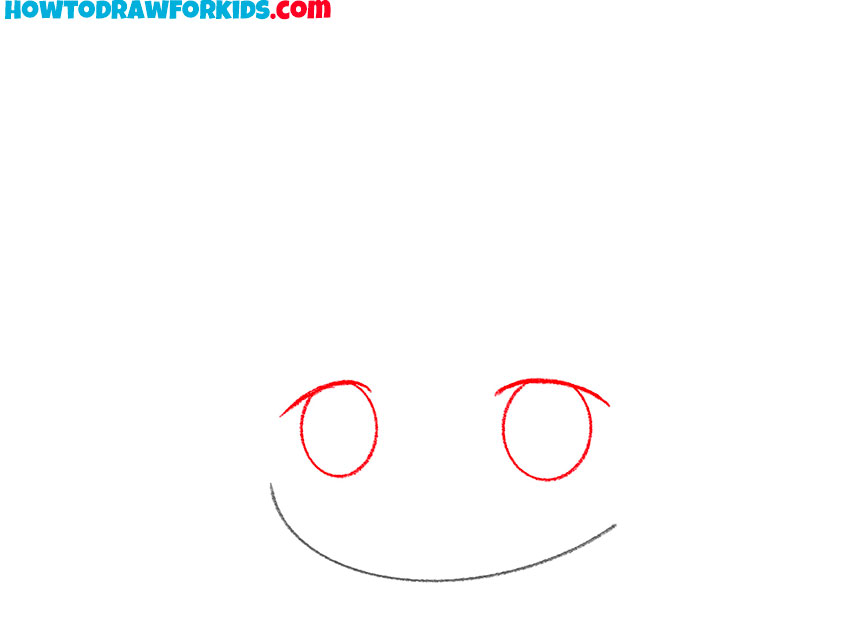
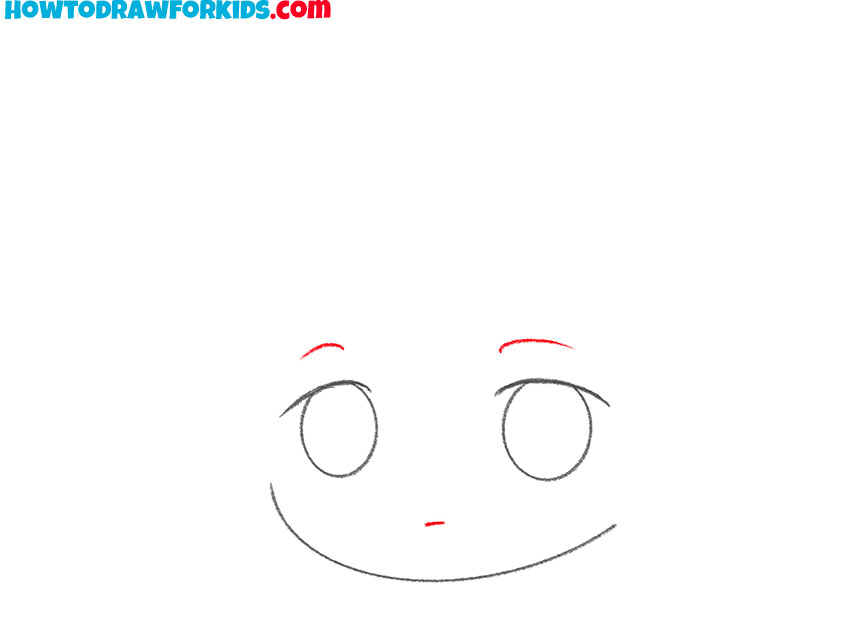
- Add the rest of the facial features.
With the help of a few short lines draw the eyebrows and the small mouth.
- Sketch out the ears.
The ears are semi-circular and set low.
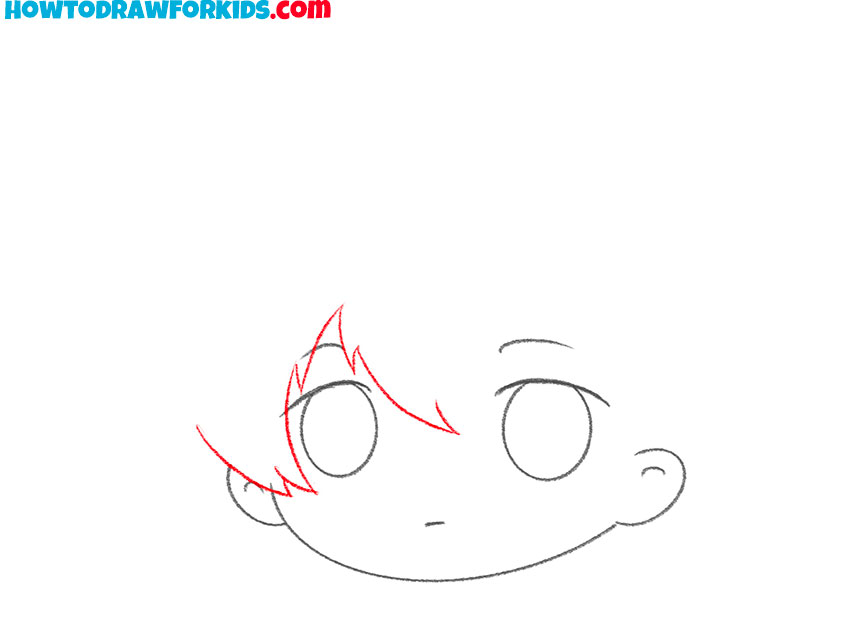
- Start drawing the hair.
On one side of the face draw spiky strands of hair using a few smooth lines.
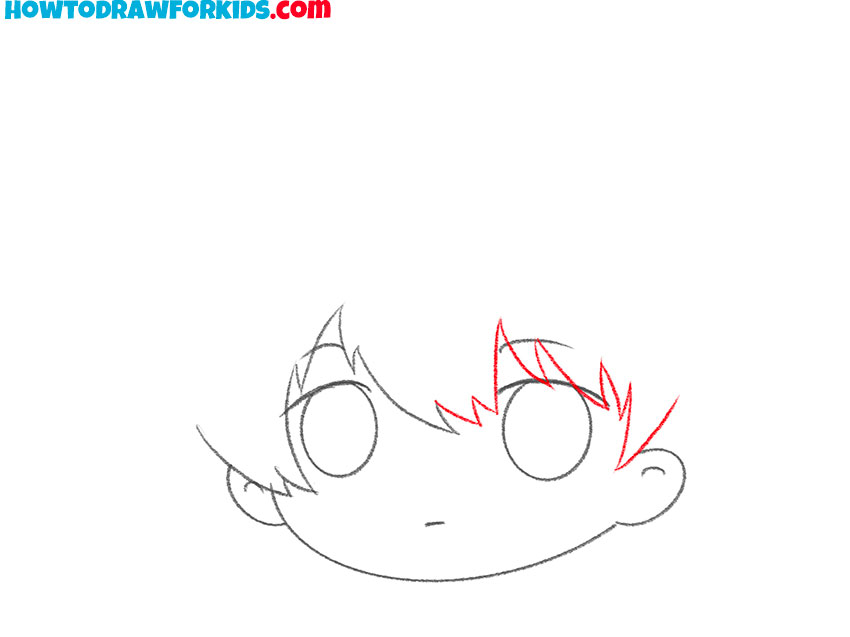
- Depict the hair on the other side.
Repeat the previous step and draw some spiky strands on the other side.
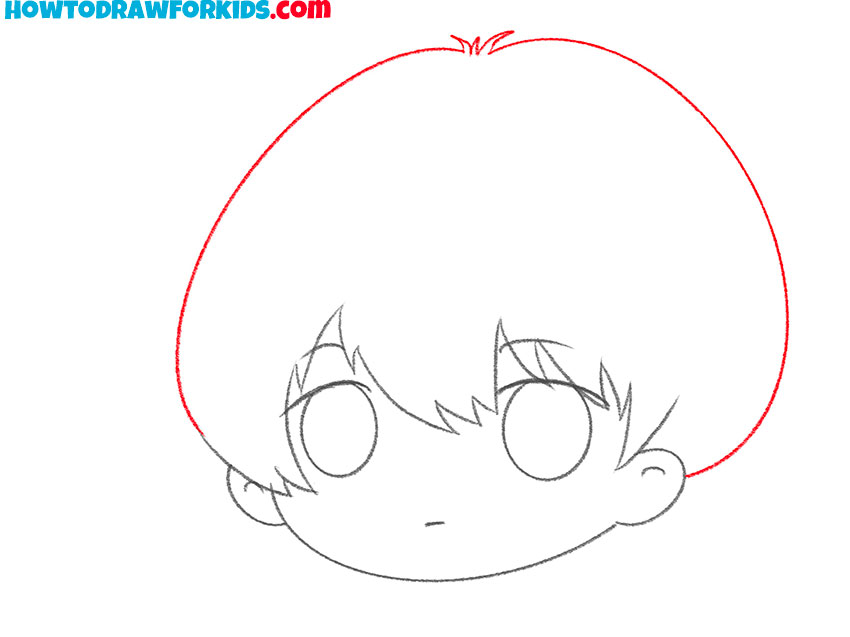
- Sketch out the top of the head.
With smooth lines draw the rest of the hair on the head.
- Add details and color the drawing.
In this step, draw the neck of the character and color the drawing as in the example.
Additional Content
Exciting news for all aspiring artists and chibi enthusiasts! I’ve crafted a special treat—a free PDF file of this drawing lesson. This concise version distills the essence of our chibi face tutorial, allowing you to download and enjoy learning anytime, anywhere, even without internet access.
Perfect for practice on the go or as a handy reference, this PDF ensures your drawing journey continues wherever you are. Grab your copy today and keep the art flowing!
Alternative Drawing Methods
Great news for budding chibi artists! I’ve developed several alternative techniques for drawing chibi faces, specifically designed to help you practice more and enhance your artistic skills. These varied methods are perfect for expanding your approach to chibi art, allowing you to experiment and refine your style.
How to Draw a Chibi Face Step by Step
In the second drawing method, I take a slightly more intricate path compared to the first. This approach introduces extra steps that guide the artist through a more detailed construction of the face, emphasizing the expressive elements that define chibi characters.
The eyes receive particular attention, growing more elaborate, and the hair is shaped to add personality and movement. Each additional step in this method is designed to sharpen the artist’s ability to craft expressive and engaging chibi faces, making it an excellent practice for honing artistic skills.
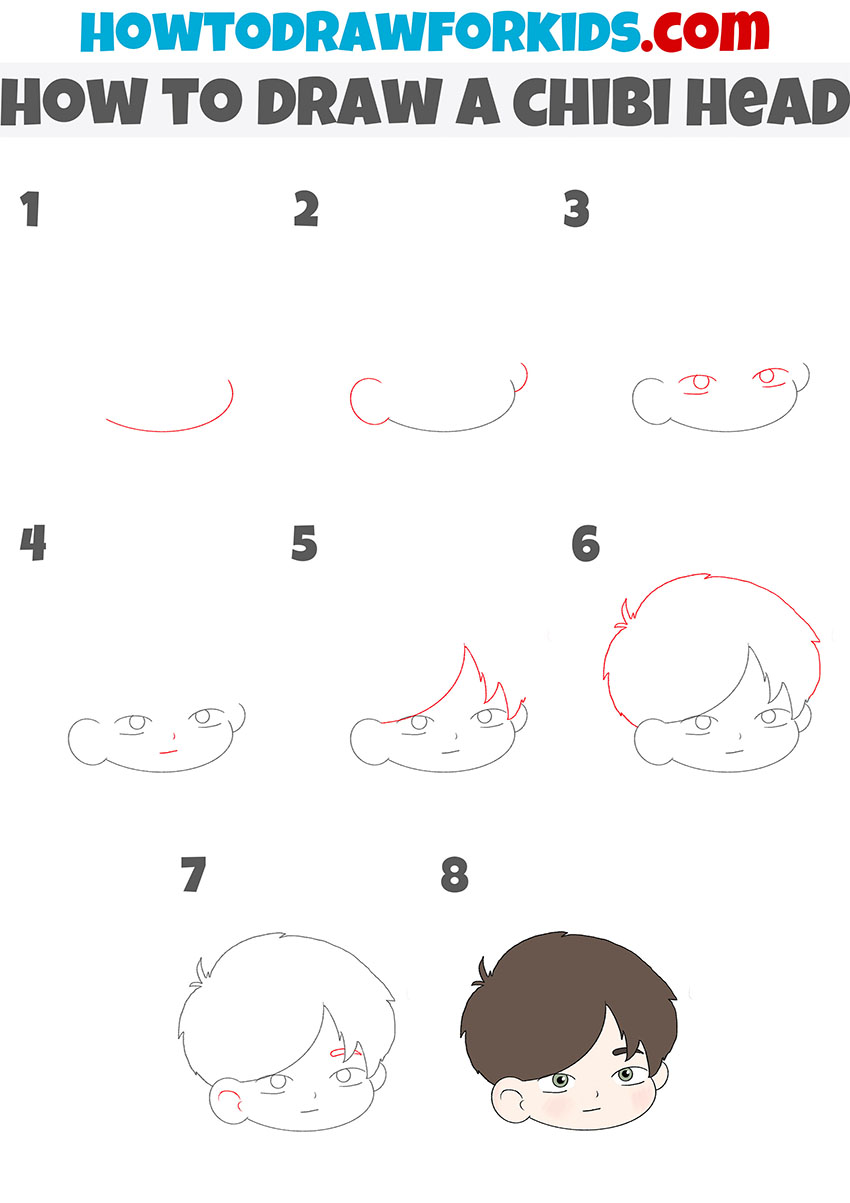
How to Draw a Chibi Head
This technique is quite similar to the first, with only subtle differences that offer a slight variation in practice. The minute variations might include a change in the curvature of the lines or the placement of facial features, allowing for a fresh take without straying far from the established pattern.
This method is ideal for reinforcing skills and gaining confidence in drawing, as the small distinctions require a keen eye but don’t overwhelm the artist with new concepts. It’s a great way to refine techniques and observe how minor tweaks can give a slightly different character to the drawing.
Conclusion
As we conclude my chibi face drawing lesson, it’s important to note that this is one of the numerous tutorials you’ll find on our site. Whether you’re interested in how to draw a dog or mastering the art of butterfly drawing, we have resources for every level.
Be sure to follow me on social media for the latest updates and announcements. My growing collection of drawing tutorials is just a click away, and by following me, you won’t miss out on any new content.


cool i love chibi!!!!