How to Draw a Cloud
In this tutorial, I’ll show you how to draw a cloud in three different ways, ranging from a simple four-step version to a more detailed method.
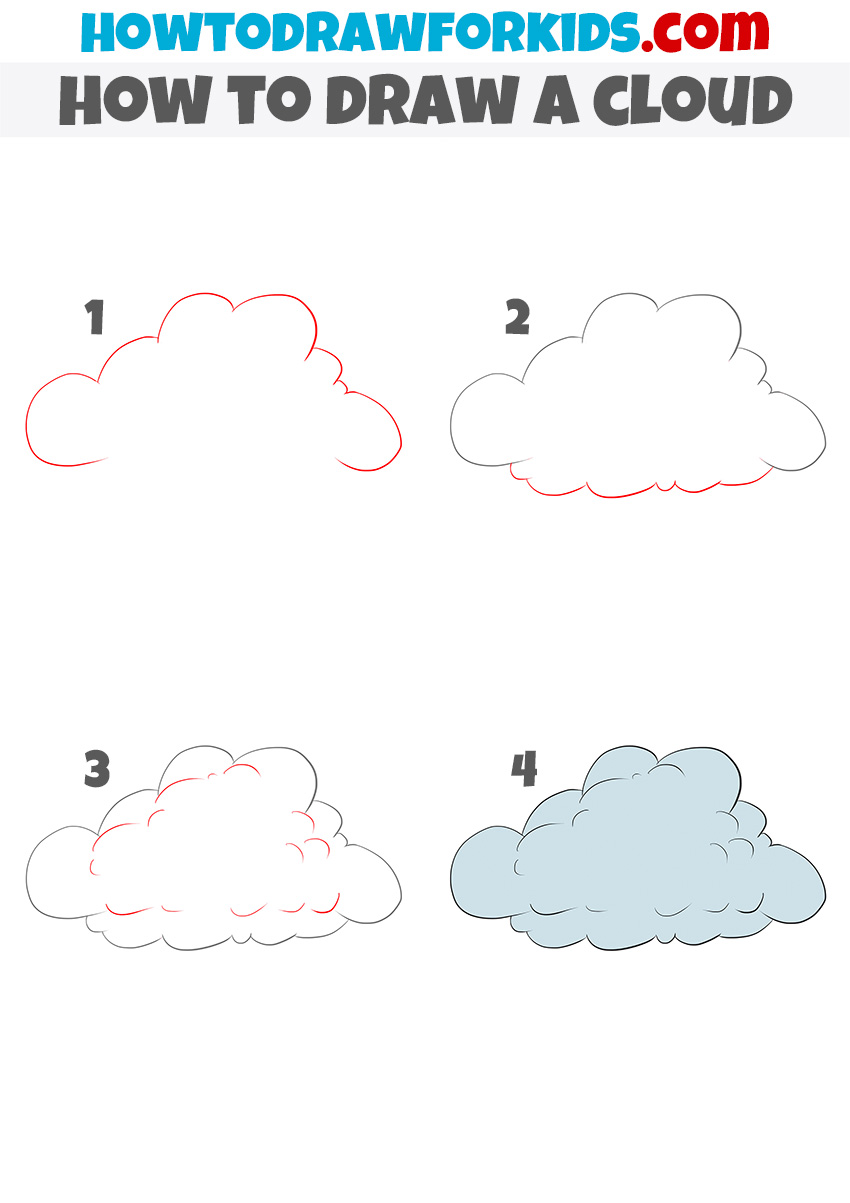
How to Draw a Cloud: Basic Information
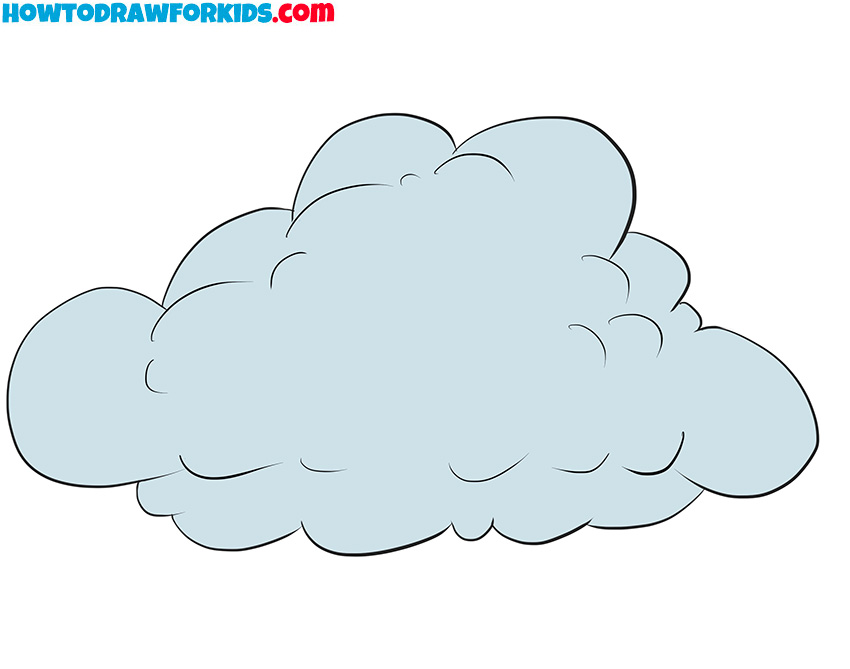
Hello, young sky watchers! Ever looked up at the sky and wished you could capture those fluffy clouds on paper? Well, with this fun lesson, you’re going to learn just that—how to draw a cloud that’s as light and puffy as the real thing. It’s a simple process that will have you creating your own sky scenes in no time.
First, we start with a gentle curve that’s as light as a breeze. This is the foundation of our cloud, and from there, we add billowing shapes to give our cloud its full and fluffy form. It’s like stacking cotton balls in the sky, each one getting softer and rounder as you go. Remember, no two clouds are ever the same, so let your imagination soar!
By the time we reach the last step of our draw a cloud guide, you’ll see how easy it is to create a whole sky full of these cottony wonders. Give your cloud some depth by adding shades of blue and gray, making it look like it’s ready to drift across your paper. Grab your pencils, and let’s start sketching a sky full of dreams and stories!
Cloud Drawing Tutorial
Materials
- Pencil
- Paper
- Eraser
- Coloring supplies
Time needed: 20 minutes
How to Draw a Cloud
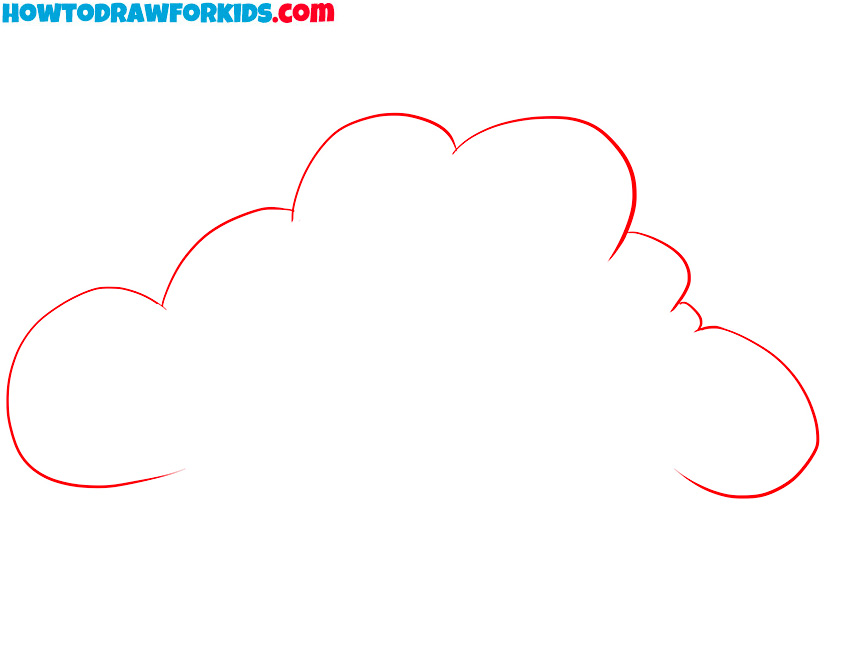
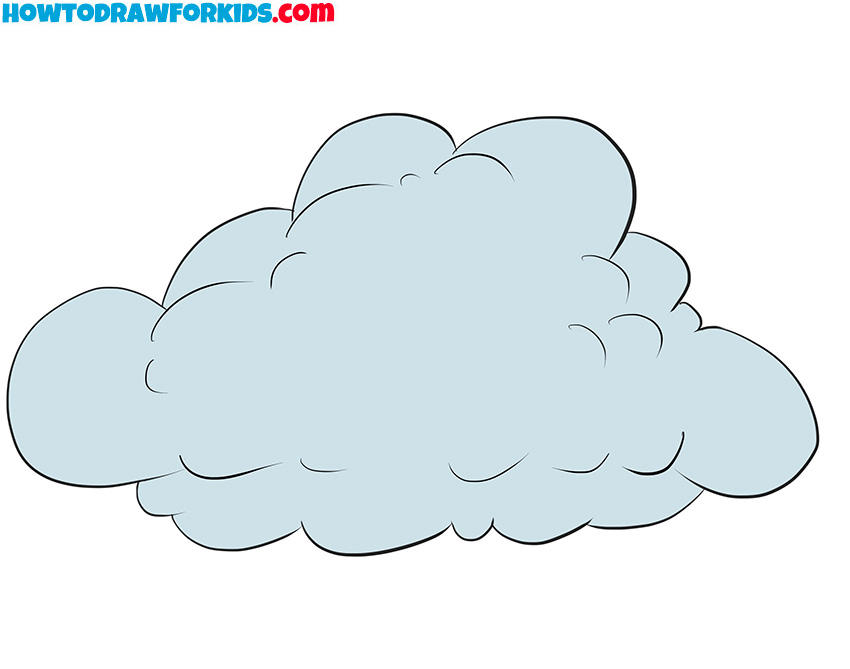
- Draw the top edge of the cloud.
To begin drawing the cloud, start by sketching a series of curved lines. These lines should form a bumpy, irregular shape to mimic the natural, fluffy outline of a cloud. Begin with one larger bump in the center, and add smaller curves to the sides. The goal is to make the cloud look soft and puffy.
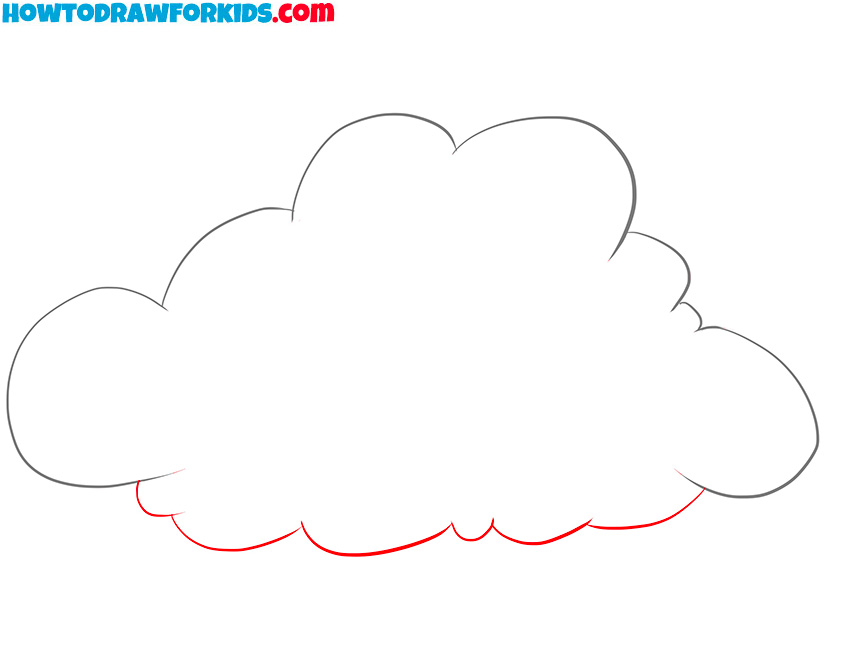
- Add the bottom edge.
This part will complement the top edge and complete the outer outline. Start by adding smaller, flatter curves along the bottom of the cloud. Unlike the top, the bottom should have a more horizontal and less pronounced shape, although it still needs to retain a slightly irregular, puffy look.
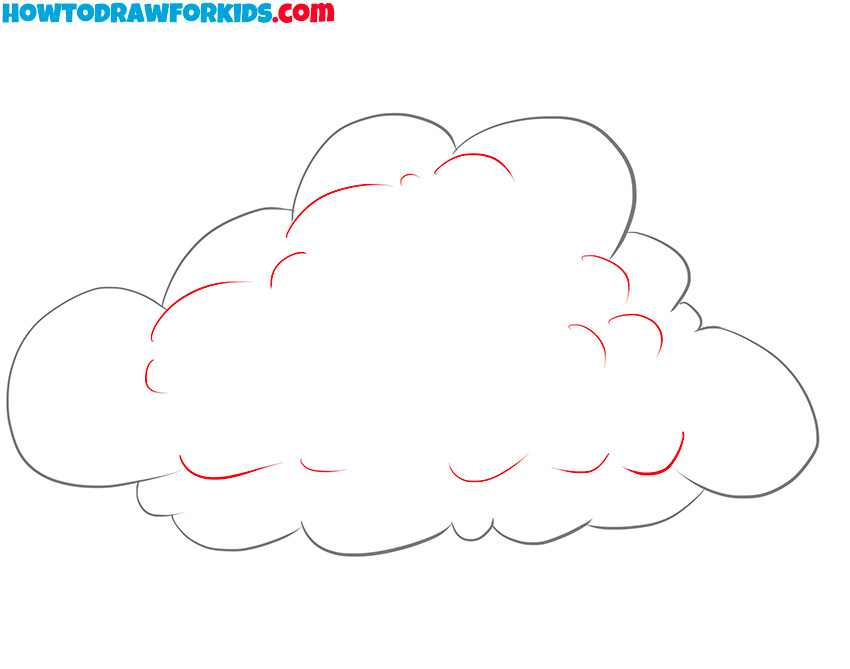
- Detail the cloud.
Start by sketching smaller curves within the outline you created in the previous steps. Focus on adding these internal bumps along both the top and bottom edges, especially where the outline already bulges out. Vary the size and placement of these details, avoiding too much symmetry or repetition.
- Review the sketch and add colors.
Once you’re satisfied with the shape, you can add color to give the cloud a soft, realistic look. A light shade of blue or gray works well for clouds, though you can also experiment with pastel colors for a different effect. You can use light shading to create a sense of volume, with slightly darker tones.
Additional Content
This is a PDF file available for download that provides useful resources to help practice drawing the cloud. This file includes an illustrated step-by-step guide of the tutorial, a coloring page for training, a tracing worksheet to improve line work, and a grid drawing worksheet to assist with proportions and placement.
This PDF can be downloaded and printed for easy use, offering a convenient way to continue practicing and refining drawing skills at your own pace. These additional materials are created to support learning and improve drawing techniques in an organized manner.
How to Draw a Cloud: Alternative Techniques
In addition to the main lesson, several alternative techniques for drawing clouds have been prepared to help vary your drawing practice. These additional exercises are created to introduce different approaches to drawing clouds, allowing you to try various methods and styles.
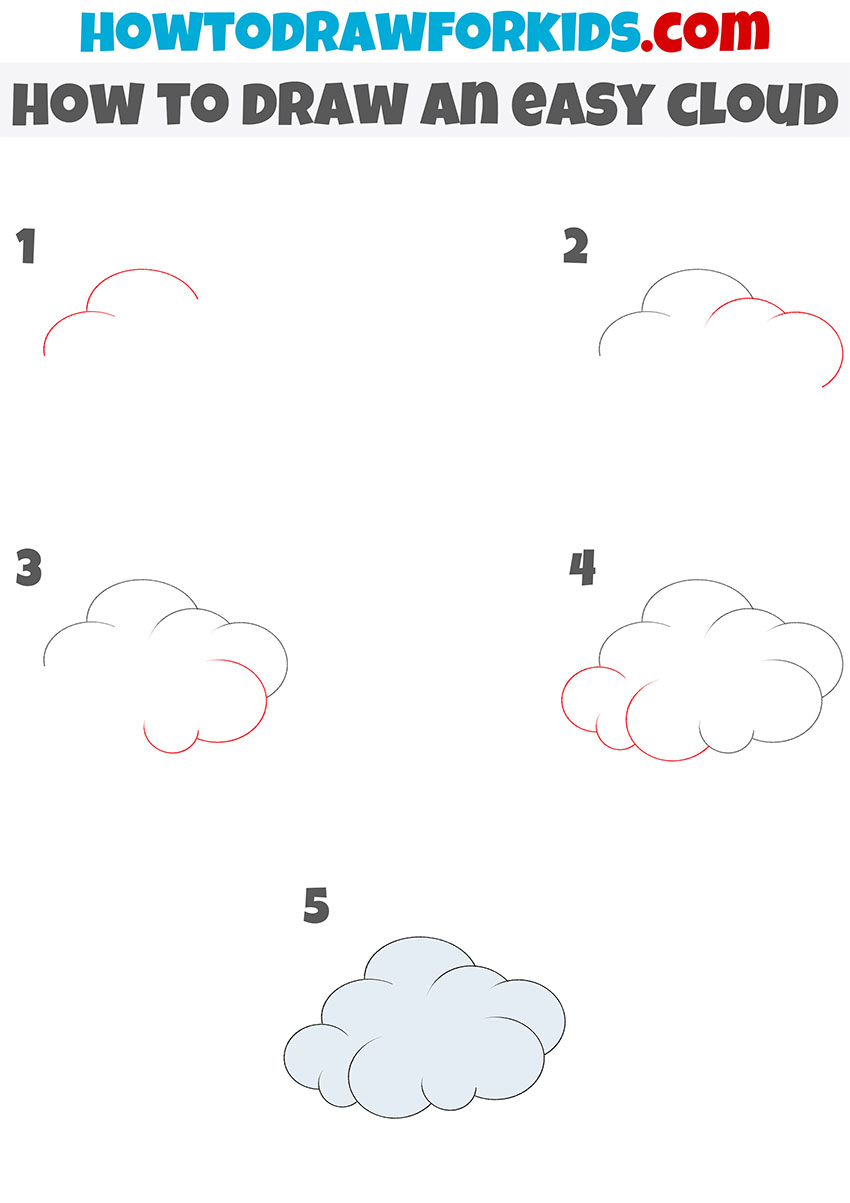
How to Draw an Easy Cloud
Start by drawing two overlapping curved lines to form the top part of the cloud. These curves should be soft and rounded, representing the fluffiness of clouds. Continue by adding another larger curved line to extend the outline of the cloud. This curve will form the right side of the cloud, creating a larger, fuller shape.
Next, add more rounded curves along the bottom of the cloud to complete the lower part. These curves should connect seamlessly with the ones you’ve drawn above, giving the cloud a soft, puffy appearance. Add a few more internal curves to give dimension to the cloud. Once satisfied with the overall shape, review your cloud drawing to ensure all lines flow smoothly. Finally, color the cloud with a light blue or gray tone to give it a soft, realistic finish.
Group of Clouds Drawing Lesson
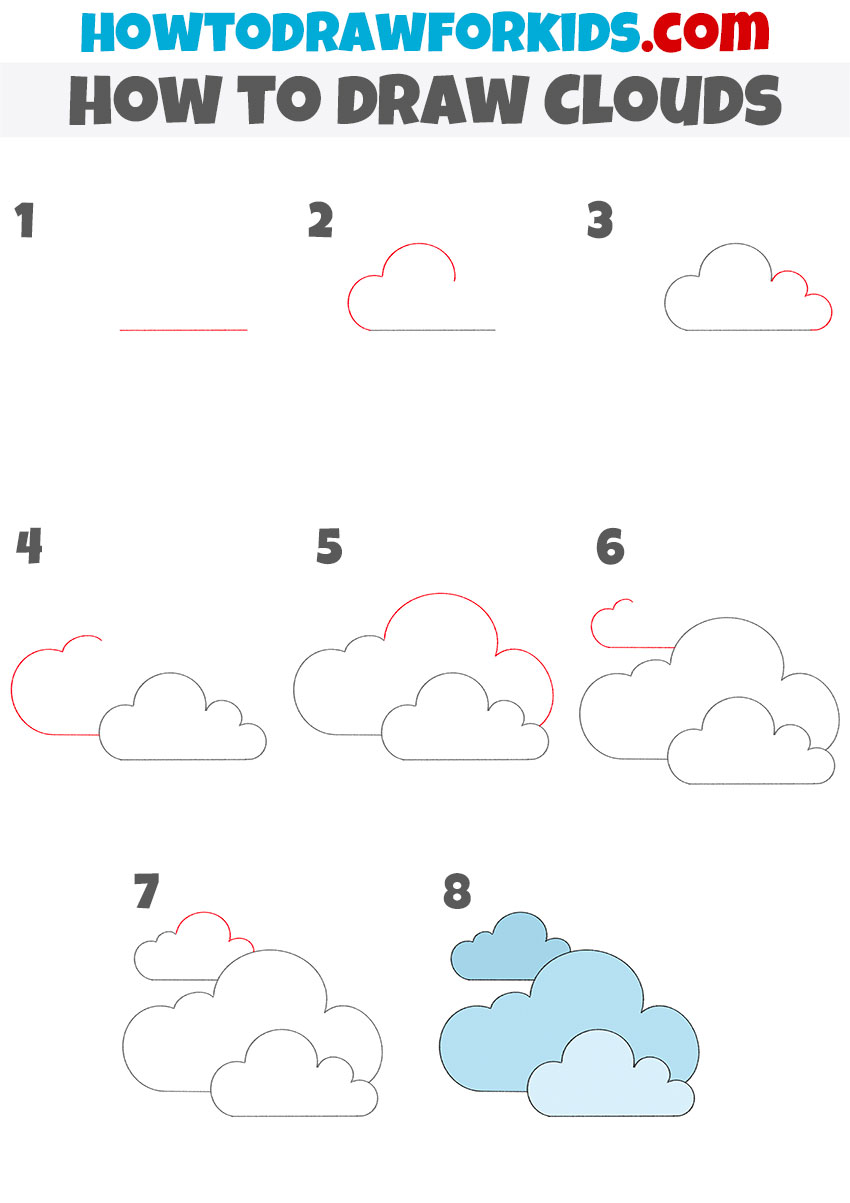
Start by drawing a horizontal straight line at the bottom, which will serve as the base of your cloud. Next, add a large, rounded curve on top of the line to form the first part of the cloud’s top edge. Continue by adding another bump to the right, connecting it to the first curve. These rounded shapes should resemble the natural puffy texture of clouds.
Now, start forming the second cloud by drawing more rounded curves on the left side, making sure they overlap slightly with the first cloud. Extend the second cloud by adding more curved bumps to complete its shape. To balance the group, add a third cloud by sketching smaller curves above the other two clouds, overlapping them slightly.
Ensure that all the clouds are connected and look like they belong together in the sky. Review the overall shapes and correct the details id it’s necessary. Finally, color the clouds with a light blue or gray tone to give them a soft, fluffy appearance.
Conclusion
We’ve reached the end of this tutorial on drawing a group of clouds. However, your drawing practice doesn’t have to end here. You can continue developing your skills with more simple drawing tutorials available on my website.
For example, try drawing a rose or learn how to draw a tree. These lessons offer additional techniques to further improve your drawing abilities.
Stay connected for more tutorials by subscribing to my YouTube channel for video lessons and step-by-step guides. You can also follow me on Pinterest, where I regularly share new ideas, tips, and tutorials to help you practice. By subscribing to both platforms, you won’t miss out on any updates or new content.
This way, you can keep improving your drawing skills at your own pace. Your support helps make more tutorials possible, so don’t forget to share your progress and keep practicing regularly.

