How to Draw a Crusader
This simple tutorial for kids will show you how to draw a crusader, a medieval knight famously depicted in numerous movies and books.
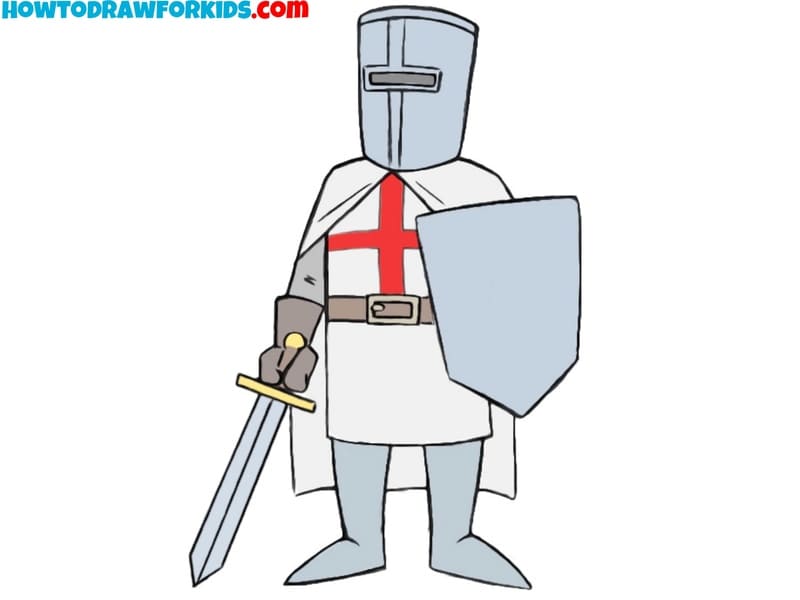
This tutorial helps artists learn to draw popular characters by focusing on illustrating their memorable details. By highlighting specific features such as the crusader’s helmet, shield, and cross-emblazoned tunic, the tutorial teaches how to illustrate the image of well-known figures.
This process aids artists in understanding what makes a character instantly recognizable and how to replicate those key elements in their own artwork.
Additionally, this guide shows how to create cartoon characters using real historical images as references. By blending historical accuracy with a simplified, cartoonish style, kids can learn to infuse their drawings with authenticity.
Recall that I have already drawn a knight on the pages of my site, and these two lessons will be quite similar.
Materials
- Pencil
- Paper
- Eraser
- Coloring supplies (grey, red, yellow, brown, light blue)
Time needed: 50 minutes
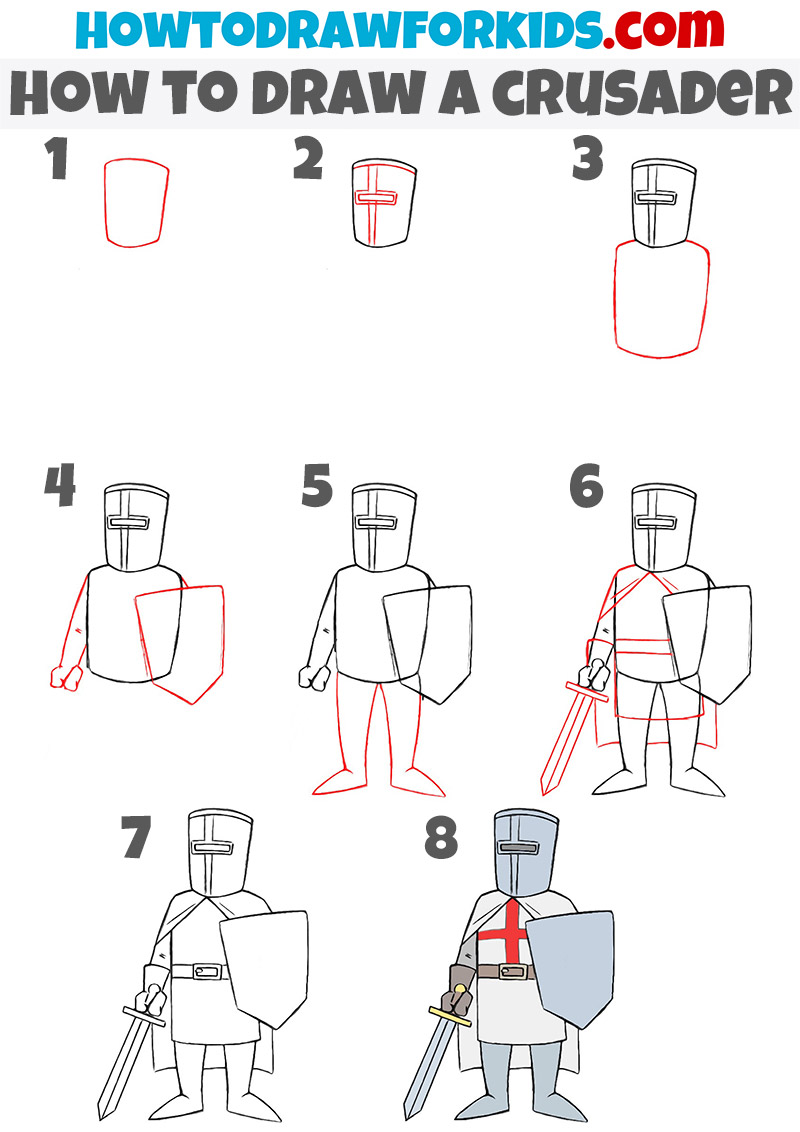
How to Draw a Crusader
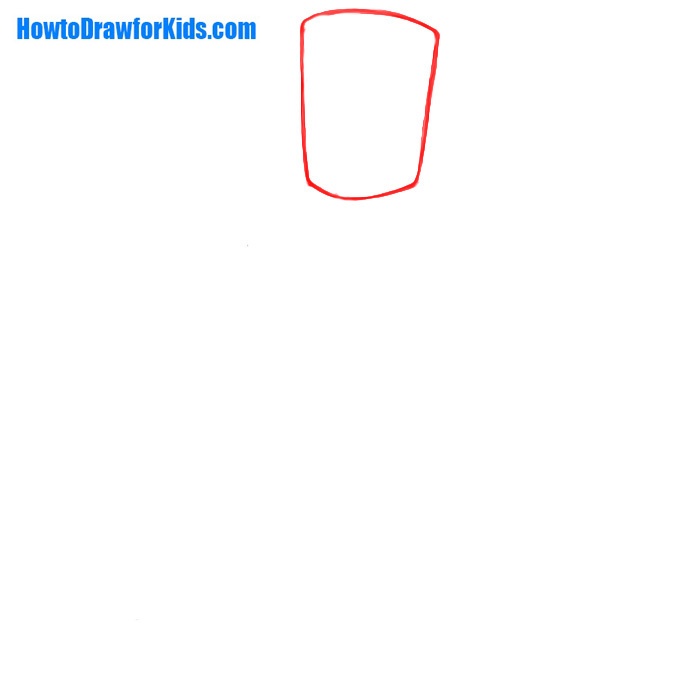
- Draw the helmet of the crusader.
Start by drawing a basic shape for the helmet, which resembles a vertical cylinder that tapers slightly as it goes down. The top is rounded like the crown of the head, and the bottom narrows just above where the knight’s neck would begin, setting the foundation for a traditional crusader helmet.
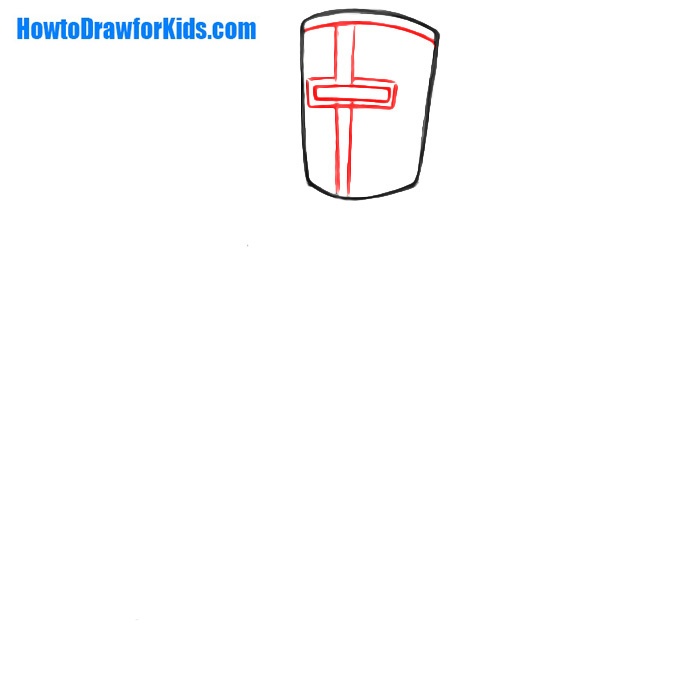
- Detail the helmet of the crusader.
Inside the helmet, add the facial slit, a long horizonal rectangle for the eyes, with a smaller horizontal line through the center for structural detail. This is the visor where the crusader would see through. The rectangle is positioned in the upper half of the helmet’s front.
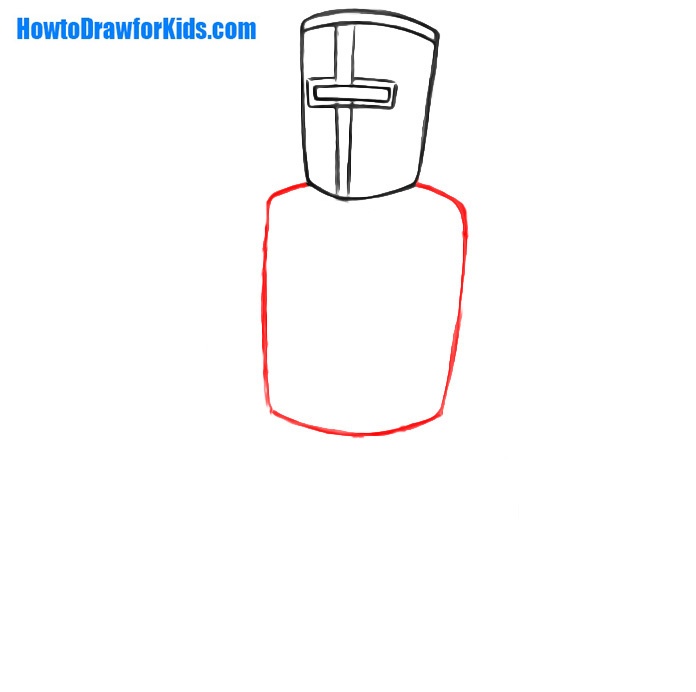
- Illustrate the torso of the knight.
Directly below the helmet, draw the torso shape of the crusader, resembling a squared-off jar with rounded edges. The bottom of the torso should be flat, illustrating the armor’s weight and form. The outline of your crusader’s torso should be noticeably wider and larger than the outline of the helmet.
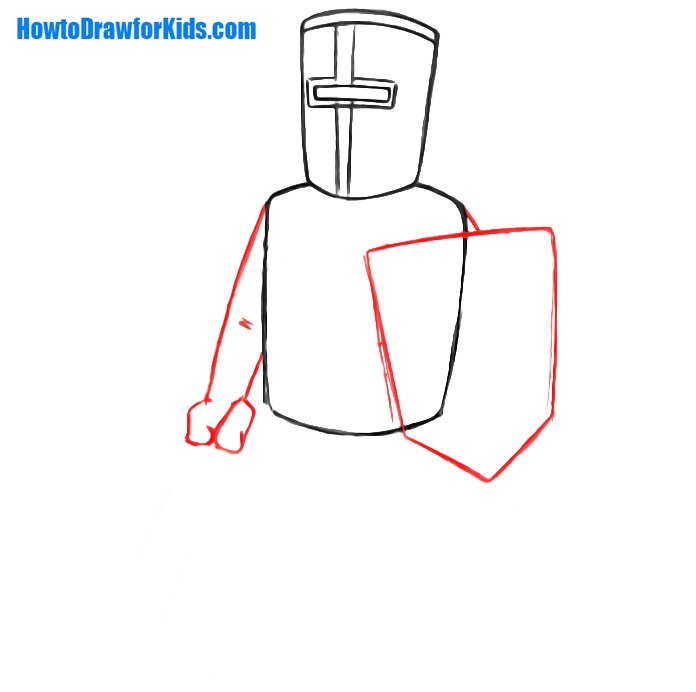
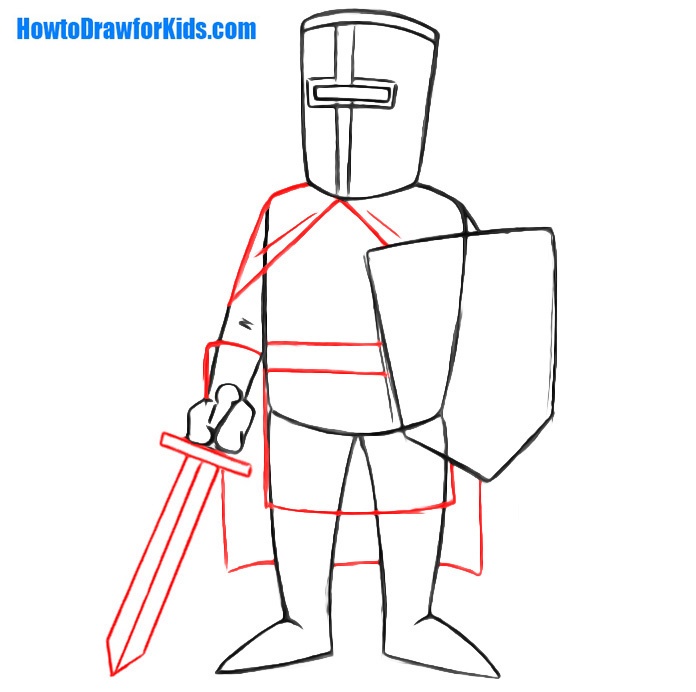
- Add the arm and shield.
Sketch simple lines for the right arm of the crusader. For greater realism, draw a couple of folds in the area of the elbow of the right arm. The left arm is covered with a shield, so instead of this limb draw a shield. The shield has a classic shape, tapering downward.
- Introduce the lower body.
Sketch two diagonal lines from the torso’s bottom for the legs, divided in the center to indicate the space between them. Draw the feet as two pointed triangular geometric shapes. The legs should be approximately the same height as the crusader’s torso.

- Sketch the sword and cape.
Add the sword to the right hand, a straight line for the blade with a simple crossguard and a handle that fits the hand’s grip. This completes the basic body armor and introduces the main weapon. Illustrate the glove and belt. Next, add a cape hanging behind the knight’s back.
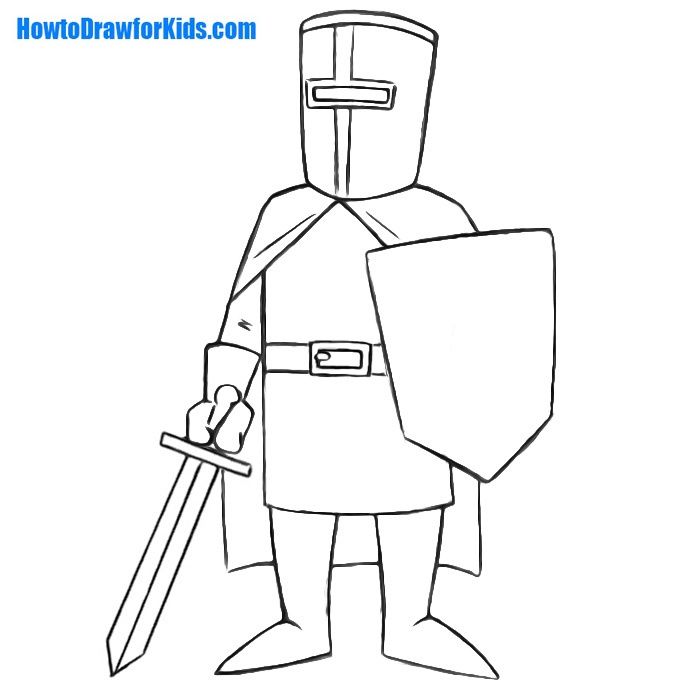
- Make the finishing touches.
Before adding color, it’s time to finalize the drawing. Gently erase the sketch lines that helped you form the structure of the crusader. Refine the contours of the crusader’s armor, ensuring that the edges are smooth and the curves are deliberate. Check the proportions once more.
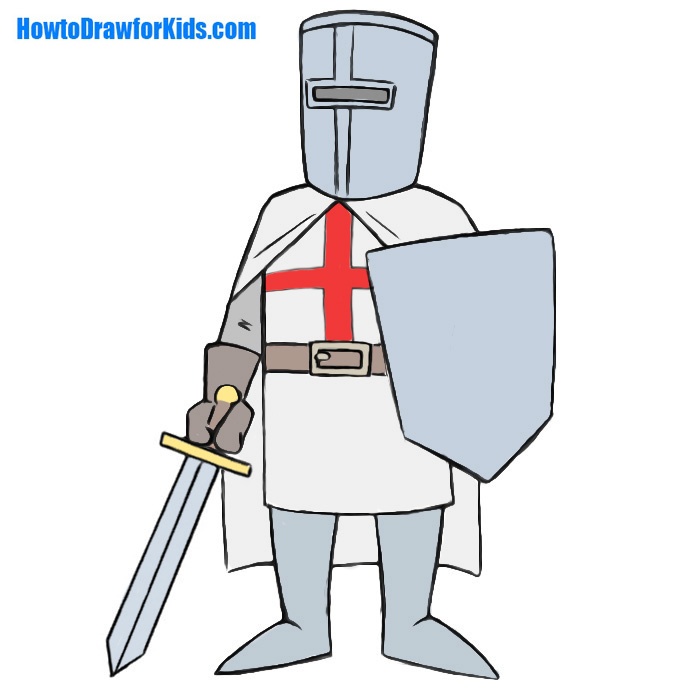
- Finalize the drawing by adding colors.
Color the helmet, shield, sword blade and armor in a metallic shade, implying steel or iron. The tunic bear a red cross, the emblem of the crusaders. Color the glove and belt brown and the buckle in yellow. The tunic and cape can be either white or light gray.
If your crusader is not at all like mine, do not worry, it’s even good because I want to give you knowledge in drawing, and every artist has his own unique drawing style.
If you save this picture to your device, you will have access to it at any time. It is even better if you share it with your friends and tell them about Howtodrawforkids.com to your friends and those who want to learn to draw very easily and quickly.