How to Draw a Deer
In this lesson I will show you three methods demonstrating how to draw a deer – one of the most graceful inhabitants of the forest

How to Draw a Deer: Basic Information
Drawing animals, such as a deer, can help improve drawing techniques and attention to detail.
This tutorial on drawing a deer is structured to guide learners through each stage, ensuring a clear understanding of the process. While drawing a deer, focus on specific aspects to improve drawing skills, observational abilities, and patience.
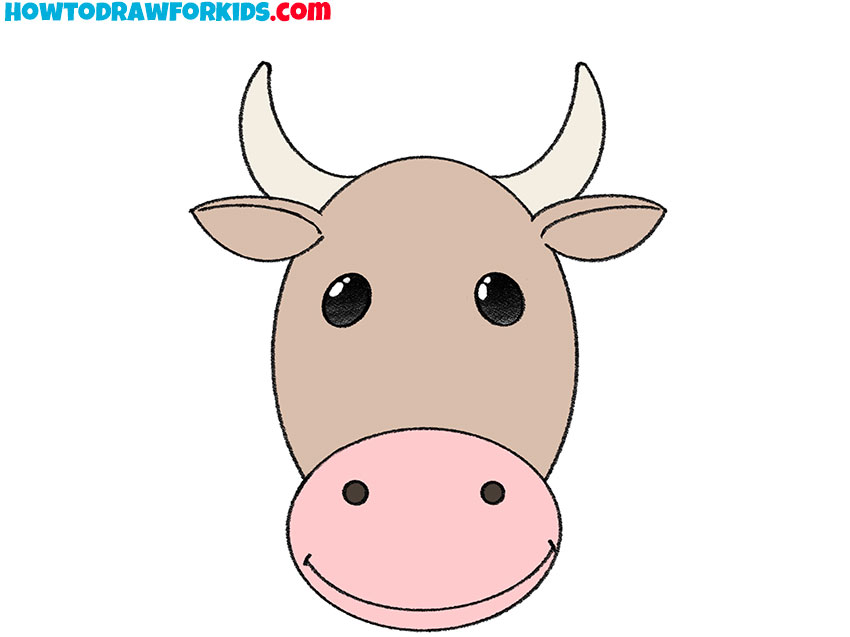
What makes this drawing noteworthy? First, consider the proportions of the deer. The body is relatively small for an adult deer, indicating that the subject is a young deer.
This deer has a cartoon-like appearance instead of a realistic one. The mouth is drawn with a simple line, and the eyes are large with highlights. These features are important for achieving accuracy and simplicity in the drawing.
The posture of the deer is also important. It is in a stationary pose with its head slightly extended forward. This suggests a sense of careful observation or attention to something unusual.
Deer Drawing Tutorial
Materials
- Pencil
- Paper
- Eraser
- Coloring supplies
Time needed: 35 minutes
How to Draw a Deer
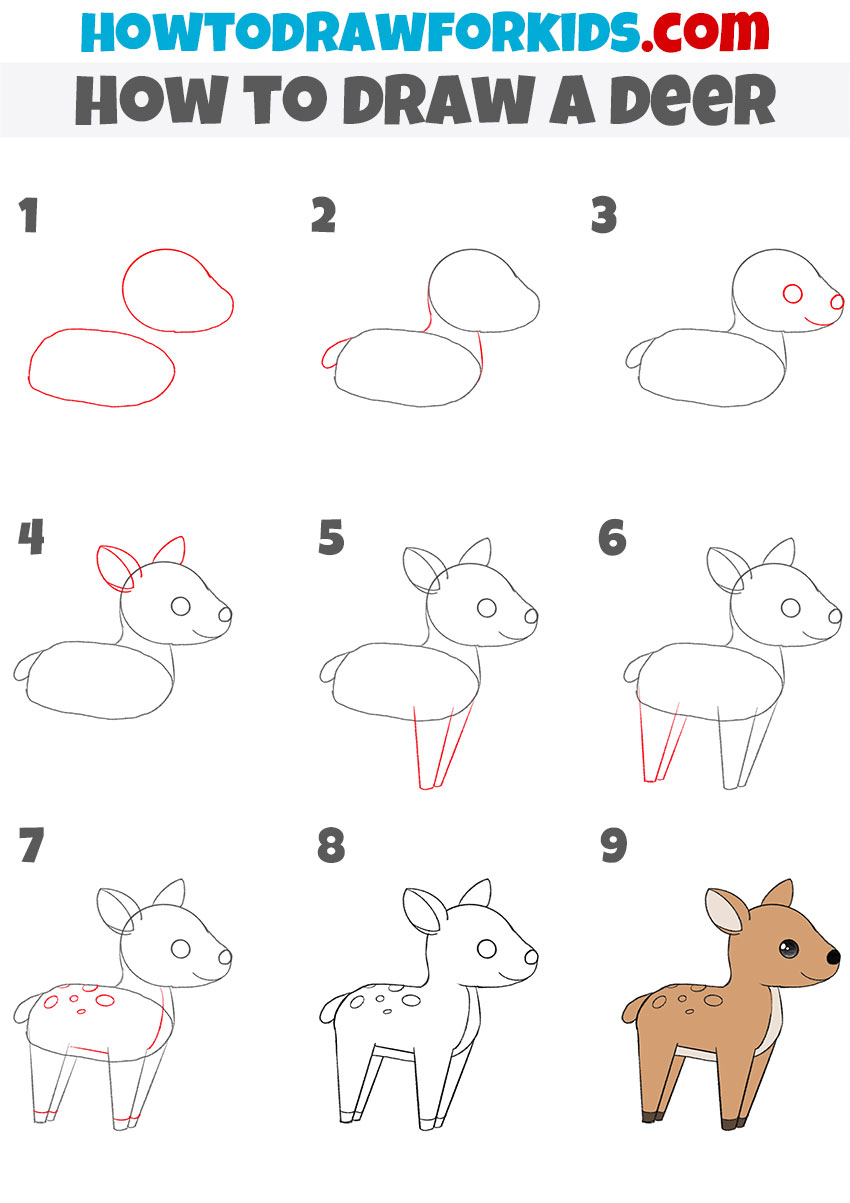
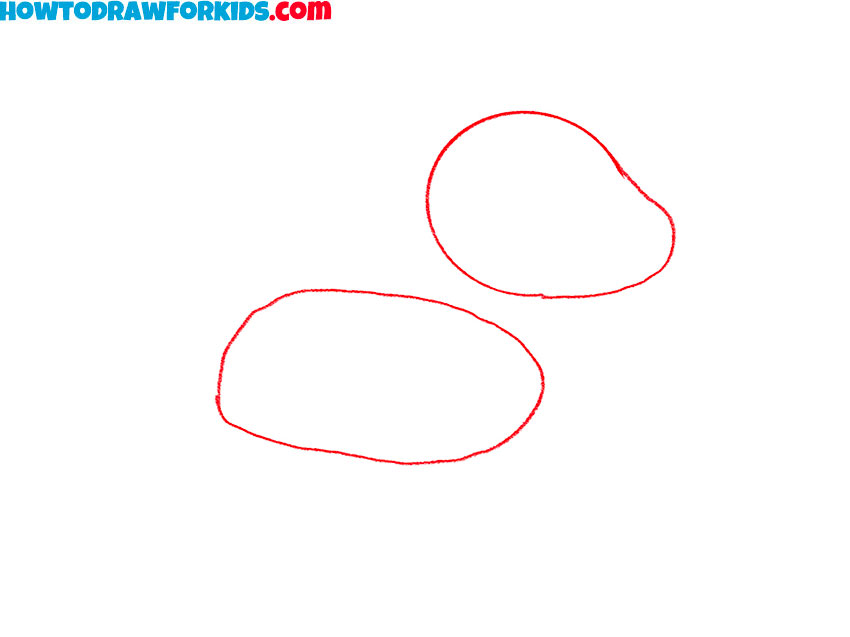
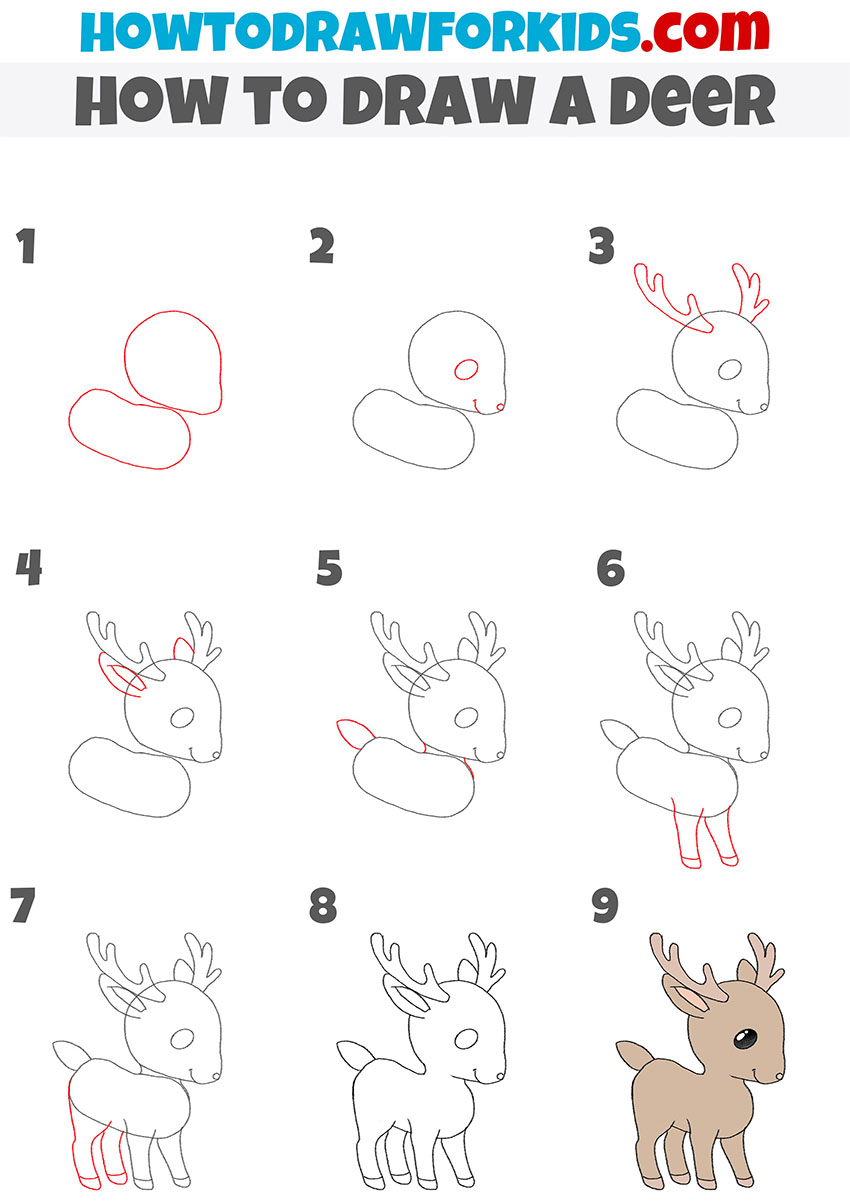
- Draw the deer’s head and torso.
Start your drawing of a deer by sketching two simple ovals. The larger oval will serve as the body of the deer, while the smaller one represents its head. Use light lines for this step since adjustments might be needed later. Keep the shapes smooth and rounded, as this will make the deer appear soft and cartoonish.
- Draw the deer’s neck and tail.
In this step, connect the head and body by drawing two curved lines to create the neck. The lines should taper slightly as they meet the head, giving the neck a natural appearance. Next, sketch a small, rounded shape at the back of the body to form the tail of the deer.

- Define the facial features.
Draw two large, round eyes in the smaller oval. After that, draw the nose of the deer with a small or circle. Then, add a small curved line near the bottom of the oval to represent the mouth. Keep these features simple and symmetrical.

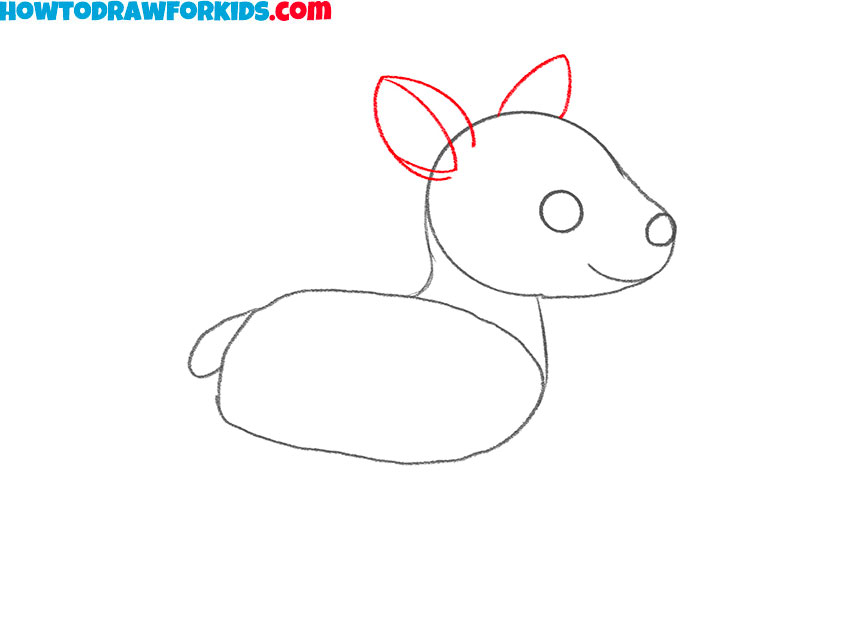
- Draw the deer’s ears.
Add two ears on top of the head to further shape the deer’s appearance. Draw each ear as a simple leaf-like shape, making them tilted slightly to the sides. Inside each ear, add a smaller shape to define the inner ear area. Keep your lines clean and smooth.
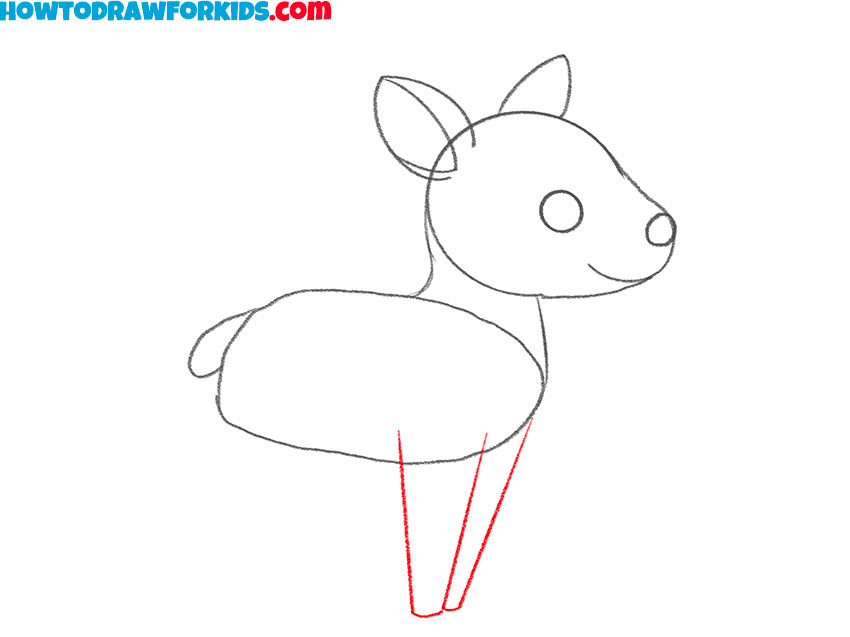
- Draw the front legs of the deer.
Move on to the body and sketch the deer’s front legs. Draw two elongated shapes extending downward from the body. Each leg should taper slightly at the bottom, ending in a flat line to indicate the hooves. Keep the lines straight, simple, and clean.
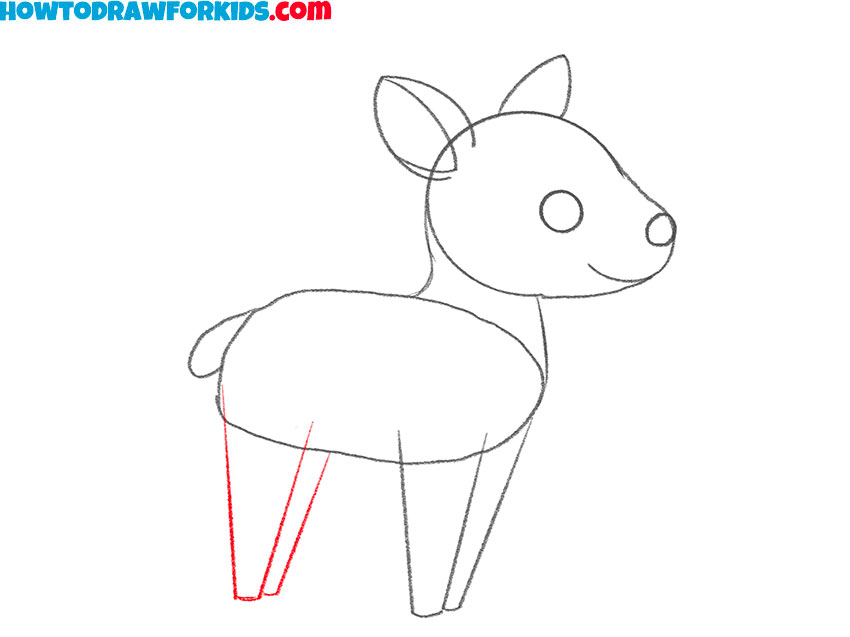
- Add the hind legs.
Like the front legs, the hind legs of the deer should be elongated shapes that taper at the bottom. To make the back legs look more realistic, you can draw them a little thicker than the front ones. Keep the proportions consistent with the front legs.
- Add spots and detail the hooves.
Draw a few oval-shaped spots on the back to mimic the characteristic markings of a young deer. These spots can vary in size and should be located randomly. Next, add horizontal lines near the bottom of each leg to define the hooves. Also, draw the lines on the chest and bottom of the torso.

- Erase the auxiliary lines.
In this step, refine your drawing of a deer by darkening the outline and erasing any unnecessary guidelines. Smooth out any rough edges to give the deer drawing a polished appearance. Check the proportions and details to ensure everything looks balanced and clean.

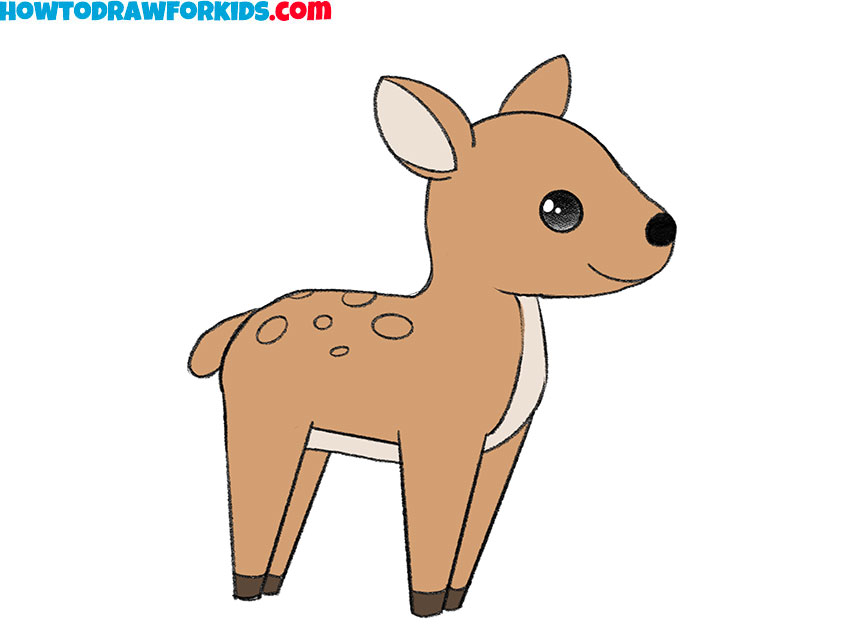
- Color the deer drawing.
Use shades of brown for the body, lighter tones for the spots, and a darker shade for the hooves. Add a touch of pink to the inner ears and black for the eyes. To make the eyes look more natural, add spots of highlights inside them. Use smooth and even strokes to create a clean and finished look.
Additional Content
This PDF contains a concise version of the deer drawing lesson, along with additional materials. It is designed to be a handy reference, allowing you to practice drawing even without an Internet connection. Download and enjoy drawing anytime, anywhere!
Alternative Drawing Techniques
To provide a variety of options, several alternative drawing techniques for sketching a deer have been developed. These methods are intended to help improve drawing skills and offer opportunities for practice and refinement.
By trying different styles, you can improve your ability to draw deer while also developing broader drawing skills. You can choose one of these methods or try them all.
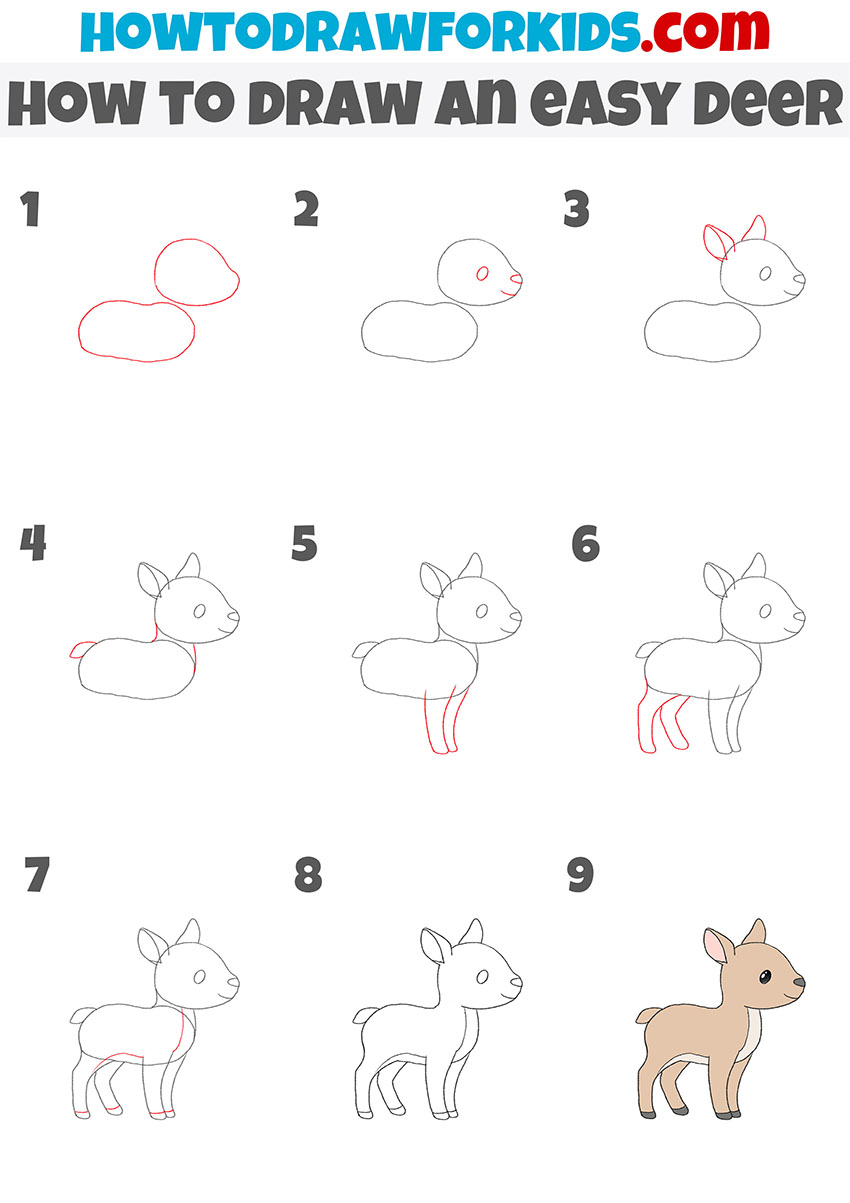
How to Draw an Easy Deer
The difference between this deer drawing tutorial and the first is the overall simplicity. The shapes in this tutorial are more basic, with fewer details such as spots or complex outlines. Also, this guide demonstrates a slight different sequence of steps. But overall, this tutorial is quite similar to the first one.
To draw an easy deer, begin by sketching two ovals for the head and body, positioning them so they overlap slightly. Add a small curved tail at the back of the body. Draw the face details by adding a round eye and a simple curved line for the nose and mouth. Next, sketch two pointed ears on top of the head. Add a curved neck connecting the head and body.
For the limbs, draw two simple front legs extending downward and two back legs with slight bends for a natural pose. Add small lines at the bottom of the legs for hooves. Refine the outline by erasing unnecessary guidelines and smoothening the lines. Finish the drawing by coloring the deer with light brown for the body, pink for the inner ears, and black for the hooves and eyes.
How to Draw a Deer with Antlers
The main difference between this tutorial and the first two is the inclusion of antlers, which makes the deer appear older and more mature. Additionally, in this deer drawing tutorial you can see a different step sequence.
To draw a deer with antlers, begin by sketching a rounded oval for the head and a larger horizontal oval for the body, slightly overlapping. Add an eye and a small nose on the head using simple shapes. Draw antlers extending from the top of the head, creating curved and branched lines on each side. Add two pointed ears, positioning them below the antlers. Sketch a small curved tail at the back of the body. Draw the neck by connecting the head and body with curved lines.
Add two front legs, ensuring they taper slightly at the bottom. Then draw the back legs. Refine the lines of your deer drawing by erasing unnecessary guidelines and ensuring smooth edges. Finish the drawing by coloring the deer with brown tones for the body, darker shades for the antlers and hooves, and black for the eyes
Conclusion
This lesson on how to draw a deer was a simple but detailed guide for young artists, their parents, or teachers. In this tutorial, we covered step-by-step instructions for drawing this elegant forest animal. We explored how to draw a version of a deer with antlers as well as one without, while also building knowledge in drawing animals.
If you found this tutorial on how to draw a deer helpful and informative, feel free to share your thoughts in the comments. Additionally, visit the Animals category to learn how to draw dogs, create accurate drawings of cats, and sketch a variety of other creatures. Remember to follow on social media to stay updated on new lessons.