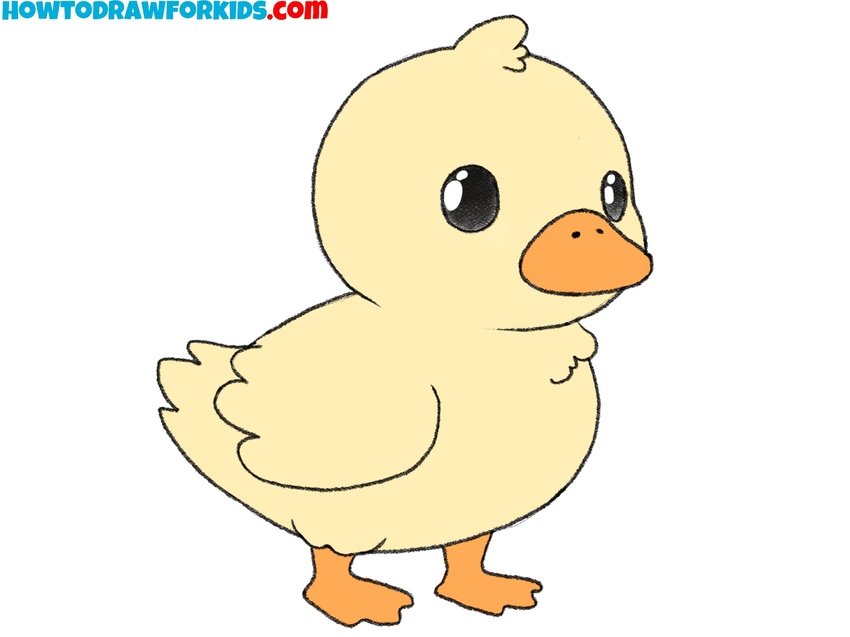
How to Draw a Duck
I recommend completing this helpful step-by-step tutorial, where I will show and explain how to draw a duck using five different methods.
How to Draw a Duck: Introduction
This tutorial on how to draw a duck is part of my bird drawing tutorial series. After this instruction, try other lessons from this series, for example, the tutorials where I show how to draw a pigeon or my simple turkey drawing guide.
Ducks are one of the most common birds encountered by humans in both the wild and at home. You can draw a duck in various styles, and by following this guide, you can give it different looks.
There are several aspects to consider when drawing a duck. For instance, it’s important to keep the outlines smooth and rounded to give the bird a natural look. It’s also important to include recognizable features like the duck’s beak and feet.
As with other guides, I’ll provide additional duck drawing tutorials at the end of this page. This can help you practice your skills and increase your knowledge in drawing birds.
Duck Drawing Tutorial
Materials
- Pencil
- Paper
- Eraser
- Coloring supplies
Time needed: 30 minutes
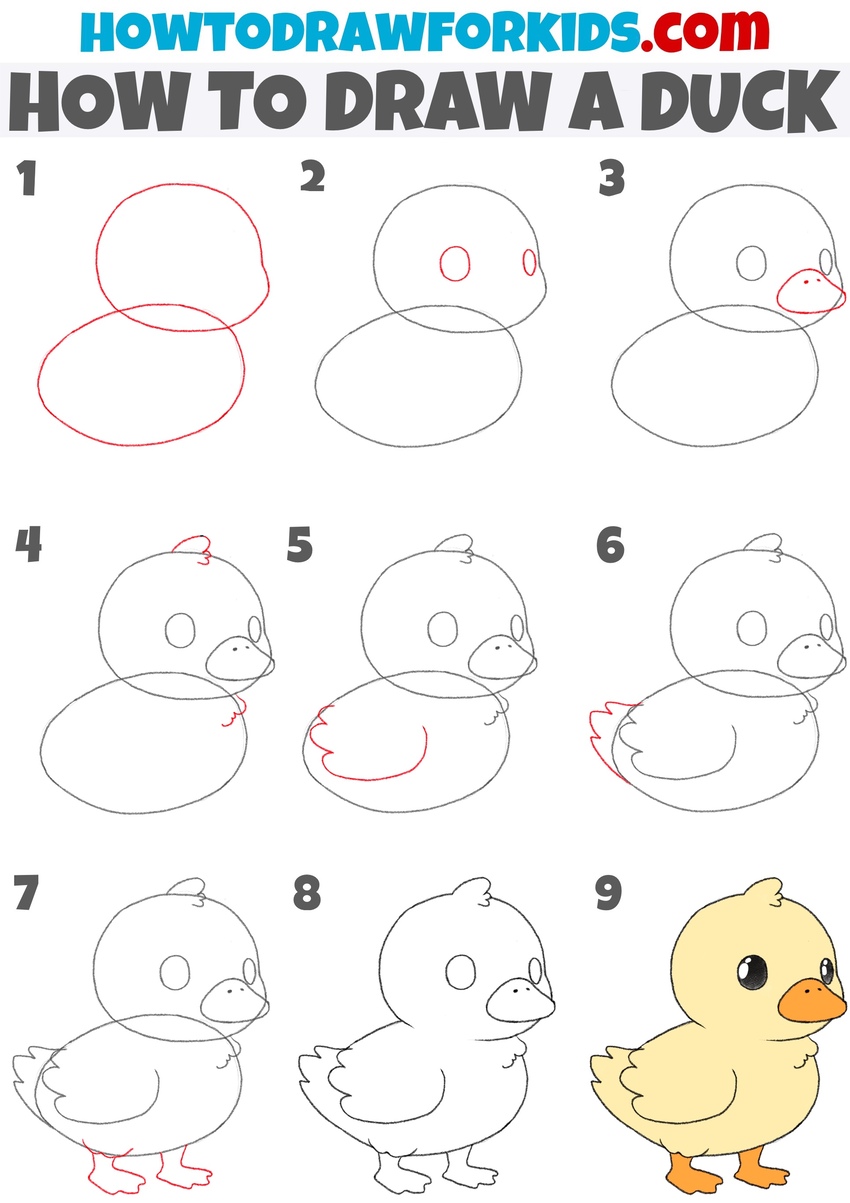
How to Draw a Duck
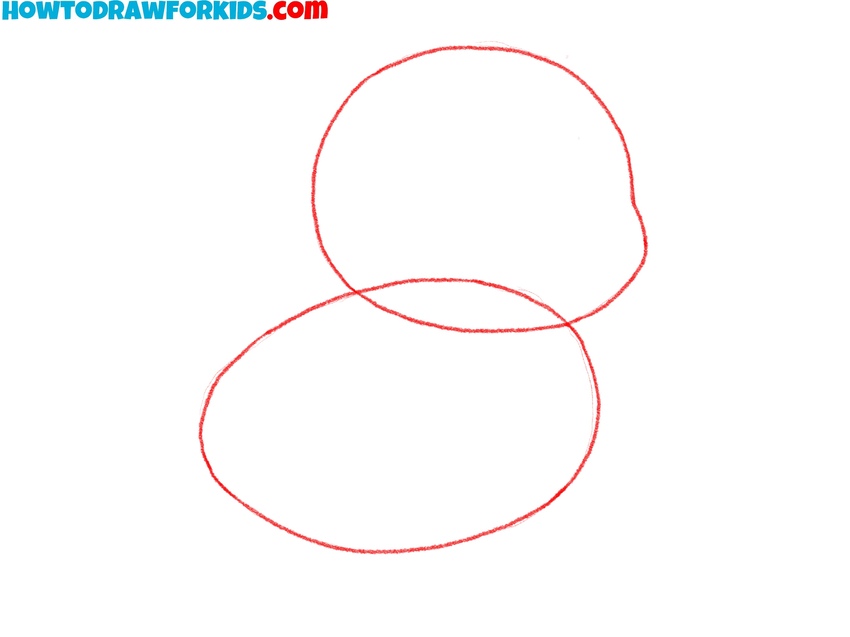
- Sketch the head and body.
Start drawing a duck by sketching two ovals that overlap slightly. The upper oval will represent the duck’s head, while the lower, larger oval forms the body. Make the head oval smaller to give the duck proper proportions. Use light strokes to sketch these shapes so you can easily erase or adjust them later.
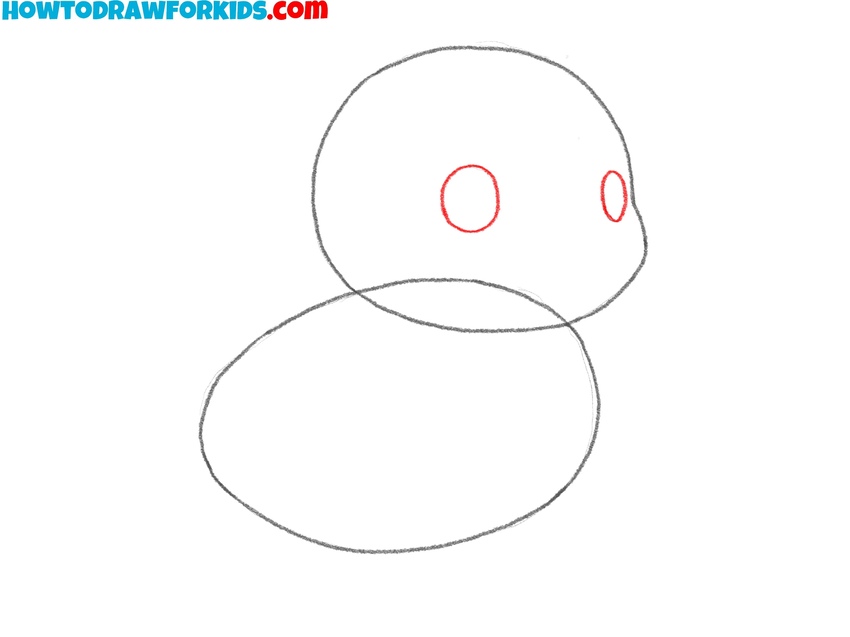
- Add the eyes.
Next, draw two circles or ovals in the upper oval for the eyes of the duck. We are drawing a duck in a rather simplified style, so the bird’s eyes are very simplified here. But to give your duck a more realistic look, give the eyes an almond shape.
- Add the beak of the bird.
Now, draw the beak of the duck by sketching a slightly rounded triangular shape. Place this geometric shape just below the eyes from the previous step. After that, draw the nostrils of the duck using two simple dots at the top surface of the beak.

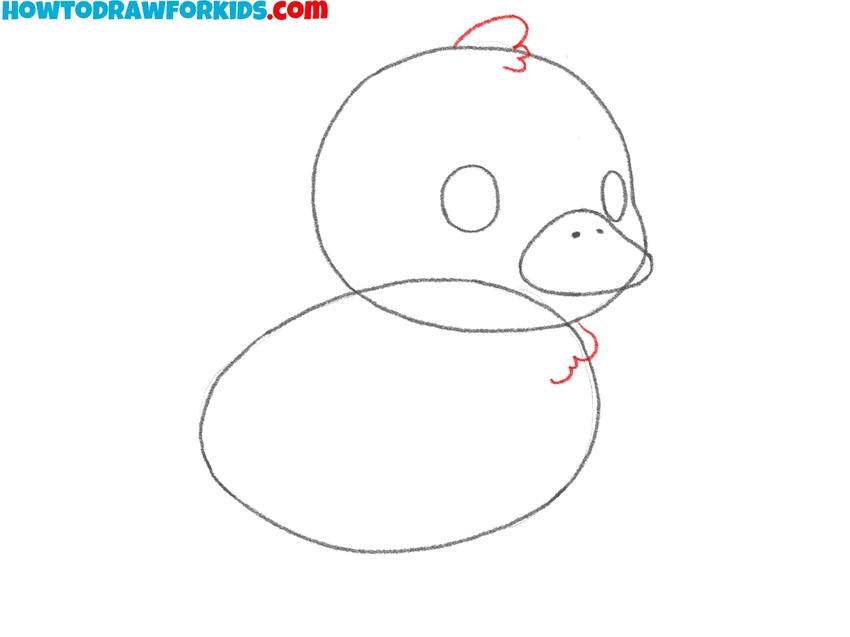
- Add the head and chest tufts.
Sketch a small tuft of feathers on top of the duck’s head using a few curved lines. After that, draw another tuft of feathers on the chest of the duck. These should be short, smooth strokes that give the duck more cute look without over-complicating the design.
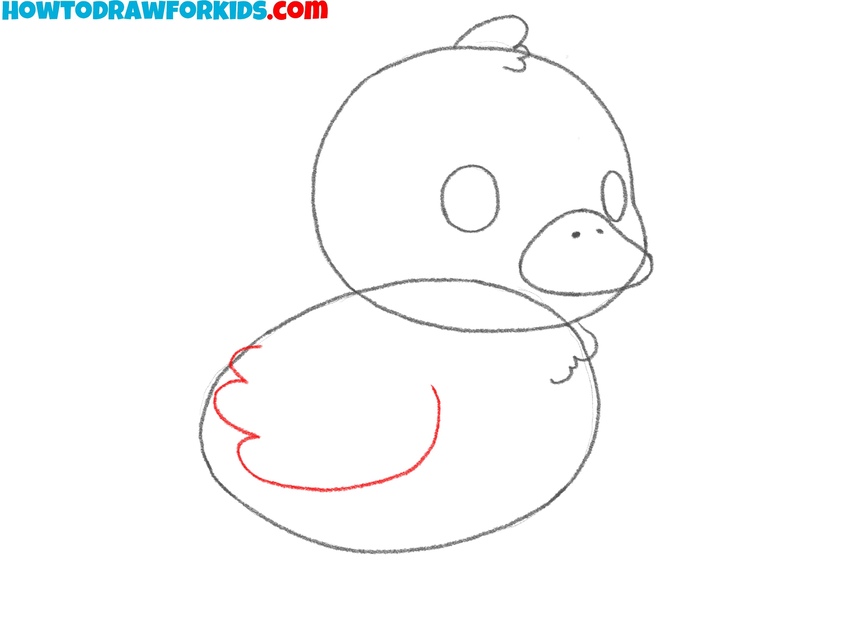
- Illustrate the wing.
To illustrate the wing of the duck, sketch a curved line along the body, starting from the middle and extending toward the back. Adding small curved lines inside the wing can illustrate feather detail without making it too complicated.
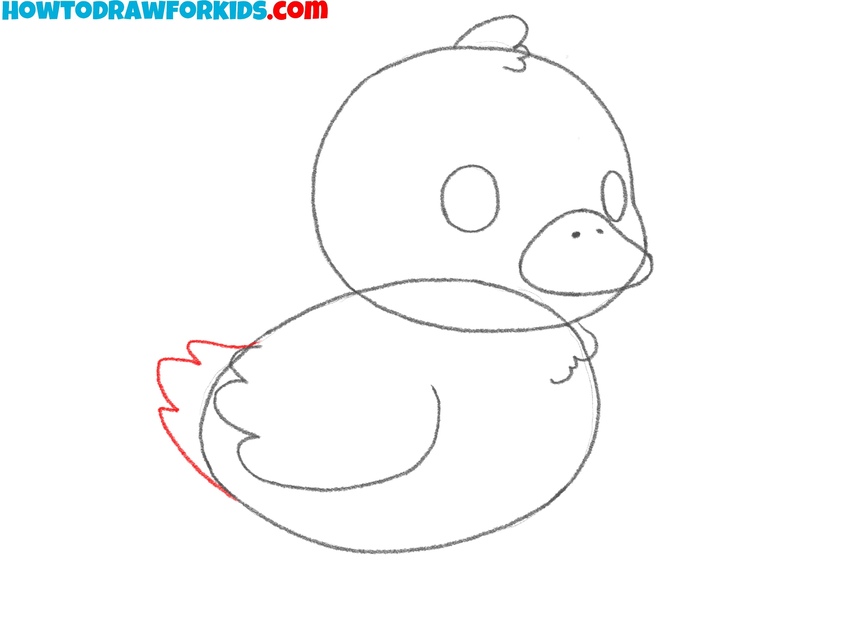
- Sketch the tail.
Now, sketch the tail of the duck at the rear of the body using three or four curved lines. The tail should have a pointed but soft appearance, so avoid using sharp angles. Focus on keeping the lines smooth and rounded to match the rest of the duck’s body.
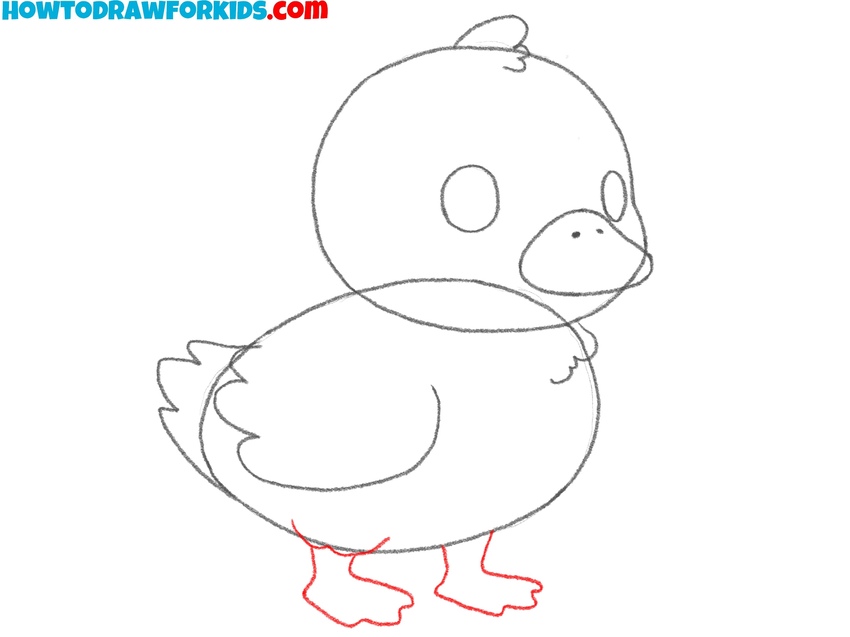
- Add the legs and feet.
To illustrate the legs of the bird, first sketch the thigh at the bottom of the torso with a smooth curved line. The draw the legs with short simple limes. After that, draw the webbing feet of the duck. Make sure to use curved strokes to create the webbing between the toes.
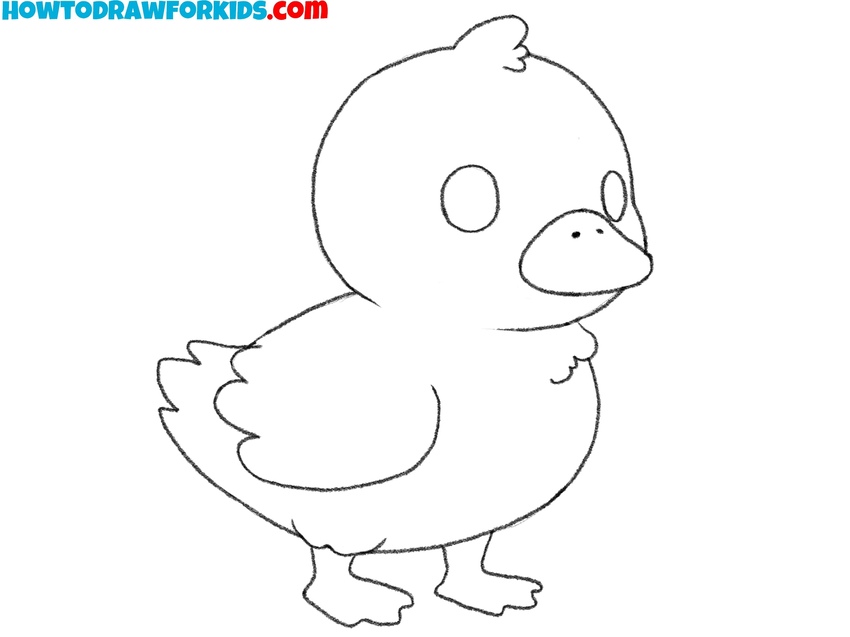
- Finalize the duck sketch.
Carefully go over the entire duck drawing and refine the lines. Smoothen the edges, ensuring there are no sharp angles, and erase any overlapping or unnecessary guidelines. Also, you can give your duck sketch more detailed look adding feathers and other details.
- Color the duck.
A pale yellow or light beige works well for the body, while orange is suitable for the beak and feet. If you draw an adult duck, you can color it using green, gray or other natural tones. Also, you can a bit of shading to give the duck some dimension, and use black for the eyes.

How to Draw a Duck: Additional Methods
After completing the basic duck drawing tutorial, you can move on to additional instructions that focus on refining details such as drawing the duck in different positions and different styles. These extra tutorials will help improve your drawing and provide more practice.
Alternative Duck Drawing Tutorial
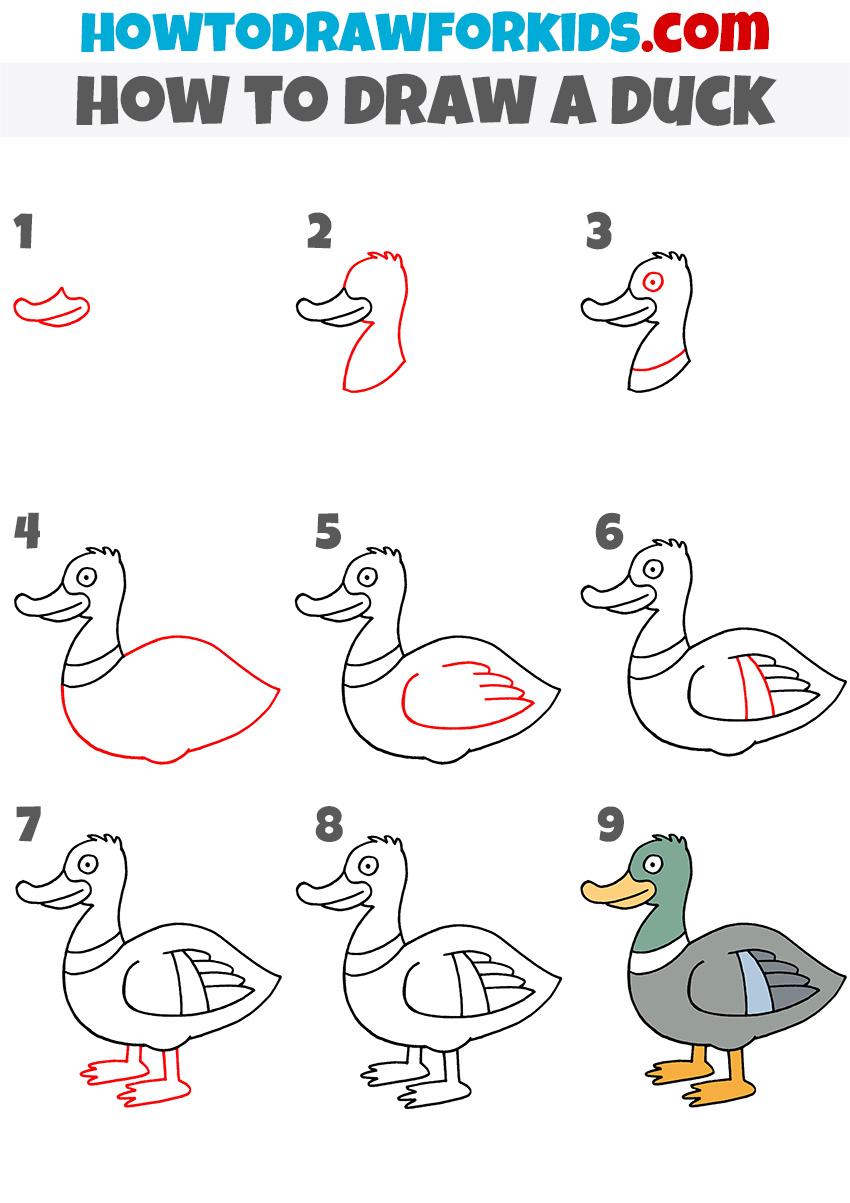
Above, we drew a baby duck, characterized by its rounded shapes and more youthful proportions. Additionally, the duck was colored yellow, which is typical for baby ducks. Now, let’s draw an adult duck, which has its own distinct features. In this tutorial, I will also use a different sequence of steps.
So, to draw a duck with this method sketch the bird’s beak as a simple curved shape. Then, add the outline of the head, extending into the neck. Draw a circular shape for the eye and add a curved line around the base of the neck. Next, sketch the outline of the duck’s body using smooth, continuous lines. Draw the wing on the side of the body with a curved shape, and add details for the feathers.
Refine the body by adding a few straight lines to represent the pattern of the feathers on the wing. Then, draw the legs and webbed feet underneath the duck. Finish the duck drawing by going over the outline to clean up any rough areas and adding final details. Once complete, you can add color to the duck, such as green for the head, brown for the wings, and orange for the feet and beak.
How to Draw a Duck for Kids
Many aspiring artists like to draw simple objects that help them believe in themselves. I support this great idea and therefore we have created a guide on how to draw a duck for kids. This instruction is more simple that the first two guides, so it will be more suitable for kids.
First, sketch two ovals: a smaller one at the top for the head and a larger one below it for the body. Make sure the head overlaps slightly with the body. Next, add the beak by drawing two curved shapes extending from the head, keeping the lines soft and rounded. After that, sketch the duck’s neck by connecting the head and body with smooth lines.
Add a small circle for the eye on the head and a wing on the side of the body with three curved lines to illustrate feathers. Then, draw the tail of the duck using small, pointed strokes at the rear. Afterward, sketch the legs and webbed feet underneath the body, positioning them near the back of the duck. Finally, review the drawing, erase any unnecessary guidelines, and refine the lines. Complete the duck drawing by coloring it, using yellow for the body and orange for the beak and feet.

How to Draw a Duck for Kindergarten
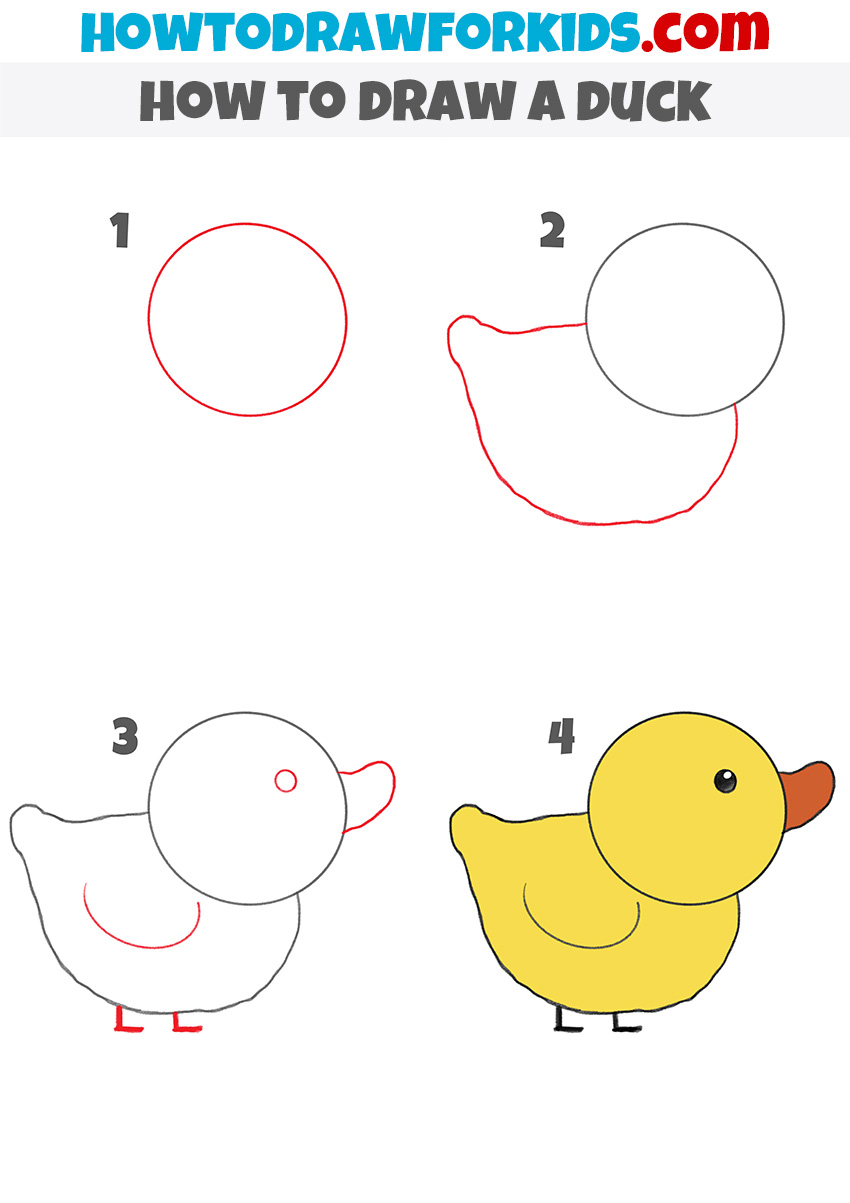
And we move to the simplest duck drawing tutorial on this page. In this tutorial, you will need to be able to make smooth, rounded lines. The head is an even circle, and the body is also rounded. The feet are very small, the beak is of medium size. Note that in this illustration, the duck does not have a neck. Therefore, it looks more like the little duckling.
First, sketch a large circle for the duck’s head. Then, from the bottom left of the head, sketch the body using a curved line. Next, draw a small round shape in the center of the head to represent the eye and add a simple beak extending from the front of the head.
Afterward, draw a curved line on the duck’s body to indicate the wing, keeping the line really simple. Add two short, straight lines at the bottom of the body for the legs, followed by small simple feet. Once the outline is complete, refine the lines and erase any unnecessary guidelines. Finally, color the duck with a yellow body and orange beak, and fill in the eye with black to complete the drawing.
How to Draw a Swimming Duck
Now we will draw a duck that appears to be swimming on the page. We will not draw the water at this stage; you can do that separately by following my lesson on how to draw water. The important thing to note is that a duck swimming in water does not have its legs visible, as they are hidden beneath the surface.
Sketch a large circle for the duck’s head. Below the head, sketch the body using a curved line that starts from the base of the head, forming the duck’s back and tail. Next, draw a small oval inside the head to represent the eye. After that, sketch the beak by drawing two overlapping oval shapes extending from the front of the head.
Then, draw a simple curved line on the side of the body to indicate the wing. Make sure to keep the lines soft and rounded. Refine the outline by erasing any unnecessary guidelines. Finally, add color to your drawing. Use light yellow for the body and a soft orange for the beak. The eye can be filled in with black with white spots for highlights.