How to Draw a Full Moon
The full moon’s allure is timeless, and capturing its luminous presence on paper is a skill I’m excited to share with you. In this tutorial, I’ll guide you on how to draw a full moon, focusing on its craggy surface. My method breaks down the moon’s complexities into manageable steps that anyone can follow with ease.
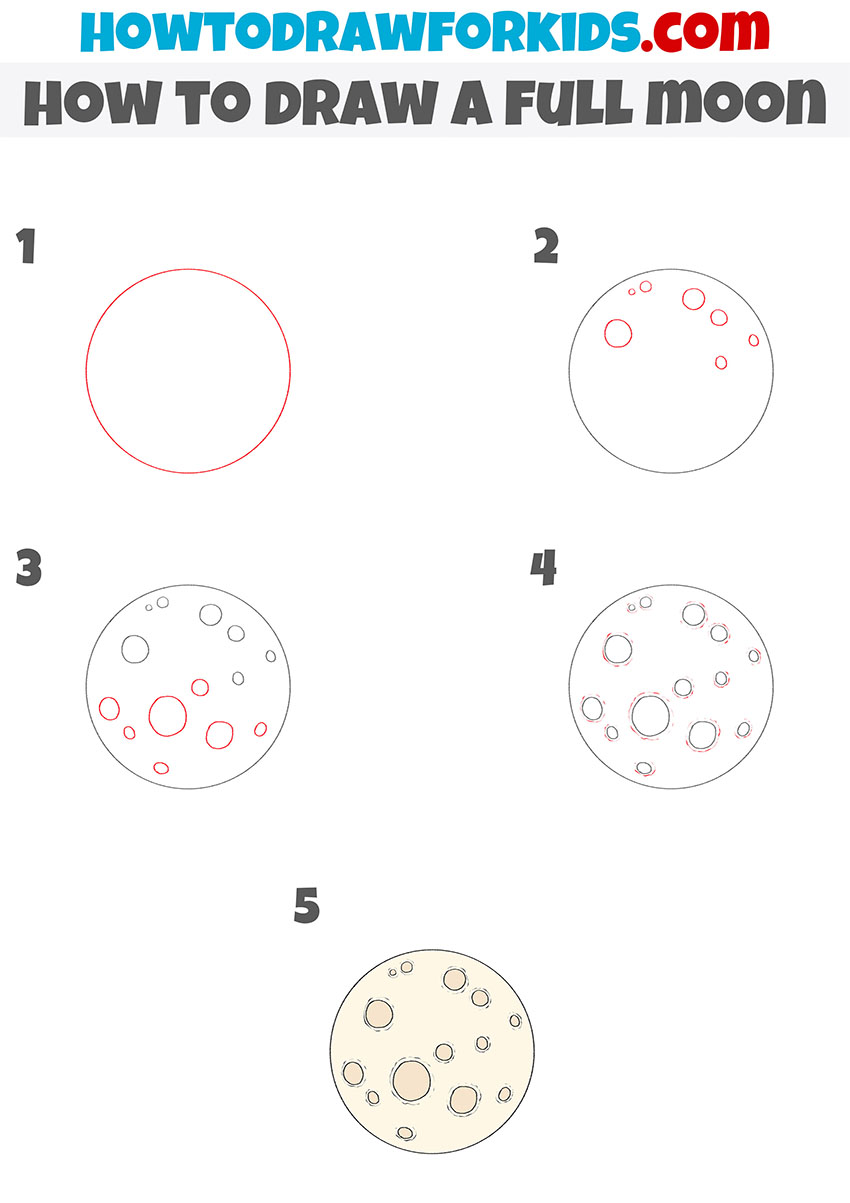
How to Draw a Full Moon: Basic Information
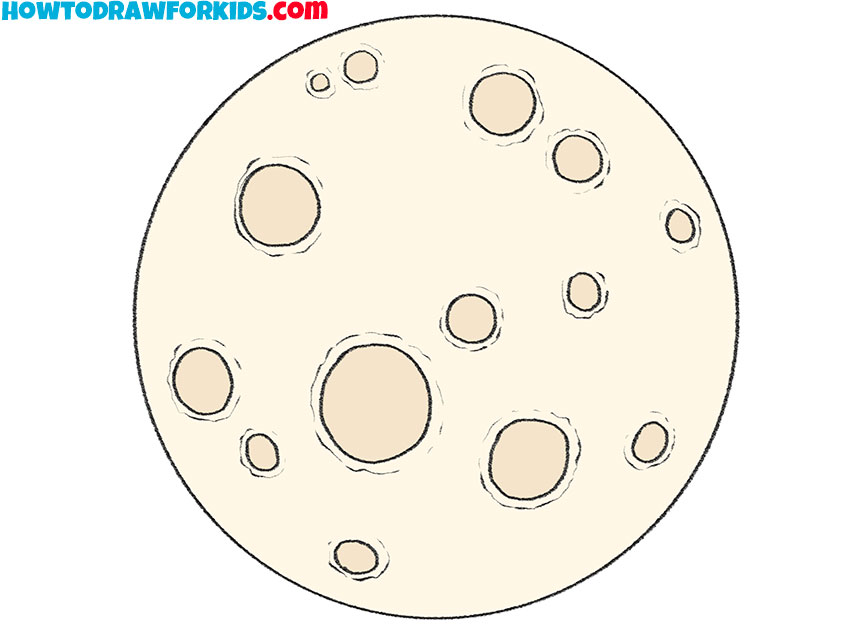
Gazing up at the night sky, the full moon has always captivated me, and I wanted to share this wonder through my tutorial on how to draw a full moon. By breaking down the moon’s surface into easy-to-draw craters and textures, I aim to make this drawing lesson accessible for all.
In creating this lesson, I emphasized the importance of circles of various sizes to represent the moon’s craters. These shapes, when shaded correctly, give the illustration depth and realism. The step-by-step process is designed to be leisurely and enjoyable, ensuring that anyone can achieve a realistic and striking lunar illustration.
By following this guide to draw a full moon, you’ll learn to capture not just its appearance but also the serene ambiance it brings to the night sky. My method encourages you to pause and appreciate the simplicity behind the moon’s complex facade. I hope you find as much peace in drawing the moon as I do in teaching you.
Full Moon Drawing Tutorial
Materials
- Pencil
- Paper
- Eraser
- Coloring supplies
Time needed: 30 minutes
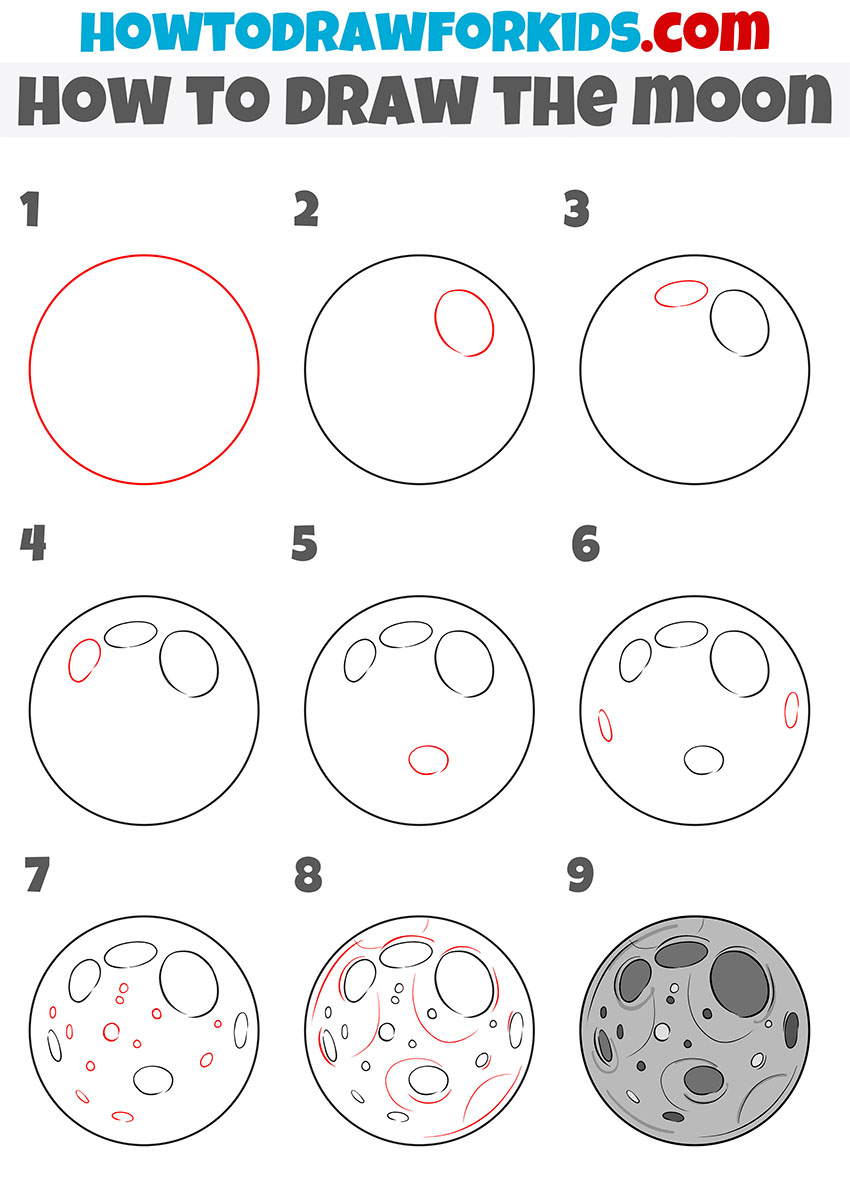
How to Draw a Full Moon
- Draw the outer outline.
The circular shape is key to capturing the essence of a full moon. Steady your hand and try to make the line smooth, avoiding any sharp edges or irregularities.

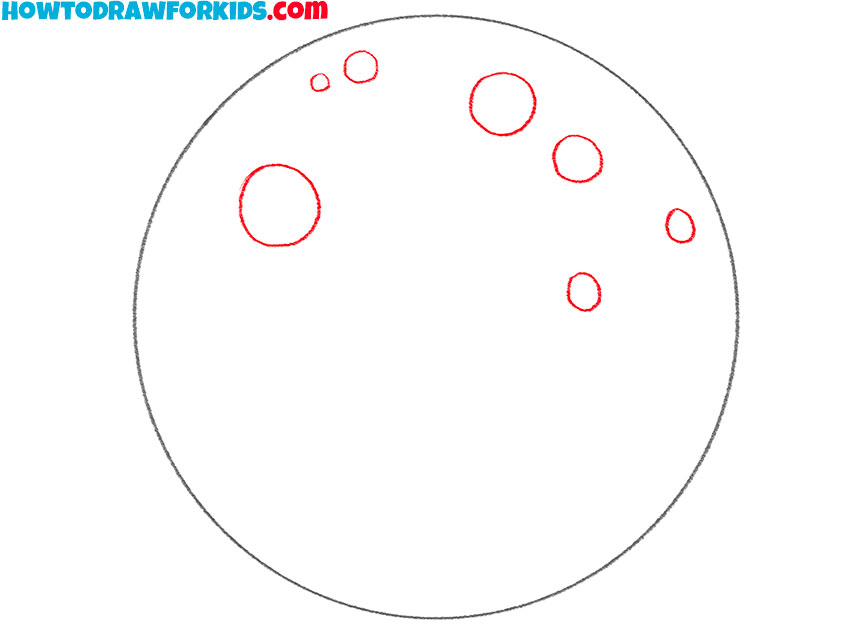
- Add the spots on the top of the Moon.
Inside the circle, lightly sketch smaller circles of various sizes to represent the moon’s craters. These don’t have to be perfectly round; slight irregularities can make the drawing more realistic
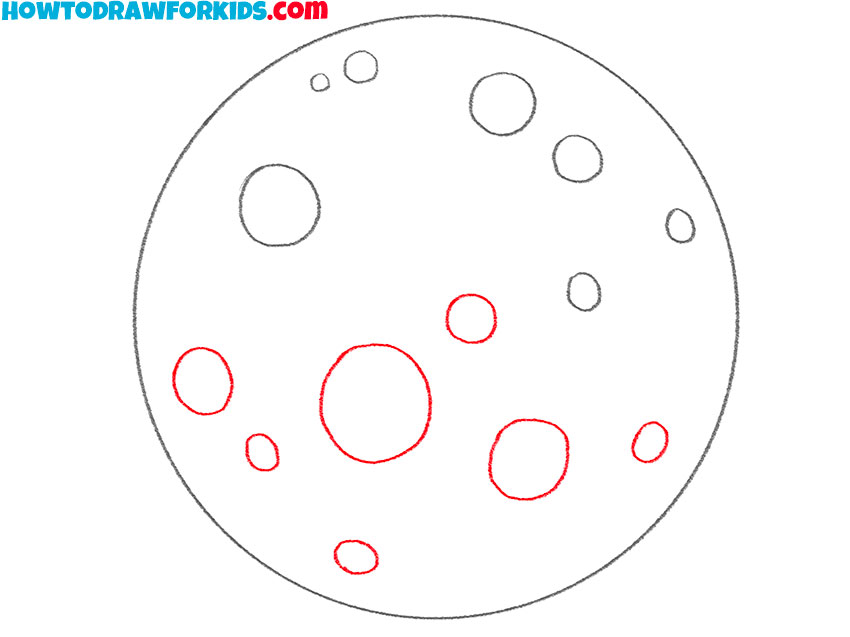
- Depict the spots on the bottom of the Moon.
As you outline the craters, remember that the line weight can help convey depth, with heavier lines suggesting a deeper or more shadowed crater.
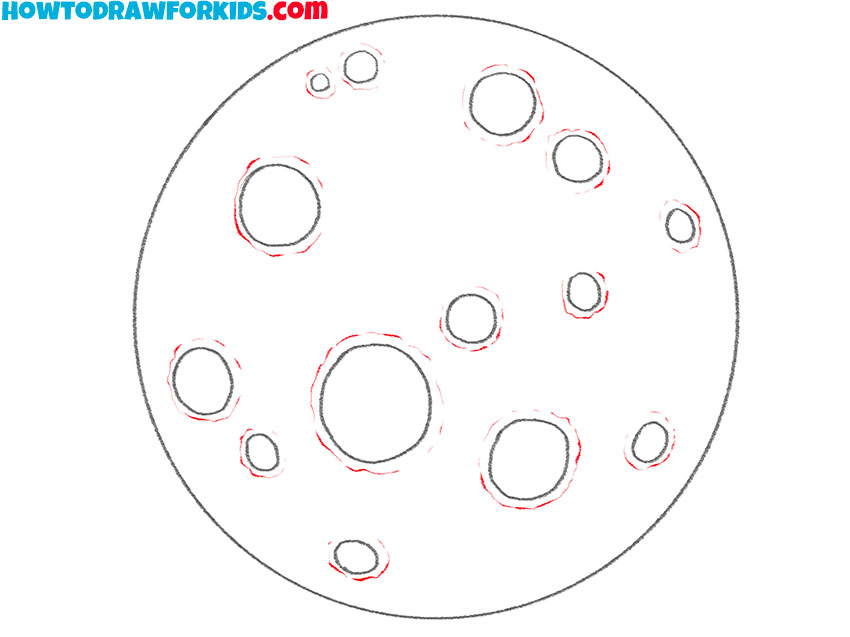
- Add details.
With the craters outlined, start shading boundaries around craters. The shading should be darker on one side of each crater, typically the side opposite your imagined light source.
- Color the drawing.
For coloring, you can use different shades of gray or brown. As I said, darker colors give a sense of depth, so use this technique to color the craters of the moon.

Additional Content
To enhance your experience in capturing the moon’s mystique, I’ve crafted a free PDF file that complements this tutorial. This concise version distills the drawing process into fundamental steps, perfect for practicing offline, ensuring you can continue honing your skills wherever you may be, regardless of internet access.
This downloadable resource serves as a quick reference, a portable guide to accompany your sketching sessions under the stars or in the cozy corner of a café. It’s designed to be straightforward, providing just enough guidance to support your journey in replicating the full moon’s serene beauty on paper.
By offering this PDF, my intention is to equip you with a tool that simplifies the artistic process. Whether you’re waiting for a friend or soaking in the solitude of nature, this file will be there to guide your pencil, turning blank pages into nocturnal landscapes aglow with the full moon’s light.
Alternative Drawing Method
In my dedication to nurturing your artistic growth, I’ve also fashioned an alternate moon drawing technique, aiming to bolster your practice and polish your skills. This variant method focuses on varying textural effects to portray the moon’s surface, offering a new set of challenges and insights.
This secondary technique places a greater emphasis on the contrast between light and dark, simulating the moon’s luminosity against the night sky. By adjusting the intensity of your pencil strokes and experimenting with layering, you’ll gain proficiency in creating a dynamic range of textures.
I encourage you to embrace this alternative method as a means to refine your artistic talents. As you alternate between the techniques, observe how your depictions of the moon evolve, growing more lifelike with each attempt. This practice is the key to transforming simple drawings into compelling works of art.
How to Draw the Moon: More Practice
In this artistic guide, I walk you through a technique for drawing the moon that embraces the use of darker shades to enhance its craters and surface features. This method is chosen to replicate the moon’s natural shadows and textures that we observe from earth. It starts with a simple circle, gradually building up to a textured lunar surface.
The next step focuses on adding variously sized craters, outlining them before filling in with darker tones to give the moon its distinctive, pockmarked look. This contrast between the moon’s surface and the craters’ shadows gives the drawing a realistic depth.
By choosing darker shades for the final touches, this method captures the essence of the moon’s surface, with all its imperfections and beauty. This approach not only teaches you how to draw the moon but also the importance of shadowing in art, leaving you with a strikingly realistic lunar representation.
Technical Details of Moon Sketching
As our lunar sketching session comes to a close, let’s take a moment to appreciate the technical nuances that elevate a simple drawing to one of astronomical accuracy. Each detail, no matter how small, contributes to the overall realism of our celestial subject.
- Precision of the Circle: The foundational circle must be as perfect as possible; it sets the stage for the entire drawing.
- Varied Crater Sizes: Diverse crater dimensions add depth and authenticity to the moon’s surface.
- Shading Gradience: Subtle gradients within the craters suggest the interplay of light and shadow on the lunar landscape.
By incorporating these nuances, your artwork transcends mere replication; it becomes an exploration of texture and contrast, revealing the moon’s rugged beauty. As you continue to sketch and hone your craft, remember that each technical subtlety you master is a step towards a more profound artistic expression.
Next Steps After Your Moon Drawing
To elevate your portrayal of the moon and embed it within the stellar expanse of space, consider the following enhancements. These additions will not only refine your lunar landscape but will also give it a place within the greater celestial narrative:
- Incorporate Stars: Dot the background with variously sized stars to emulate the starry night sky.
- Sketch Nearby Planets: Introduce simple circles or rings to suggest other planets or moons in the lunar vicinity.
- Add a Gradient Sky: Use a soft gradient to create a night sky that transitions from the dark void of space to the glowing horizon.
Every detail you add weaves complexity and context into your drawing, transforming a solitary moon into a portal to the universe. These enhancements don’t just improve your current drawing; they expand your repertoire of techniques and your perspective as an artist.
May the moon you’ve drawn not only reflect your growing abilities but also inspire you to continue exploring the boundless possibilities that the canvas of space offers. Keep reaching for the stars, and let your creativity know no bounds.
Conclusion
Now that our celestial masterpiece is complete, why stop there? My site is brimming with tutorials on a wide array of subjects, from sketching the intricate details of a tree branch to capturing the eerie essence of a zombie. Each lesson is designed to challenge and inspire, pushing your boundaries further into the artistic unknown.
Don’t miss out on any new artistic explorations – make sure to follow my social media channels for updates on fresh content. And if there’s something specific you’re hoping to learn, I encourage you to leave a comment below the lesson. Your input is invaluable in crafting future tutorials that light up your creative path.

