How to Draw a Glass of Water
In this step-by-step tutorial, I’ll show you how to draw a glass of water using a simple method for kids. After the main tutorial, I’ll also demonstrate two additional ways, each using a different approach and style.
Prepare to Draw a Glass of Water
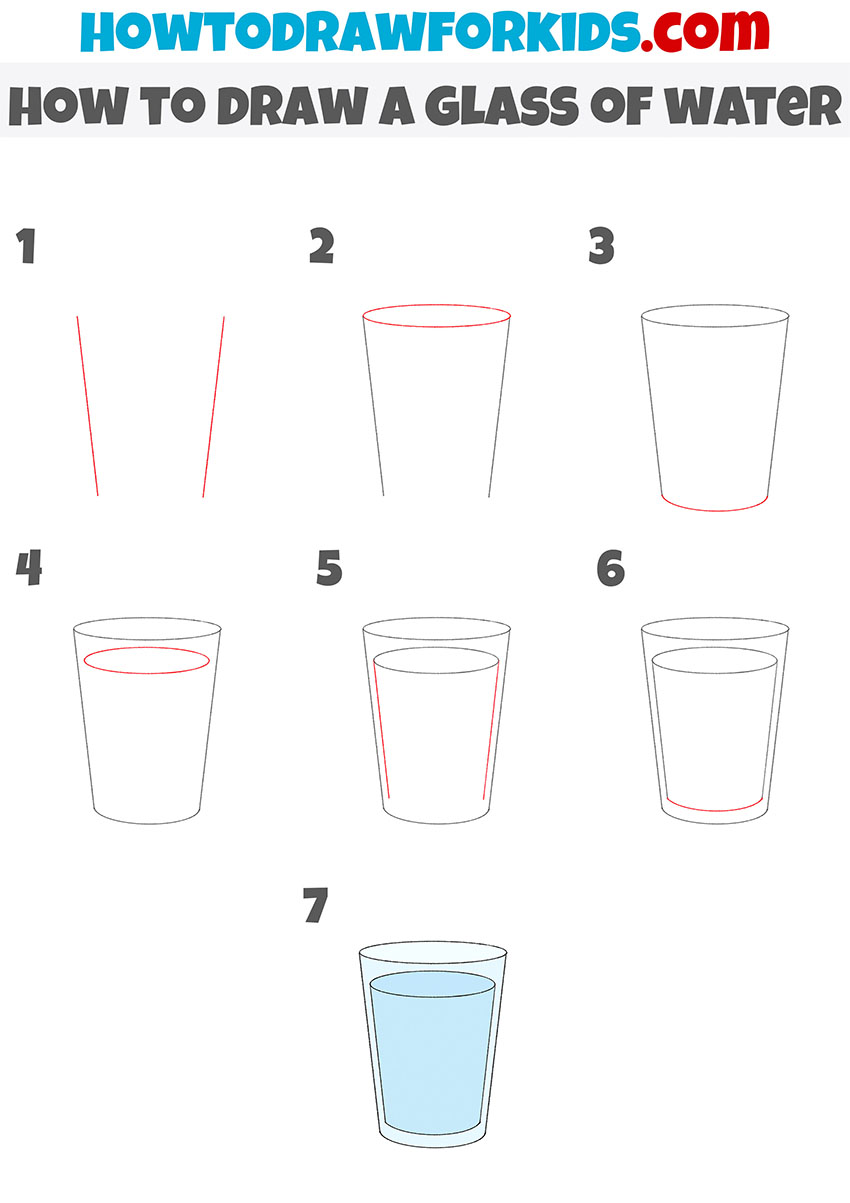
Especially for children and beginners, I have prepared a simple guide on how to draw a glass of water. The instruction includes seven steps that you can easily follow, even with little experience in drawing.
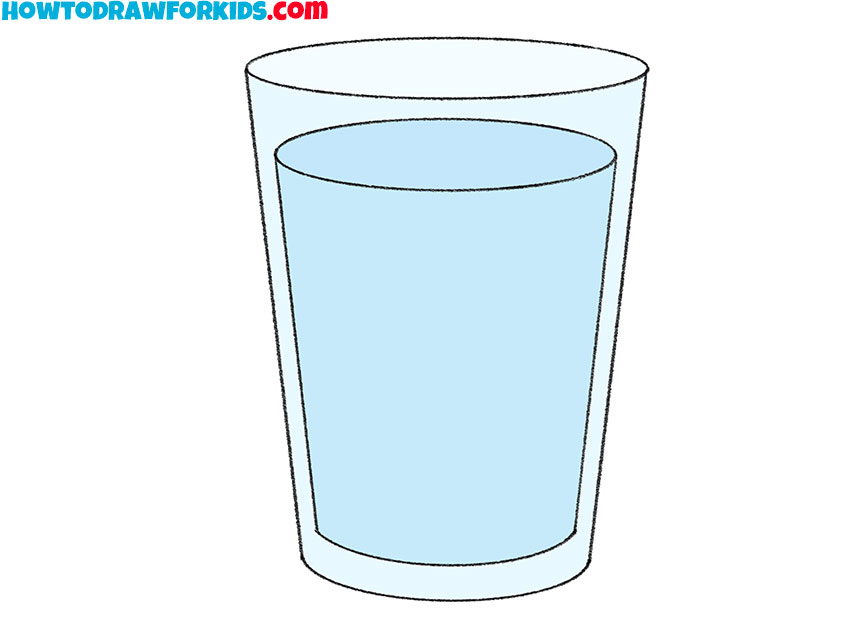
The figure shows a standard-shaped transparent glass of water beaker filled almost to the brim with clean water. In this tutorial, you will once again practice drawing straight lines. Your task is to correctly draw the outer contours.
A glass of water has a cylindrical shape. If you have to draw any cylindrical object, then at the beginning of drawing you must determine the central axis of the object.
To do this, you need to draw a straight vertical line. At the initial stage, I recommend that you use thin lines, which can later be easily corrected or removed.
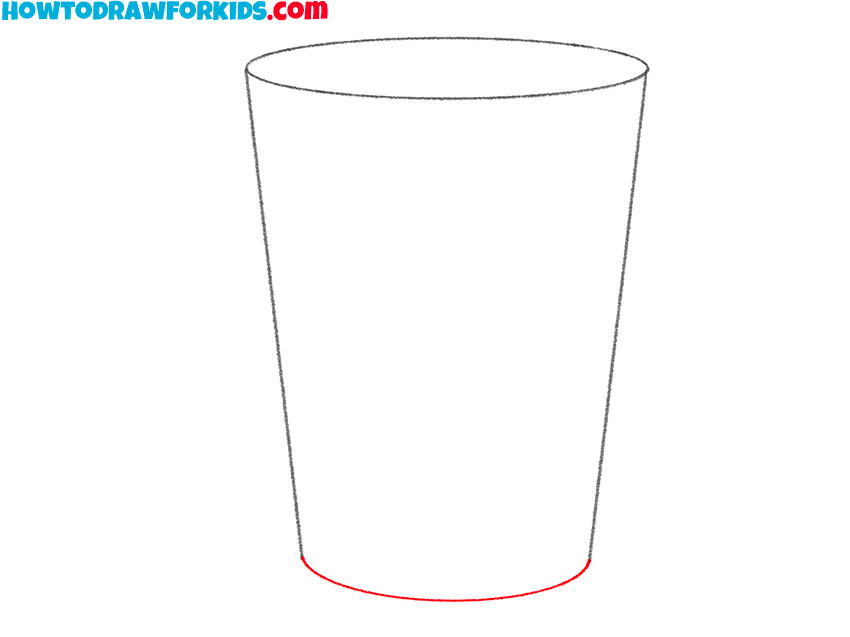
The upper and lower contours of the glass of water are smooth ellipses. I draw your attention to the fact that the side contours of the ellipses should not be sharp, but should have smooth rounded contours.
This is a mistake many new artists make, but I hope you will be careful and do it right.
Steps for Drawing a Glass of Water
Materials
- Pencil
- Paper
- Eraser
- Coloring supplies
Time needed: 30 minutes
How to Draw a Glass of Water
- Draw the sides of the glass.
Depict two straight lines at some distance from each other.

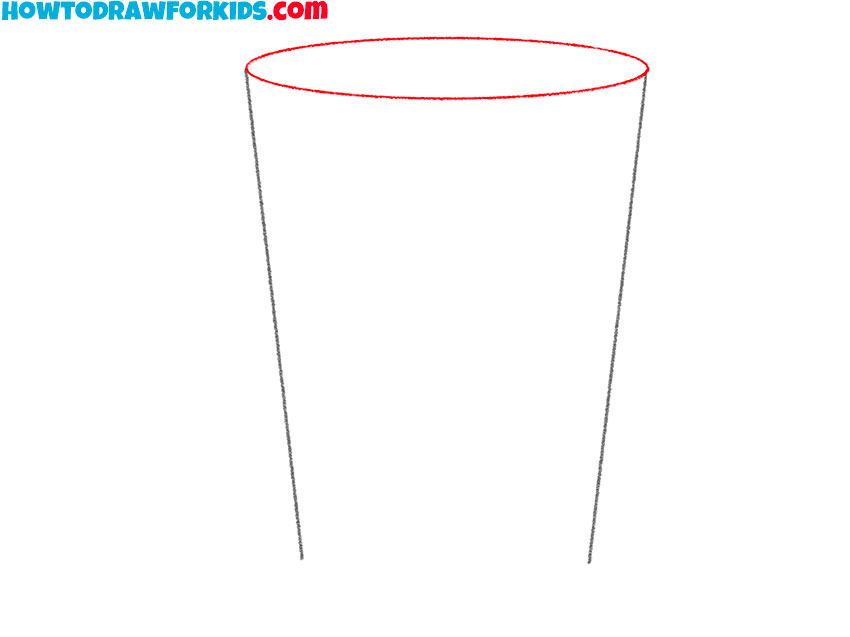
- Depict the top outline of the glass.
Between the two upper ends of the straight lines, carefully draw an even ellipse.
- Add the bottom outline of the glass
Draw a curved connecting line at the bottom of the drawing.
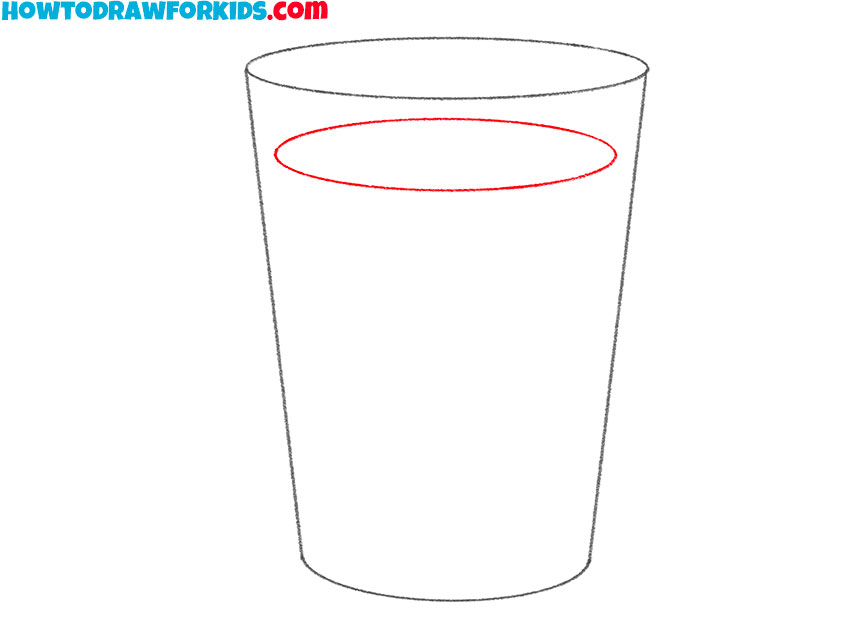
- Sketch out the outline of the water.
Draw an even ellipse at the top of the glass.
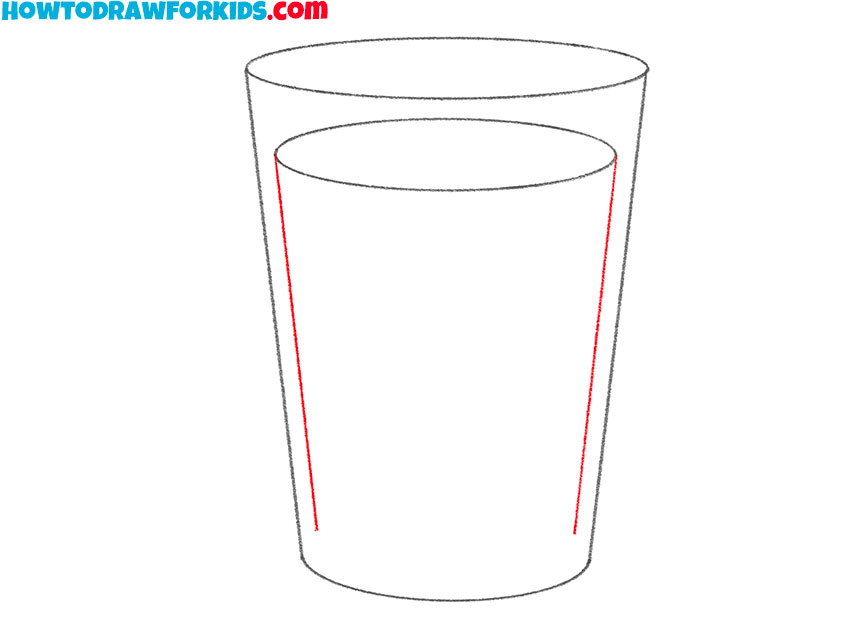
- Draw the thickness of the side walls of the glass.
Depict straight lines along the side contours of the glass, as shown in the example.
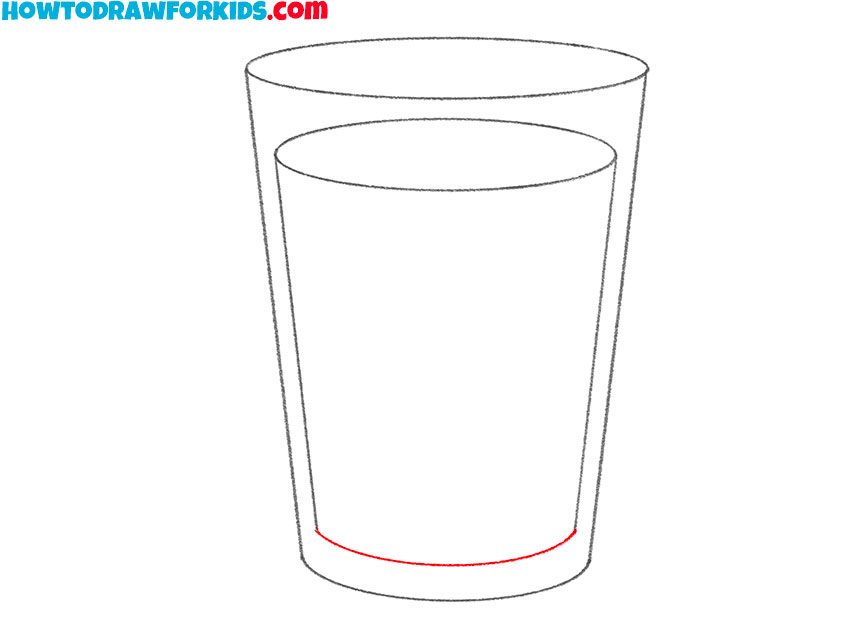
- Add the thickness of the bottom of the glass.
At this stage, sketch out the thickness of the bottom of the glass.
- Color the drawing.
For coloring, you will need different shades of blue.
Additional Content
By tradition, at the end of the lesson, I prepared a PDF file for you, which contains a brief instruction and additional training materials.
Download the file so you can return to the tutorial at any time if necessary.
Alternative Ways to Draw a Glass of Water
If you’d like a little more practice, try drawing the glass without the water. I also have two related lessons that show how to draw an empty glass and a glass of juice.
They’re a good way to compare different versions of the same object and practice drawing transparent glass from a few different perspectives.
Method 1: How to Draw a Glass for Kids
This version is even simpler because the glass is empty and the lesson includes only six steps. The main thing to pay attention to is the ellipses at the top and bottom.
If they are smooth and even, the finished glass will look much more realistic.
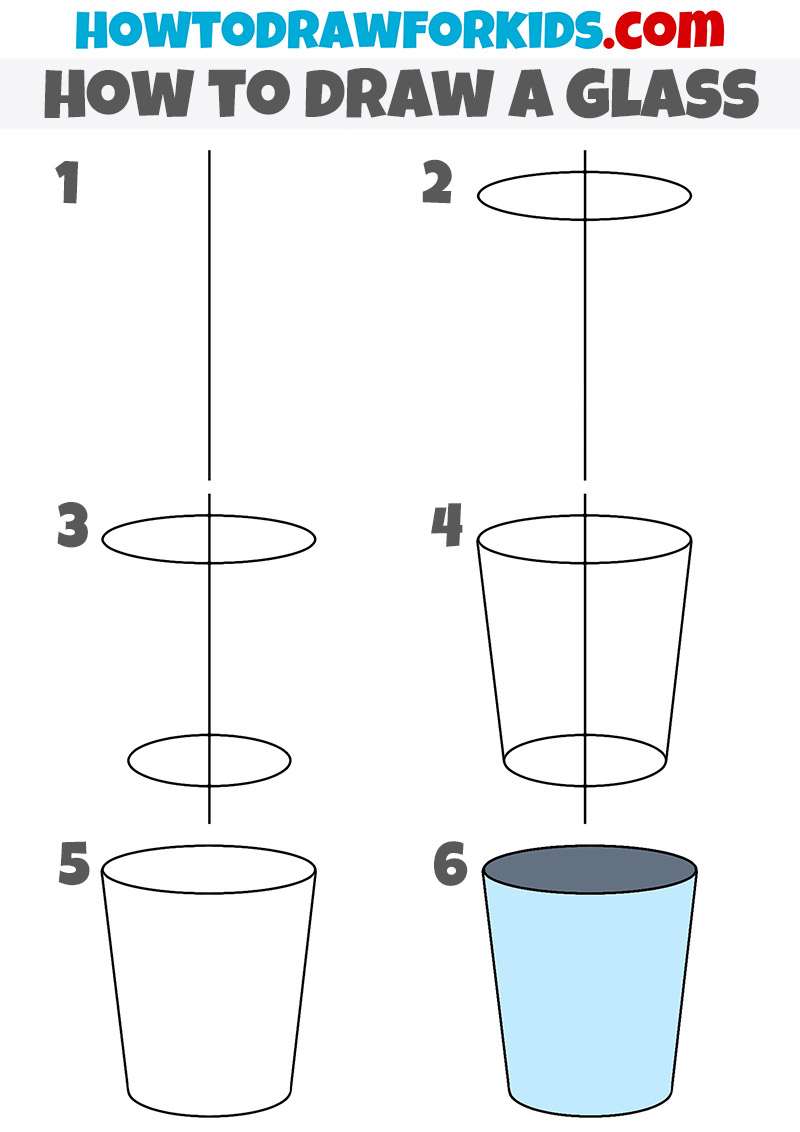
Method 2: How to Draw a Glass for Kindergarten
This version shows a glass with a pink drink and a straw. The shape is still simple, but the added drink and straw make the drawing a little more detailed than the empty glass.
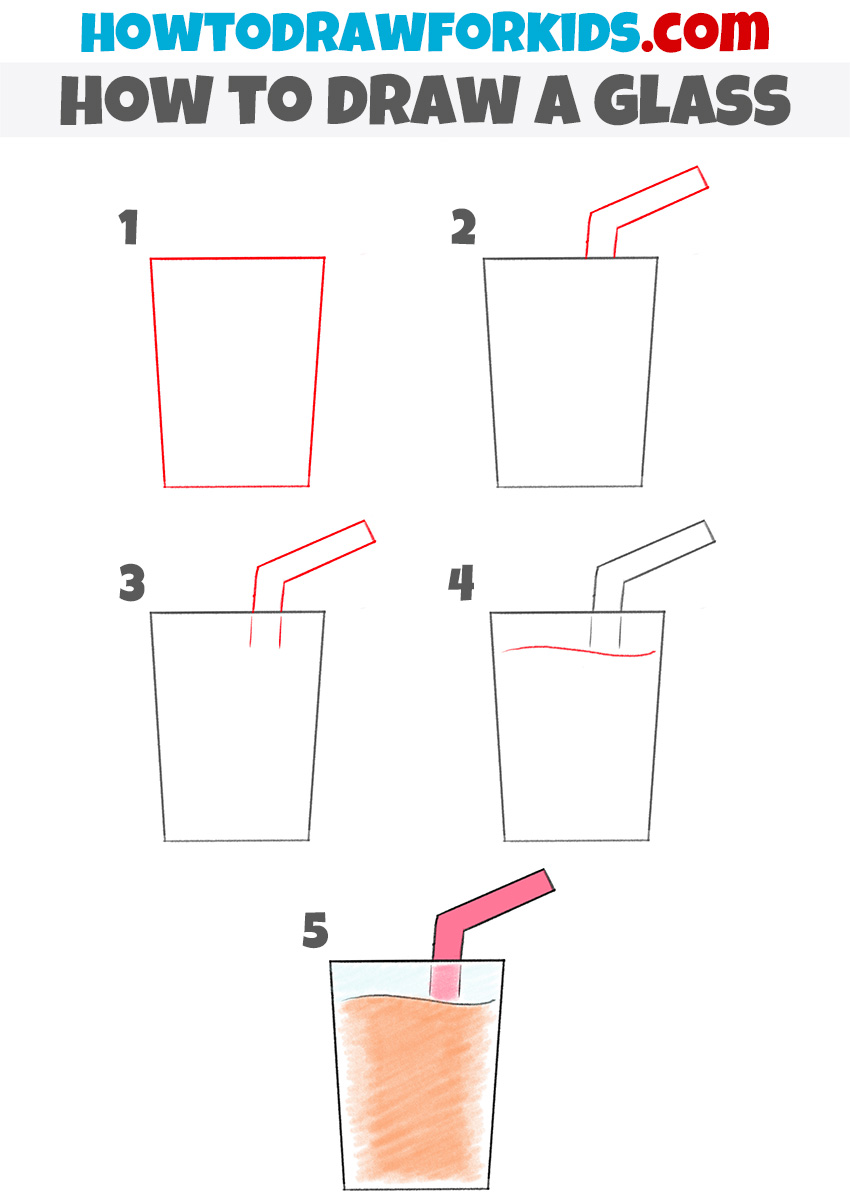
Tips for Improving Your Drawing
Once you’ve finished the drawing, try turning it into a simple still life. Add a few everyday objects around the glass. Draw an apple with my simple tutorial or sketch a vase, to practice arranging several objects in a single composition.
To make the glass look more convincing, add a few highlights and a shadow beneath it.
Small additions like these can completely change the finished drawing and are a great way to begin practicing more detailed still life scenes.
If you’d like to make the glass drawing a little more interesting, try changing the water level. A nearly full glass, a half-filled glass, or just a small amount of water will all create a slightly different look.
Another good exercise is to draw the same glass from a different viewpoint. Compare a side view with a slightly higher or lower angle and notice how the ellipses change.
You can also experiment with the shape of the glass itself. Make it taller, wider, or give it a thicker base.
What’s Next?
Now you know how to draw a glass of water, and I hope this guide helped you practice drawing simple symmetrical shapes.
Even though this is a very common object, getting the proportions right and keeping the ellipses even is a great exercise that will help you in many other drawing lessons.
When you finish this drawing, don’t stop with just one version. Try making the glass taller, shorter, wider, or filling it to different levels.
You can even add ice cubes, bubbles, a straw, or a lemon slice to create several completely different drawings using the same basic construction.
Once you’re comfortable with these variations, try my bottle drawing tutorial or wine glass drawing tutorial to continue practicing different types of transparent objects.
If you’d like to keep up with my newest drawing tutorials, be sure to follow me on social media. I regularly post updates whenever a new tutorial is published, so you’ll always know what to draw next.