How to Draw a Gargoyle
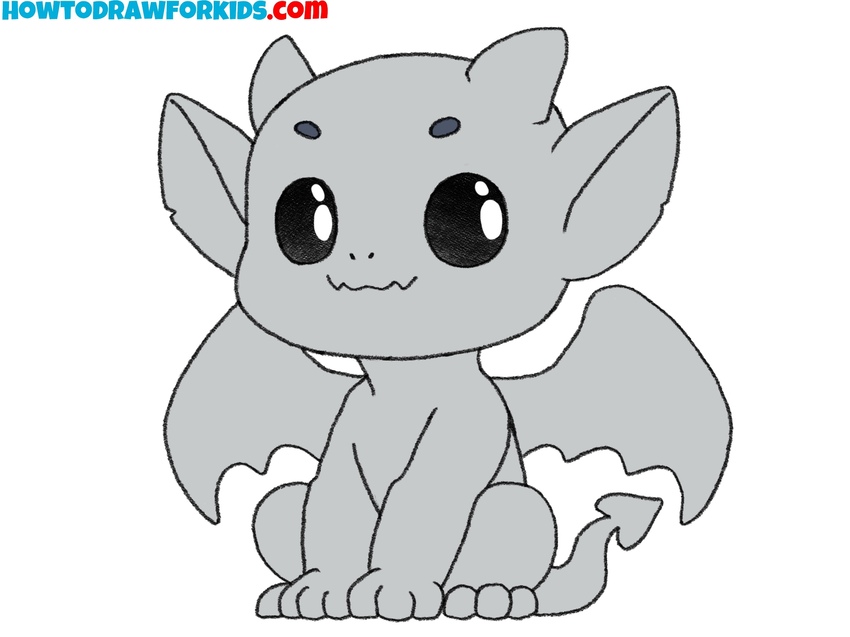
Let’s learn how to draw a gargoyle, a mythical creature that appears in many architectural styles, designs, and works of art.
How to Draw a Gargoyle: Introduction
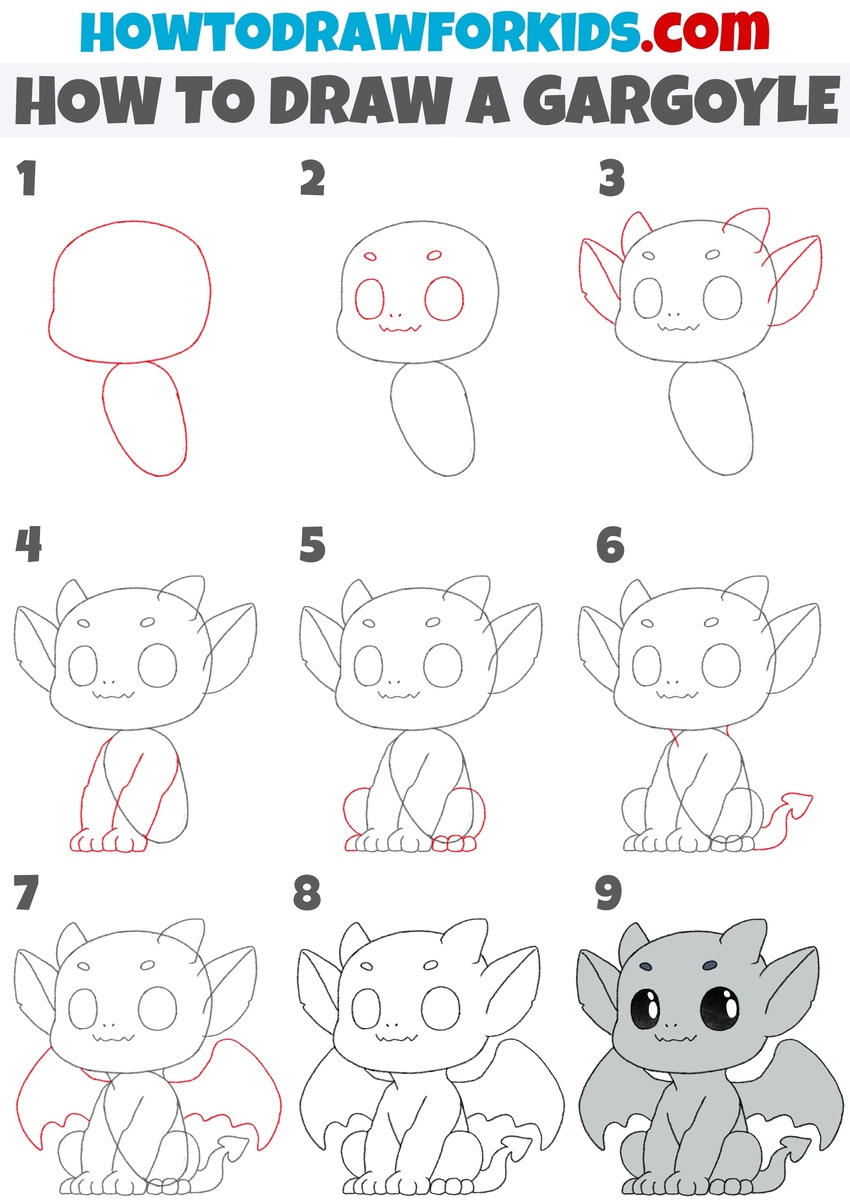
Like all the drawing lessons I share on this site, this one is presented in a simple and accessible format. It will show you how to draw a gargoyle that includes all the key features of the creature, while still appearing cute and friendly.
This tutorial on how to draw a gargoyle can be used in a variety of contexts. It works well if you’re drawing an architectural element – such as adding a gargoyle to a Gothic-style building. It can also be useful if you’re trying to draw gargoyle characters from media, like the classic 1990s animated series, where these creatures would come to life at specific moments in the story.
It’s also important to remember that gargoyles can vary widely in appearance. Their facial features, wing shapes, horns, and overall body structure can differ depending on the style or story they belong to.
To give your gargoyle drawing a more personalized look, feel free to adjust parts of the sketch as you go. You can change the face, wings, or other details to match the mood or setting you’re aiming for.
Gargoyle Drawing Tutorial
Materials
- Pencil
- Paper
- Eraser
- Coloring supplies
Time needed: 40 minutes
How to Draw a Gargoyle
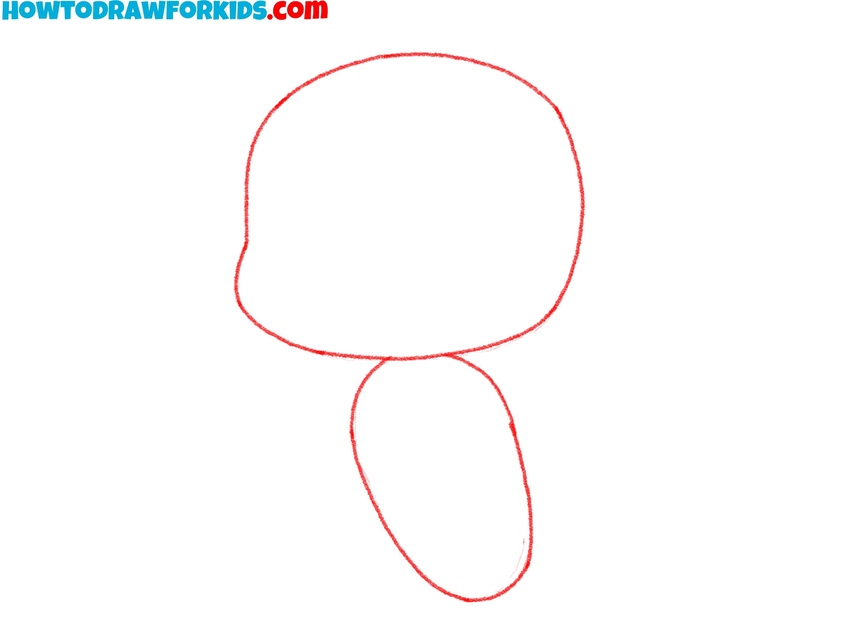
- Draw the gargoyle’s head and body.
Begin drawing a gargoyle by sketching the basic outlines of the head and body. For the head, draw a large oval with smooth curves, leaving the bottom part open to connect to the body. Next, add an elongated oval shape below the head, representing the gargoyle’s torso.
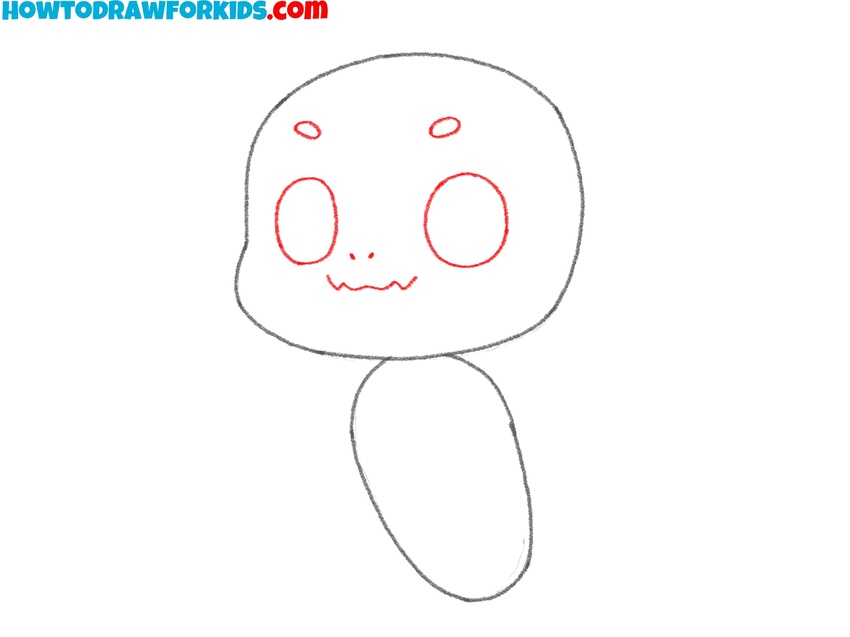
- Add the facial features.
First, draw the eyes of the gargoyle by sketching two ovals or circles, positioned centrally. Next, sketch small curved lines above the eyes as eyebrows. Add two tiny curved nostrils just below the center of the eye level, and beneath them, sketch a smiling mouth with pointed teeth.
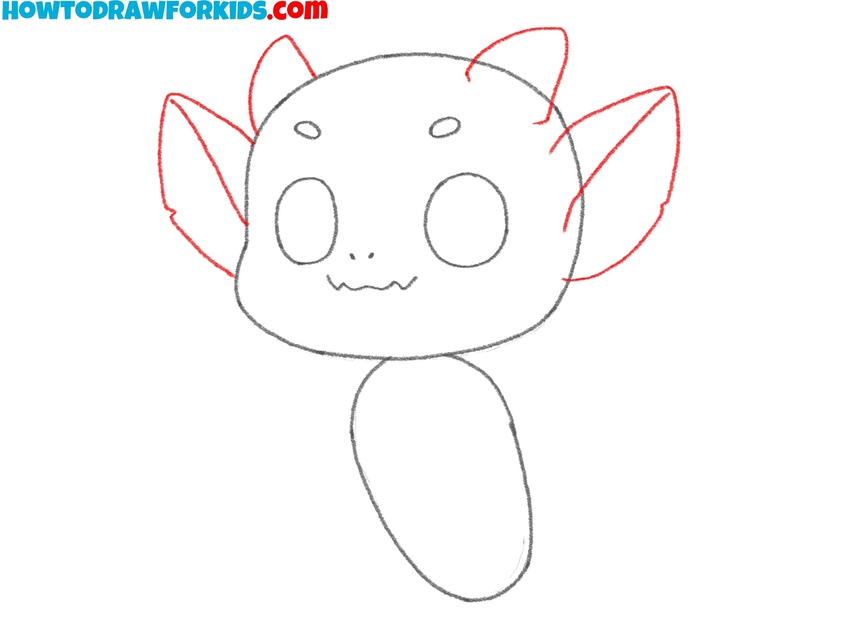
- Draw the gargoyle’s ears and horns.
In this step, add the distinctive ears and horns that give the gargoyle its iconic appearance. Draw two large, pointed ears on each side of the head. These ears should have curved edges and taper to sharp points at the tips. Between and slightly above the ears, draw the horns of the gargoyle.
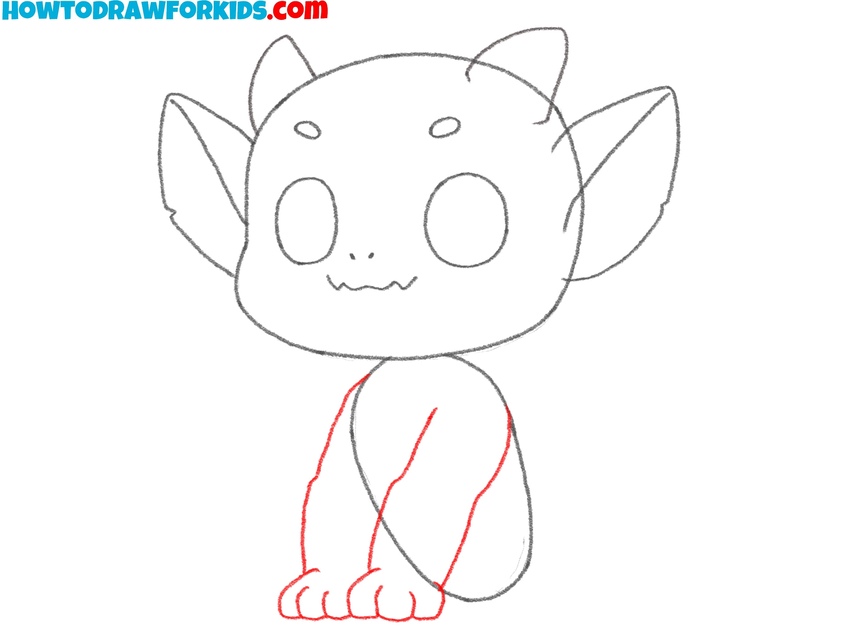
- Sketch the front legs and feet.
Begin sketching the gargoyle’s front legs and feet by drawing two elongated, slightly curved shapes starting from the sides of the torso, extending downward. At the bottom, add simple feet by drawing small rounded shapes with clear, individual toes – three or four are enough for each foot.
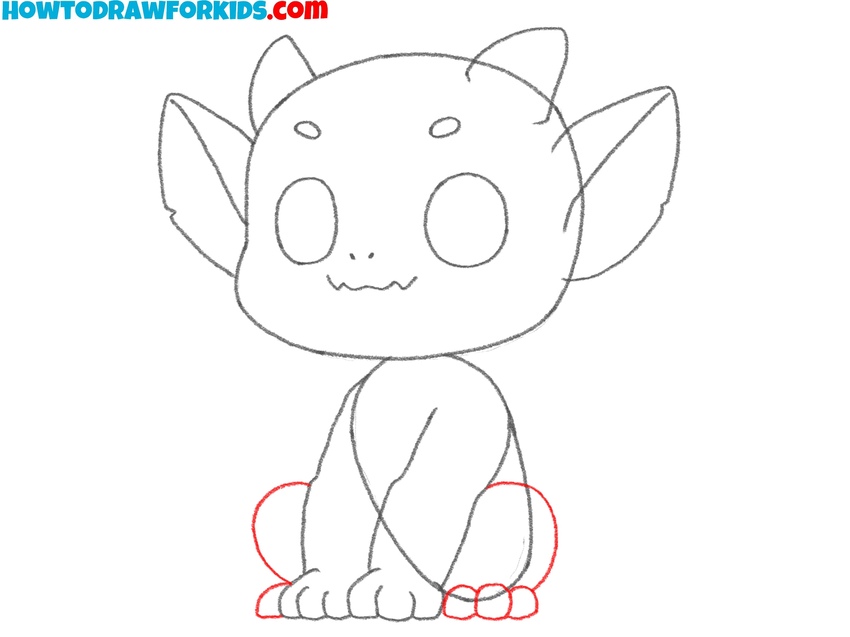
- Sketch the hind legs and feet.
Position these slightly behind the front legs, sketching them as curved shapes extending from the sides of the torso down to the feet. At the base of each hind leg, add clear, rounded feet with distinct toes, consistent in style with the front feet you’ve already drawn.
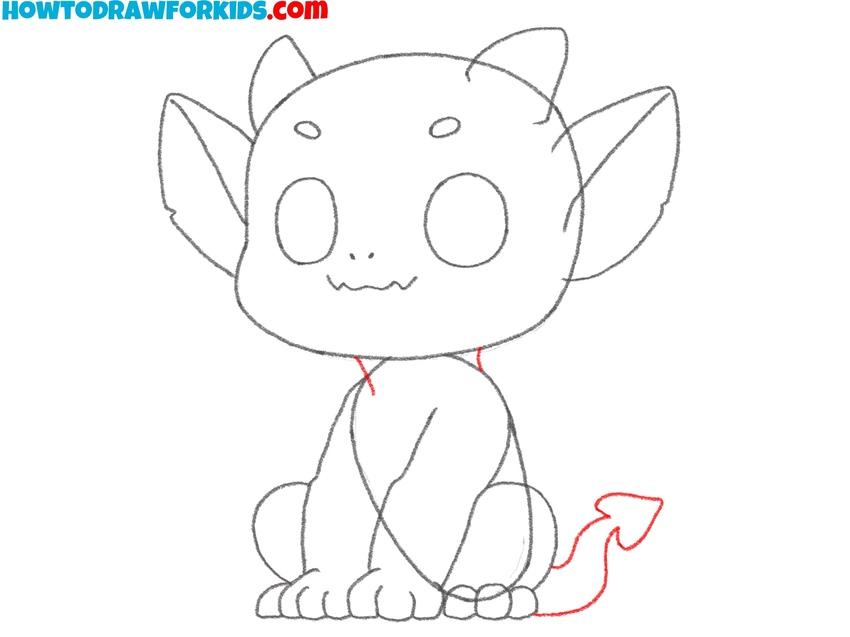
- Add the tail and neck.
Sketch the tail as a curved shape that smoothly transitions into a pointed tip, similar to a small arrow or spade shape. You can adjust the shape and curve of the tail, if you want. Then, draw the neck of the gargoyle, to connect the head and torso.
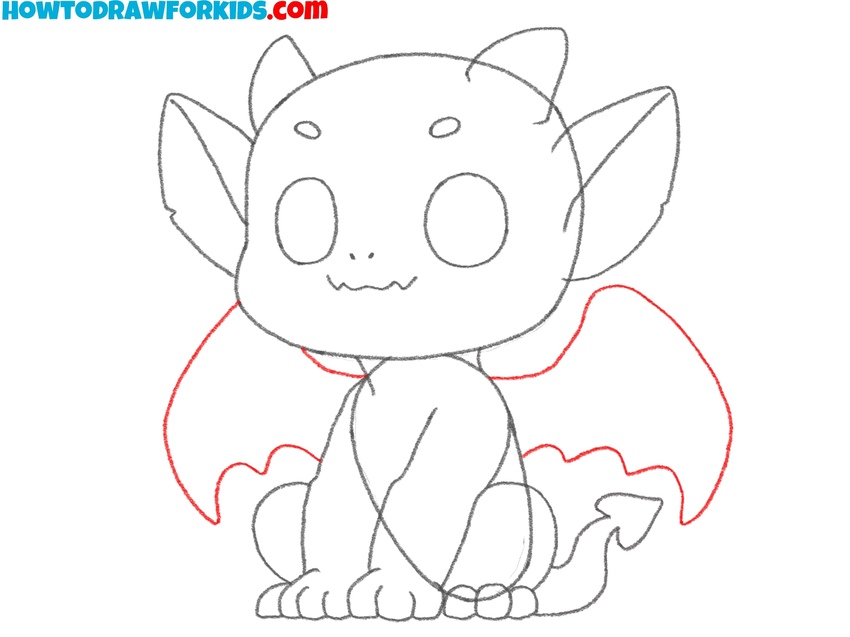
- Draw the gargoyle’s wings.
Draw the gargoyle’s wings behind the shoulders, extending outward and slightly upward. Sketch each wing with a large, smooth curved top edge, then create an uneven scalloped lower edge to represent the webbing between the wing supports. Visit the wings drawing tutorial to learn more about sketching wings like these.
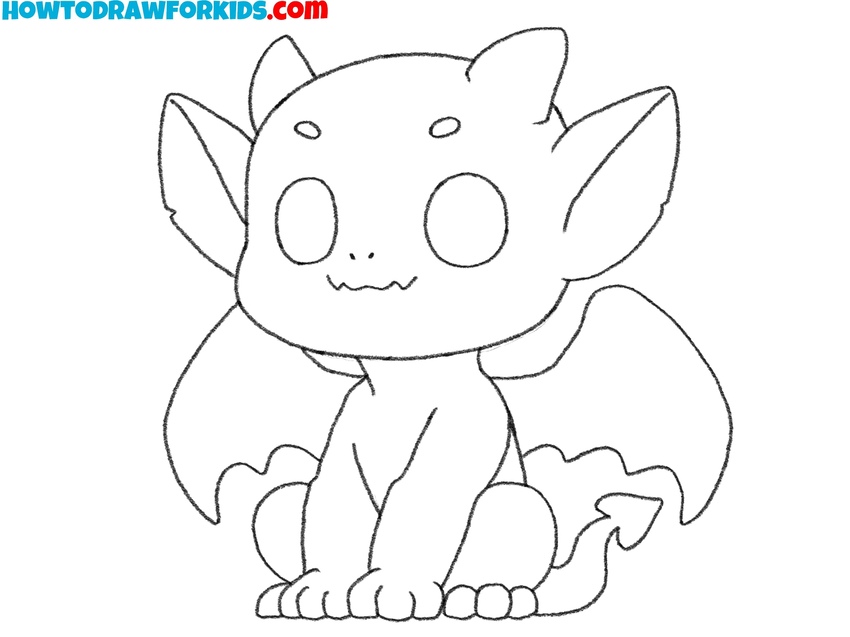
- Erase extra guidelines and finalize the sketch.
Carefully erase any remaining unnecessary sketch lines, guidelines, and overlaps from earlier steps. Be cautious while erasing to avoid removing any of the important lines or details. Take the opportunity to improve small details, checking that proportions and symmetry are correct throughout your drawing.
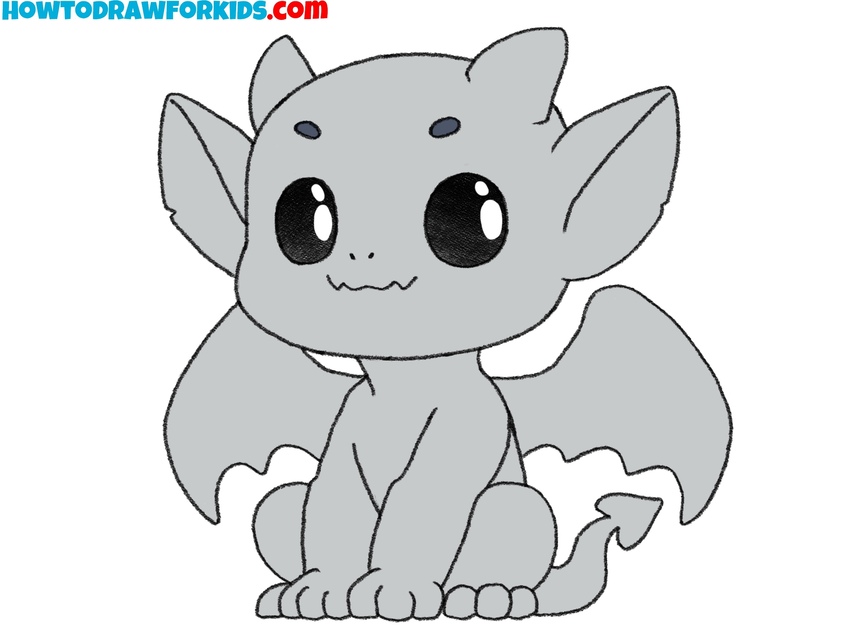
- Color the gargoyle drawing.
Select shades of gray, stone-like colors, or softer pastel tones for the body of the gargoyle. Color the eyes black or dark gray, leaving highlights. You can color the horns and claws slightly darker or lighter than the body. Feel free to experiment with adding shadows or some extra details.
Conclusion
So, now you’ve learned how to draw a gargoyle. You’ve discovered how simple and easy it can be to sketch the basic outlines of this mythical creature and architectural element. It’s now time to further develop your drawing skills and take them to the next level.
For example, you could draw another gargoyle and incorporate it into part of a building. Or perhaps create a different background scene that complements your gargoyle. Exploring different settings and contexts will enhance your creativity and artistic abilities.
To continue improving your art skills even further, be sure to visit other sections of my website. You can learn how to draw a dragon, as well as other legendary and impressive creatures you’ve likely encountered in books, movies, and games.
Exploring these various characters and creatures will give you a deeper understanding of shapes, anatomy, and imaginative design. It’ll also help you build confidence in drawing more complex compositions.
If you enjoyed this gargoyle drawing tutorial, keep practicing regularly, and soon you’ll master drawing even more challenging subjects. Don’t forget to check back frequently, as I’m always adding new tutorials to help you boost your drawing skills.


