How to Draw a Gem
This tutorial on how to draw a gem will teach you to sketch beautiful natural crystals and help you practice your symmetry skills.
How to Draw a Gem: Introduction
In this tutorial, I’ll show you how to draw a gem using two simple methods. First, you’ll learn a basic approach that uses straight, symmetrical lines. Then, I’ll demonstrate an additional method that will help you further strengthen your drawing skills.
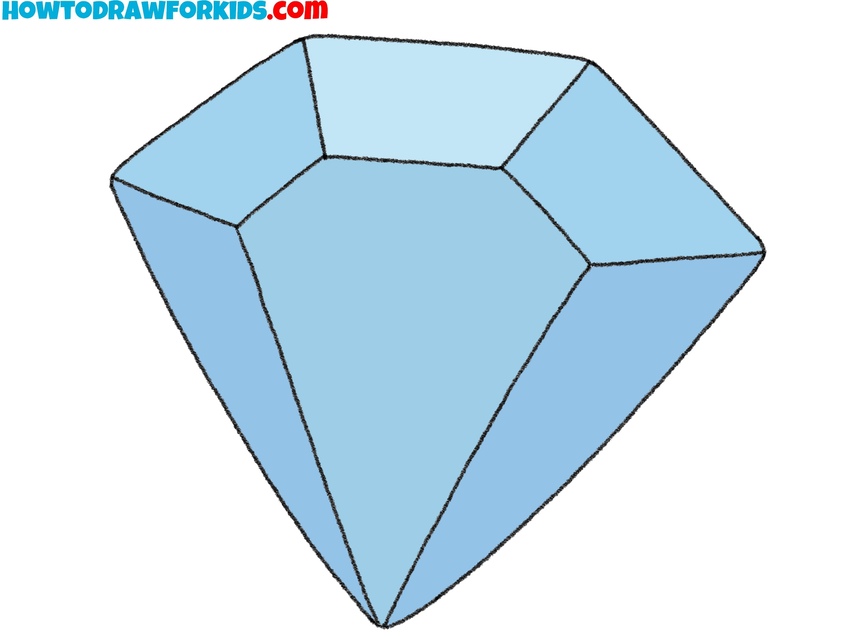
There are many beautiful ornamental stones in the world, often used in fine jewelry. In the example shown, the gem is colored blue, resembling a sapphire. However, if you color it red, it can represent a ruby; if you color it green, it becomes an emerald. You can use the suggested color or choose any other based on your preferences.
This tutorial will require you to draw straight, symmetrical lines, since gems have multiple facets. Keep in mind that when light hits a gemstone, each facet reflects a different shade. To make your drawing more realistic, consider this effect and use several shades when coloring your gem.
Gem Drawing Tutorial
Materials
- Pencil
- Paper
- Eraser
- Coloring supplies
Time needed: 25 minutes
How to Draw a Gem
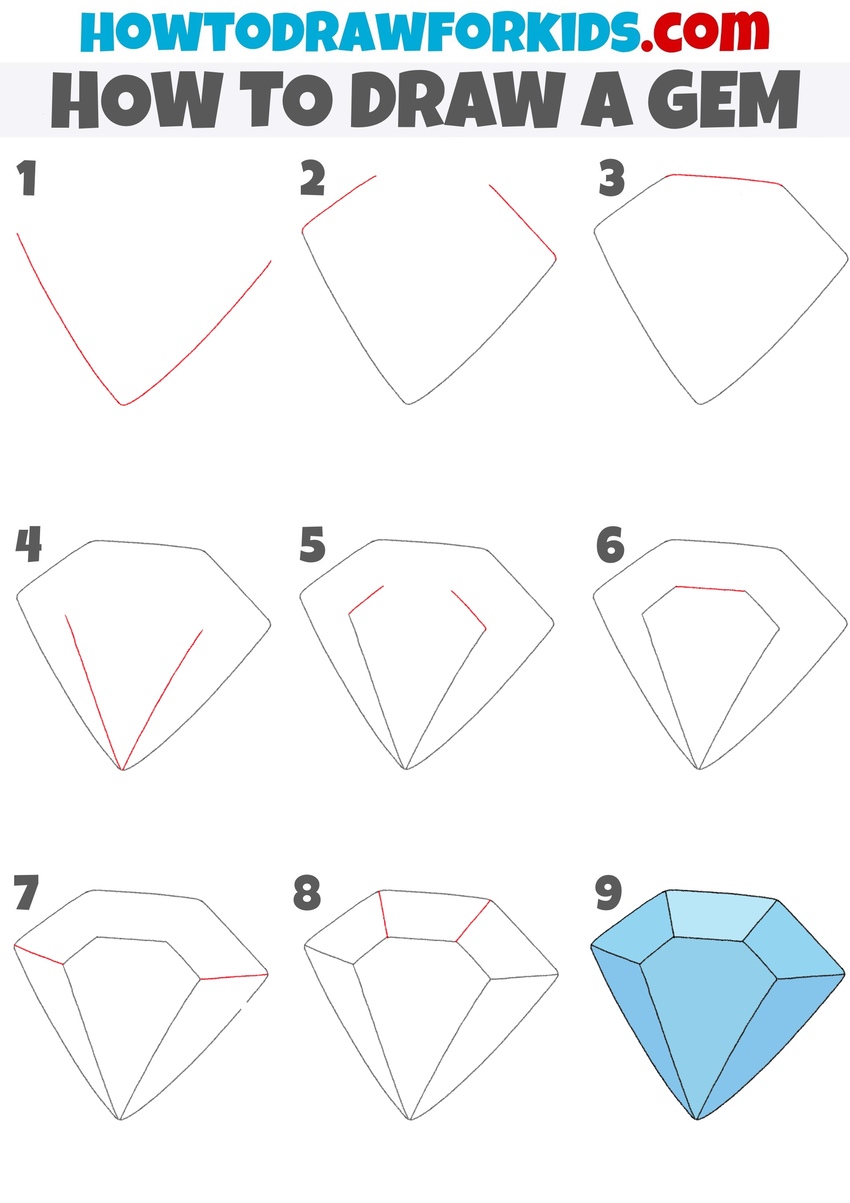
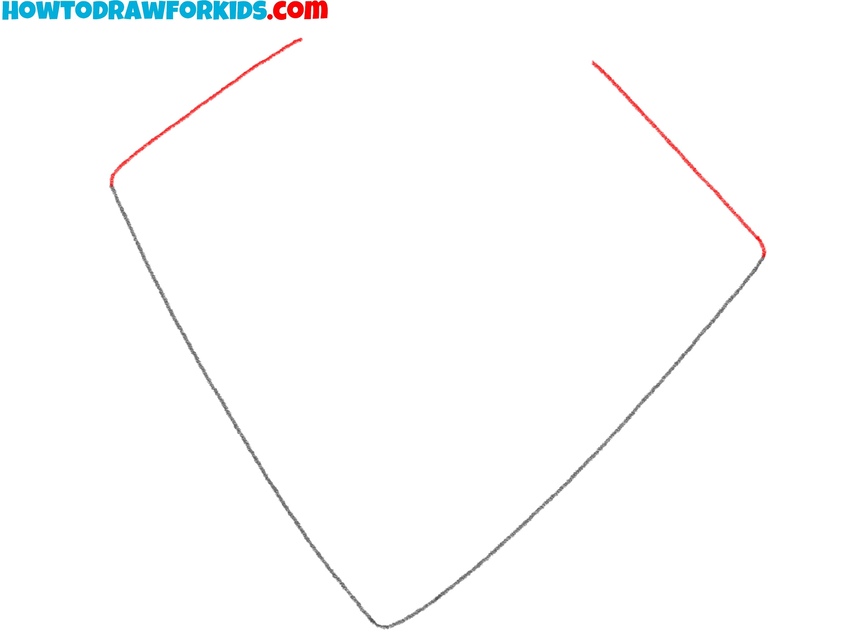
- Draw the gem bottom sides.
First, sketch two straight lines that meet at a sharp angle near the bottom. These lines will form the bottom edges of your gem drawing. The shape should resemble an open triangle pointing downward. Keep the angle symmetrical. If the lines are too curved or uneven, the final result will not look symmetrical.

- Add the upper sides.
From the top of each line you drew in Step 1, draw two upward-angled lines that form the upper left and right sides of the gem. These lines should slant slightly inward and remain symmetrical. Your shape should now resemble a kite or diamond frame, wide at the top and pointed at the bottom.
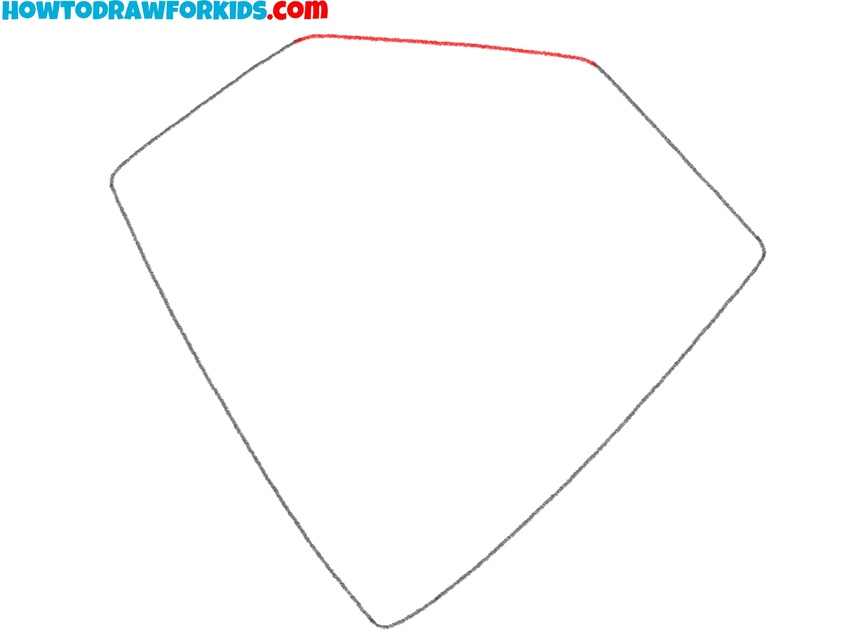
- Draw the gem top line.
To close off the top of the gem, connect the two upper points with another straight or slightly curved line. This completes the outer contour of the gemstone. Double-check your outline for consistency before moving forward. You can adjust the top line, making it flat, curved upward, or even faceted
- Sketch the inner bottom angles.
Begin the internal structure of your gem drawing by sketching two straight lines from the bottom point of the gem. These lines should mirror the outer edges and stop partway up the gem’s body. This triangular shape forms the central ridge or face of the gem, which helps convey its three-dimensional appearance.

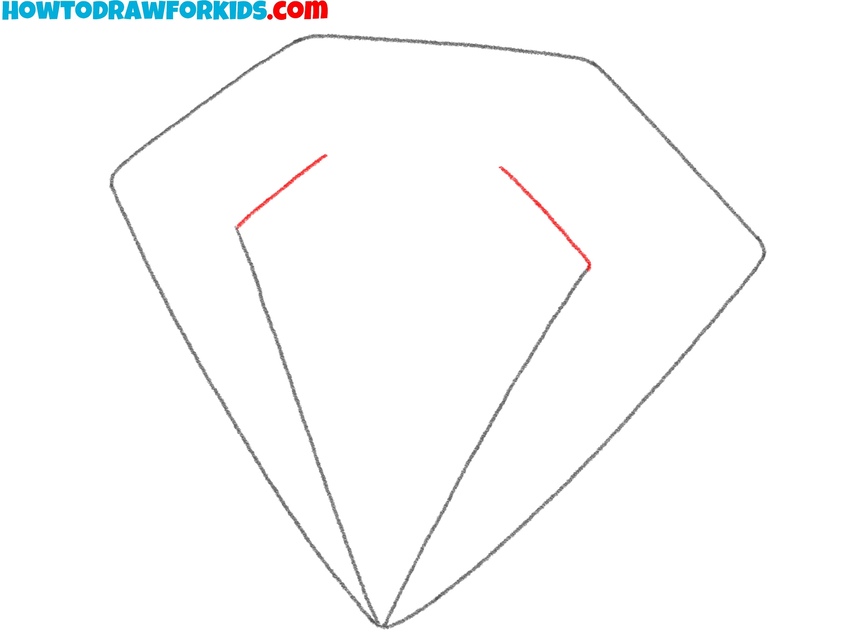
- Draw the gem upper facet sides.
Next, draw two short angled lines that begin where the lines from Step 4 ended and angle slightly inward and upward. These lines should follow the outer slope of the gem but remain inside the boundary. Their placement creates the upper left and right side facets, dividing the gem’s top into sections.
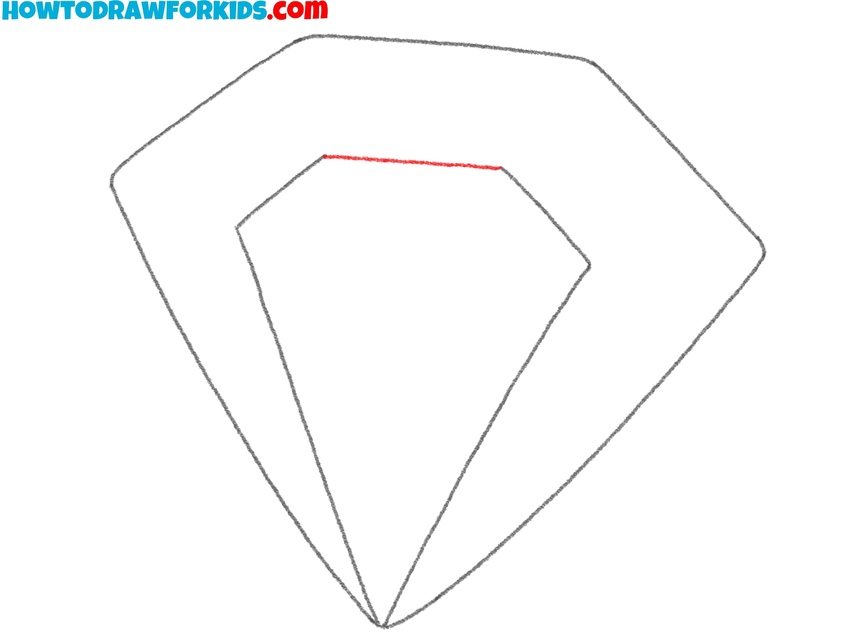
- Connect the top facets.
Now connect the two endpoints of the lines you added in Step 5 with a straight horizontal line across the upper part of the gem. This line completes the top portion of the interior, closing off the trapezoid-shaped area above the central triangle.
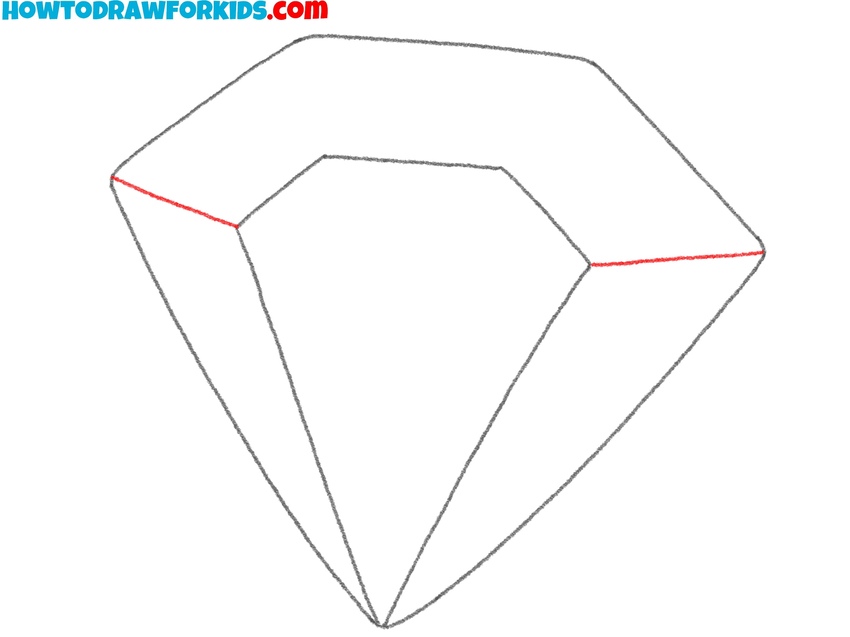
- Finish the lower gem edges..
To add more complexity to your gem’s shape, draw short lines extending from the lower corners of the trapezoid shape you just completed to the corresponding outer edge of the gem. These lines form the lower left and right facets and help establish a full faceted frame.
- Complete the top section.
Draw two final short angled lines connecting the topmost corners of the trapezoid to the outer top corners of the gem’s outline. These lines complete the segmentation of the top surface into three distinct planes – left, center, and right. The result should now look like a fully cut gem drawing.

- Add colors, highlights, and tones.
Use a light blue or any hue of your choice and apply varying shades to each facet. Darker shades can go on the outer and lower planes to create volume, while lighter tones work best on the top and center. This contrast simulates the way light reflects off real gem surfaces.

Alternative Gem Drawing Tutorial
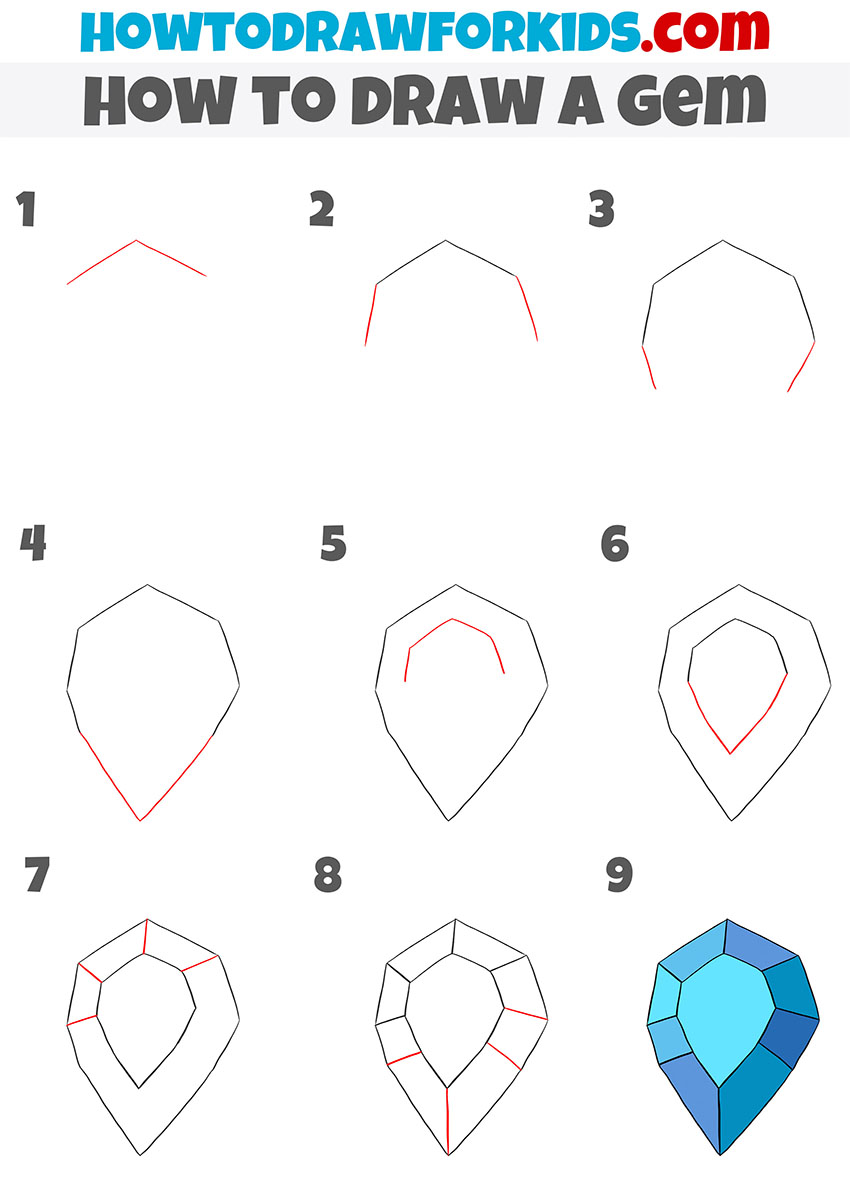
This method of a gem drawing tutorial shows a more elongated, drop-shaped form compared to the first drawing tutorial, which used a traditional diamond silhouette. The steps here show how to draw a gem gradually from the top down.
To begin this alternative gem drawing tutorial, sketch the top edge with two angled lines meeting at a shallow point. Extend short vertical lines downward from each side. Close the shape with a long V-shaped line that meets at a sharp bottom point. Inside the gem, repeat the outer shape but draw it smaller to define the central facet. Add angled lines connecting the inner and outer edges to form individual faces.
Carefully segment the remaining areas by drawing straight lines from corner to corner to complete the structure. In the final step of this additional tutorial on how to draw a gem, use several shades of blue or any color of your choice to give the drawing volume and simulate the way a real gemstone catches light.
Conclusion
Now that you’ve completed this gem drawing tutorial, you should have a clean, symmetrical shape with clearly defined facets. Try experimenting with variations – adjust the angles, create different gemstone shapes, or use alternate colors to turn your drawing into a ruby, emerald, or topaz.
You can also add a background, like a jewelry box or a glowing light source, to place your gem in context. If you want to improve your control over lines and shading, repeat the steps using other facet arrangements or styles. Check out my other tutorials to continue practicing symmetry, structure, and surface detailing.
Also, be sure to check out other sections and lessons on my site to build your skills further. For example, you can learn how to draw a rose and use it to complement your gem drawing, or illustrate a gem set in a gold ring by following my step-by-step ring drawing tutorial.