How to Draw a Gift Box
Let’s practice our skills in creating simple shapes and composition with the help of two easy lessons on how to draw a gift.

How to Draw a Gift Box: Introduction
A gift box is a simple shape made up of basic lines, and in this lesson on how to draw a gift box, I’ll explain in detail how to recreate this recognizable image on paper. Here, I’ll show you two options, each of which is truly simple but presents different variations of drawing a gift box.
One option will show you how to draw a gift box from the side, illustrating the most basic and even flat representation. If you don’t need to create additional volume and want to learn how to illustrate this object in the simplest way possible, this lesson will be perfect for you.
The other lesson will show you how to draw a more three-dimensional gift, taking perspective into account to make it look more realistic.
I highly recommend studying both methods, as this will significantly improve your ability to draw gift boxes and create volumetric square and rectangular forms, which will, in turn, be useful when working on more complex compositions.
Gift Box Drawing Tutorial
Materials
- Pencil
- Paper
- Eraser
- Coloring supplies
Time needed: 20 minutes
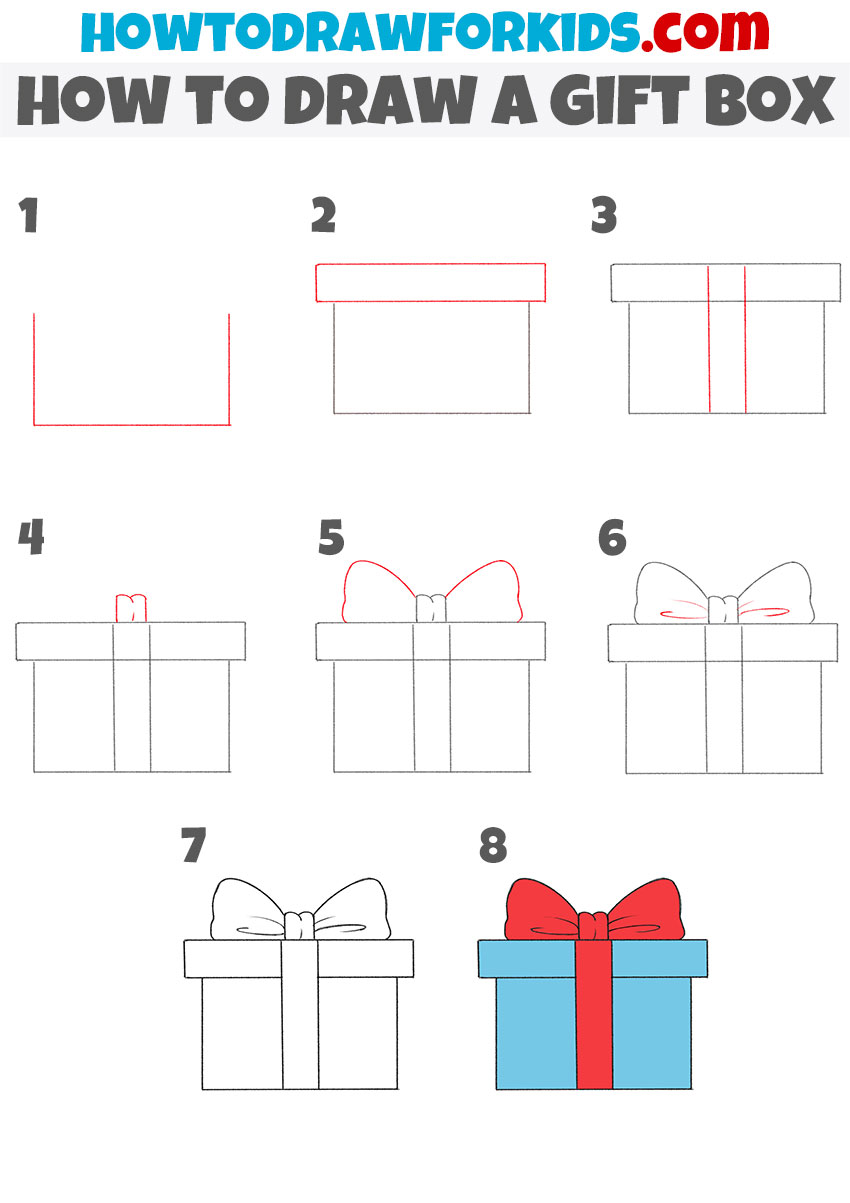
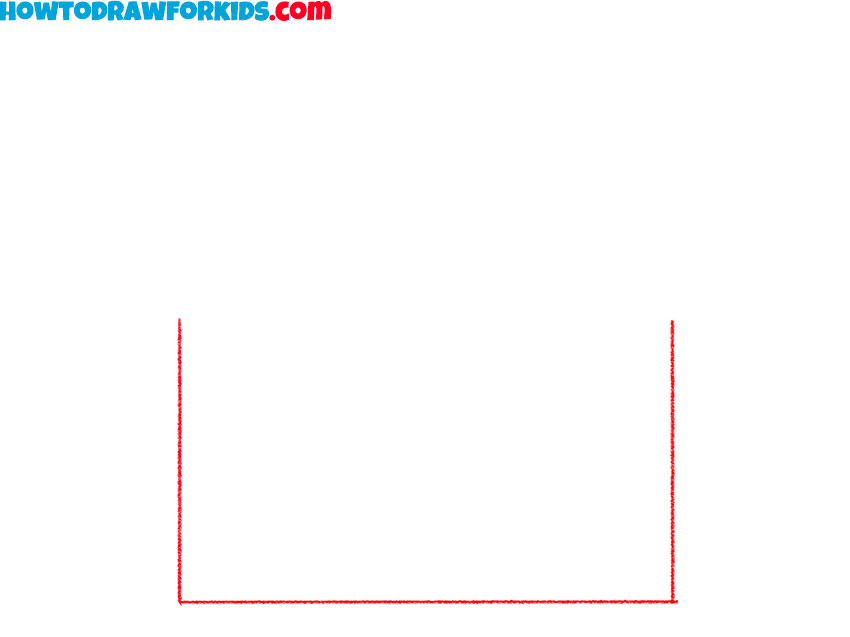
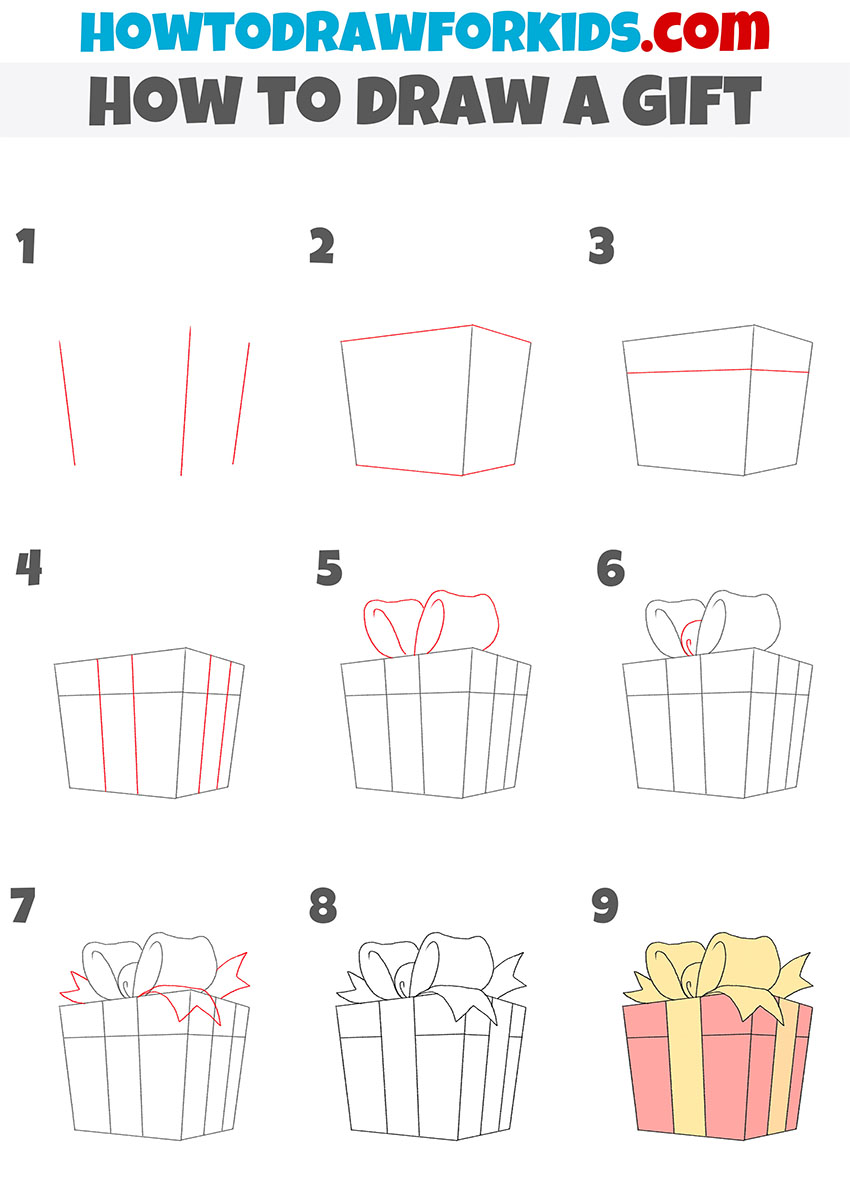
How to Draw a Gift Box
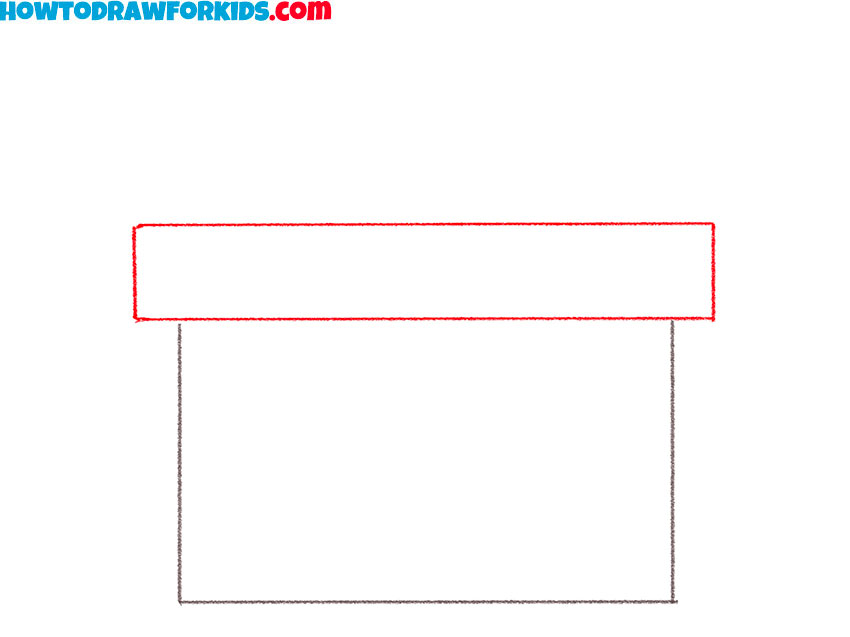
- Draw the base of the gift box.
First, sketch a simple U-shaped figure with straight lines. This will serve as the bottom of the gift box. Make sure the lines are vertical and parallel to each other, with a horizontal line connecting them at the bottom. Try to maintain symmetry so that both sides appear even.
- Add the lid at the top.
Now, draw a horizontal rectangle on top of the box. This rectangle should be slightly wider than the base of the gift box, giving the appearance of a lid resting on top. The lid should have straight, clean edges. The horizontal lines of the lid should be parallel to the bottom edge of the box.
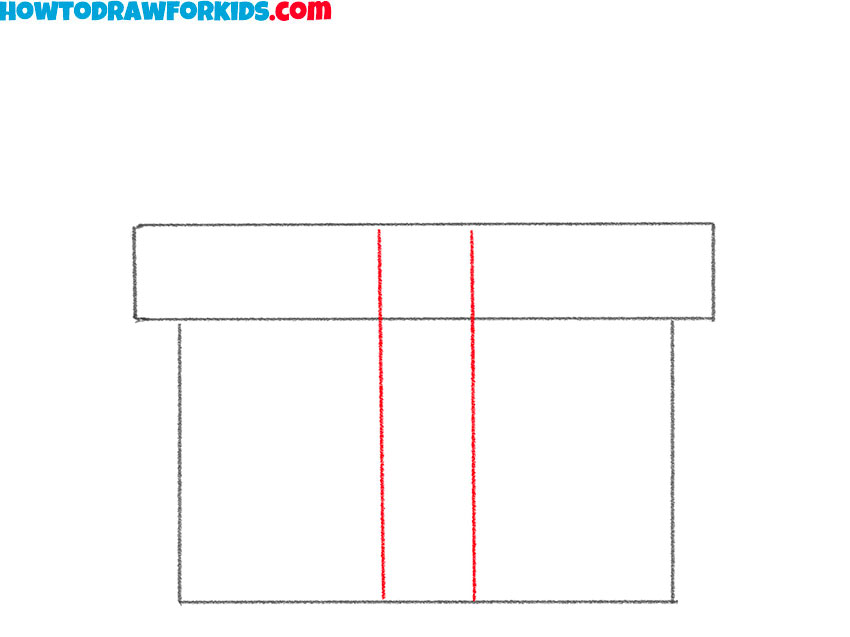
- Sketch the vertical ribbon.
Next, add the ribbon that wraps around the gift box by drawing two parallel vertical lines running down the center of the box and lid. The lines of the ribbon should be parallel to the sides of the gift box. Try to keep the lines straight and evenly spaced. If needed, adjust the width of the ribbon.
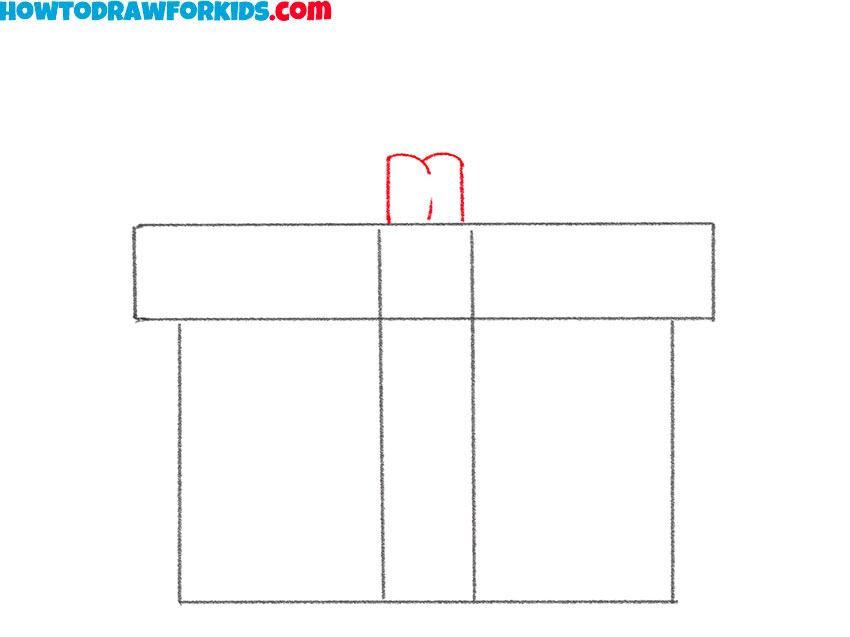
- Add the bow’s center.
To start drawing the bow on top of the gift box, sketch a small rectangular or oval shape in the center of the lid. This will serve as the knot of the bow, the central point from which the loops will extend. Make sure the knot is centered above the vertical ribbon.
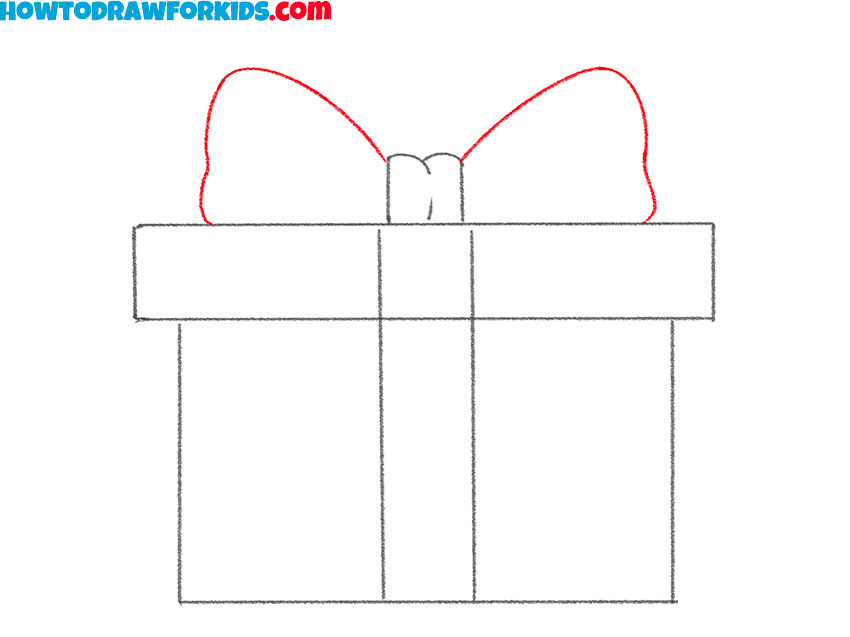
- Draw the bow loops.
Now, extend two curved lines from each side of the knot to form the loops of the bow. These loops should be large and rounded. Try to make both loops symmetrical, keeping their curves even and smooth. You can adjust the shape of the loops to be slightly wider or taller, depending on the style you prefer.
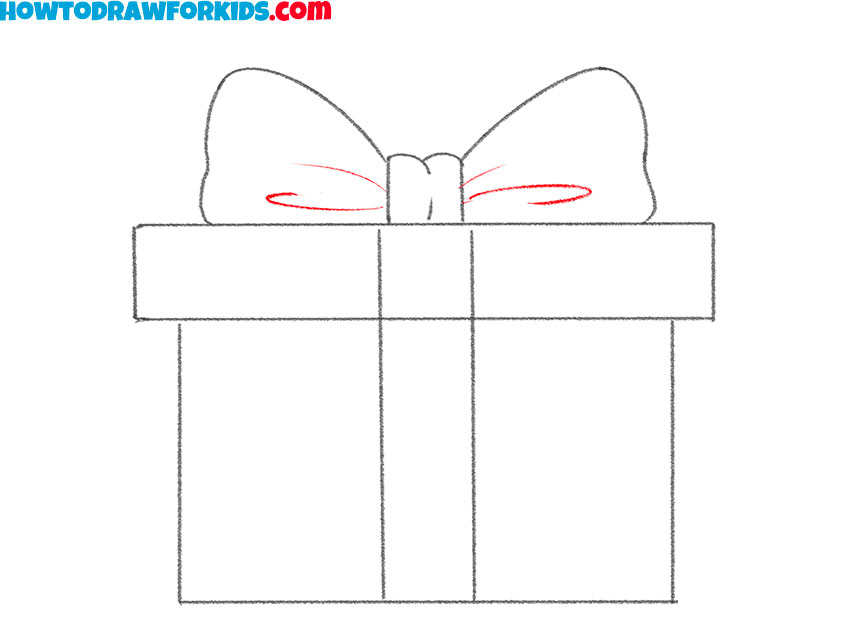
- Add ribbon details.
To make the bow look more detailed, add small curved lines inside the loops to represent folds in the fabric. These lines should follow the curve of the bow, giving it a slightly three-dimensional appearance. You can also add extra lines near the knot. These small details help give the gift box drawing more realism.
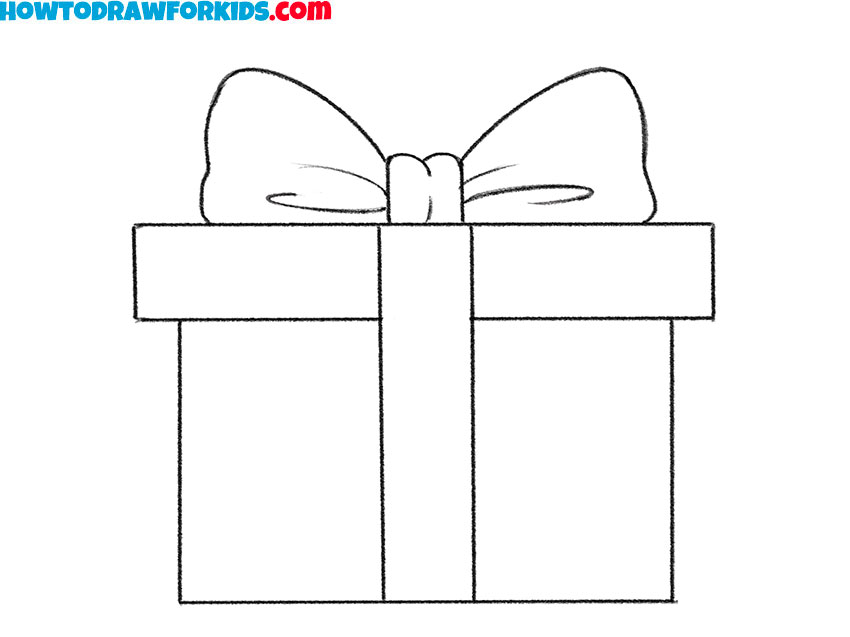
- Finalize the outline.
Now that all the main elements are in place, go over your entire drawing with a darker pencil or marker, refining the lines to make them cleaner and more defined. If there are any overlapping or extra sketch lines, erase them to make the drawing look neat. If needed, make any last-minute adjustments.
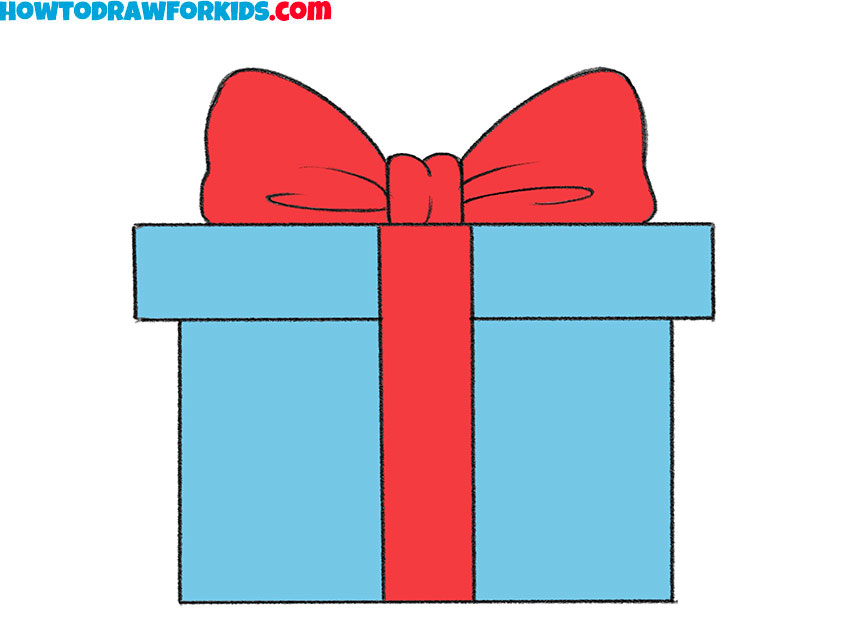
- Add color to your gift box.
Choose any colors you like for the gift box, ribbon, and bow. Typically, red and blue are classic choices, but you can experiment with different combinations. You can add shading to give the gift box drawing more realistic look. Adding highlights to the bow can also make it look more realistic.
Additional Content
A downloadable PDF guide is available for this lesson, providing additional material to support your drawing practice. It includes supplementary exercises that go beyond the basic steps, helping you refine your technique. The guide is designed as a practical resource that you can use at any time to improve your understanding of drawing and develop your skills further.
How to Draw a 3d Gift Box
This method shows how to draw gift box in more 3d style, differing from the first tutorial, which creates a flat, side-view representation. It follows a different sequence of steps, beginning with perspective lines to establish volume before constructing the full shape. Additional structural elements, such as vertical edges and a top lid, create a more realistic form. The bow is drawn in multiple stages to reflect its volume and folds.
Start by drawing two slanted vertical lines to establish perspective. Connect them with horizontal lines to form the base of the gift box. Extend the vertical edges and complete the top face of the box. Draw the lid slightly wider than the base, adding a horizontal division to indicate separation between the lid and the main box.
Add vertical ribbon lines, ensuring they wrap around the box naturally. Sketch the bow by first drawing two curved loops, then add more layers to create a realistic shape. Refine the bow with additional curved details. Extend ribbon tails outward, shaping them with flowing lines. Finalize the gift box drawing by outlining all details and erasing the guidelines. Add any color to the parts of the gift box.
Conclusion
The lessons on how to draw a gift have come to an end. I really hope you found my instructions helpful. Now is the perfect time to take your skills even further. Before moving on, try creating a more complex and interesting composition using your drawn gift along with additional elements. For example, you can draw a Christmas tree and place your gift right under it. You could also draw Santa Claus holding the gift box you created using this tutorial.
To become an even more skilled artist, I highly recommend visiting the “Holidays” category, where you will find a wide variety of drawing lessons related to different celebrations.
And of course, share this and other lessons you enjoyed with your friends and acquaintances who are also interested in holiday-themed drawings and want to improve their skills to become true artists.