How to Draw a Horse Eye
In this lesson, I have put together three detailed yet simple step-by-step instructions that will teach you how to draw a horse eye.

How to Draw a Horse Eye: Introduction
Drawing any object, whether it’s an object, a person, or an animal, involves creating large general shapes and then adding details.
To be able to draw a horse, you need to understand both the overall structure of its body and the finer details, such as how to draw a horse eye. Drawing is always about practice, and the more you practice, the better you will understand how to depict this subject on paper.
In this lesson, I want to show you how to draw a horse’s eye using three different methods. These methods will be very simple, but each one will demonstrate the process of drawing a horse eye in a different style. This will help you refine your skills and gain a deeper understanding of the drawing process.
Most importantly, these three lessons will teach you how to draw a horse eye while ensuring it looks accurate and recognizable. By following these steps, you will be able to create a well-defined and detailed horse eye drawing.
Horse Eye Drawing Tutorial
Materials
- Pencil
- Paper
- Eraser
- Coloring supplies
Time needed: 30 minutes
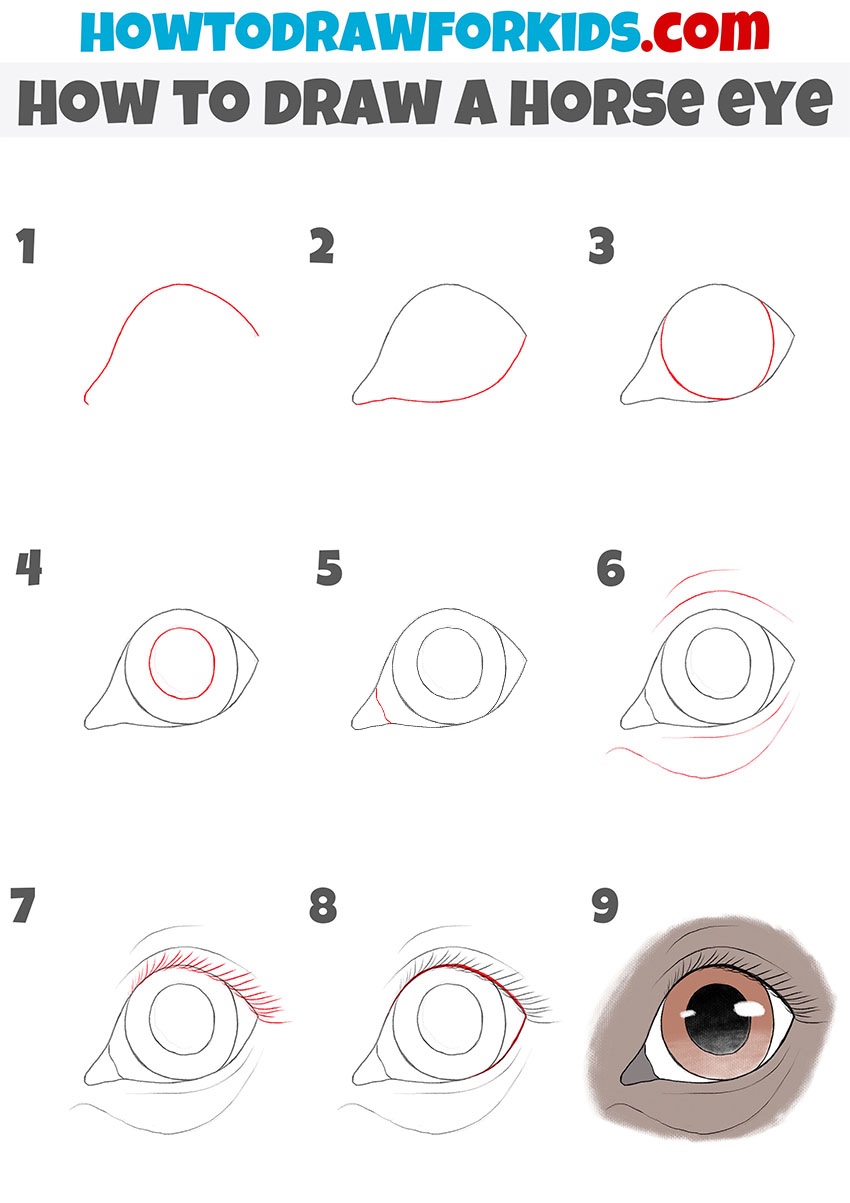
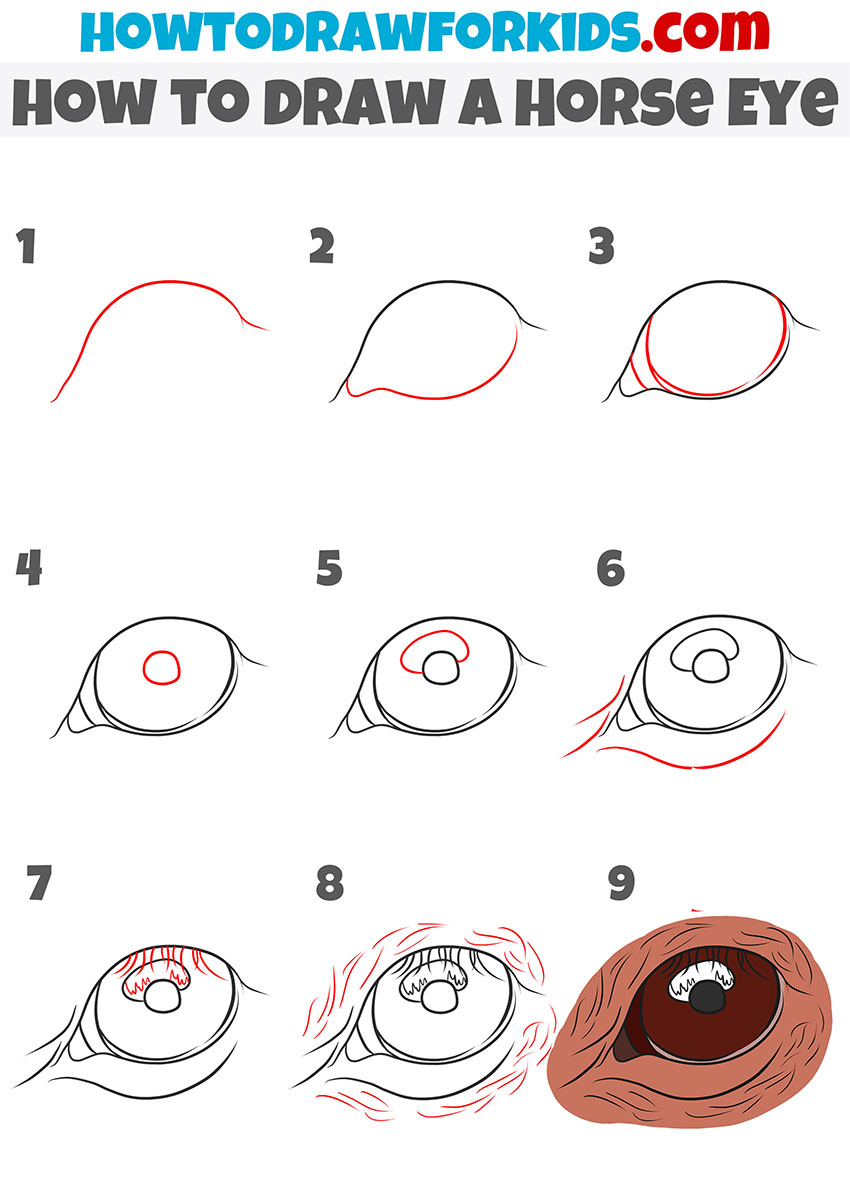
How to Draw a Horse Eye
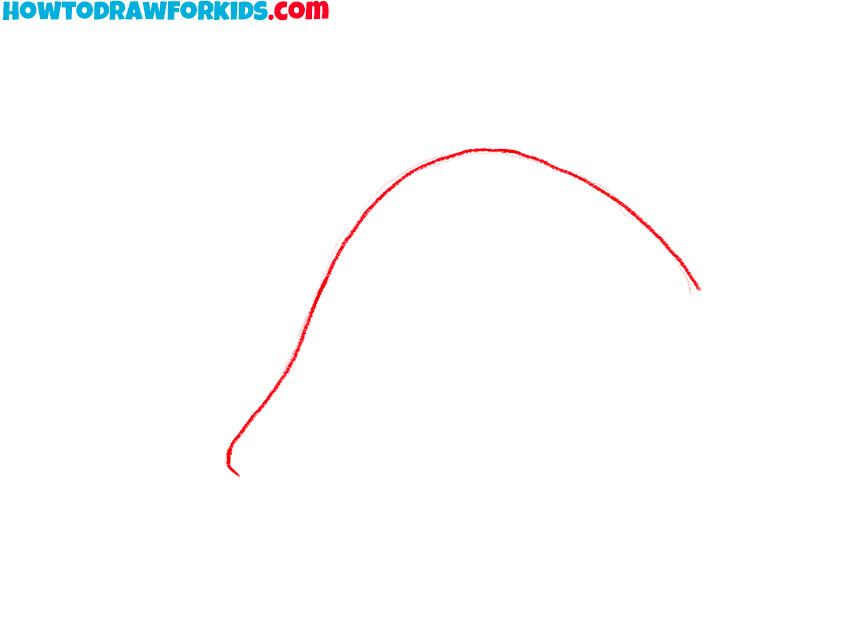
- Draw the upper outline of the eye.
To begin learning how to draw a horse eye, start by sketching the upper outline of the eye. A horse’s eye has an almond-like shape with a slight curve. Since this is just the initial structure, keep the lines light so that you can adjust them later if necessary.
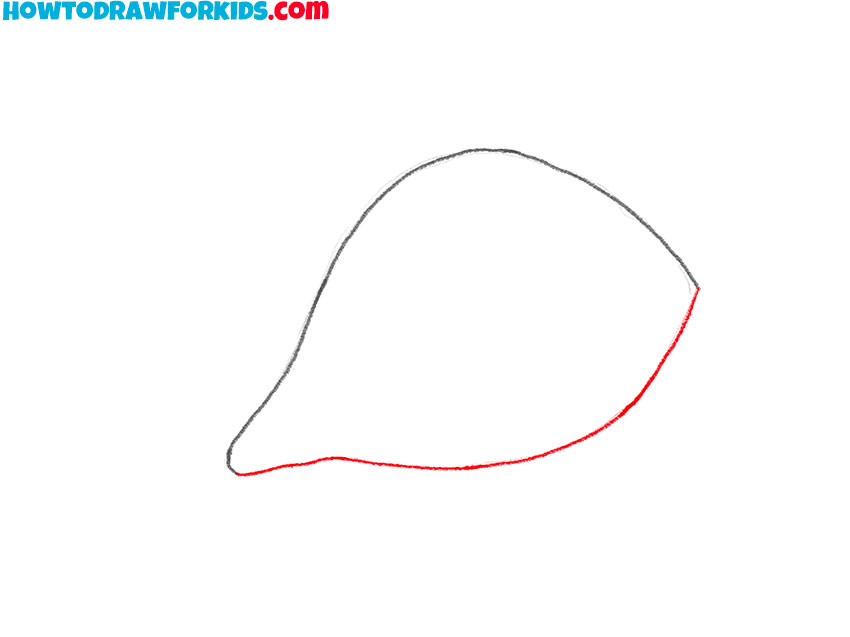
- Complete the outer shape of the eye.
In this step of how to draw a horse eye, add the lower part of the eye to complete its shape. The lower curve should be slightly less arched than the upper one, giving the eye a natural shape. The overall form should resemble a teardrop or a rounded almond.
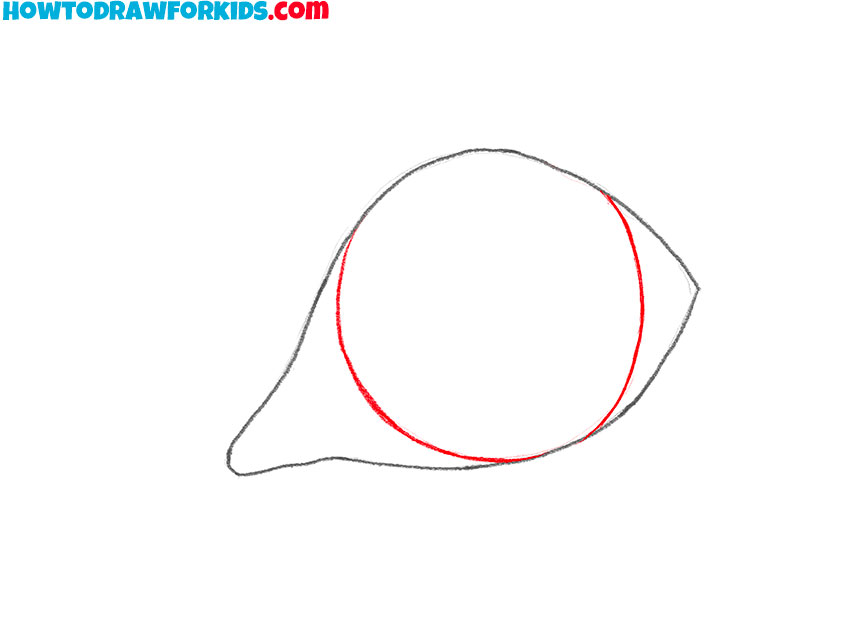
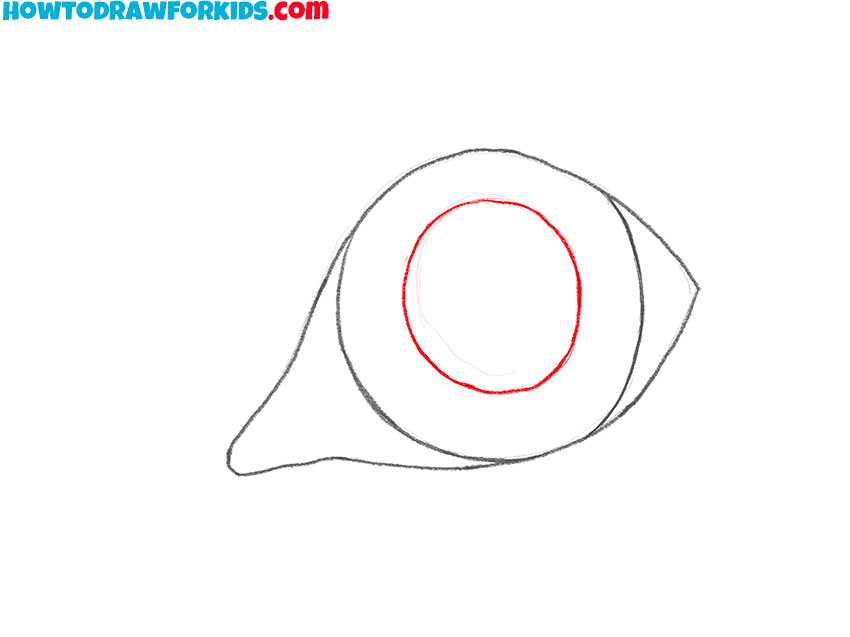
- Draw the iris inside the horse eye shape.
Now that the general shape of the eye is complete, it’s time to add the details. To start doing this, draw a large circular shape inside the outlined eye. This represents the shape of the iris and should be positioned slightly off-center toward the outer side.
- Add the pupil inside the iris.
Inside the iris of the horse eye, draw a slightly smaller circle to form the pupil. Within the iris, you can sketch a small circle to represent the highlight. Unlike human eyes, a horse’s pupil is more elongated and horizontal, so you can slightly adjust the shape to reflect this.
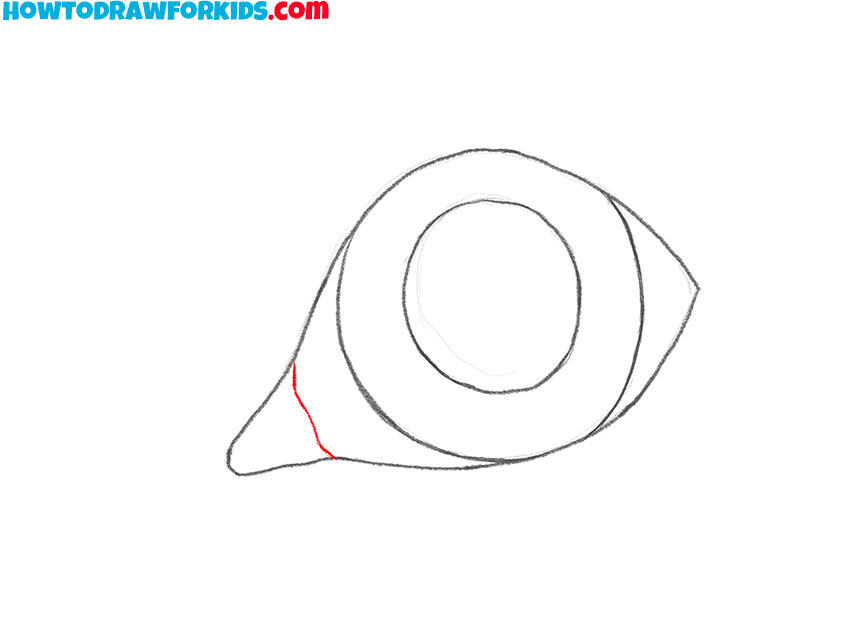
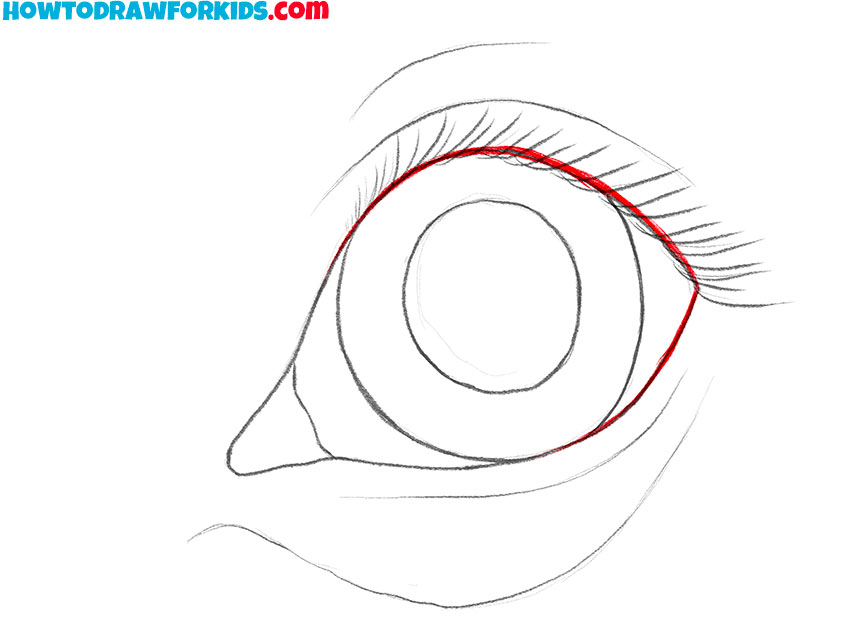
- Sketch the lacrimal caruncle.
In this step of the guide on how to draw a horse eye, focus on adding structure to the surrounding area. To give the horse eye a more detailed look, draw a small line that separates the eye from the lacrimal caruncle of the eye from the rest of the eye.
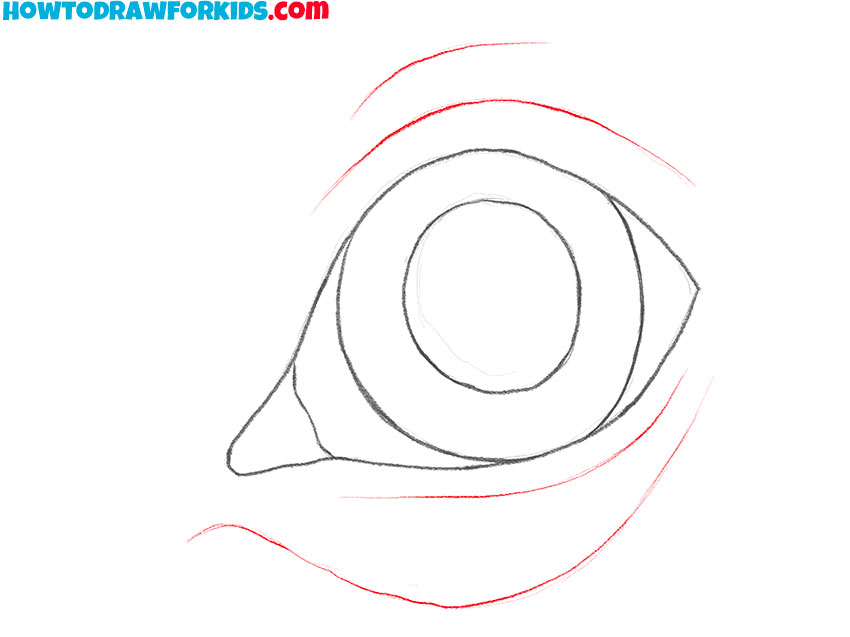
- Add skin folds around the eye.
In this stage of the guide on how to draw a horse eye, refine the contours around the eye by adding additional curved lines. Horses have distinctive skin folds and soft contours around their eyes. Using soft, curved strokes, add a few more lines to create natural folds.
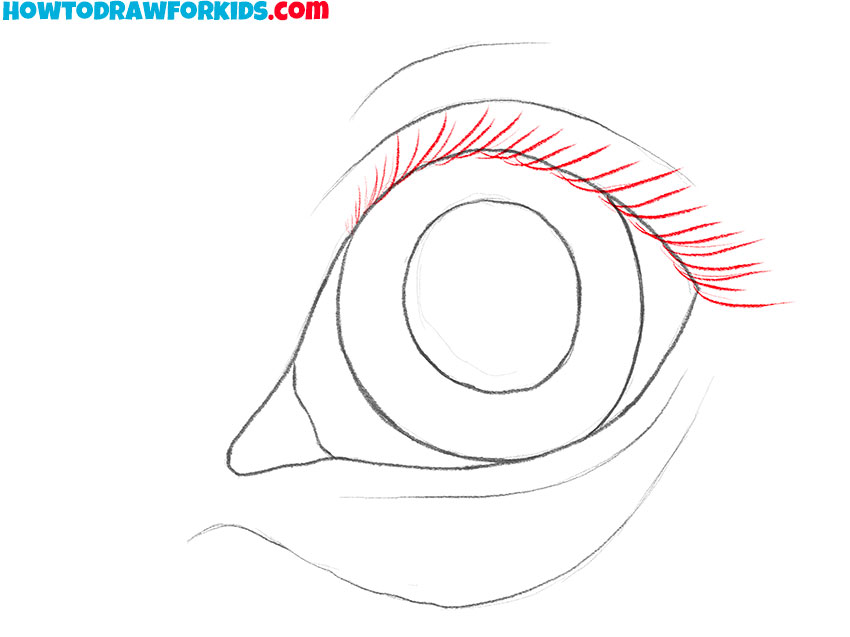
- Sketch the eyelashes.
Horses have long, noticeable eyelashes, especially on the upper eyelid. Using short, curved strokes, draw individual eyelashes extending outward from the top of the eye. The lower lashes should be more subtle and less defined.
- Finalize the outlines and refine details.
Darken the main lines of the horse eye while keeping the contours smooth and natural. You can also enhance the thickness of some lines to make the line work more interesting. If needed, erase any unnecessary construction lines to clean up the horse eye drawing.
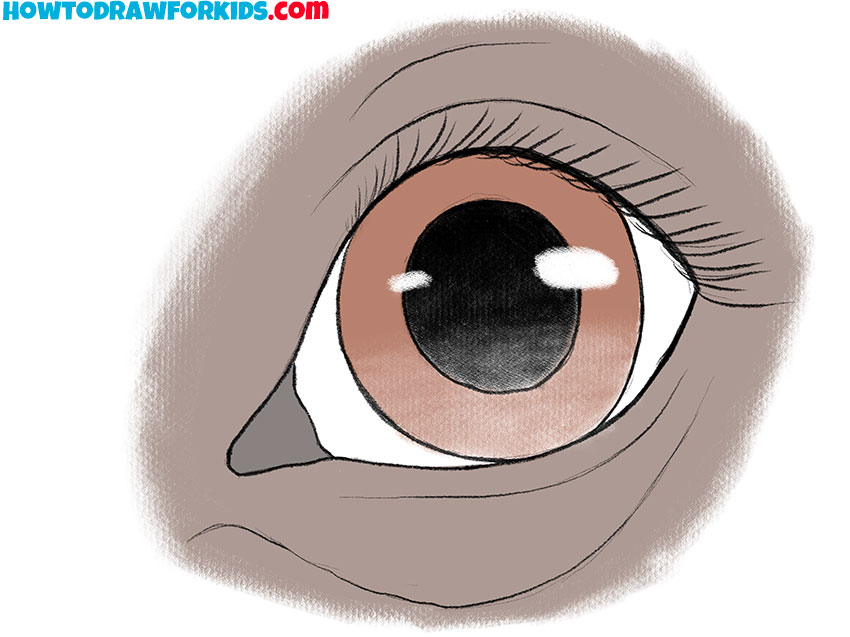
- Add color and shading.
Horses’ eyes typically have dark brown or black irises, with highlights reflecting light. Use a deep brown or black for the iris, leaving small white highlights to create a shiny effect. Add subtle shading around the eye to give it realism. The skin around the eye can be shaded with soft brown or gray tones.
Additional Content
I’ve created a free PDF as a handy offline reference to help reinforce what you’ve learned. It includes exercises and challenges to improve your technique, focusing on realism. Once you’re comfortable with the basics of drawing a horse eye, this resource will help you build your skills further.
How to Draw a Horse Eye: Additional Techniques
text
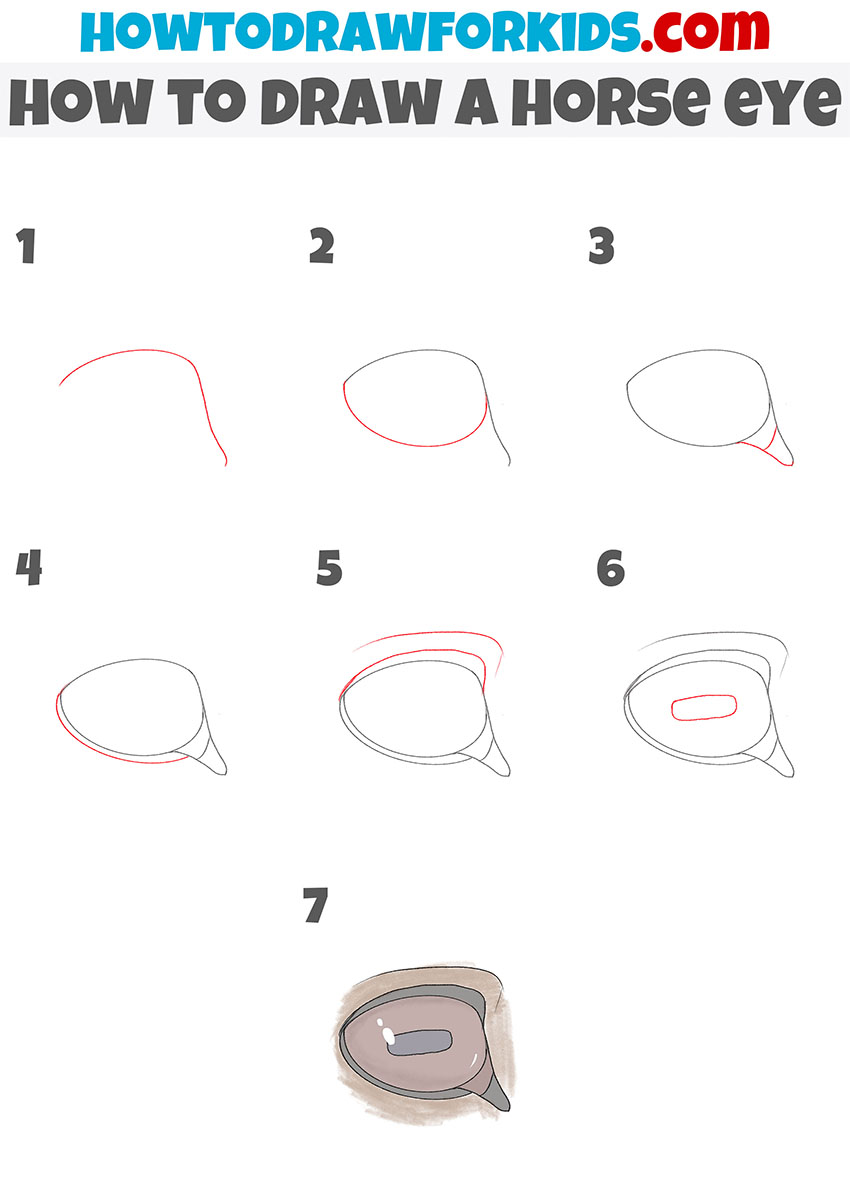
Alternative Horse Eye Drawing Tutorial
This method of how to draw a horse eye is more stylized compared to the first tutorial. The eye shape is different with a distinct reflective highlight that gives it a glossy look. Unlike the first tutorial, this approach omits detailed eyelashes and surrounding wrinkles.
Start by drawing the upper curve of the horse’s eye, keeping the line smooth and slightly arched. Extend the shape downward to form the lower part of the eye, creating a rounded form. Add a small tear duct area at the inner corner of the eye. Draw a second curved line above the eye to indicate the surrounding area of the eyelid.
Inside the eye, sketch the elongated pupil, keeping it centered and slightly rounded at the edges. Finally, color the eye in shades of brown, leaving a white highlight to create a glossy effect. Darken the edges for contrast, and softly shade the surrounding area to make the eye appear more natural.
Simple Horse Eye Drawing Tutorial
This method of how to draw a horse eye is more simplified compared to the first tutorial. Unlike the first tutorials, which includes more intricate eyelid folds and eyelashes, this approach uses only basic lines. The eye retains a natural look but is easier to follow for beginners.
Draw the upper curve of the eye, making it smooth and slightly arched. Extend the shape to form the complete outline, adding a small section for the tear duct. Define the lower eyelid with a curved line, keeping the shape simple. Inside the eye, draw the iris and pupil.
Place a small highlight inside the pupil to give the eye a glossy look. Outline the upper and lower eyelids with smooth lines. Add subtle details around the eye, such as light creases, to improve the shape. Draw short, simple eyelashes on the upper eyelid. Complete the drawing by coloring the eye in shades of brown, leaving bright highlights.
Conclusion
The lesson on how to draw a horse eye has come to an end, and I hope you now know how to create this part of this graceful animal in a recognizable way. It is very important to me that my drawing lessons are both useful and interesting, so your feedback matters a lot. Your opinions also help me develop future drawing lessons, so please share your thoughts on this tutorial and suggest new topics. I always read your comments.
And if you want to improve your skills in drawing animals, I highly recommend checking out my Animals section. There, you can learn how to draw a leopard or create simple yet convincing drawings of donkeys and many other animals.
To stay updated on new content, be sure to follow me on social media. On Pinterest, I regularly post new images, collages, and announcements about upcoming articles and projects. On YouTube, I share video tutorials and give you a behind-the-scenes look at how I create drawing lessons and coloring pages.