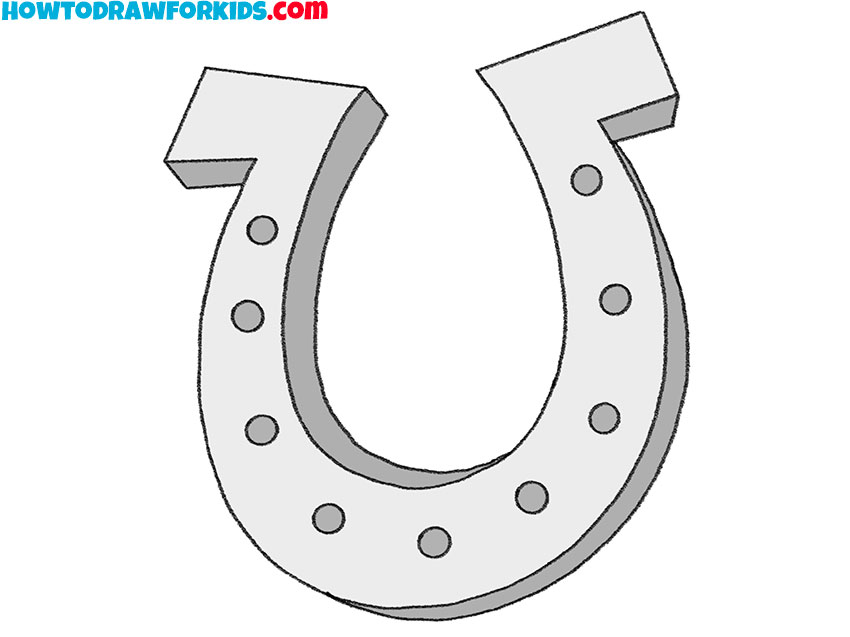
How to Draw a Horseshoe
In this guide I will show you how to draw a horseshoe in 7 really simple steps and share some extra tips to make your art even better.
How to Draw a Horseshoe: Basic Information
So, now I will show you in detail how to draw a horseshoe step by step. This is a great object for drawing and if you complete this lesson, you will once again train your drawing abilities.
Horseshoes have a balanced, symmetrical shape. Practicing this can improve your ability to create complex compositions in other drawings. Symmetry helps in creating harmony and proportion, which are really important for producing aesthetically pleasing artwork.
Pay close attention to maintaining the correct proportions of the horseshoe’s outline. This enhances your spatial awareness and your ability to replicate shapes accurately. Consistency in shapes is also really important for realism and for maintaining the integrity of your artwork.
Drawing the curved lines of the horseshoe improves your ability to render curves smoothly and accurately. Mastering curves is crucial for depicting natural forms and objects realistically.
Horseshoe Drawing Tutorial
Materials
- Pencil
- Paper
- Eraser
- Coloring supplies
Time needed: 30 minutes
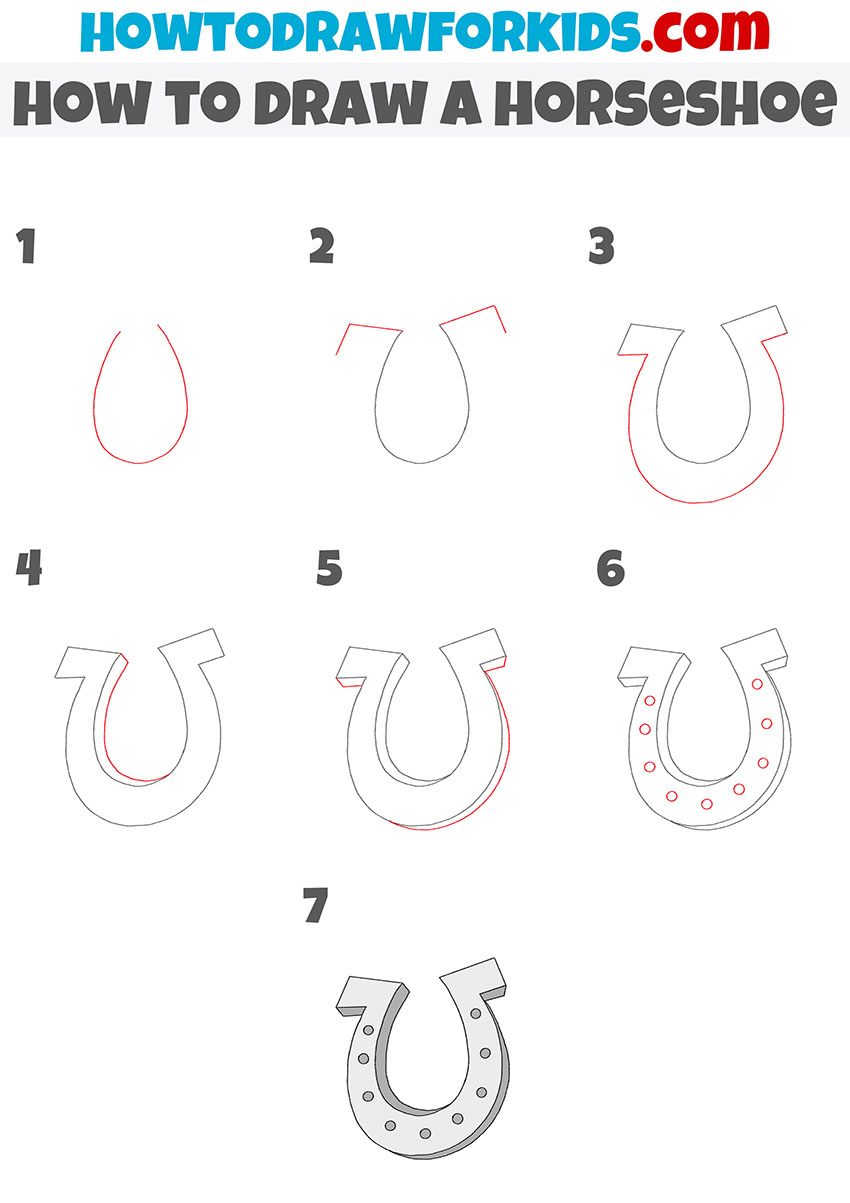
How to Draw a Horseshoe
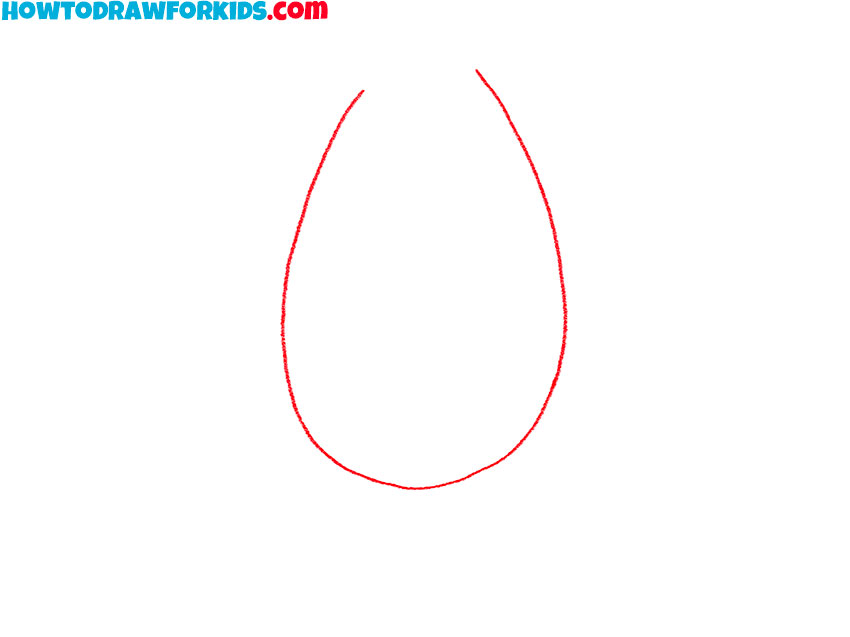
- Draw the inner outline.
In this first step, start by drawing a simple outline for the horseshoe. Create an inverted U-shape with slightly curved sides. This basic shape serves as the foundation for your drawing, so focus on getting the symmetry right. The bottom of the U should be wider than the top.
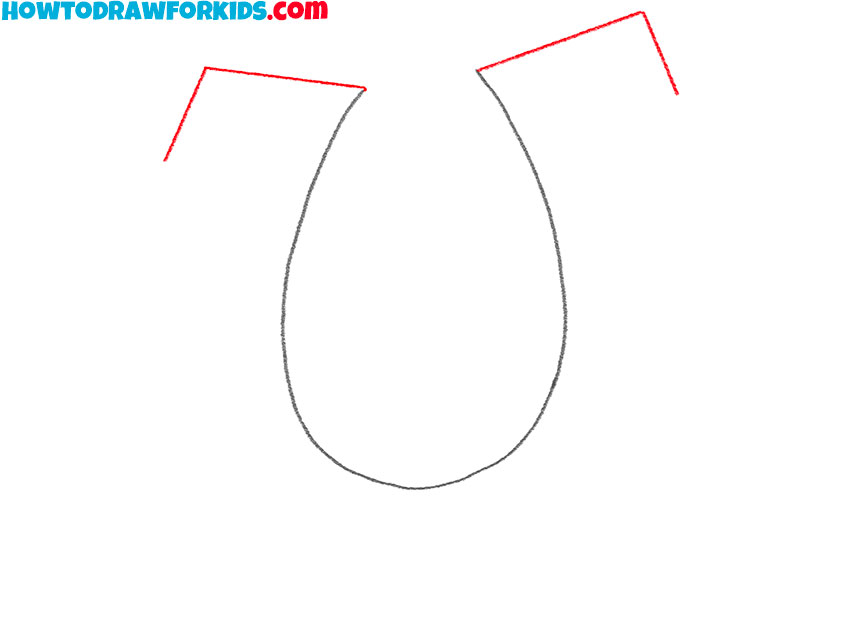
- Add the top sections of the horseshoe.
Draw two short, angled lines extending outward from the top ends of your initial U-shape. Make sure the lines are the same length and symmetrically spaced. This step helps to start giving the horseshoe its distinct shape and prepares for the detailing in the following steps.
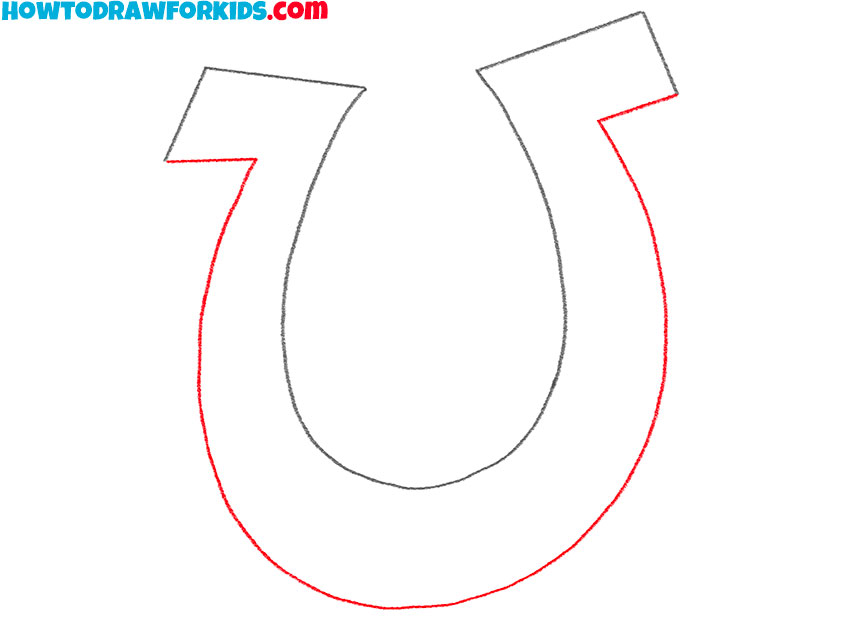
- Draw the outer contour of the horseshoe.
Now, refine the shape by connecting the lines drawn in the previous steps. From the ends of the angled lines, draw curves that meet at the bottom of the initial U-shape, forming a more defined horseshoe shape. The drawing should now start looking like a real horseshoe.
- Illustrate the thickness of the horseshoe.
In this step, add an inner border to the horseshoe. Follow the outer line of the horseshoe, drawing a curved shape inside it, maintaining an even distance from the outer edge. This inner border gives the horseshoe a sense of depth and structure, preparing it for further detailing.

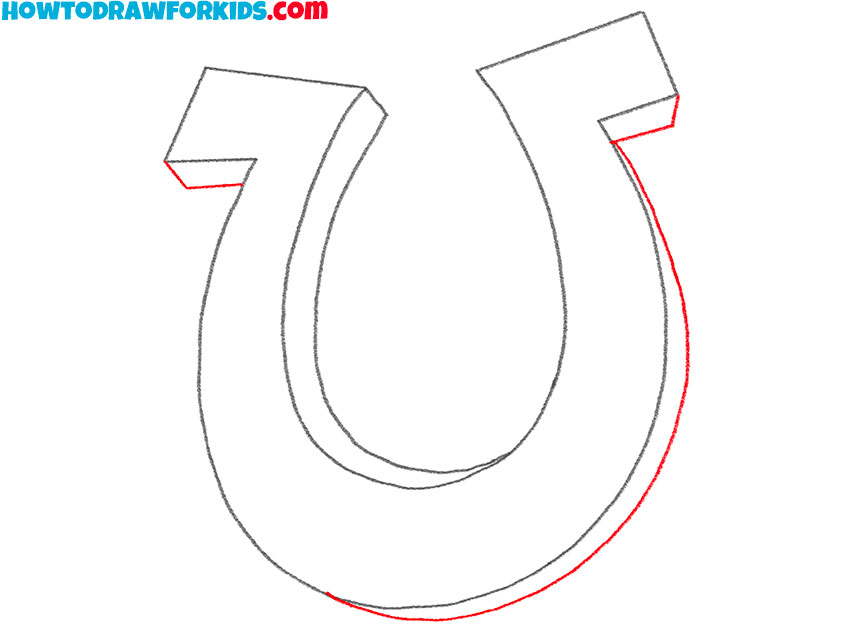
- Draw the thickness of the side parts of the horseshoe.
Now add volume to the right side of the horseshoe by drawing the far edge using a curved line following the contour drawn in the first step. Next, add volume to the upper sections using a couple of horizontal and a couple of short vertical lines.
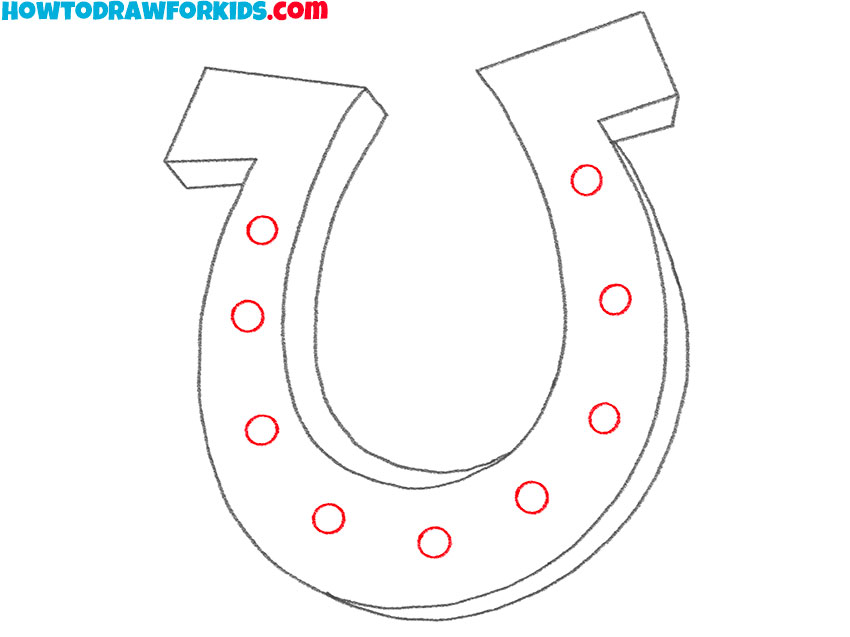
- Draw the nail holes.
Evenly space a series of small circles along the inner border. These holes should be uniform in size and placement, creating a symmetrical pattern. Typically, horseshoes have an equal number of nail holes on each side, so aim for a balanced distribution.
- Color the horseshoe drawing.
Darken the lines you want to keep and erase any guidelines or mistakes. Ensure the nail holes are well-defined and the overall shape of the horseshoe is symmetrical and clear. Adding color and texture can give the horseshoe a more realistic look.

Additional Content
This PDF file is a really cool resource created to improve your drawing practice. It includes detailed illustrations of each step in the tutorial, providing clear guidance as you draw the horseshoe.
Additionally, it offers a coloring page, allowing you to experiment with different shading techniques and color palettes. The tracing worksheet helps improve your line work and precision, while the grid drawing worksheet aids in mastering proportions and spatial awareness.
By downloading and using this PDF, you can conveniently practice and refine your drawing skills.
How to Make Your Horseshoe Drawing Even Better
You can add shading to your horseshoe to create a more three-dimensional look. Identify a light source and shade the areas opposite to it. Use gradual changes in tone to depict the curves and edges, enhancing the volume. Darker shading along the inner edges and lighter shading on the outer curves can create a metallic sheen.
Incorporate texture to mimic the appearance of metal. Use small, controlled strokes to add scratches and imperfections, giving the horseshoe a more realistic, worn look. Highlight areas where the metal might be smoother or more polished from use.
Draw a background to make your horseshoe drawing more complex. Consider placing it in a stable or against a wooden wall, adding elements like hay, tools, or a horse’s hoof.
Pay extra attention to the nail holes by adding slight indentations and shadows around them. This makes them appear more realistic and integral to the structure of the horseshoe. Small details like these contribute to the overall authenticity of your drawing.
Depict rust and patina to give the horseshoe an aged, weathered look. Use different shades of brown, orange, and green to create these effects. Include environmental details such as dirt, grass, or a barn floor around the horseshoe.
How to Draw a Horseshoe: FAQ
If you have any questions about drawing a horseshoe, my FAQ section has got you covered. Here, I address common queries and provide detailed answers to help you improve your drawing skills. Whether you’re looking for tips on creating symmetry, adding texture, or achieving a metallic look, my FAQs will guide you through the process.
Common mistakes include uneven symmetry, inconsistent line weight, and incorrect proportions. Take your time to ensure the curves are smooth, the sides are balanced, and the details like nail holes are evenly spaced.
Tutorials on drawing other objects with similar shapes, like horse hooves or different types of tools, can complement this horseshoe drawing tutorial. Additionally, tutorials focused on shading techniques, texture creation, and drawing from different perspectives would be beneficial.
Yes, drawing decorative horseshoes can be a fun way to experiment with patterns and designs. Add engravings, symbols, or embellishments.
To depict wear, add uneven edges, dents, and scratches. For rust, use a range of brown and orange tones, applying them unevenly to suggest corrosion. Blending these colors softly can create a realistic rusty texture.
Use a combination of shading and highlighting. Darken areas where shadows fall and leave highlights where light hits. Blending smoothly and adding sharp highlights with a white pencil or eraser can mimic the reflective quality of metal.
Use smooth, continuous strokes to draw the curves. Practice drawing ellipses and circles to gain control over your curves. For beginners, lightly sketching the curves first and refining them can help achieve smoother lines.
Measure equal distances along the inner edge of the horseshoe and mark small dots where the nail holes will go. This ensures they are evenly spaced. Use a reference photo to understand their typical placement and size.
Conclusion
Through this tutorial, you learned to draw a horseshoe step-by-step, focusing on symmetry, shading, and detailing. You practiced creating texture, adding volume, and using different techniques to enhance realism in really simple way.
This exercise improved your line work and understanding of light and shadow, providing a solid foundation for future drawing projects. By incorporating elements like background details, you also enhanced your ability to create more complex artworks.
Thank you for following this tutorial! We hope you enjoyed the process and found it helpful. If you did, please share this tutorial with your friends. Don’t forget to subscribe to my social media for more drawing tutorials. Also leave your comments with wishes, questions, and suggestions below.