How to Draw a Husky
Husky dogs are one of the most beautiful and hardy dog breeds. In this tutorial, I want to show you how to draw a husky with two methods.
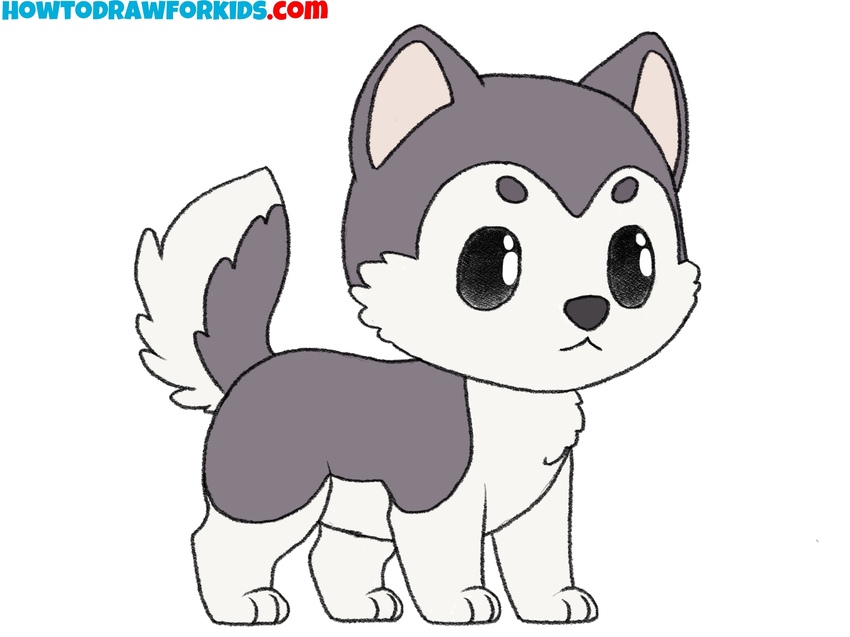
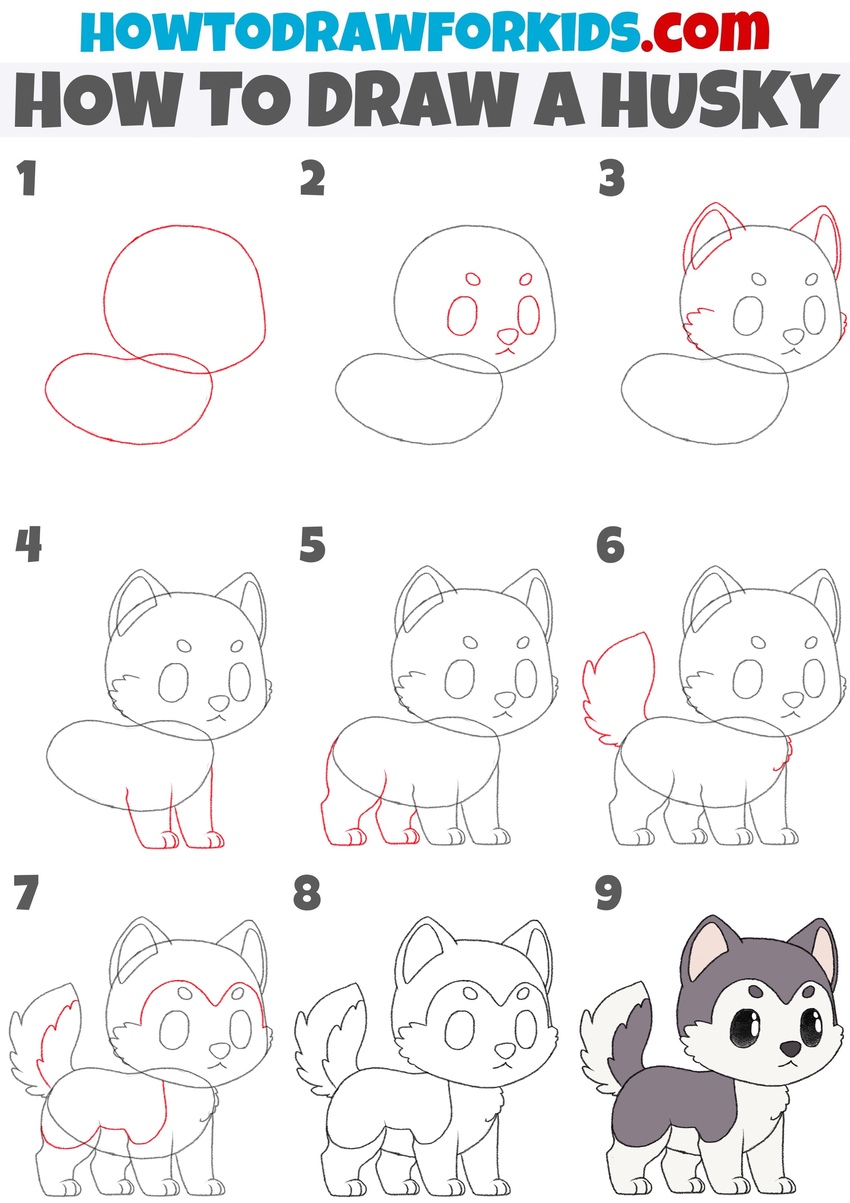
How to Draw a Husky: Introduction
In this tutorial, you will learn how to draw a husky. The husky is a large, muscular, and hardy dog breed native to northern regions. Originally from Siberia, huskies have been used as sled dogs for transportation in cold climates.
The husky has a thick coat, a pointed muzzle, erect ears, and a straight tail. Its eyes are typically brown or light blue. In this drawing, the husky will have slightly cartoonish and simplified proportions, but you can adjust the body size and leg length to create a more realistic look.
This husky drawing lesson will help you improve your skills in depicting this breed and will also provide general guidance for drawing dogs of other breeds. It may also be useful for drawing wolves, as these animals share similar characteristics and are related.
To better understand how to draw a husky and improve your skills further, refer to the additional lesson at the bottom of the page. This additional lesson will help reinforce the techniques and take your skills to a higher level.
Husky Drawing Tutorial
Materials
- Pencil
- Paper
- Eraser
- Coloring supplies
Time needed: 40 minutes
How to Draw a Husky
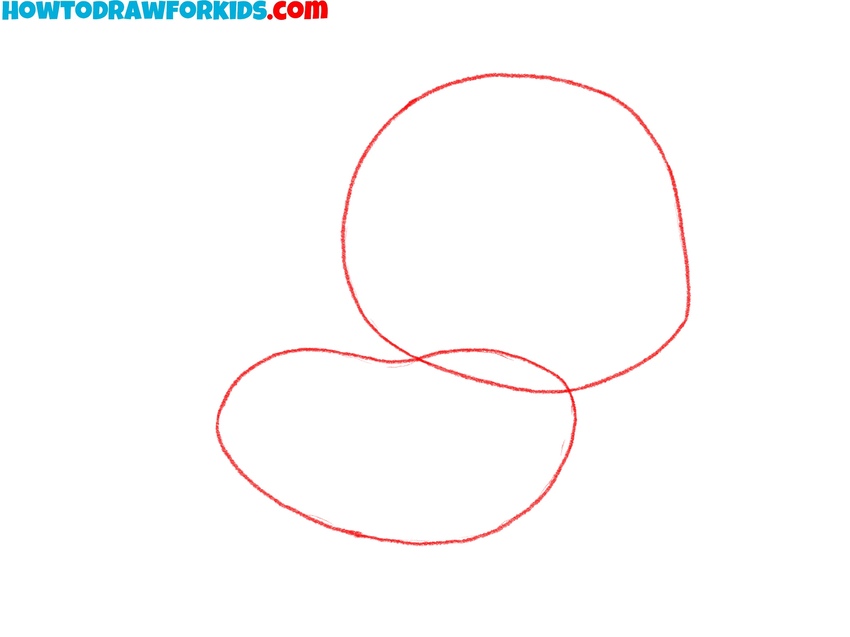
- Draw the head and torso of the husky.
Begin by drawing the basic shapes of the husky’s body. Start with an oval for the head, positioned above a larger, horizontally oriented oval for the body. Keep the head smaller than the body. The shapes are just rough outlines at this stage, helping to place the head and body accurately.
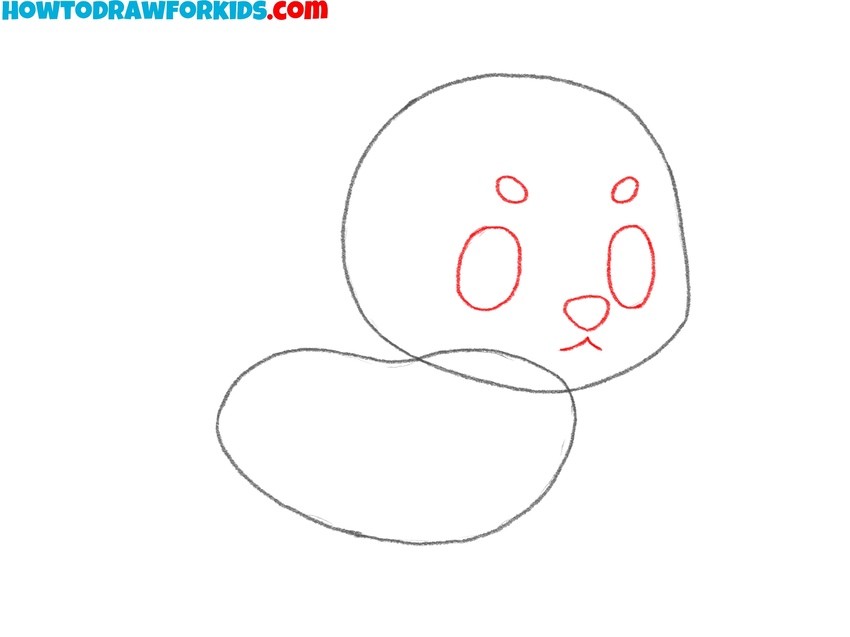
- Illustrate the facial features of the dog.
Draw two oval shapes for the eyes of the husky, placing them at the center of the face. Add a small rounded shape for the nose between the eyes. After that, draw the mouth below the nose using two short snd curved lines. Finish drawing the husky face adding the eyebrows above the eyes.
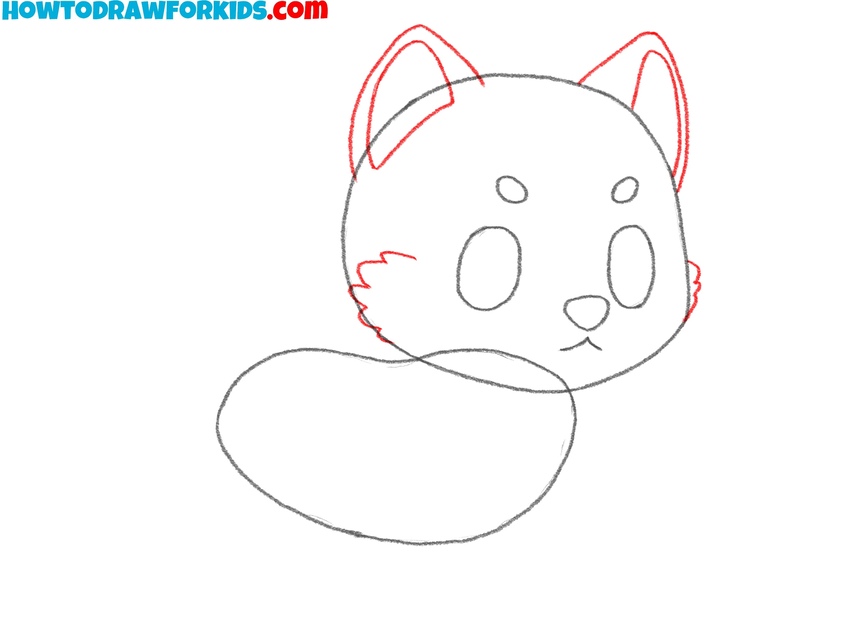
- Add the ears and cheeks.
Create two triangular shapes on top of the head for the husky’s ears, with slight curves at the top parts to make them look natural. Add small lines within the ears to illustrate the inner details. Refine the outer shape of the face by adding lines of fur on the cheeks.
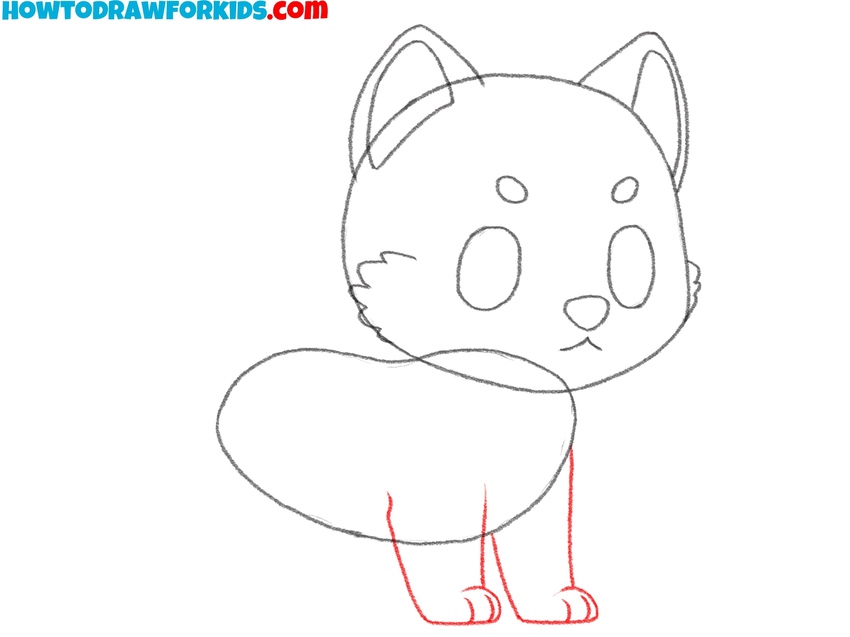
- Draw the front legs of the husky.
Draw two simple slightly curved lines extending downward from the body shape to form each leg. At the bottom, draw small rounded shapes to represent the paws of the husky. For the toes of the dog, draw small and curved lines on the paws.
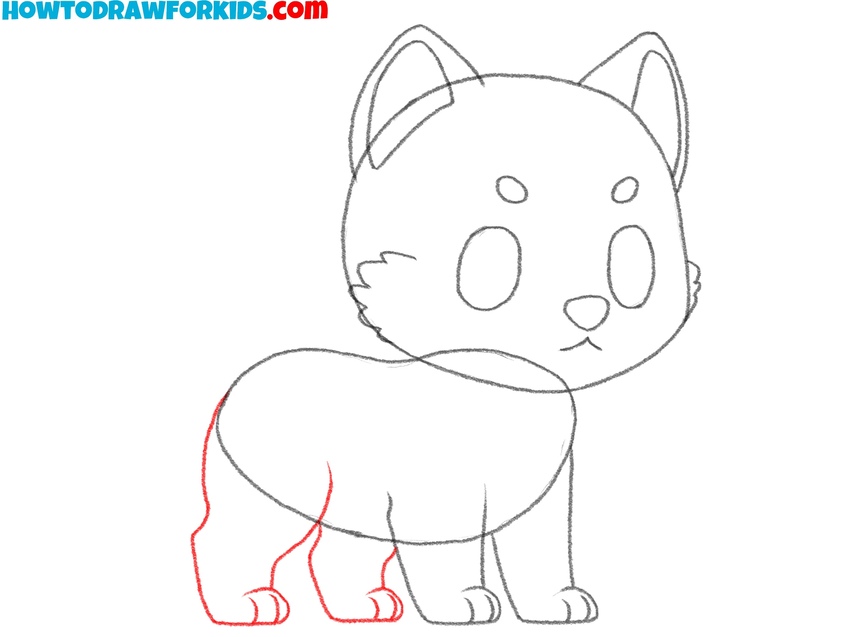
- Sketch the hind legs of the dog.
In this step, draw the back legs of the husky by following the shape of the front legs but with a slight curve to illustrate the hindquarters. Add small ovals for the back paws at the bottom. As with the front toes, draw the back toes using short, slightly curved lines.
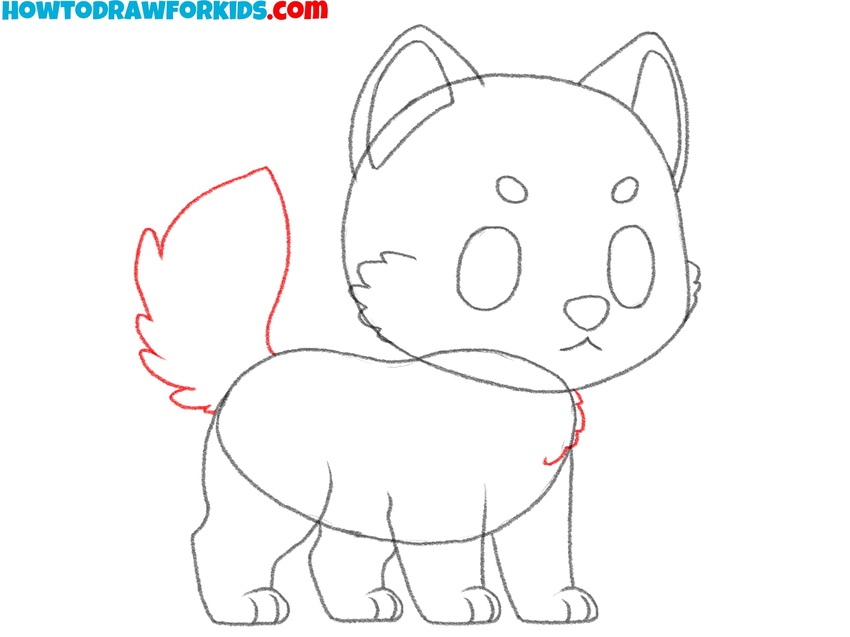
- Draw the tail of the husky.
Start by sketching a fluffy, curved tail extending upward from the back of the body. Huskies are known for their bushy tails, so add slight waves to illustrate fur texture. Next, add small, curved lines on the chest area to indicate the fur detail there.
- Detail the fur of the dog.
Draw a curved line above the eyes to create the signature markings on the husky’s face. Then, sketch additional lines along the body to indicate fur, especially around the tail and chest areas. These lines add texture, making the husky drawing look more realistic.
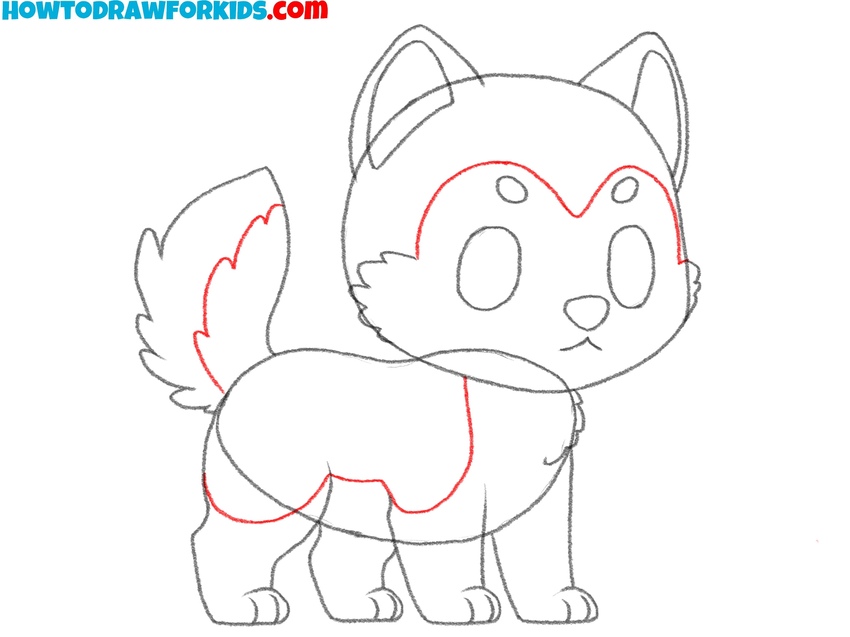
- Refine the husky sketch.
Carefully erase the guidelines and strengthen the main lines to make the husky drawing cleaner. Check for any remaining rough spots, especially around the face, and refine them as needed. A smooth outline will give your husky drawing a more finished appearance and prepares it for coloring.
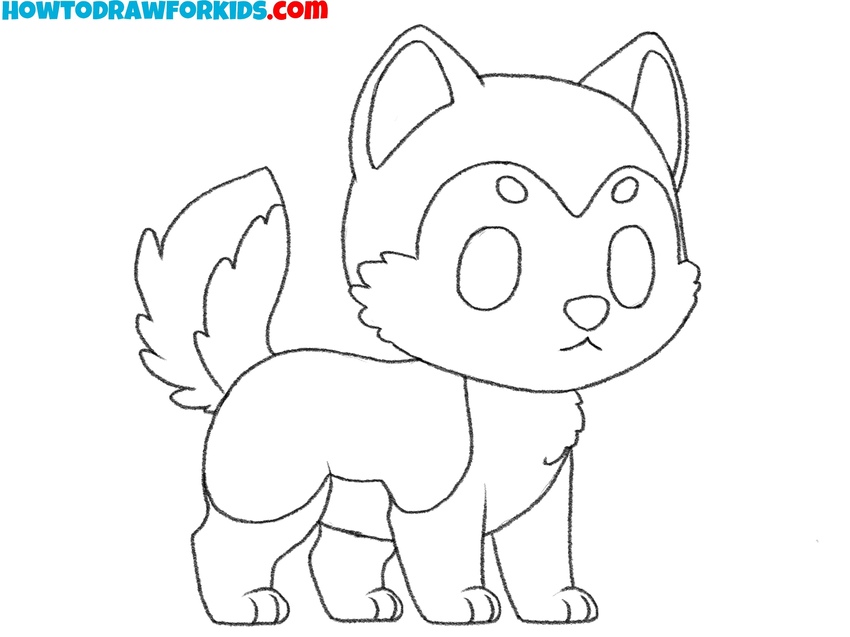
- Add color to the husky.
Use shades of gray and white to color the husky’s coat, trying to replicate the characteristic color pattern of a husky. Darker gray covers the back, top of the head, and tail, while white is used for the face, chest, and legs. Fill in the eyes with black, adding a small white dot for a highlight.
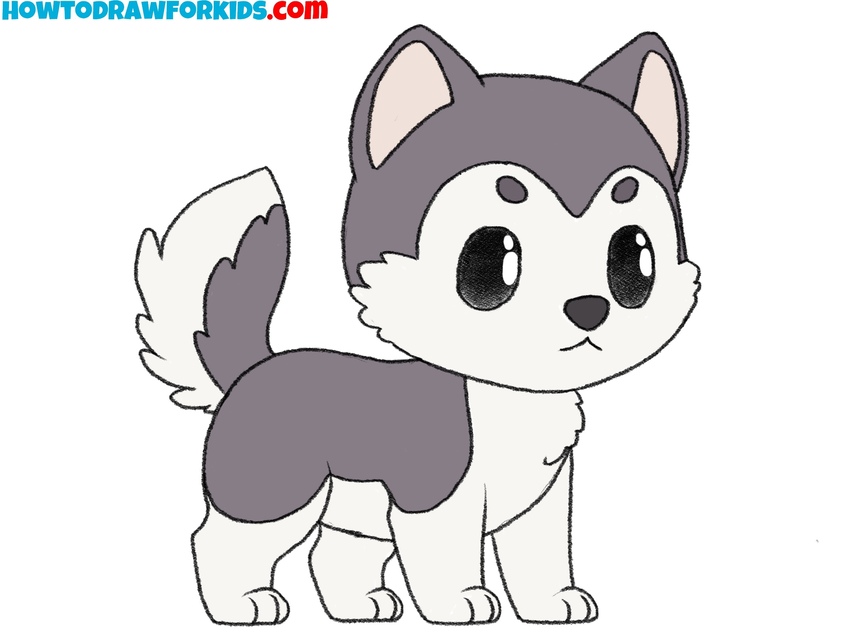
Simple Husky Drawing Tutorial
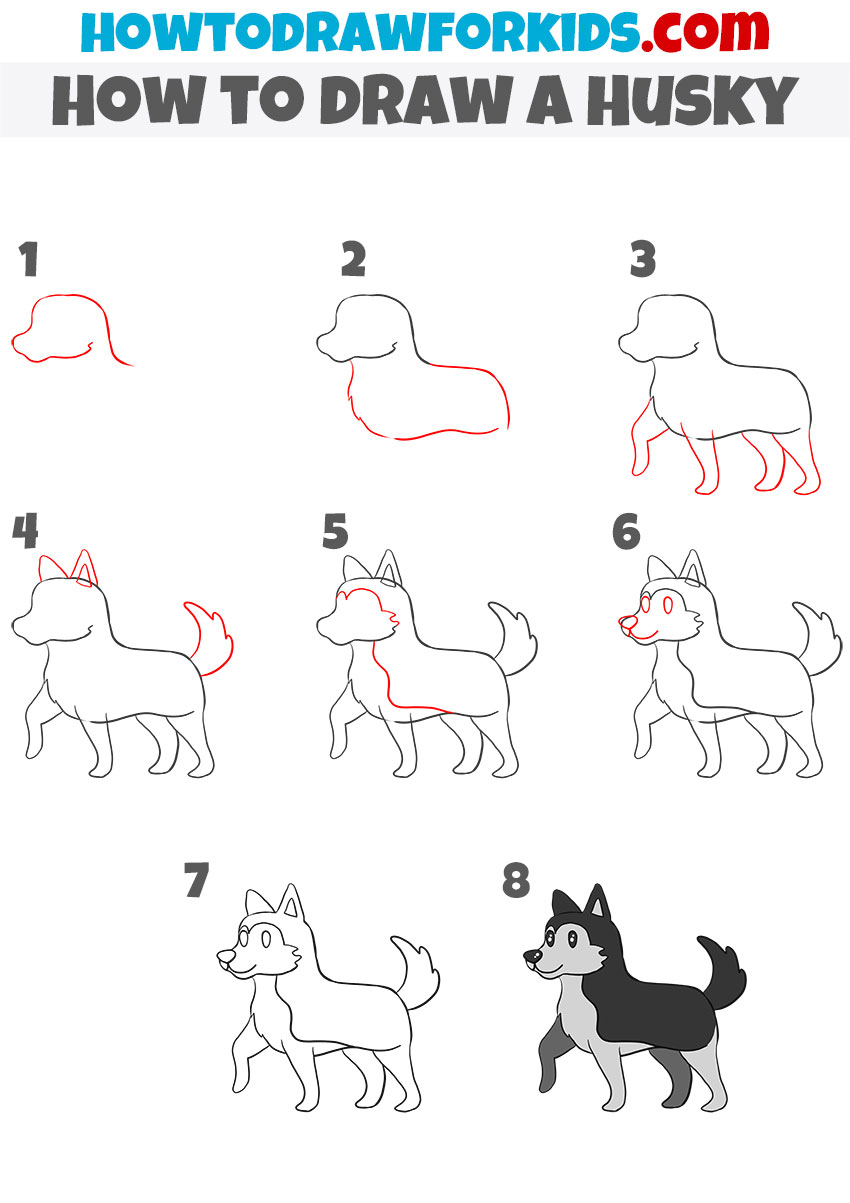
This alternative husky drawing tutorial differs from the previous one in style and complexity. Here, the husky is drawn using more natural body proportions and fewer exaggerated features. The previous tutorial focused on a cartoonish appearance with rounded shapes and simplified proportions, while this version presents a bit more accurate depiction with defined fur and body contours.
To draw a simple husky, start by sketching the outline of the head and snout. Add the main body shape, extending it back. Draw the front legs first of the husky, then sketch the back legs. Next, add the pointed ears and draw a bushy tail that curves upwards.
Define the husky’s chest and back, then add facial details, including the eyes, nose, and mouth. Refine the outline by adding lines of fur, especially around the neck and tail areas. Finally, color your husky drawing with shades of black, gray, and white, following typical husky coloration.
Don’t forget to download the PDF of the short version of the lesson. This file contains useful information and you can use it at any time.
Conclusion
Now you can draw a husky dog in different styles and with various body proportions. This set of drawing tutorials aims to provide useful skills that you can apply in future artworks.
Additionally, check out other drawing tutorials in the Animals section for more similar guides. For example, you can learn to draw bunnies or practice drawing lions. Don’t forget to visit my social media platforms, such as Pinterest or YouTube, for additional content.

I like this because I can draw cute drawings!! And it has them step by step.
ugly
I like