How to Draw a Japanese Dragon
Now I will show you how to draw a Japanese dragon. I am sure that this lesson will be useful and interesting for any aspiring artist.
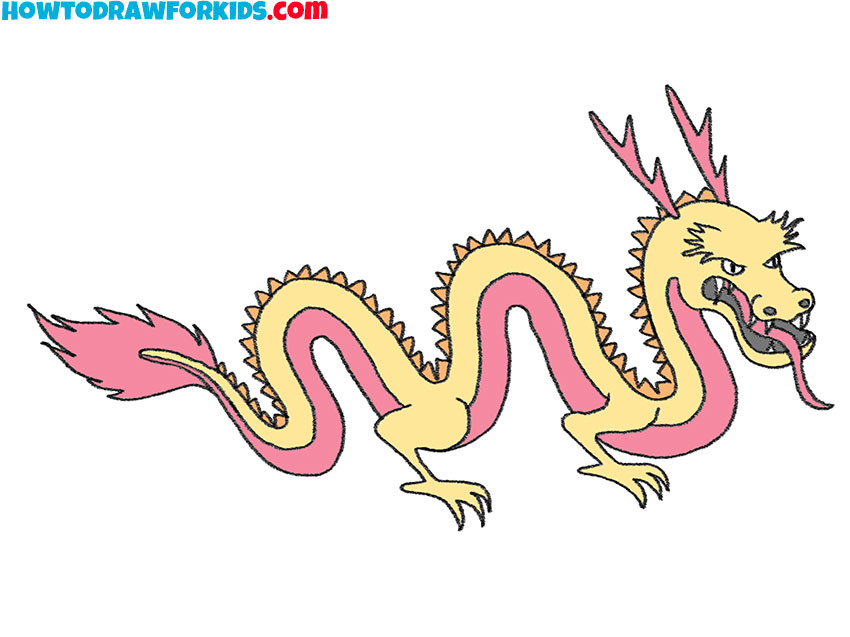
If you like to draw mythical creatures, then you will definitely like this lesson, because now you will learn how to draw a Japanese dragon. This creature looks like a large snake with scales on its back. In many myths, the dragon is tied to the water element, but at the same time it is able to fly.
In the picture, the Japanese dragon looks very menacing. It has sharp spikes on its head, a long tongue, and long claws. The Japanese dragon symbolizes strength, power, and wealth. Now the image of a dragon is very common not only in Japan, but also in other countries.
Perhaps you want to get started on this exciting lesson as soon as possible. If all art supplies are ready, then you can sequentially follow all the steps in this instruction.
Japanese Dragon Drawing Tutorial
Materials
- Pencil
- Paper
- Eraser
- Coloring supplies
Time needed: 35 minutes
How to Draw a Japanese Dragon
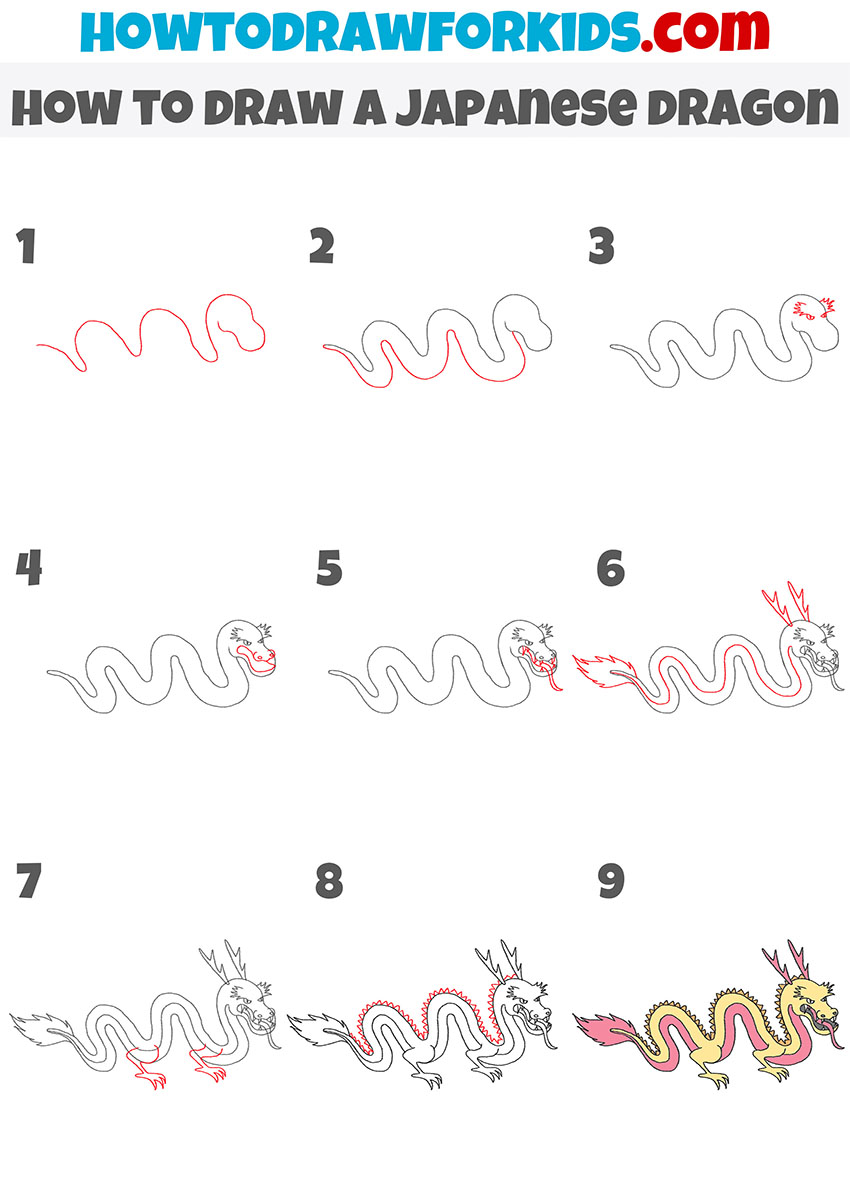
- Draw the upper body and head.
Depict a wavy line to depict the back and draw the outline of the head.
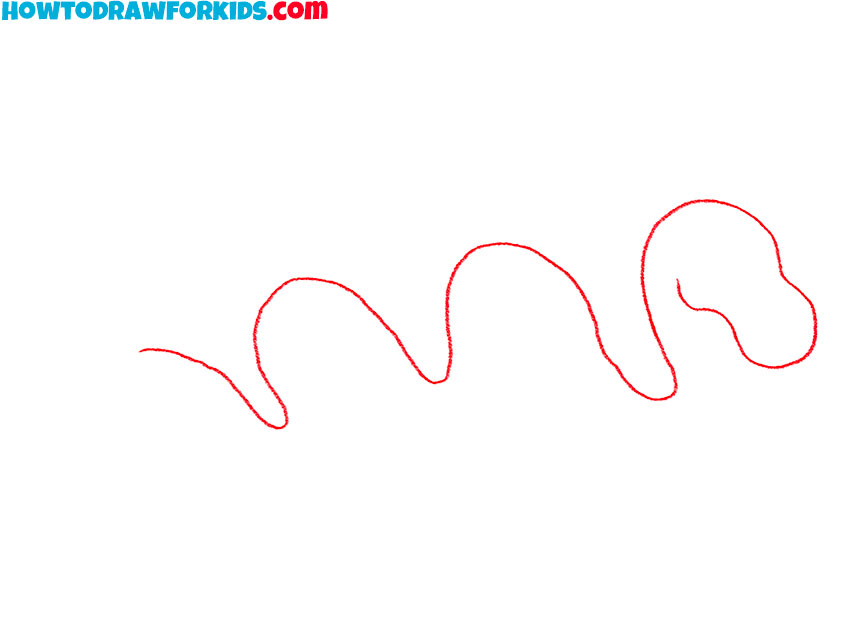
- Add the lower body of the dragon.
Draw another wavy line at the bottom. So you depict the thickness of the dragon’s body.
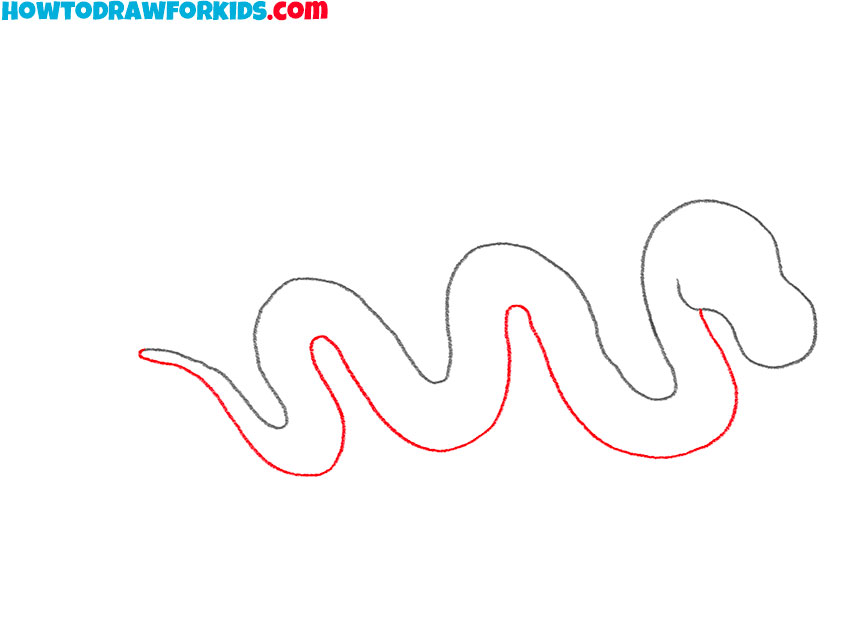
- Sketch out the eyes.
On the head draw the eyes, add the pupils and above the eyes draw the spikes with zigzag lines.
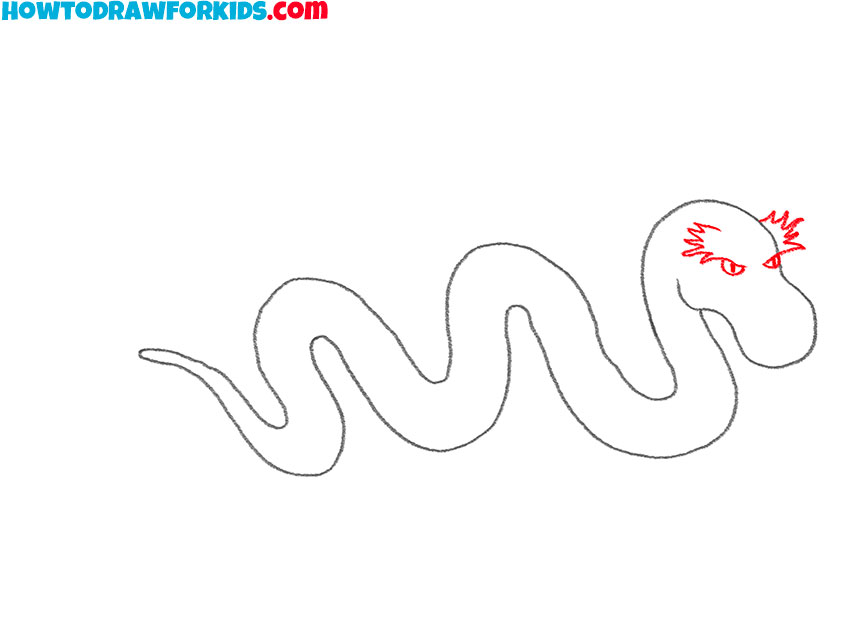
- Depict the front of the head.
Sketch out the mouth that is wide open and draw the large nostrils.
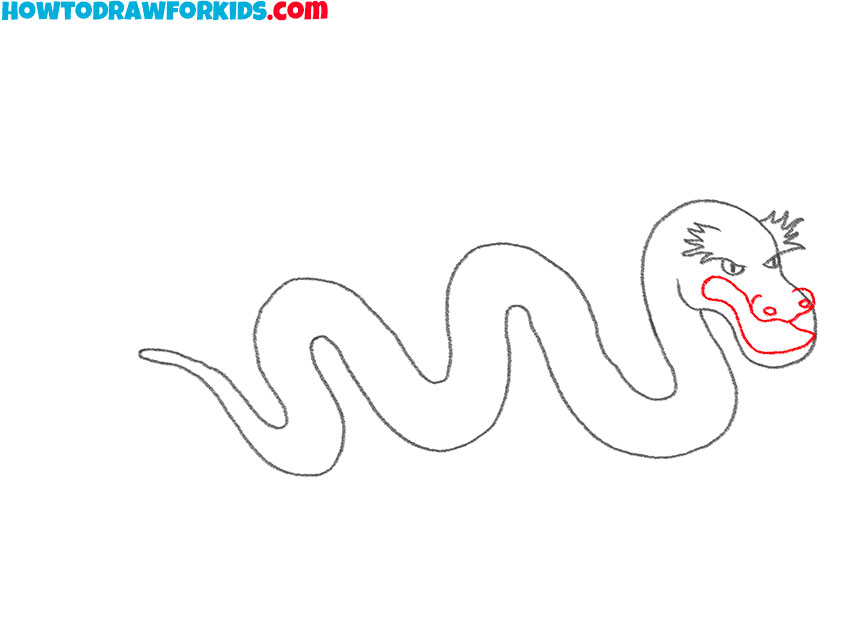
- Detail the mouth.
Consistently draw the teeth and with the help of a wavy line depict the long thin tongue.
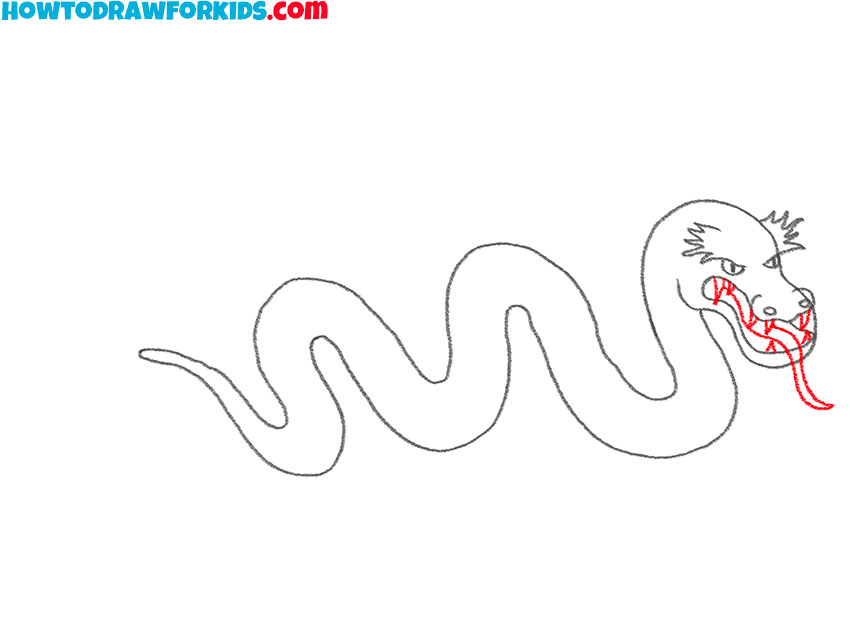
- Draw the paws.
In the lower part of the torso, add the paws. Sketch out the sharp claws.
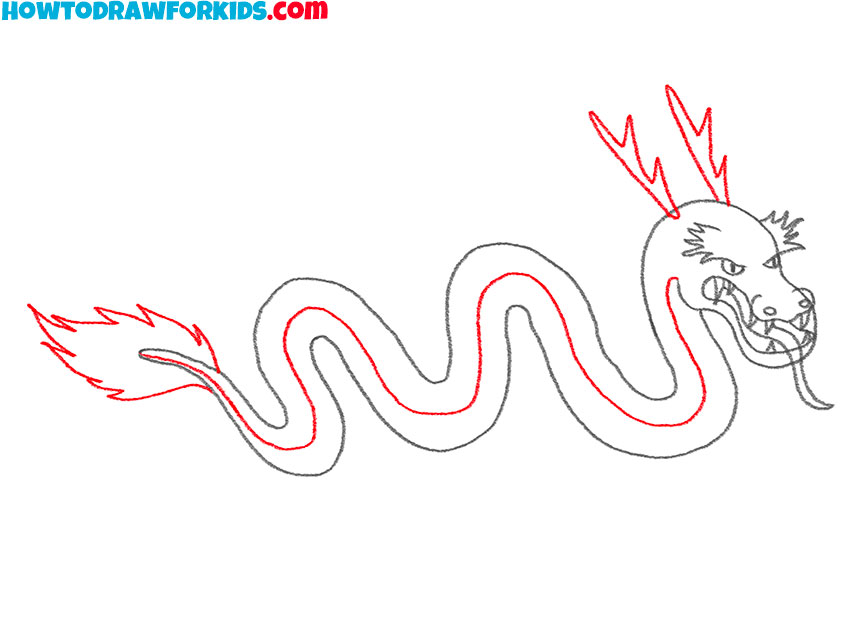
- Depict the rest of the elements.
Draw a line and mark the contour where the color will differ. Add the spikes on the head and on the tail.
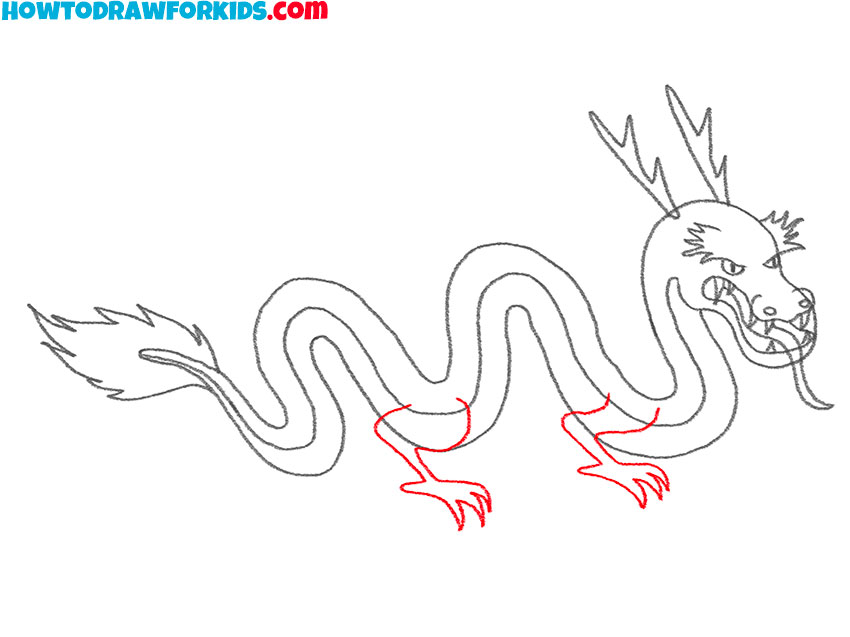
- Add the spikes on the back.
Consistently depict the small triangular spikes along the upper contour of the torso.
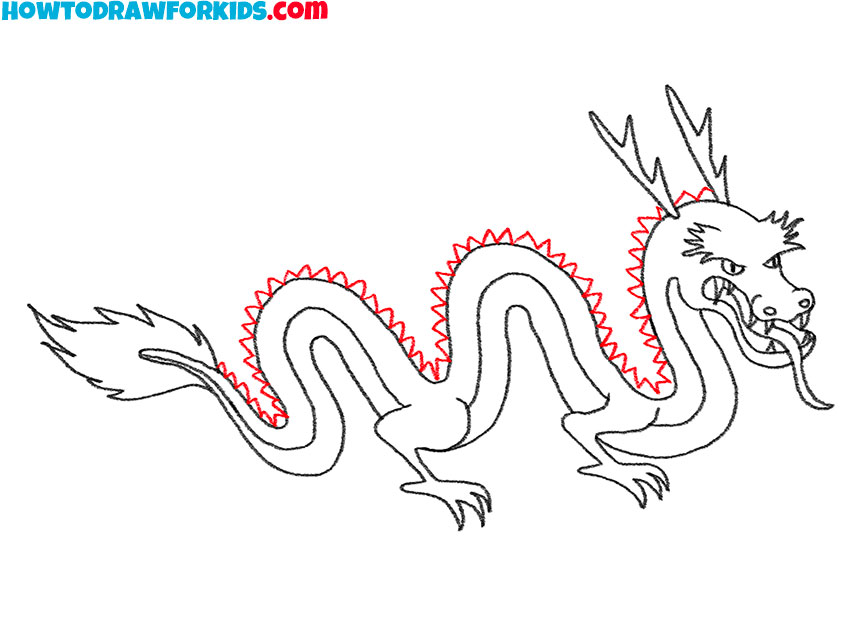
- Color the drawing.
You will need beige, orange, pink, and gray.
If you tried your best at each stage of drawing, then you should get a great drawing. Share your impressions about this lesson in the comments. At the end of the lesson, I suggest you download the PDF file, which contains a brief instruction and additional training materials.