How to Draw a Pepper
Join me on this flavorful drawing journey, where we’ll peel back the layers of complexity to reveal just how to draw a pepper. With each line we sketch, the humble pepper will emerge, vibrant and full of life. This lesson distills the art of drawing into simple, savory steps that anyone can follow and enjoy.
How to Draw a Pepper: Basic Information
Step into my artistic kitchen where today’s recipe is how to draw a pepper. With a dash of line work and a pinch of shading, we’ll create something that looks freshly picked from the garden. My approach breaks down the complex shapes of this spicy subject into a series of simple, digestible steps.
The key features of our subject – the tapered end, the curving body, and the sprightly stem – will be our focus as we layer lines and shades. My method ensures you’ll appreciate the subtleties of the pepper’s form, infusing your artwork with realism and charm. Each stroke on the paper is a step closer to capturing the pepper’s spirit.
At the close of this lesson, not only will you know how to draw a pepper, but you’ll also have deepened your artistic perception, seeing the extraordinary in the ordinary. Carry these skills forward, and let the simple pepper inspire you to uncover the dynamic potential in all you choose to draw next.
Pepper Drawing Tutorial
Materials
- Pencil
- Paper
- Eraser
- Coloring supplies
Time needed: 30 minutes
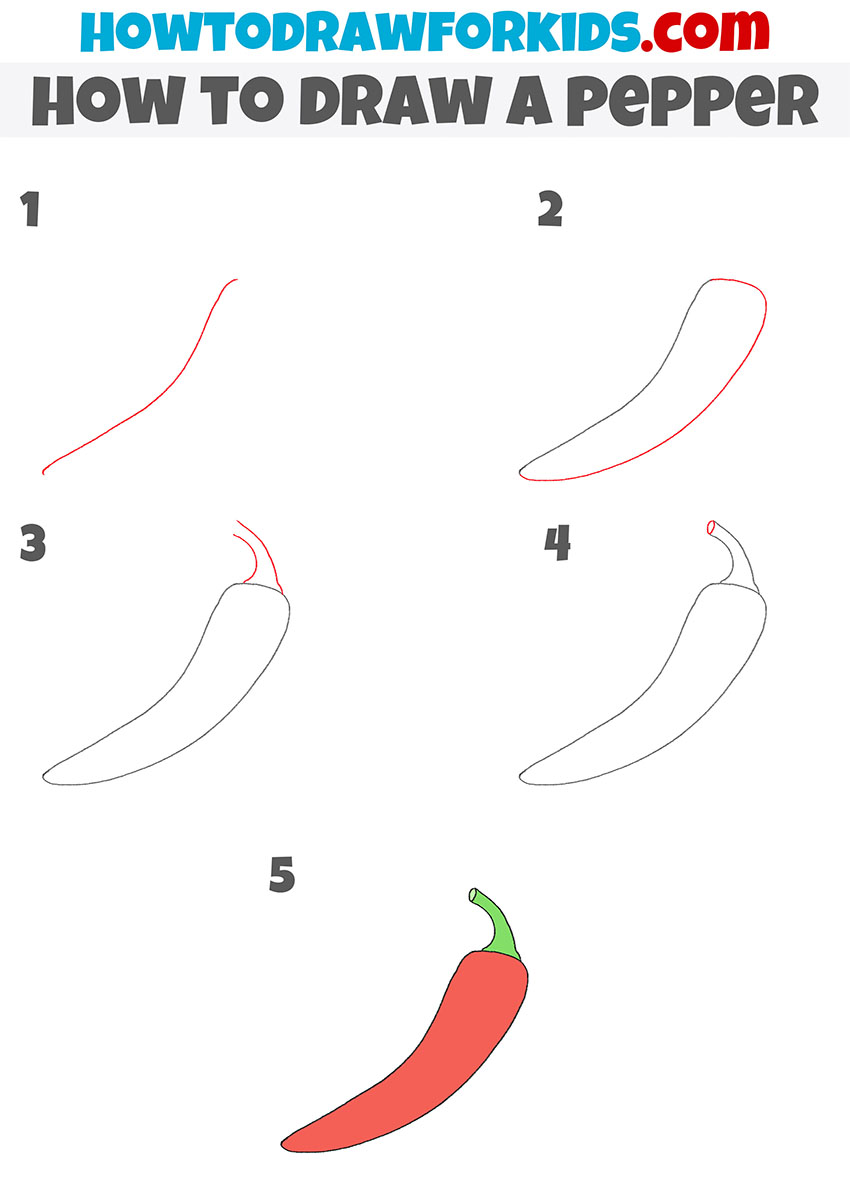
How to Draw a Pepper
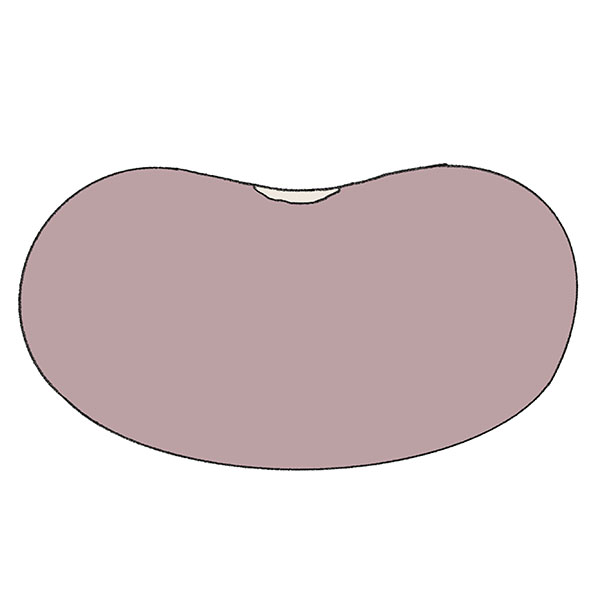
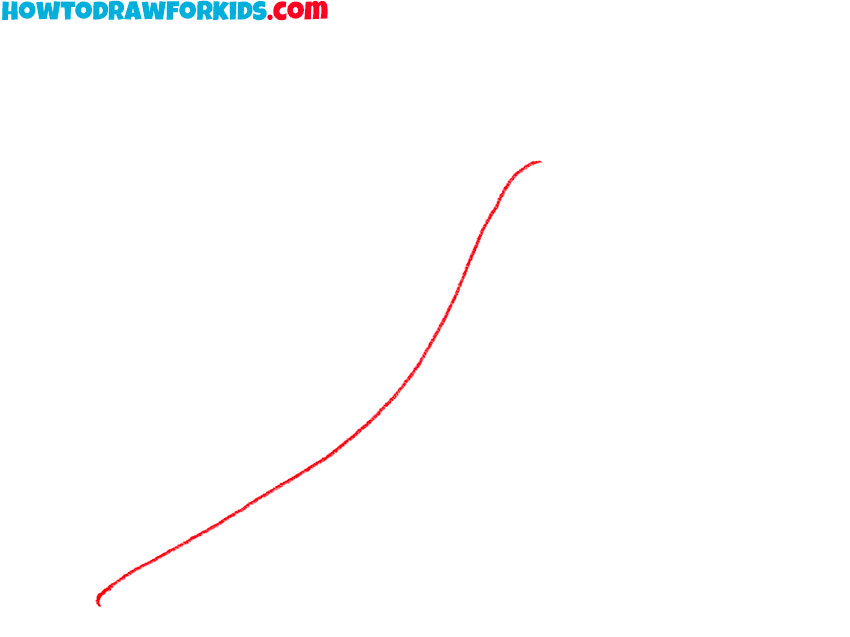
- Draw the top edge of the outline of the pepper.
To complete this simple step, you should draw one curved line, as shown in the picture.
- Add an outline to the bottom of the pepper.
From the ends of the previously drawn curved line, draw another longer curved line.

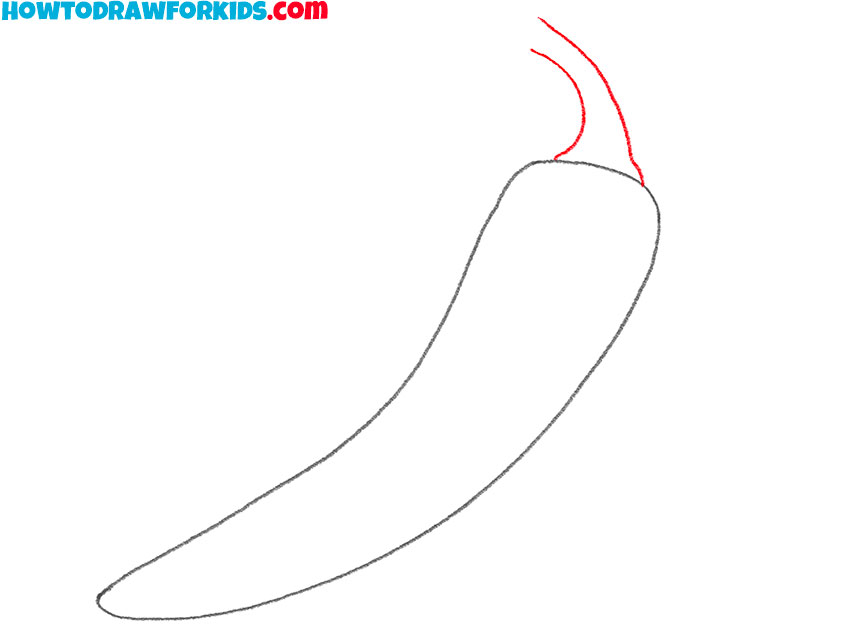
- Start drawing the top of the pepper.
At the top of the drawn shape, draw two curved lines of different lengths, as shown in the figure.
- Finish drawing the tail of the pepper.
Connect the ends of the previously drawn curved lines with one small oval.

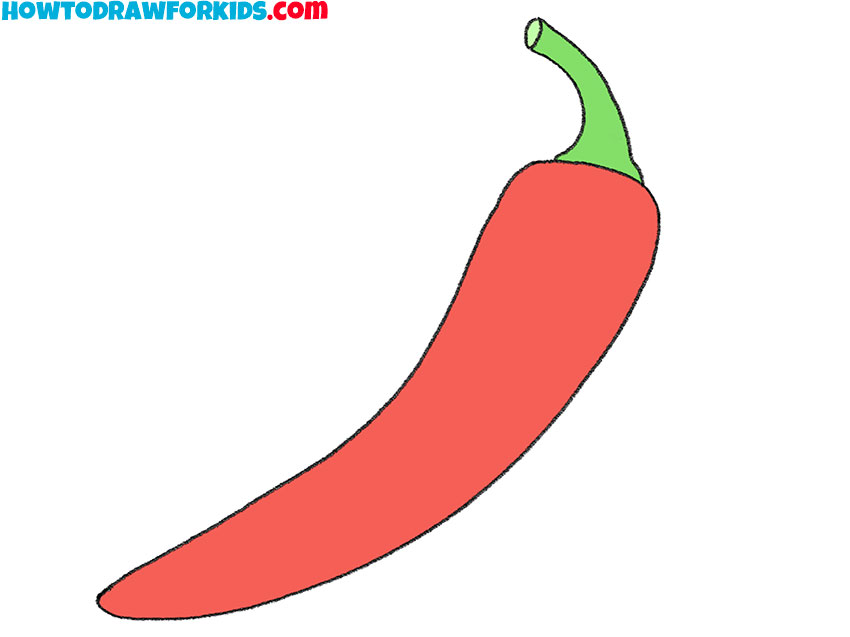
- Color the drawing.
To color this pepper, you should use red and shades of green.
Additional Content
In the spirit of nurturing your journey in art, I’ve put together a special PDF file tailored to enhance your practice post-lesson. Available for free, this file is a compact version of our class that you can access offline, allowing you to sharpen your skills without the need for internet connectivity.
This PDF isn’t just a recap; it’s a springboard for further development. Inside, you’ll discover additional material focused on refining your drawing techniques. It’s a resource intended for use after you’re comfortable with the basic steps of creating art, pushing you into new realms of proficiency.
Designed to be your silent mentor, the PDF is replete with exercises to deepen your understanding of form and shadow, building upon what we’ve covered. As you work through these, you’ll find your ability to capture the world on paper growing ever more intuitive and confident.
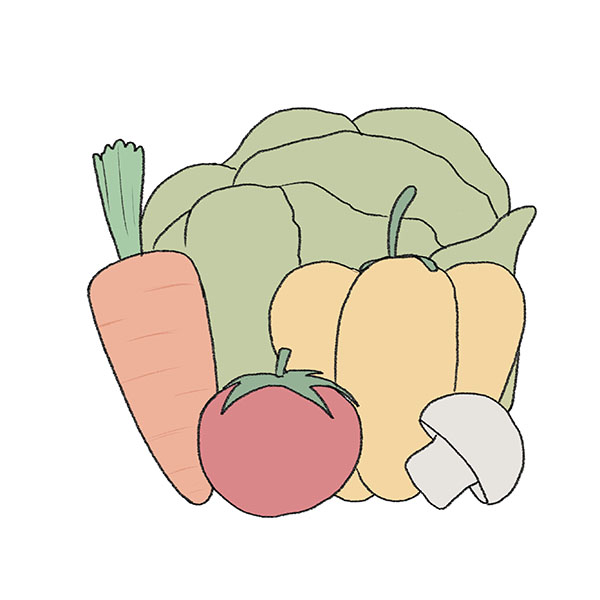
Alternative Drawing Technique
To enrich your artistic repertoire, I’ve also crafted a simplified method to draw a pepper, designed to encourage more frequent practice. This pared-down approach introduces a streamlined version of the pepper, focusing on its most basic form, allowing you to perfect the foundation of its shape with ease and confidence.
With this alternative technique, every artist can quickly capture the essence of a pepper, using fewer strokes and less detail. It’s tailored for those at the beginning of their artistic journey or for anyone looking for a quick and satisfying drawing exercise that still improves their skills with each rendition.
By employing this simpler method, you’ll reinforce your fundamental drawing abilities, laying down the groundwork for more complex subjects in the future. It’s a testament to the power of practice and the beauty of simplicity, enabling you to enhance your craft in small, manageable steps that lead to significant progress.
How to Draw a Pepper for Kindergarten
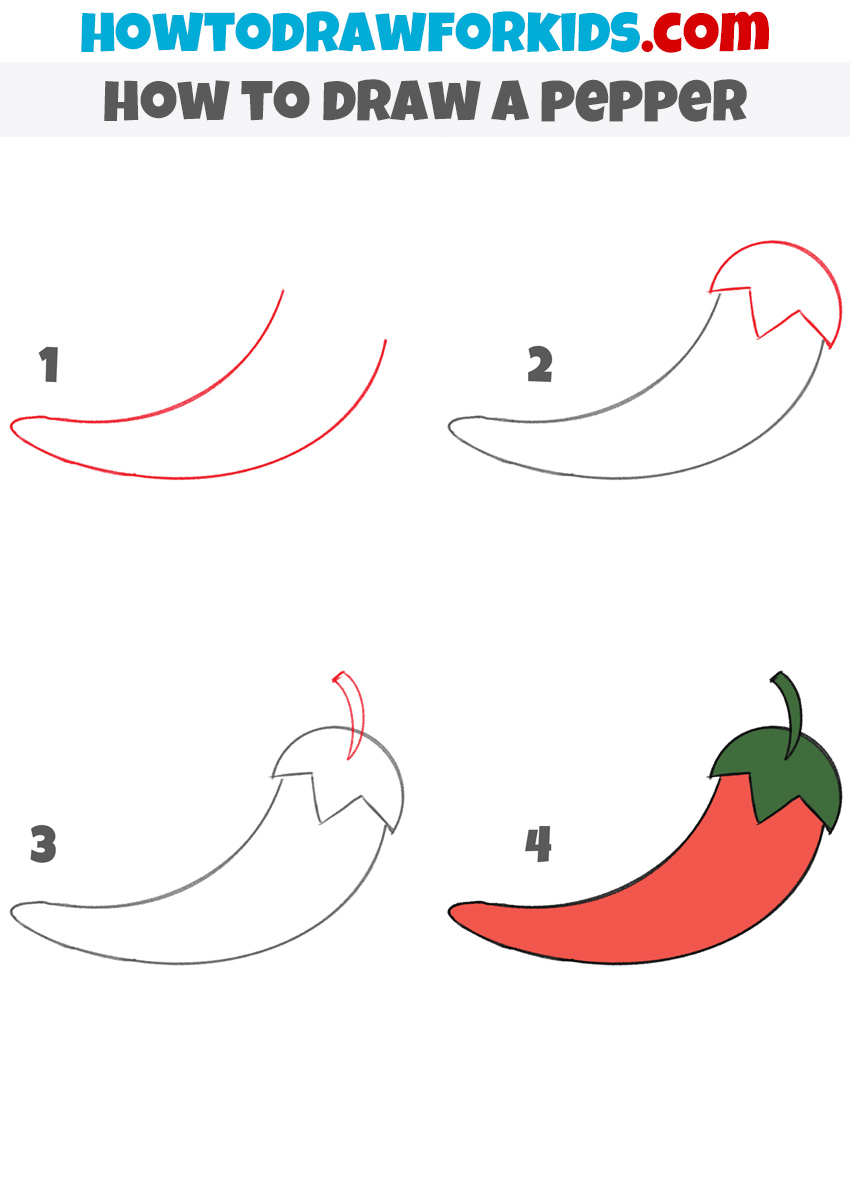
For our youngest artists in kindergarten, this four-step guide makes drawing a pepper as easy as pie. We start with a simple curved line for step one, capturing the pepper’s body with a gentle sweep of the pencil. It’s about making that first mark with confidence and a touch of flair.
Moving to step two, we add the pepper’s top with two short lines, creating a crown that sits snugly on the curve. This is where our pepper begins to take shape, with each child adding their own unique twist to the lines. It’s not just drawing; it’s creating a character on the page.
Step three has us refine the crown of the pepper, giving it a bit more detail to stand out. And finally, in step four, we bring our pepper to life with color, a bright red for the body and a deep green for the stem. With these four simple steps, even the smallest hands can create a vibrant pepper that jumps off the page.
Perfecting Your Pepper Artwork with Pro Tips
Having journeyed through the fun process of drawing a pepper, let’s sprinkle our learning with some additional tips and tricks. These pointers are designed to cultivate the skills that have just begun to sprout in your artistic garden.
- Smooth Lines: Practice drawing smooth, confident lines by letting your arm guide the pencil, rather than just your wrist.
- Bold Colors: Choose vibrant colors to fill in your pepper, pressing firmly with your crayons or markers for a rich, even application.
- Adding Texture: Create the illusion of texture by using light, cross-hatching strokes to suggest the pepper’s bumpy surface.
- Shadows for Depth: Place a light source in your mind and shade one side of your pepper to give it a three-dimensional look.
- Highlighting: Use a lighter color, or even your eraser, to add highlights on the opposite side of your shadows.
- Proportion Control: Keep an eye on the size of the stem in relation to the pepper’s body; it should be proportional.
- Mixing Mediums: Experiment with different materials, like watercolors or pastels, to see how they affect the outcome of your pepper.
- Steady Pace: Take your time with each step, ensuring accuracy and attention to detail.
In the art of drawing, every tip and trick is a seed that, when nurtured, can grow into an astonishing skill. Carry these insights with you, and let them guide your hand in future artistic endeavors. Remember, every masterpiece begins with the courage to make that first mark.
Essential FAQs After Your Pepper Drawing Lesson
In the wake of our colorful pepper drawing adventure, it’s natural for budding artists to have a basket full of questions. Let’s sift through these curiosities, providing answers that will help nurture the seeds of your artistic talent.
- What’s the best way to hold my pencil when drawing? Grip your pencil towards the end for broader, softer lines, and closer to the tip for fine, detailed work.
- How can I keep my colors within the lines? Practice steady hand control and turn your paper as you color to get the best angle for precision.
- Can I mix colors when drawing with pencils? Absolutely! Layer different colors on top of each other to create depth and new hues.
- My pepper doesn’t look like yours, is that okay? Every artist has their style; celebrate your unique take on the pepper!
- How can I make my pepper look more realistic? Study an actual pepper and observe where the light falls and where the shadows form to add realism.
- What should I do if I make a mistake? Use an eraser gently, or creatively incorporate your mistakes into the drawing.
- How can I improve my drawing skills? Regular practice is key. Keep drawing every day, and challenge yourself with new subjects.
Gathering these FAQs at the end of our session acts as a fertile ground for you to reflect and grow. Just like tending a garden, patience and care in your drawing practice will yield beautiful results. Keep these questions and answers as a handy guide as you continue to draw, and remember, each line you sketch brings you closer to mastering the art you’re clearly passionate about.
Conclusion
With the final stroke of our pepper now complete, the canvas of learning is far from full. My website is a garden of such lessons, where the blossoms of a flower or the contours of a human face await your eager pencil. Each tutorial is a new petal in the bouquet of your artistic development, inviting you to explore and expand your abilities.
Let’s keep our pencils dancing across the page and our creativity in perpetual bloom. Follow my social media channels to catch the latest updates and share your voice in the comments below the lesson. Your suggestions are the seeds that could grow into the next great drawing guide, nurturing the community’s collective quest for beauty in art.