How to Draw a Jellyfish
Earlier, we drew some interesting and unusual sea and ocean inhabitants. Continuing this theme, I’ll show you how to draw a jellyfish.

How to Draw a Jellyfish: Introduction
This creature has a truly recognizable appearance, with an upper part resembling a mushroom and long, writhing tentacles. In this lesson on how to draw a jellyfish, I will demonstrate the process in detail, guiding you through the steps to create an image of this unusual and interesting-looking sea creature.
As is tradition on my website, I will show you the simplest and most cartoon-like way to draw a jellyfish, featuring large cartoon eyes and childlike proportions.
However, you can make your jellyfish drawing more realistic by adjusting the shapes, changing the proportions, and removing the anthropomorphic facial features.
At the end of this lesson, I will show you how to draw a jellyfish using a simpler technique while still achieving a slightly more natural and authentic-looking creature.
Jellyfish Drawing Tutorial
Materials
- Pencil
- Paper
- Eraser
- Coloring supplies
Time needed: 30 minutes
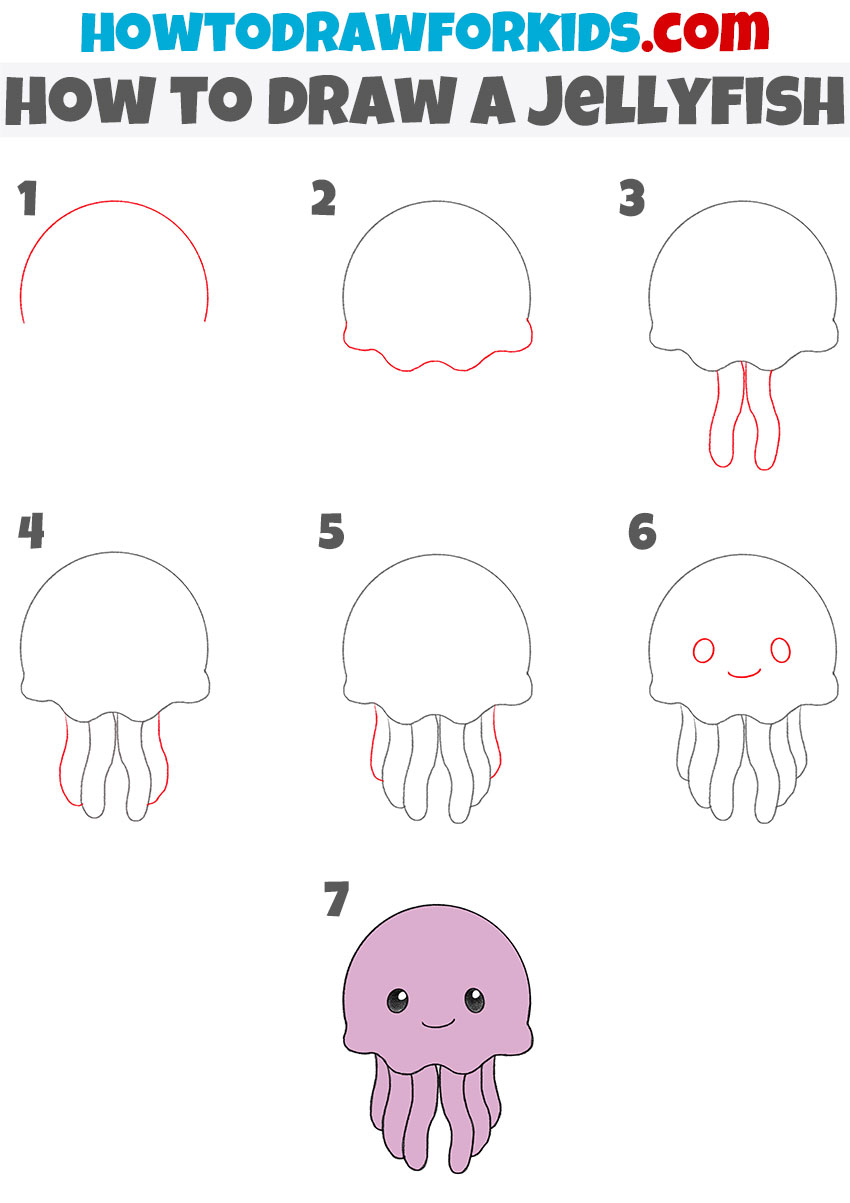
How to Draw a Jellyfish
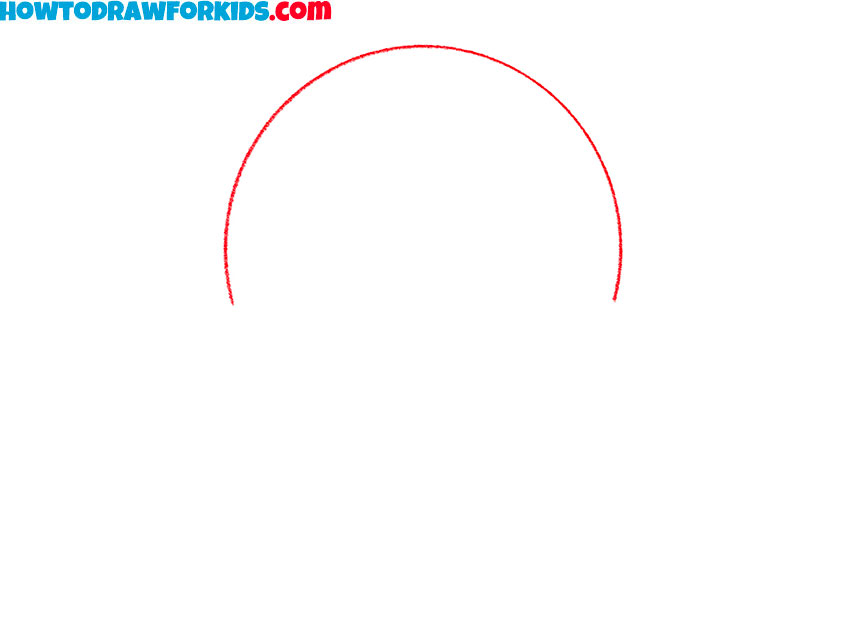
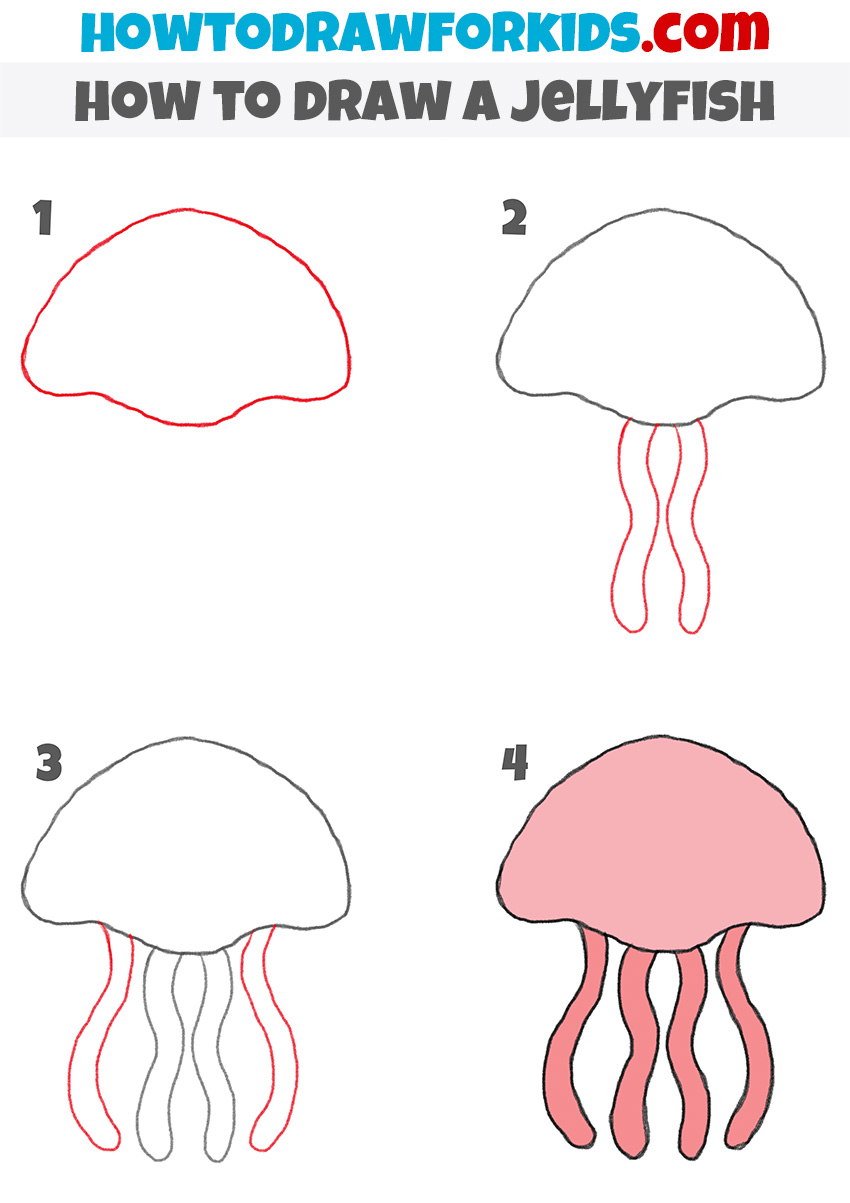
- Draw the jellyfish’s dome.
First, sketch the top part of the jellyfish’s body, which resembles a dome. To do this, sketch a large, smooth semicircle with even curves. Try to keep the shape symmetrical, but it doesn’t have to be perfect – natural imperfections can make it look more organic.
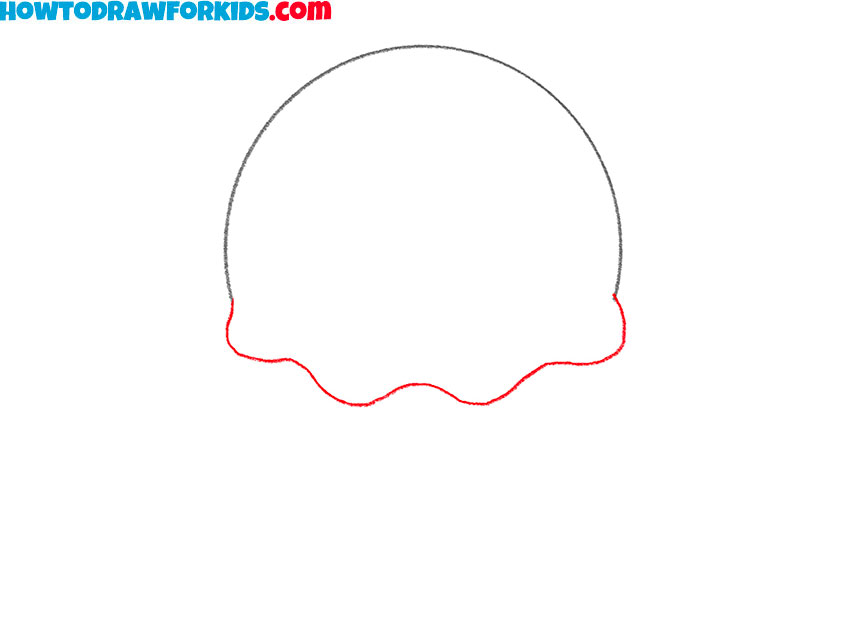
- Add the wavy edge.
Starting from the bottom ends of the semicircle, sketch a curvy, flowing line that connects both sides. These waves represent the natural folds of the jellyfish’s soft body. Try to keep the curves smooth and rounded. The number of waves is up to you.
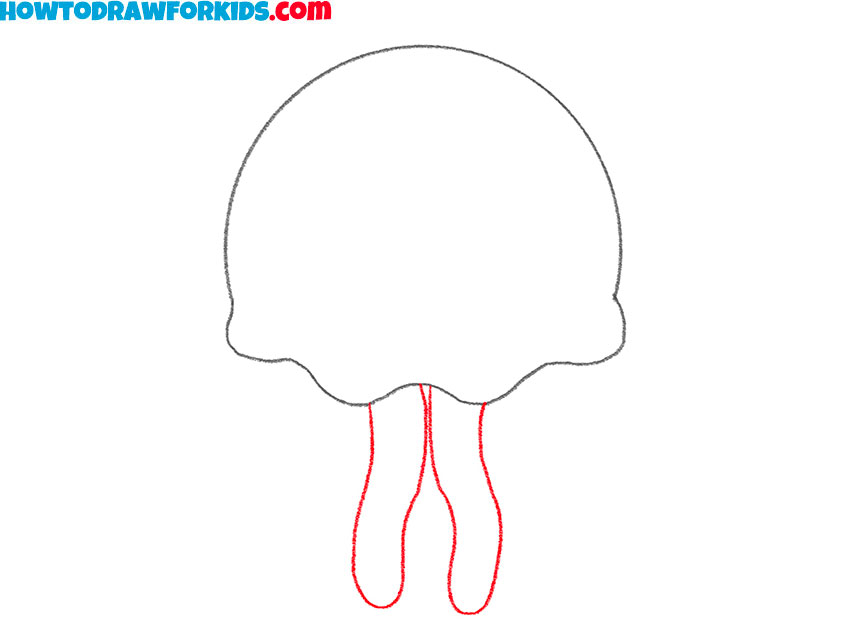
- Draw the first two tentacles.
With the jellyfish’s body complete, it’s time to add the tentacles. Start by drawing two long, wavy tentacles extending downward from the center of the body. These should be curved and slightly irregular, as jellyfish tentacles rarely follow a perfectly straight path.
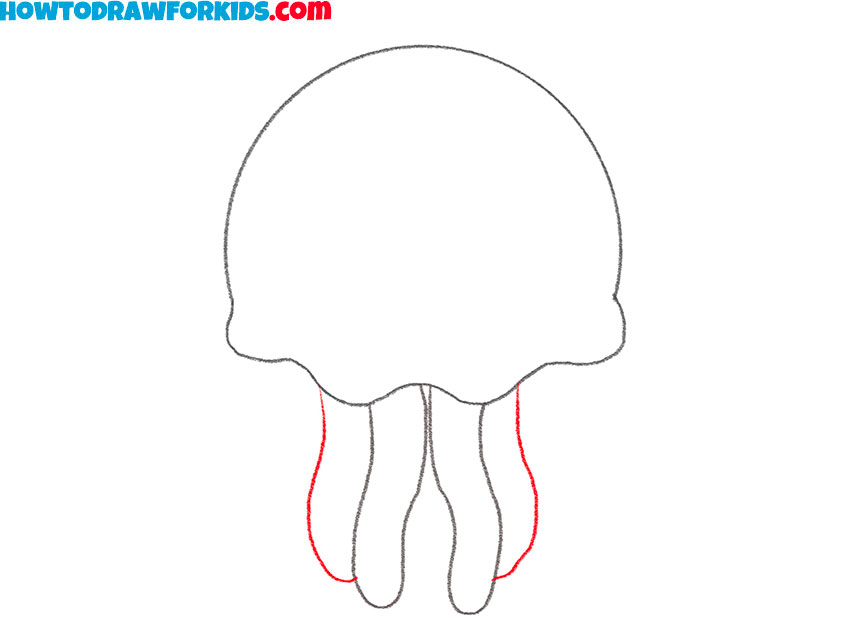
- Add more tentacles.
Now, draw two more tentacles on each side of the existing ones. These new tentacles should curve slightly differently than the first two, helping to create variety and a more natural appearance. Try to make them slightly overlapping or positioned at different angles.
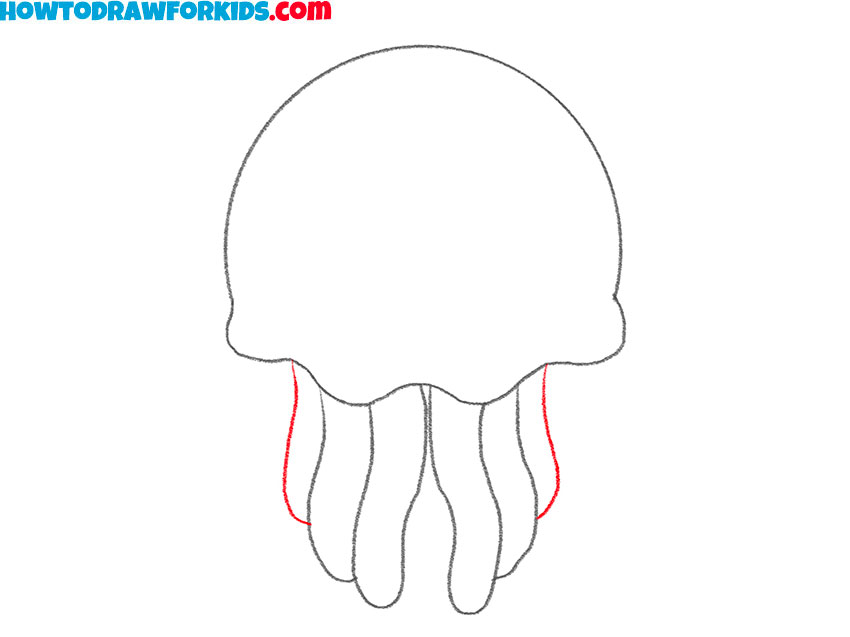
- Complete the tentacles.
To make the jellyfish look even fuller, draw the final set of tentacles in the remaining space. These tentacles should appear slightly behind the others, giving the drawing more volume. Vary their length and curvature to make them look realistic.
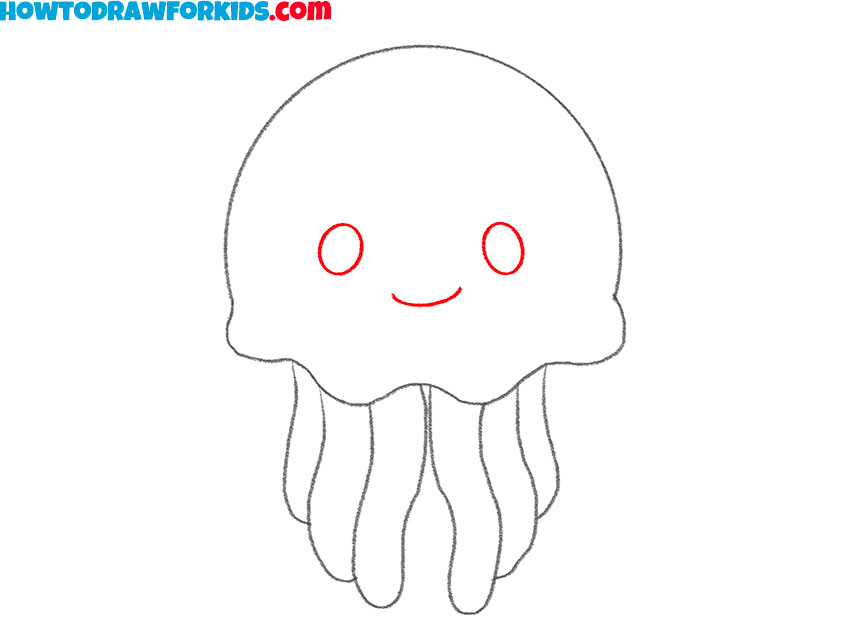
- Add the eyes and mouth.
Now, give your jellyfish drawing a cute expression by drawing a simple cartoon-style face. Start with two small circles for the eyes, positioned near the middle of the body. Below the eyes, draw a small curved line for the mouth, forming a gentle smile.
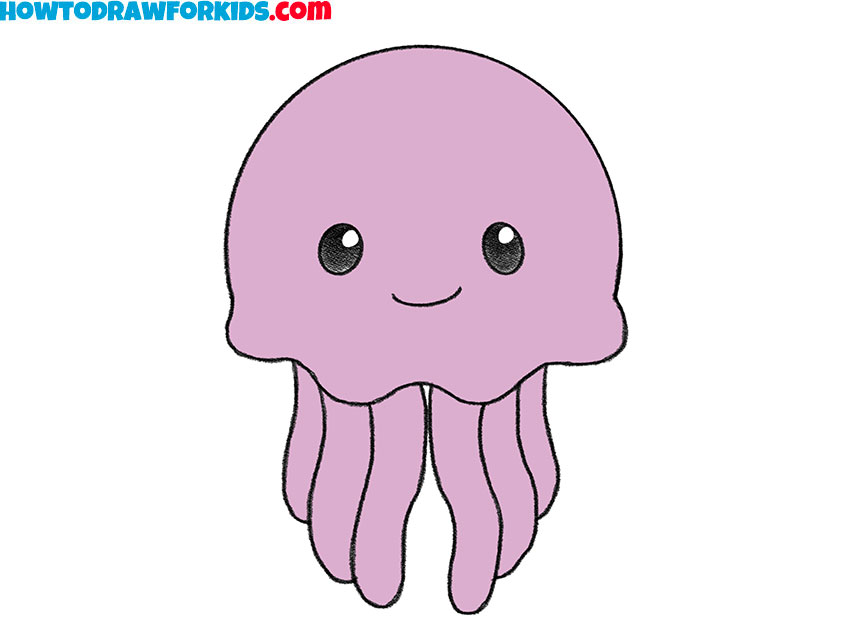
- Color the jellyfish.
Jellyfish come in a variety of shades, but for a simple and vibrant look, use a soft pink or purple tone for the body. To make the jellyfish more visually interesting, add shading by making the edges slightly darker and leaving the center lighter. If you want a glowing effect, you can lightly add some white highlights.
Additional Content
The steps of the lesson on how to draw a jellyfish are complete. If you want to access them at any time, be sure to download this PDF file, which also includes additional materials. For example, it contains a coloring page, a tracing worksheet, and a grid drawing worksheet. These materials will help you reinforce the skills you’ve learned and practice drawing lines and applying color.
How to Draw a Jellyfish for Preschoolers
This method is more simplified for preschoolers, featuring fewer details and smoother, rounded shapes. The tentacles are drawn with simple wavy lines, and the body lacks facial features. Unlike the first jellyfish drawing tutorial, which includes a cartoon face and more detailed tentacles, this version focuses on basic forms without additional elements.
To begin this tutorial on how to draw a jellyfish, sketch the main body by drawing a wide, rounded shape with a slightly wavy bottom edge. Make the lines smooth and simple. Next, add the first set of tentacles by drawing three long, curved lines extending downward. Keep them slightly wavy but not too complex.
Then, draw additional tentacles on both sides, following the same simple curved shape. Once all the tentacles are complete, check the drawing for any uneven lines and refine the shape if necessary. Finally, color the jellyfish with a soft pink or any preferred color, making the body slightly darker than the tentacles.
Conclusion
First, we learned how to draw a jellyfish that looks like a fun cartoon character from an animated show or children’s comic. Then, I showed you how to draw a slightly more natural and authentic-looking jellyfish using fewer steps and a more simplified style. Which method and shape do you prefer?
As I mentioned at the beginning of this lesson, I have already created a large number of tutorials on drawing various sea and ocean creatures. To explore more, check out my lesson on how to draw a shark, as well as my collection of tutorials on how to draw a dolphin.
For a more comprehensive understanding of drawing these creatures, be sure to visit the Animals category, where I upload all these lessons. There, you will find many different creatures – those that swim in the sea and ocean, jump through the trees in forests and jungles, and soar through the skies.