How to Draw a Llama
Follow this simple, stylized tutorial to learn how to draw a Llama, a cute animal that has a really distinct appearance and thrives in mountain regions.
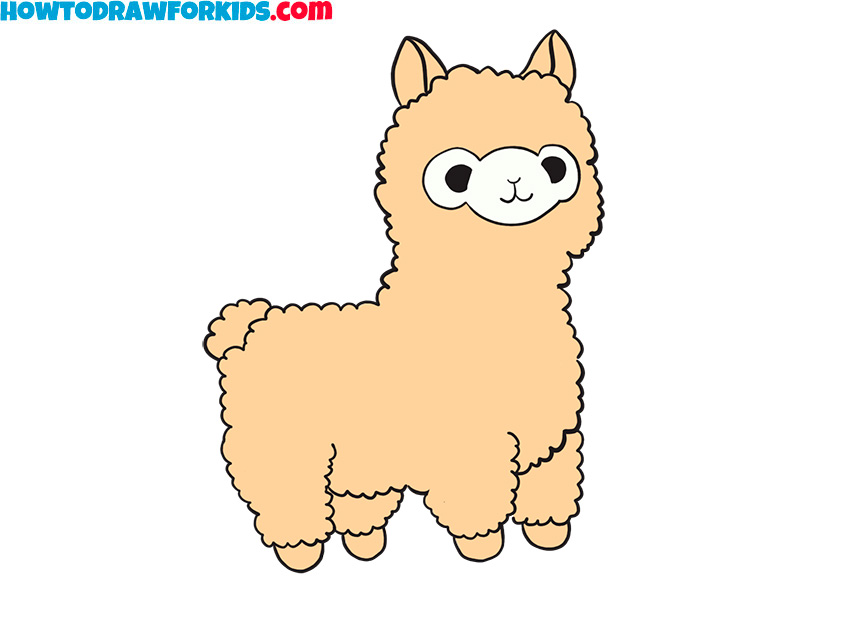
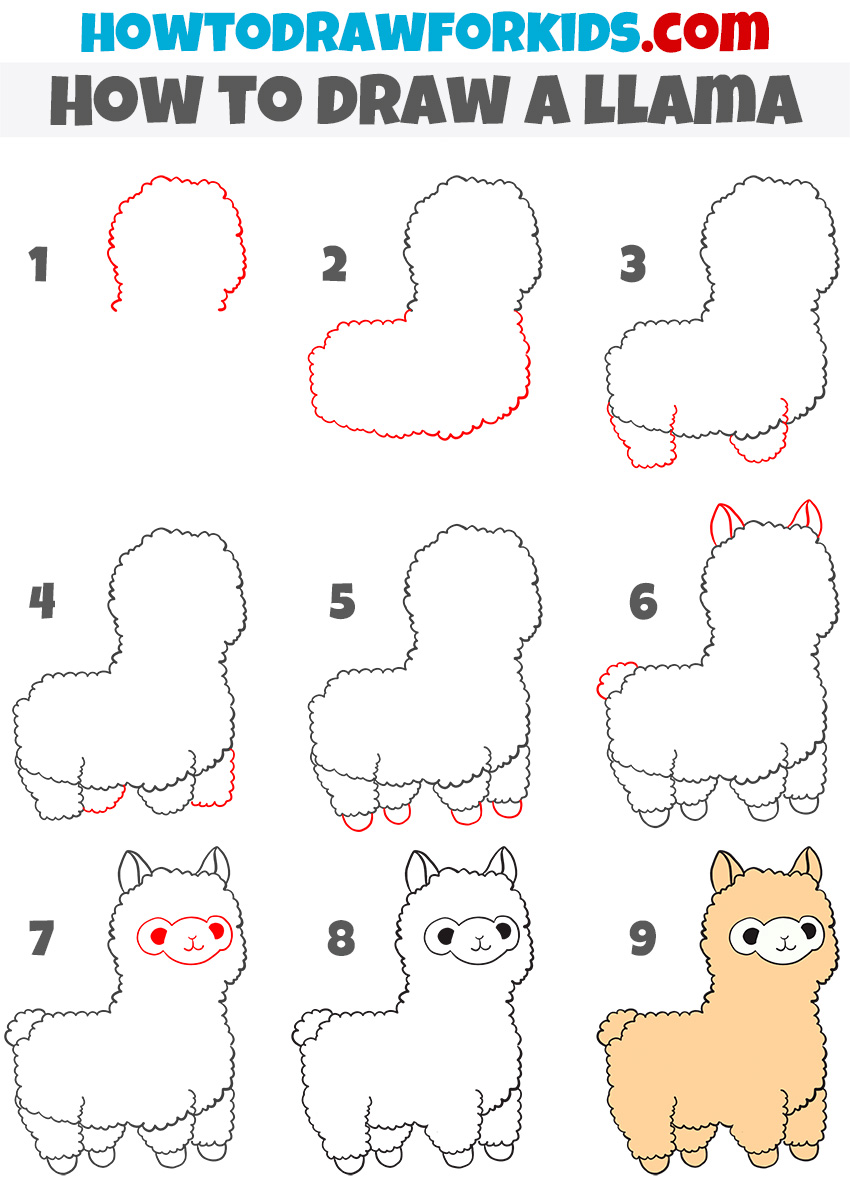
How to Draw a Llama: Basic Information
If you’re charmed by the fluffy silhouette of a llama and wand to draw this beautiful animal, you’ve come to the right place. I’ve created an easy tutorial on how to draw a llama that simplifies its quirky and loveable form into really easy steps. This lesson is designed for all who admire these gentle Andean creatures.
The llama in this tutorial will be drawn in a simple basic pose, but to make your drawing more dynamic and perhaps more interesting, you can change some details, such as the location of the limbs.
I will tell you how to make your llama drawing more interesting during this lesson. In addition, at the bottom of the page I will show you two additional llama drawing tutorials.
As we finish the tutorial and you draw a llama, you’ll find yourself mastering the art of simple yet effective animal sketches.
Llama Drawing Tutorial
Materials
- Pencil
- Paper
- Eraser
- Coloring supplies
Time needed: 35 minutes
How to Draw a Llama
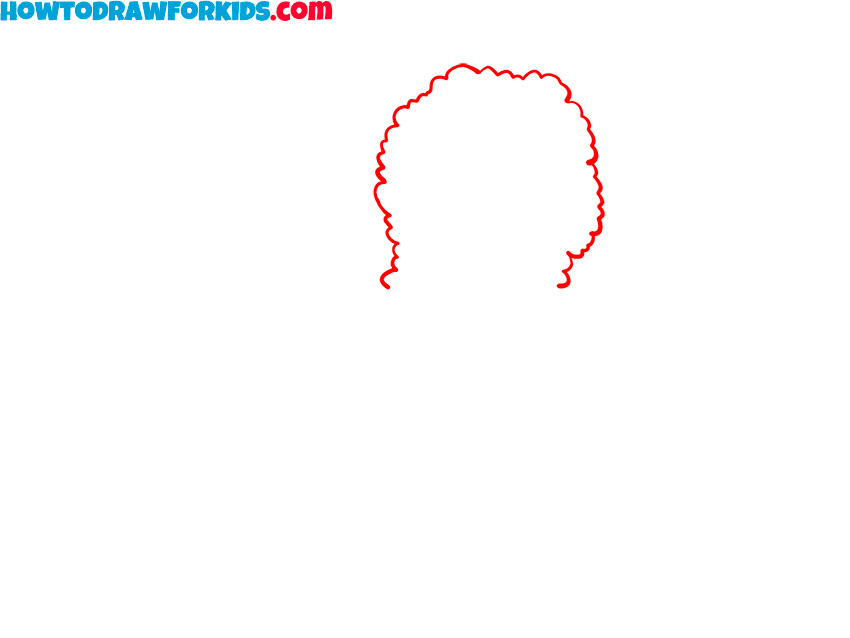
- Sketch out the head of the llama.
The first step starts with drawing the outline of the llama’s head and neck in a single smooth, curved line. The line begins at the top of the head, curves around to outline a fluffy neck, and ends at the base, resembling a cloud shape. This creates a foundation for the character’s distinctive head and neck shape.
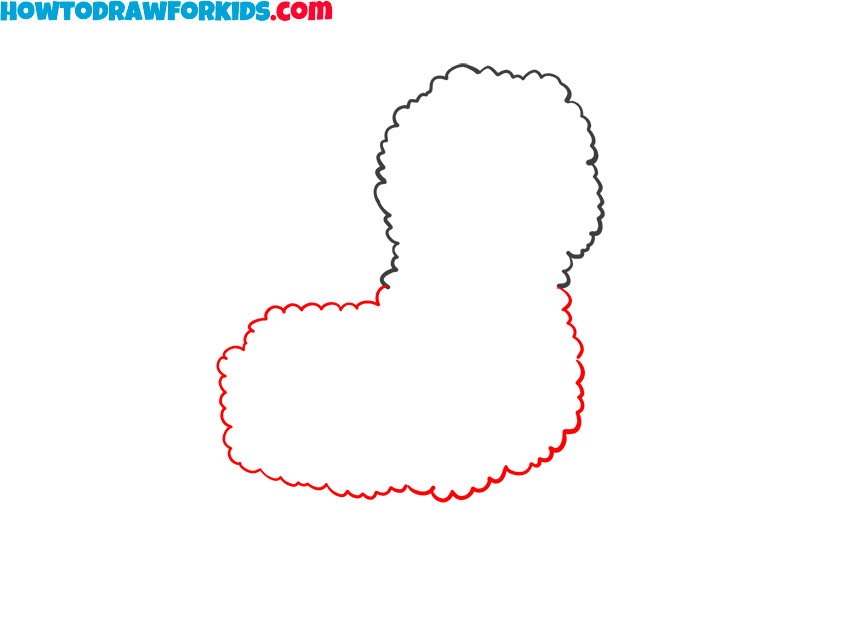
- Draw the torso of the Llama.
Continue by adding the body to the head and neck outline. Draw another curvy, cloud-like line starting from where the first line ended, extending downwards to form the back and belly of the llama. This illustrates the fluffy, rounded body characteristic of a cartoon llama.
- Draw the legs closest to us.
Starting from the bottom of the body, draw two short, rounded shapes extending downward. These should resemble slightly curved rectangles with wavy edges, following the fluffy theme of the rest of the body. The legs should be positioned close to the front of the body, with enough space between them.

- Add the remaining legs.
Draw the limbs that are farther away, to improve the three-dimensional appearance of your llama. When sketching these legs, remember that elements further away tend to appear smaller and slightly obscured by those in the foreground.
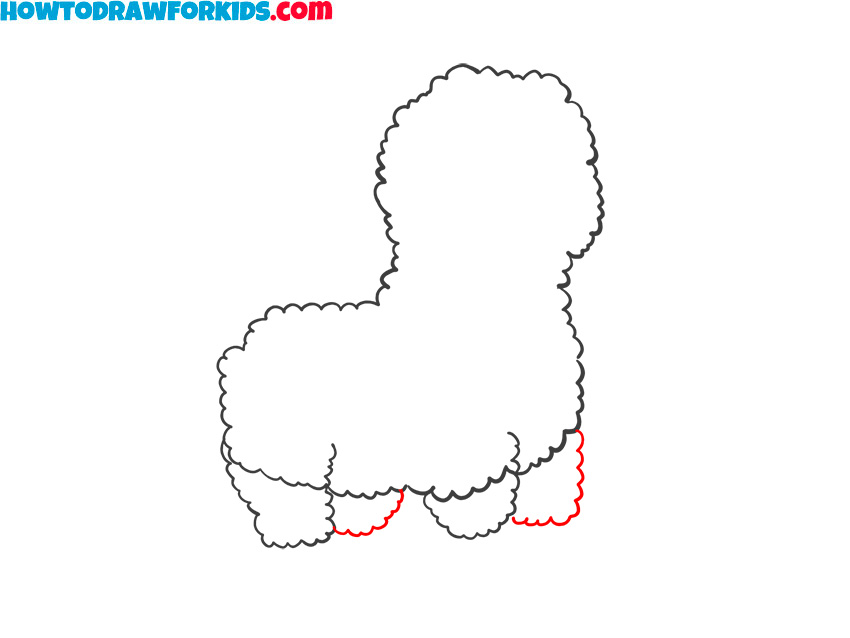
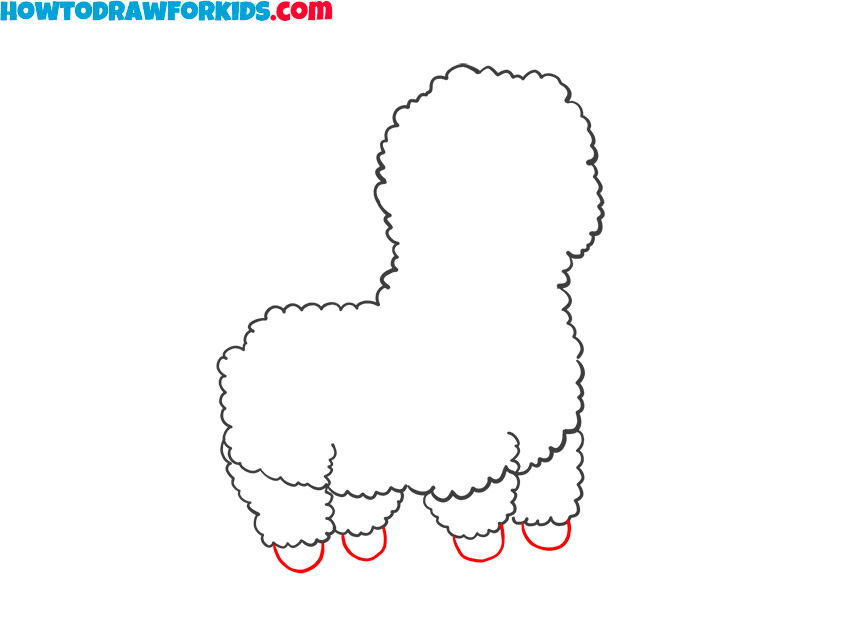
- Add the hooves.
So, add distinct hooves to each of the llama’s legs to give it a more finished and realistic appearance. Draw rounded, prominent hooves at the base of each leg, ensuring they are slightly larger and clearly defined to stand out against the fluffy leg shapes.
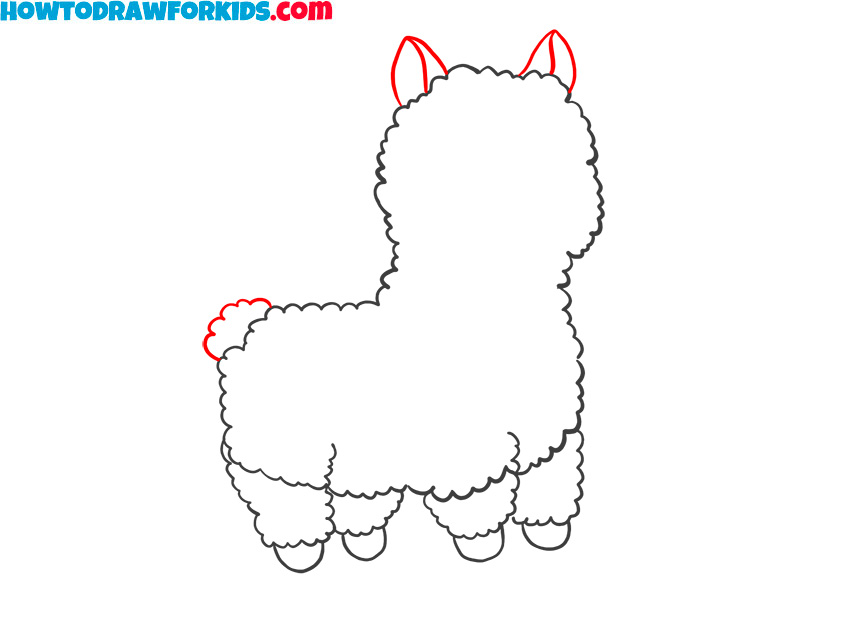
- Illustrate the ears and tail.
Sketch two small, triangular shapes with rounded tips to give the ears a soft and cute appearance. Position them symmetrically on either side of the head, slightly pointing upwards. Next, add a small, fluffy tail at the rear of the llama’s body.
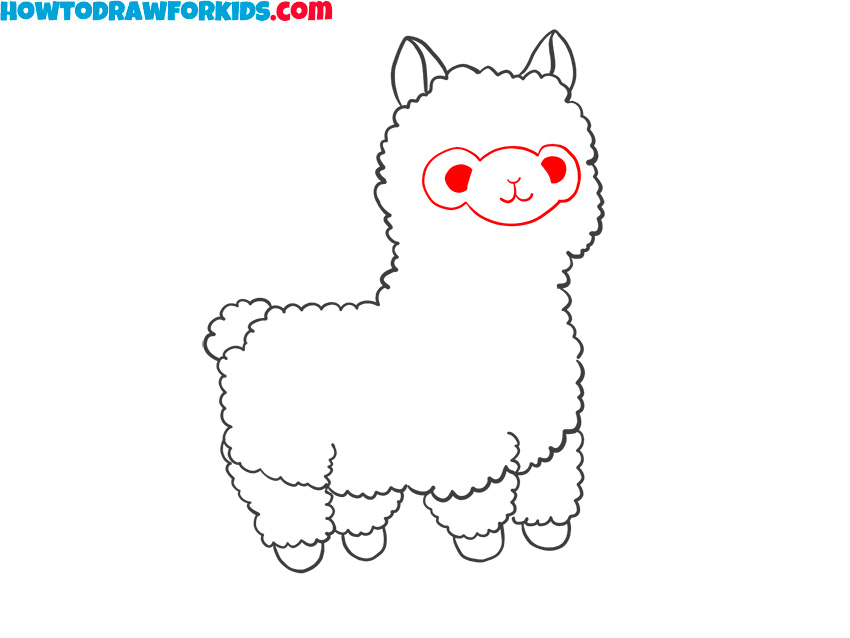
- Draw the face of the llama.
Draw an oval shape in the center of the head, slightly elongated to accommodate the facial features. Draw the eyes as simple, monochrome circles to keep them schematic and straightforward. Next, add a small, curved line for the mouth below the eyes.
- Erase the guidelines.
Clean up your drawing by erasing any unnecessary lines from previous steps to clarify the final contours of your llama. Focus on smoothing out the transitions between the different parts of the body, ensuring that the outline is finished and polished.
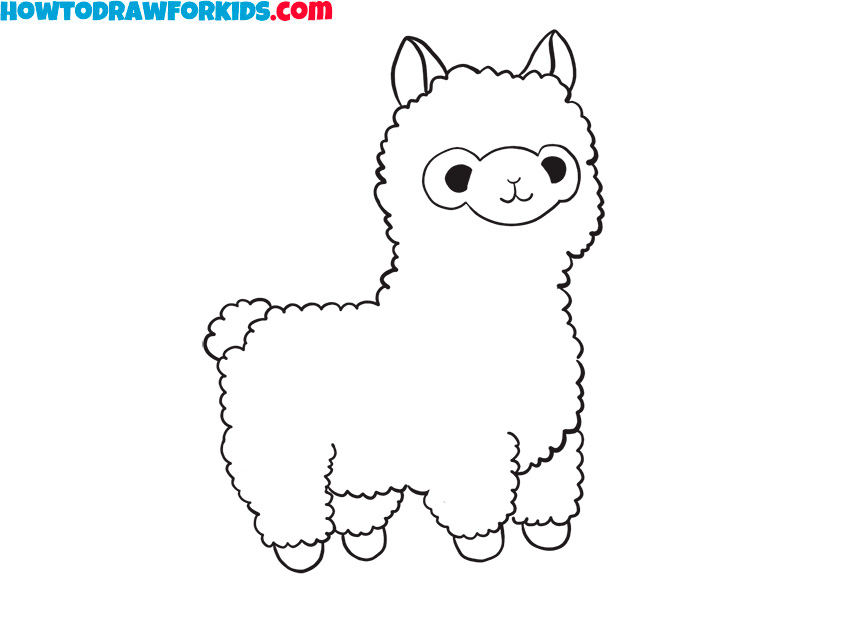
- Color the llama.
Complete your drawing by coloring the llama. Use soft, warm tones to color the body, ears, and face, keeping the overall palette light and cute. Consider using different shades of the same color to add realism, particularly in the woolly body and around the face.
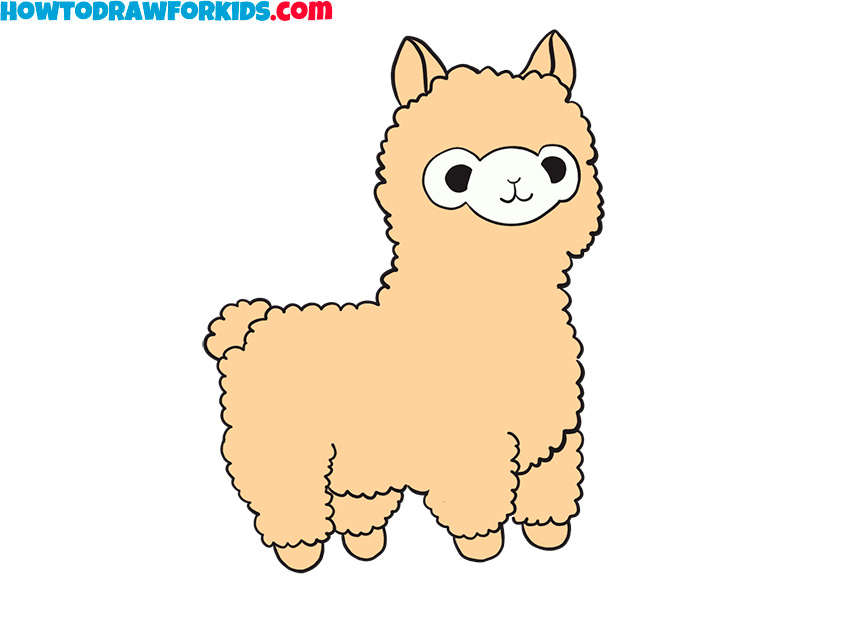
Additional Content
To support your drawing practice, I’ve prepared a downloadable PDF to accompany the llama drawing lesson. This file is created for use when you’re offline, offering extra material to practice and refine your technique.
Instead of the full step-by-step lesson, the PDF includes exercises aimed at deepening your understanding and improving your ability to draw llamas. It helps reinforce what you’ve learned and motivates you to develop your skills further.
How to Draw a Llama: Alternative Techniques
To improve your llama drawing skills, I’ve created several techniques that are meant to improve your abilities. These methods offer different styles and looks, allowing you to develop your drawing techniques.
While the basic shapes remain consistent, these techniques introduce new ways to represent the llama’s fur and other details of the body. By trying these various approaches, you’ll see your drawing skills improve over time.
Cute Llama Drawing Tutorial
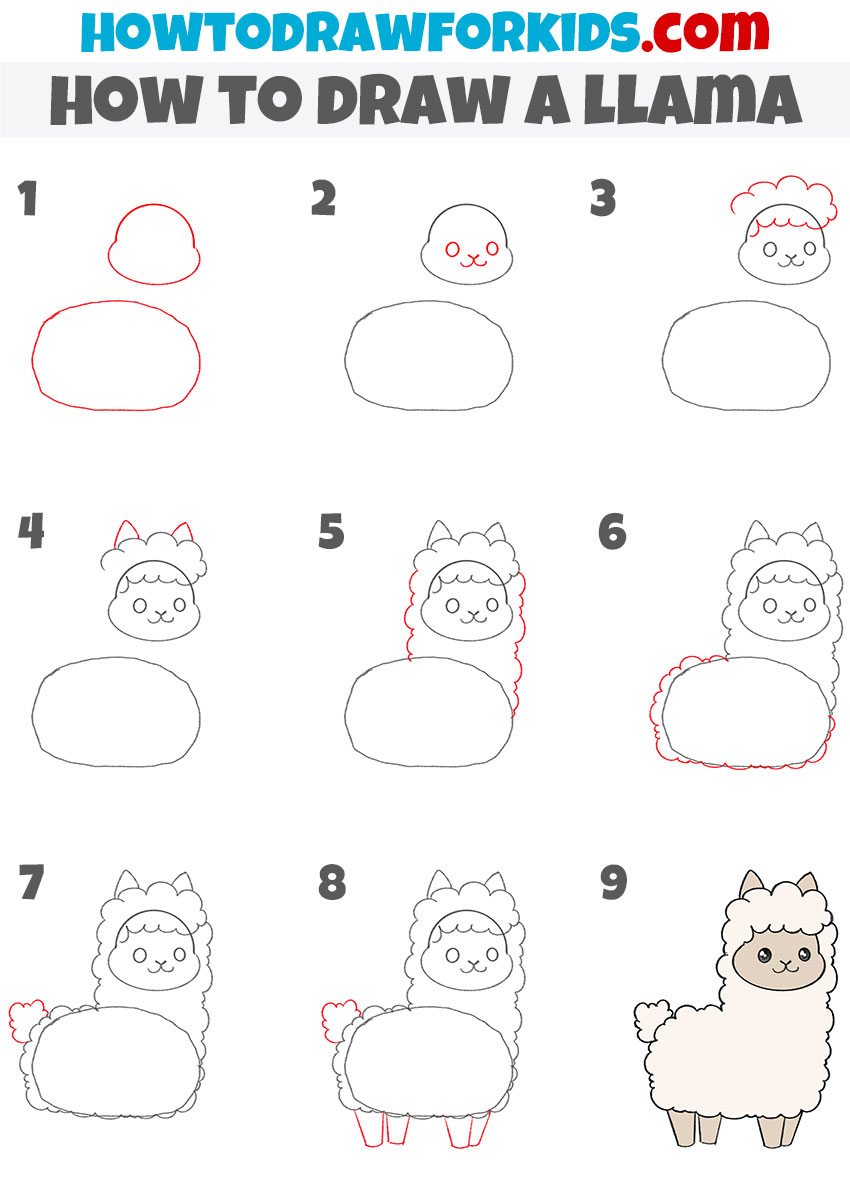
To draw a llama with this method, start by sketching an oval shape for the body and a smaller, rounded shape for the head above it. Add two circles within the head for the eyes, and beneath them, draw a simple curved line for the mouth, with a small nose above it.
Next, add a wavy line across the top of the head to represent the llama’s fluffy fur. Draw two pointed, triangular ears on top of the head, and refine the fluffy outline around the face. Extend this fluffy texture down the sides of the neck and attach it to the body. Continue by outlining the body with the same wavy lines to maintain the llama’s woolly appearance.
At the rear, draw a small, rounded puff to indicate the tail. Then, sketch four simple legs extending downward from the body. Finally, add a few details to the legs for hooves and complete your drawing by coloring in the llama with soft, natural tones to create its fluffy texture.
Easy Llama Drawing Tutorial
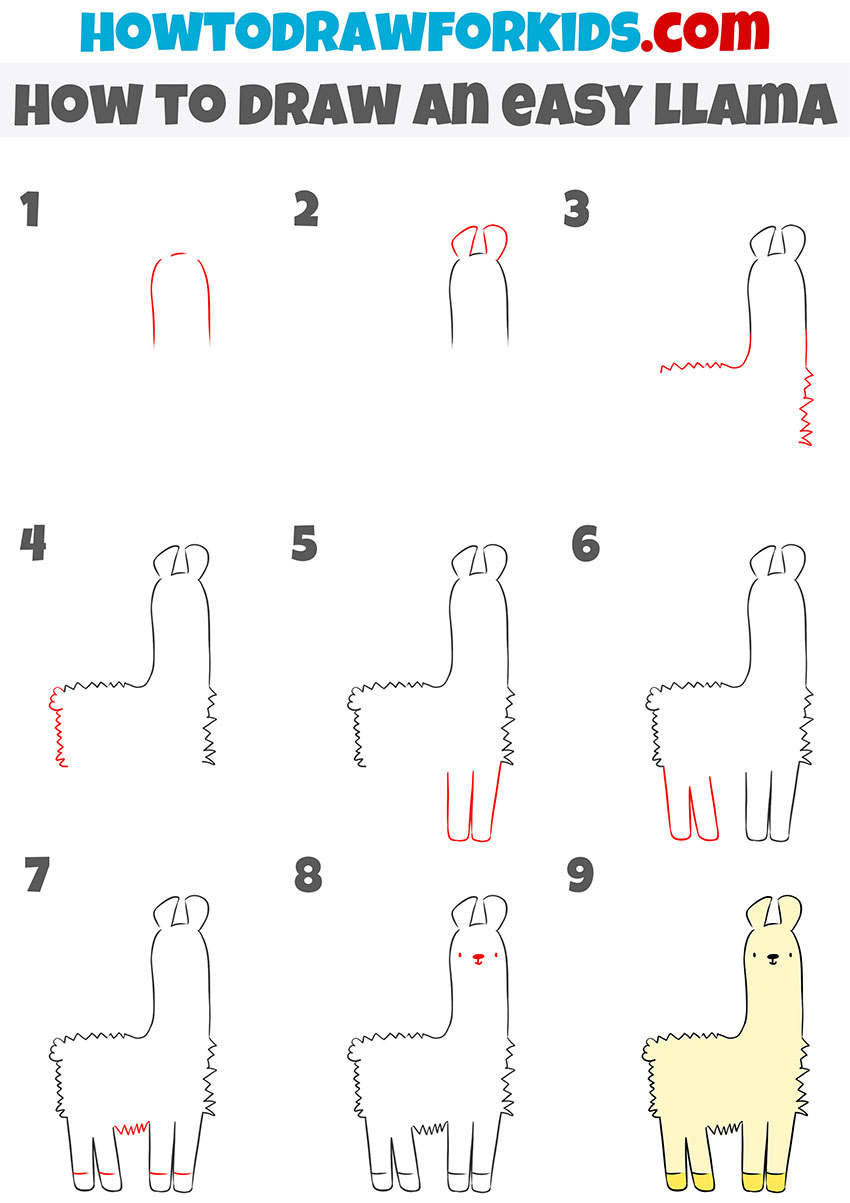
To draw an easy llama, start by sketching a tall, narrow rectangle with rounded edges for the llama’s head and neck. At the top of the head, draw two small, curved ears, positioning them slightly apart. Next, add a long, curved line down the right side of the neck, forming the outline of the body.
To create the back, extend the line horizontally to the left, adding a zigzag pattern to indicate the fluffy fur. Continue this zigzag line downward to form the back edge of the body. Repeat the same process for the front edge of the llama’s body.
Now, draw two straight lines from the bottom of the body to form the front legs, keeping them simple and slightly rounded at the bottom. Then, add a similar pair of lines for the back legs. After that, sketch the facial features, including small dots for the eyes and a simple, inverted triangle for the nose, with a small line beneath it for the mouth. Finally, add a short line at the bottom of each leg for the hooves, and finish by coloring in the llama with a light, natural tone.
How to Draw a Llama: FAQ
When learning to draw llamas, it’s common to encounter specific challenges or questions. Below are some frequently asked questions to help you navigate these aspects of llama drawing.
This issue often arises when the neck is not drawn correctly. Make sure to focus on giving the neck an elongated, smooth curve, as this is a key feature that distinguishes a llama from a sheep or other similar animals. Additionally, pay attention to the overall body proportions and the placement of the head relative to the body, ensuring that the llama’s form is more sleek and less bulky.
Achieving a fluffy appearance involves using short, slightly curved lines around the edges of the llama’s body rather than long, straight lines. These shorter lines should be drawn in a way that mimics the texture of wool, giving the illusion of thickness and softness. The placement and density of these lines are really important – avoid uniformity to prevent the fur from looking flat. Instead, vary the lines slightly to create a more natural, fluffy look, particularly in areas like the neck and back where the fur is thicker.
To avoid stick-like legs, focus on giving the legs a gradual taper from the thighs down to the hooves. The thighs should be slightly wider and more rounded, gradually narrowing as they approach the feet. Pay attention to the slight bend in the legs, which can be accentuated with subtle lines or shading to give the legs more dimension.
If the face appears off, it might be due to asymmetry or incorrect placement of features. Make sure the eyes are level and evenly spaced, with the nose and mouth centered beneath them. The ears should also be symmetrical and angled correctly to match the orientation of the head. Another tip is to pay close attention to the shape of the face outline, ensuring it complements the head’s overall form. Small adjustments in these areas can significantly improve the look of the llama’s face.
For the mouth, simplicity is really important. A single curved line often works best, as it provides a subtle, yet effective smile that suits the llama’s appearance. Place the line just below the nose, curving it slightly upward at the ends to illustrate a cute and smiling expression. Avoid making the mouth too wide or too detailed, as this can detract from the overall look. If needed, you can add small, additional lines to indicate the corners of the mouth or slight dimples for more realism.
To keep the tail from disrupting the llama’s silhouette, draw it as a small, rounded puff at the back. This can be achieved with just a few curved lines that create fluffiness without going into too much detail. The tail should be positioned where the back curves down slightly. By keeping the tail small and simple, you maintain the overall look of the llama’s shape while still adding this important detail.
When it comes to proportions, a useful tip is to use the height of the head as a reference point for measuring the rest of the body. Consistently checking proportions as you draw can help you create a llama that looks finished and natural.
Conclusion
Our llama drawing tutorial ends here, but there are more lessons available on my website. You can find tutorials on drawing a variety of subjects and animals, from a dog to a tiger. Each tutorial offers new opportunities to improve your skills, and I’m here to help you along the way.
If you’re interested in more lessons, consider following my social media channels. For example, you can follow me on Pinterest for updates and shorter versions of my drawing tutorials, and on YouTube for video lessons. Your feedback is important for future lessons. Feel free to leave a comment under the lesson and suggest what you’d like to draw next.

Such fun! Highly recommend.
Thank you, Chester!
This is a great tutorial for kids!