How to Draw a Milkshake
In this tutorial on how to draw a milkshake, I’ll show you simple ways to convey the mix of soft cream, liquid drink, and glass on paper.
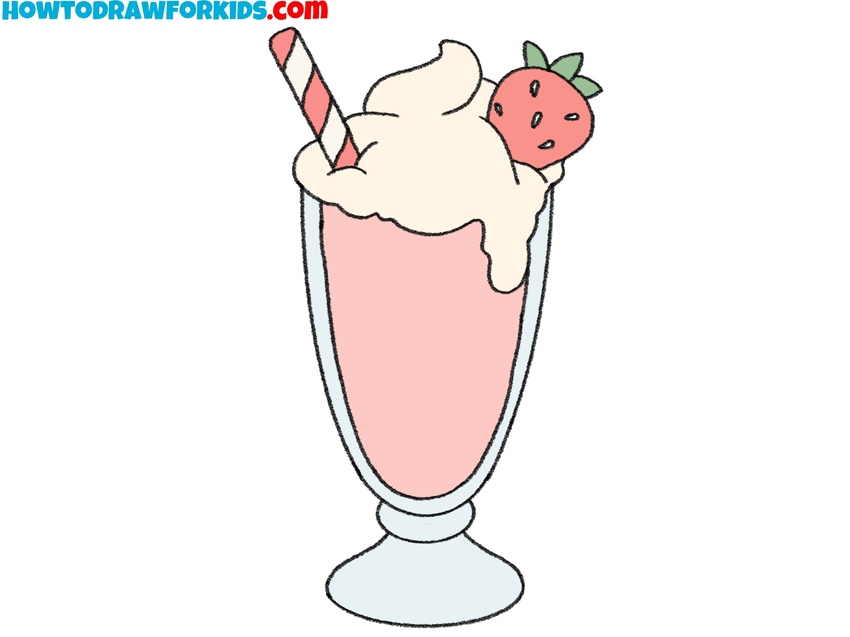

Now I will show you how to draw a milkshake. This is a great object for drawing because it’s always nice to draw some delicious food. In addition, you will gain new useful skills that will be useful to you in the future if you want to develop your creative abilities.
In the picture, you see a milkshake in a tall transparent glass through which the contents are clearly visible. There is a lot of white foam at the top and there is a straw for convenience. There is probably a fruit additive in the cocktail, so the cocktail has a nice pink color. Thus, the cocktail looks very appetizing.
With this step-by-step guide, you will quickly and easily draw a cocktail. The lesson consists of six simple steps that any child and aspiring artist can easily repeat. At each stage of drawing, you are offered a small hint. Use it for great results.
Materials
- Pencil
- Paper
- Eraser
- Coloring supplies
Time needed: 20 minutes
How to Draw a Milkshake
- Sketch the tall glass shape.
Every object drawing needs a strong base, and for a milkshake that begins with the glass. Sketch a long and curved vertical line forms a long U-like shape. Try to keep both sides symmetrical. A tip here is to imagine folding the paper in half, both sides should roughly mirror each other.

- Draw the milkshake glass base.
The next step is to add a pedestal base, so at the very bottom of your U-shaped outline, sketch a short, narrow oval for the short stem, then flare it outward with a wide, rounded shape for the foot of the glass. This shape should like a champagne glass base. You can try different variations here: a slightly wider base, or a thinner stem.

- Draw the creamy topping.
A milkshake wouldn’t be complete without a creamy topping. On top of the glass outline, sketch a fluffy, cloud-like shape that rises above the rim. Use flowing, curved lines that overlap each other in a spiral to convey whipped cream piled high.

- Sketch drips of cream.
To make the milkshake drawing feel more realistic, add a bit of whipped cream spilling over the glass edge. Sketch a dripping line on one side of the whipped cream, letting it hang down with rounded drips. If you want to vary the look of your sketch, you could add more drips around the rim.

- Add thickness to glass.
A tall glass usually has some thickness, so let’s show that by drawing an inner rim. Inside the U-shape of the glass, sketch a second curve that follows the outer contour. Stop this line just below the cream. This small detail makes the glass look more three-dimensional and helps define its walls.

- Add the striped strawl
No milkshake is complete without a straw. Place it at an angle, sticking out from the whipped cream, drawing two parallel diagonal lines and connecting them with a rounded end. To make it more authentic, add diagonal stripes across its length.

- Draw the strawberry on top.
Desserts often come with toppings, so let’s draw a strawberry for extra detail. On one side of the whipped cream, sketch a small oval shape for the berry, slightly angled so it looks natural. Add a small leafy crown on top, with three or four pointed leaves spreading to the sides. Mark a few tiny dots across the berry to illustrate seeds. Keep the strawberry simple, since it’s a supporting detail, not the main focus.

- Neaten the glass and cream outlines.
Now that the main lines and details of the drawing are complete, it’s time to clean it up. Remove overlapping lines where the straw and strawberry meet the whipped cream, keeping only the clean outer outline. Once erased, you can retrace the main shapes with a darker pencil or fine pen to make the lines bold and clear. Cartoon drawings often rely on strong outlines to keep the image readable.

- Fill the milkshake with pastel tones.
The final stage is coloring, which makes the drawing look complete. Use a light pink or pale beige for the drink itself, filling in the central part of the glass. The whipped cream should be left white or shaded lightly with cream tones. Color the strawberry in red with green leaves. The straw can be filled with red and white stripes. For the glass, use a pale blue or gray to make it look transparent.

Bonus: Easy Milkshake Drawing Tutorial
This version is much simplified, and draw a milkshake in this style, outline the tall glass with smooth vertical curves and add a small base at the bottom for balance.
Next, draw the inner line of the glass to show the thickness of the sides. Add a rounded shape at the top to represent the whipped cream, letting the edges drip slightly over the glass. After that, sketch a straw angled into the cream with two parallel lines, and mark the sections with diagonal stripes.
Finally, color the glass in a light shade, the milkshake in pink or another flavor color, the cream in white, and the straw in red and white stripes.


