How to Draw a Pretzel
This subject is not only tasty to eat but also fun to draw, because in this lesson you will learn how to draw a pretzel in two methods.

How to Draw a Pretzel: Introduction
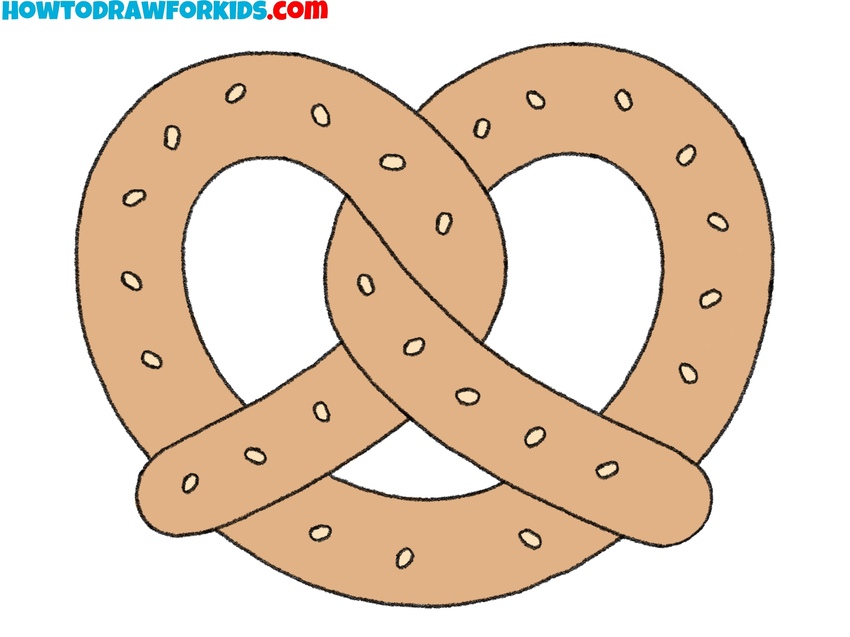
In this tutorial, I will show you how to draw a pretzel. Undoubtedly, you will like this lesson, because drawing various goodies is always a pleasure. A pretzel is a bun that has a specific shape, similar to the number “8”.
This pastry is made from a long strip of dough that is folded into a beautiful shape. The pretzel looks very appetizing. This pastry has a golden-brown crust, a smooth shiny surface, and a little sprinkled with sesame seeds on top. You can see all this in the picture.
In this lesson, you will need to be able to make rounded lines, because the pretzel has a complex rounded shape. Be careful while completing the lesson. Try to draw the shape of the pretzel correctly. In fact, everything is easier than you think. If you consistently follow all the steps, you will get an even, beautiful pretzel.
Add shadows and highlights to make the pretzel look more realistic. To do this, I recommend that you use several shades of different intensities when painting.
Pretzel Drawing Tutorial
Materials
- Pencil
- Paper
- Eraser
- Coloring supplies
Time needed: 15 minutes
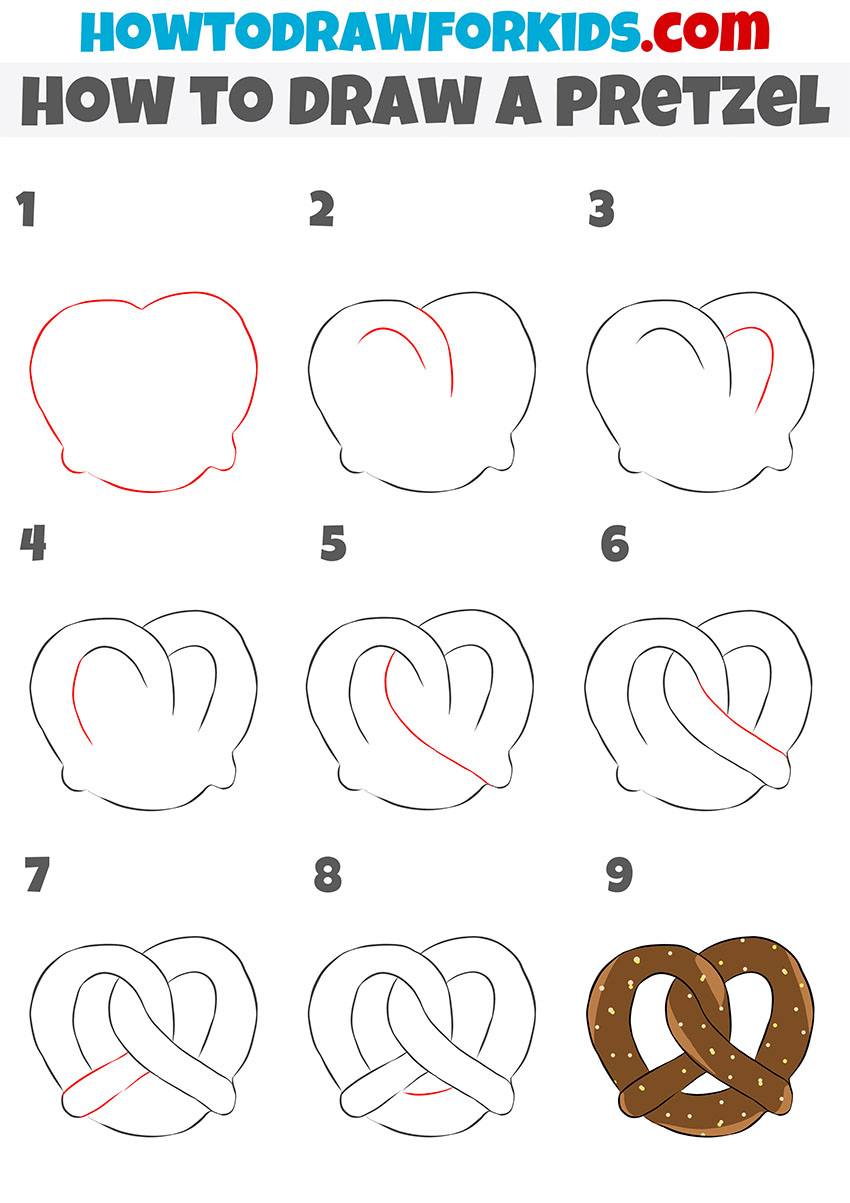
How to Draw a Pretzel
- Start shaping the pretzel band.
To create the base of the pretzel, it’s helpful to think of it as a soft rope of dough. Sketch a curved tube-like shape on one side. Use rounded ends so it looks like part of a bread twist. At this stage, you don’t need it to connect anything else, just create a simple shape.

- Cross another strip of the pretzel.
To continue forming the twist, draw another curved band crossing over the first one. It should look like two thick ropes crossing in the middle. Keeping the width of this second band similar to the first one helps maintain authentic look.

- Create the first upper loop.
A pretzel has two rounded loops at the top, so sketch one large arc curving upward and then back down to join the previous segment. This should resemble a wide curve or an open loop of dough. Make the line broad and smooth.

- Draw the second pretzel loop.
Now draw the matching loop on the other side of the pretzel. This new curve should mirror the first loop, so check the height and width to keep them consistent. Pretzels are known for their symmetrical appearance, but if your lines do not look perfect, don’t worry. This can make your sketch look more realistic.

- Connect the shape with the lower curve.
To close the pretzel’s outline, sketch a smooth curve connecting the two lower ends of the loops. This creates the rounded bottom edge. Don’t this lower band too flat, adding a gentle arc will help it look more natural, like a real bread

- Draw scattered pretzel toppings.
A pretzel is often sprinkled with salt, and this small detail helps the drawing look more realistic. Place small oval shapes across the surface of the dough. Vary their angles slightly so they don’t all look the same. Keep them small, since they’re meant to be just a topping.

- Fill the pretzel with color.
Color the drawing your pretzel in a brown or light yellow shade. The salt pieces can stay uncolored or be shaded a lighter tone. A smooth, flat application of color works best for this drawing style, but you can add slight shading if you want to make your sketch look more dimensional.

Easy Pretzel Drawing Tutorial
Continuing from the main tutorial, this additional version of how to draw a pretzel focuses on the smooth, interlocking shape of the baked snack. The design is built from broad curved lines that loop and cross over each other, creating the familiar knot form. The structure is kept simple while still showing the overlapping parts clearly, making the pretzel easy to recognize. This approach avoids small details and instead highlights the main silhouette, which is useful practice for controlling long, even curves.
To draw a pretzel using even more simplified method, it is important to first outline the overall form. Sketch a rounded shape with two upper loops and a lower section. Add curved lines inside each loop to show the overlapping strands, then connect them at the bottom with a thicker curve to form the knot.
Continue drawing the crossing sections of the pretzel. Once the structure is clear, refine the outline and erase unnecessary construction marks. Add small oval or dot shapes on the surface to represent grains of salt, spacing them irregularly for a natural effect. For coloring, use a brown shade for the dough and lighter spots for the salt.
Conclusion
The pretzel is ready! Hope you did your best and the pretzel looks very realistic and delicious. You can add other objects to your drawing. For example, you can draw a beautiful still life with a cup of tea and other sweets.
For more practice on similar topics, see the cupcake drawing tutorial to try another popular snack, or the cup of tea drawing tutorial to combine with food themes.
You can also visit the food coloring pages for additional materials to color and practice. Share your results, write a comment, and check back for new step-by-step lessons.

