How to Draw a Road
In this tutorial, you’ll practice landscape drawing and learn how to draw a road disappearing into the distance through green fields and trees.
How to Draw a Road: Introduction
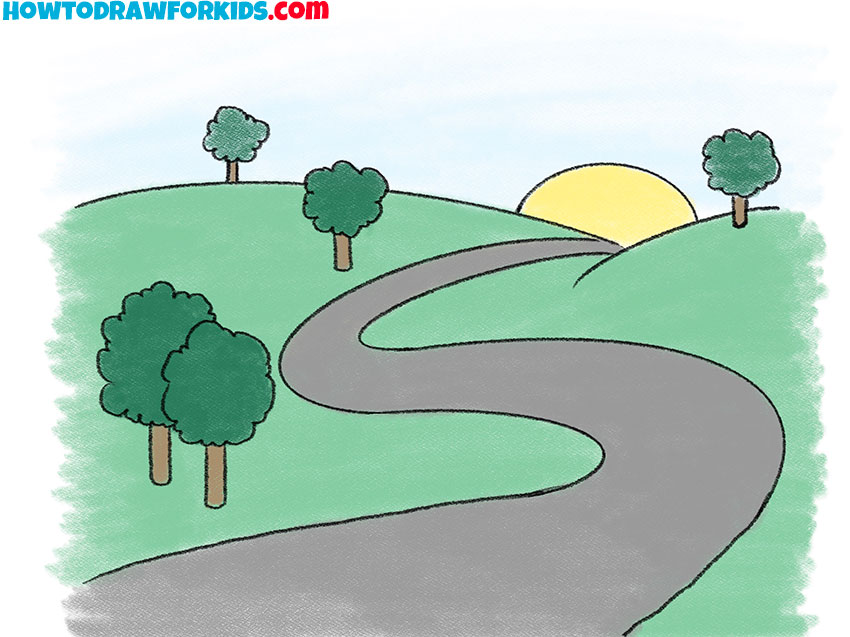
In this tutorial, you will learn how to draw a road that curves gently into the distance, surrounded by green hills, trees, and a rising sun. Also, I’ll show you how to draw a perspective in your drawing. It is a very good introduction to landscape drawing.
This is a great starting point if you’re learning how to draw a road in a calm countryside setting. You can change small details like the shape of the trees or the position of the sun to make your version different.
If you’d like to try another approach, there’s also an additional tutorial on how to draw a road using one-point perspective. That version features a straight road leading into the distance, framed by mountains and fields, and gives you a chance to practice your perspective drawing skills.
Road Drawing Tutorial
Materials
- Pencil
- Paper
- Eraser
- Coloring supplies
Time needed: 35 minutes
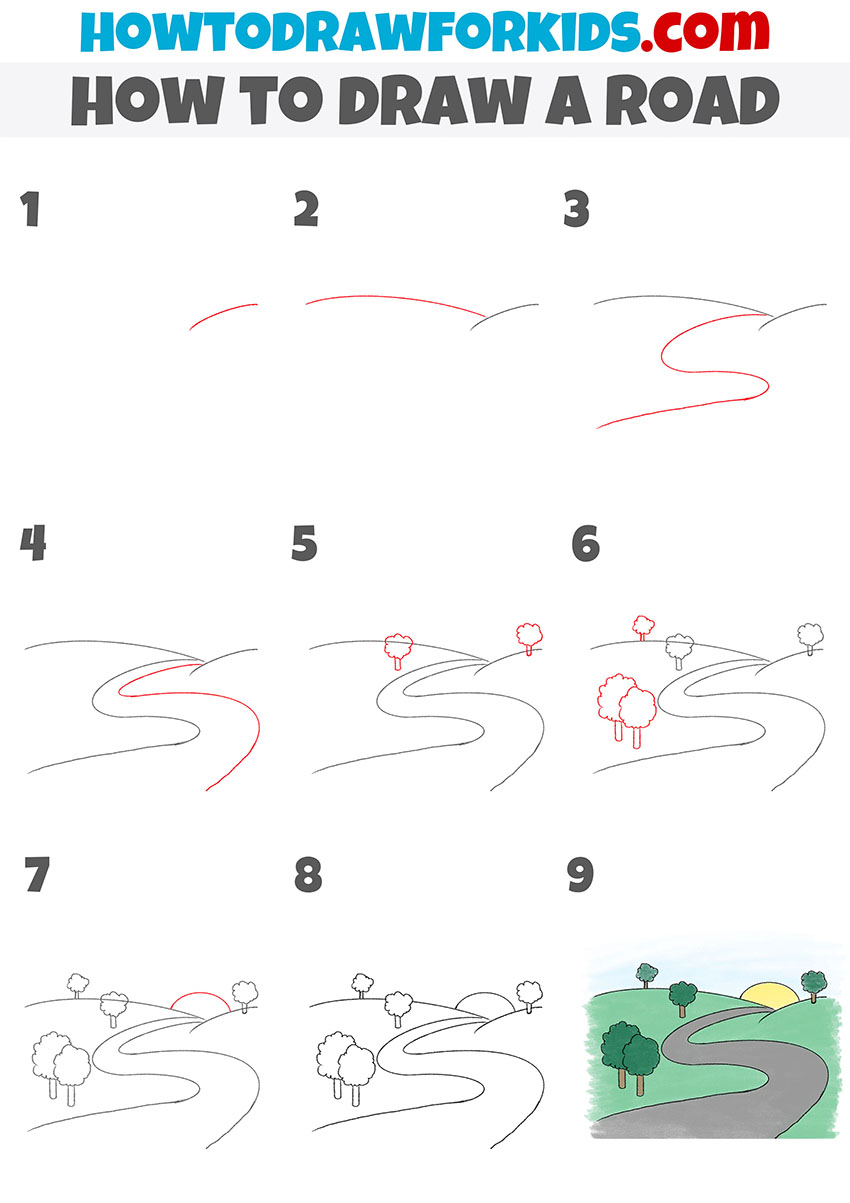
How to Draw a Road
- Draw the base of the horizon.
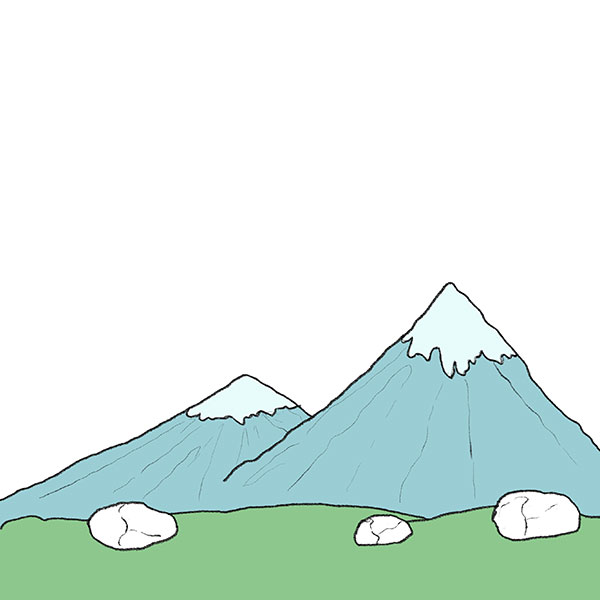
Begin by drawing a gently curved line across the upper part of your paper. This will represent the distant hill or edge of the landscape. You can keep the line low and simple, or make it more uneven to create natural slopes or even distant mountains, depending on the type of environment you want to create.

- Add a second hill.
Draw another long curved line below the first one to form a second hill. This helps create perspective in your road drawing. You can vary the height or steepness of this curve. If you want to build a more detailed setting, consider drawing additional lines to show overlapping hills or uneven ground on either side of the road.

- Draw the left road edge.
Start sketching a winding road starting near the center and curving down in an “S” shape toward the bottom of the page. This curved line gives a strong sense of perspective. You can change the shape to a straighter road, or add slight bends to give the road a more natural, rural look.

- Draw the right road edge.
Now draw the opposite edge of the road, mirroring the shape and widening it as it moves toward the foreground. If you want to add more detail, consider including a center line, dashed markings, or even a sidewalk or a narrow dirt path running along one side for variation.

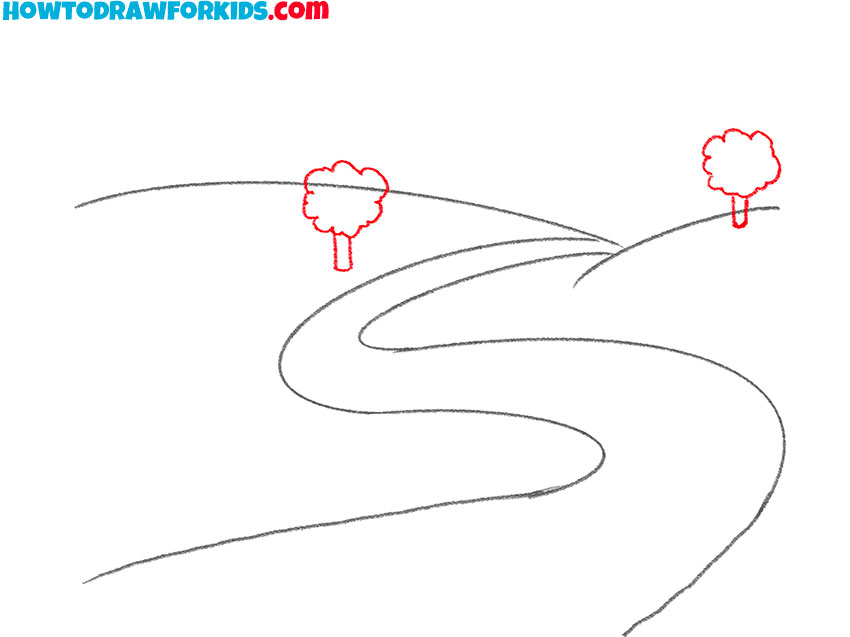
- Add background trees.
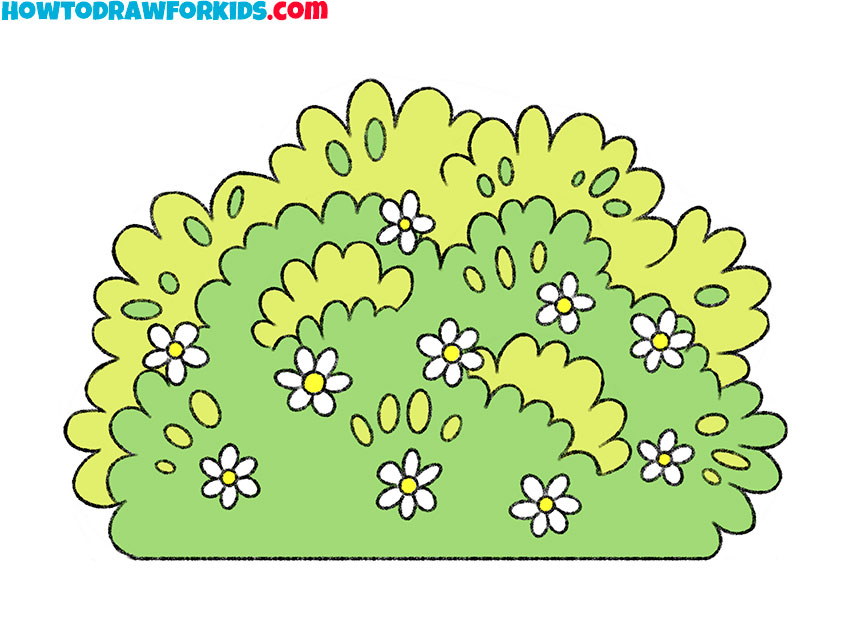
Now, let’s start adding details. Draw a tree near the back of the road, keeping the size small to match the perspective. Add another tree at the background. A rounded top and short trunk are enough to show it clearly. You can switch this out for a bush, distant house, or signpost.
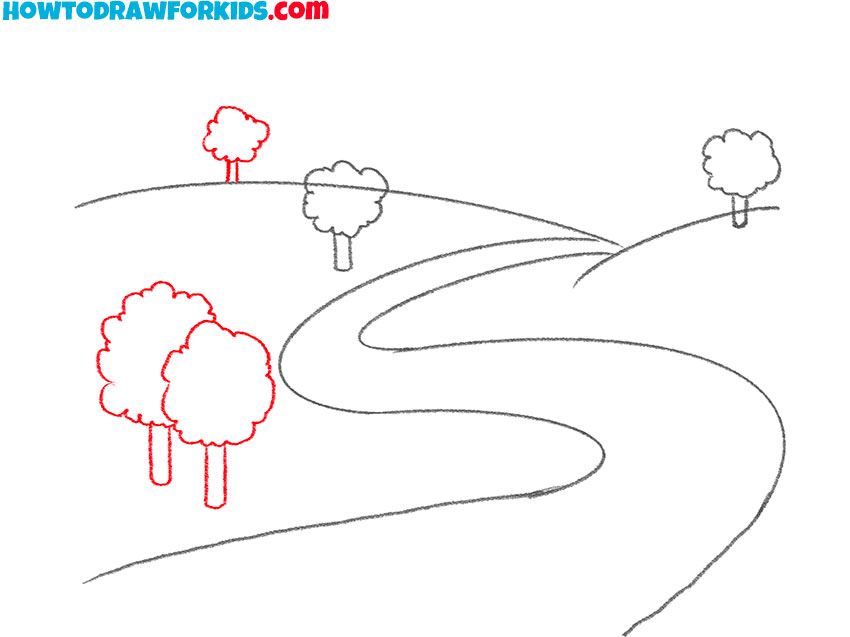
- Sketch the foreground trees.
Add a few more trees scattered along the top edges of the hills. Keep them varied in shape and slightly different in size to make the scene more natural. You could also include a distant barn, a windmill, or a simple fence line running along the horizon.
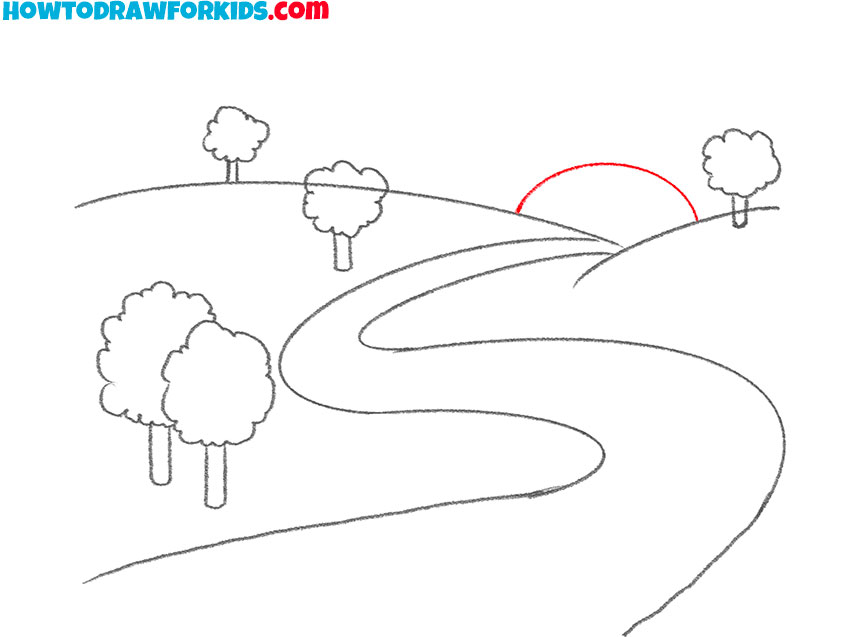
- Draw the sun above the road.
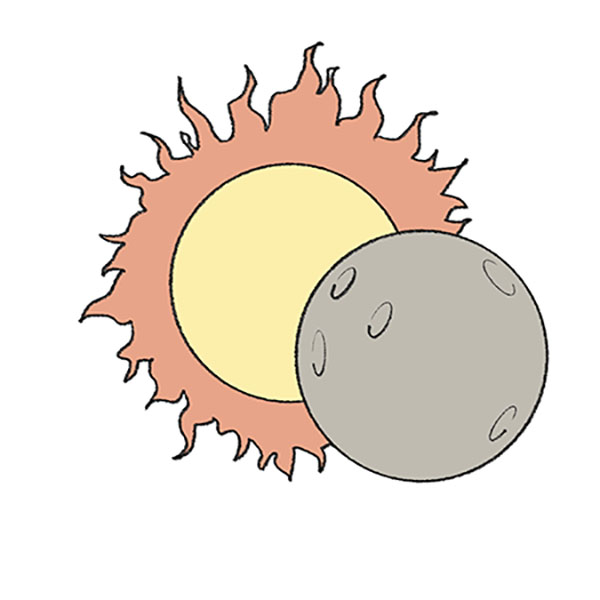
Place a semi-circle just above the back hill to show the rising or setting sun. You can draw the sun directly on the horizon for symmetry or move it off-center. If you’d like, draw a full sun higher in the sky, or a moon for a night scene, or even a few small clouds or flying birds to fill the sky area.
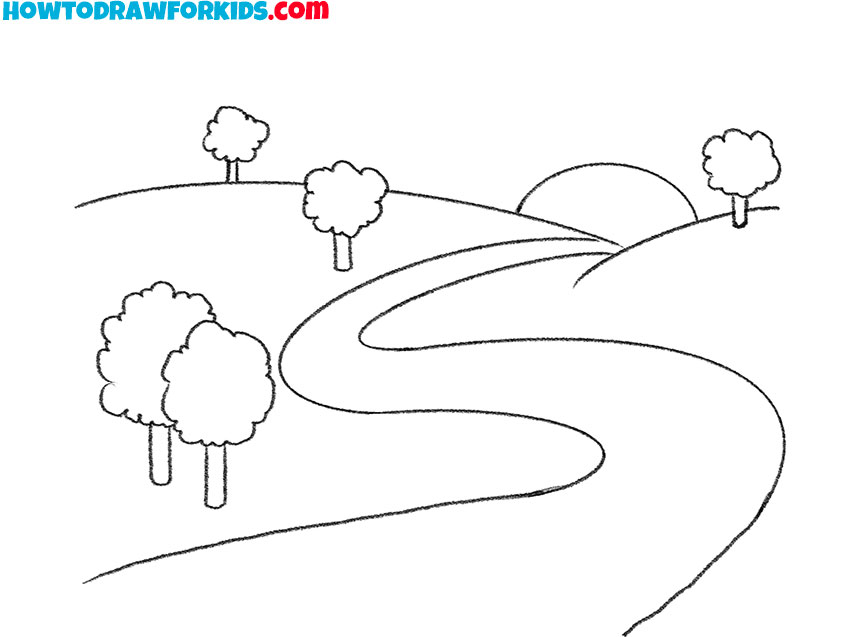
- Adjust and polish the sketch.
Use a darker pencil or pen to trace your sketch and make it look more polished. Erase unnecessary guidelines and adjust any uneven shapes. You can add extra background elements like a house, bushes, or some distant buildings to enrich the scene, depending on how simple or detailed you want it to be.
- Color the road and background.
Color the grass with green, the road with gray, the sun with yellow or orange, and the sky with a light blue. For variation, try an autumn look with orange and brown trees, or a winter version with white hills and a pale blue sky. Use soft even strokes to keep the scene calm and clean.

Additional Content
Subscribe to us on social networks so as not to miss new interesting lessons. I suggest you download and print a PDF file for free which contains a quick guide and some helpful tools.
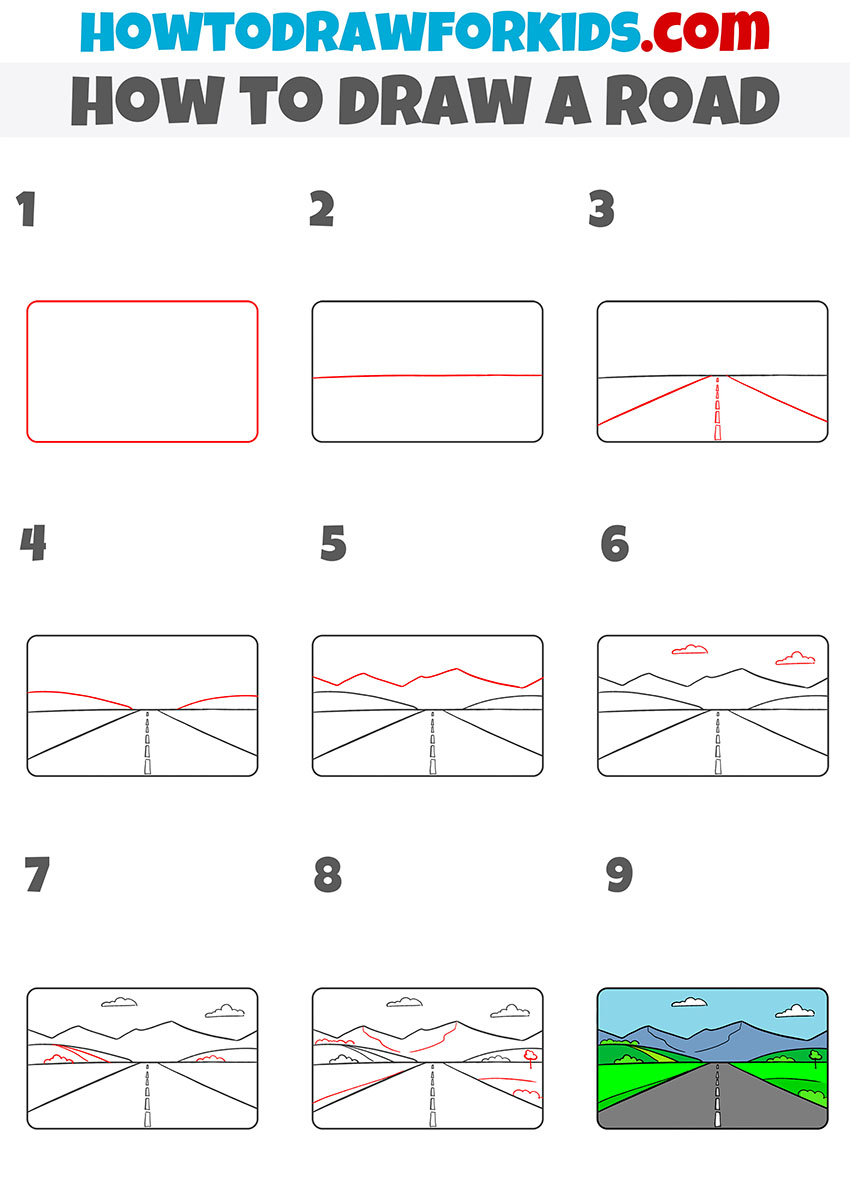
How to Draw a Road: Alternative Method
This version of how to draw a road uses a completely different approach compared to the earlier tutorials. It does not contain any difficult steps and uses only simple details for drawing, as it is created especially for children and beginners. Unlike the winding countryside road in the first guide, this method creates a straight road bordered by mountains, trees, and clouds.
To learn how to draw a road using this method, begin by drawing a large rectangle with rounded corners to frame your entire scene. Add a slightly curved horizontal line across the top third of the rectangle to form the distant horizon. From a point at the center bottom, draw two straight diagonal lines extending upward and outward to create the road edges.
Add dashed lines along the center of the road for markings. Add hills on each side of the road, then draw mountains above them. Draw clouds in the sky. Add small landscape elements like trees or bushes. Finish the drawing with clean lines and use color to separate the road, hills, and mountains clearly.
Conclusion
This road drawing tutorial is complete. Now you’ve created a simple landscape with a winding road, distant hills, trees, and a sun on the horizon. It’s a great way to practice perspective and build confidence in drawing basic natural scenes. You can repeat the drawing with different elements, like changing the shape of the road or adding more background details.
Also don’t forget to visit other drawing tutorials and coloring pages on the site, and follow along for new lessons. Also, don’t forget to subscribe to me in social media for more interesting and exciting content.