How to Draw a Rock
Today, in this tutorial, I will show you how to draw a rock step by step. This simple instruction consists of seven steps.

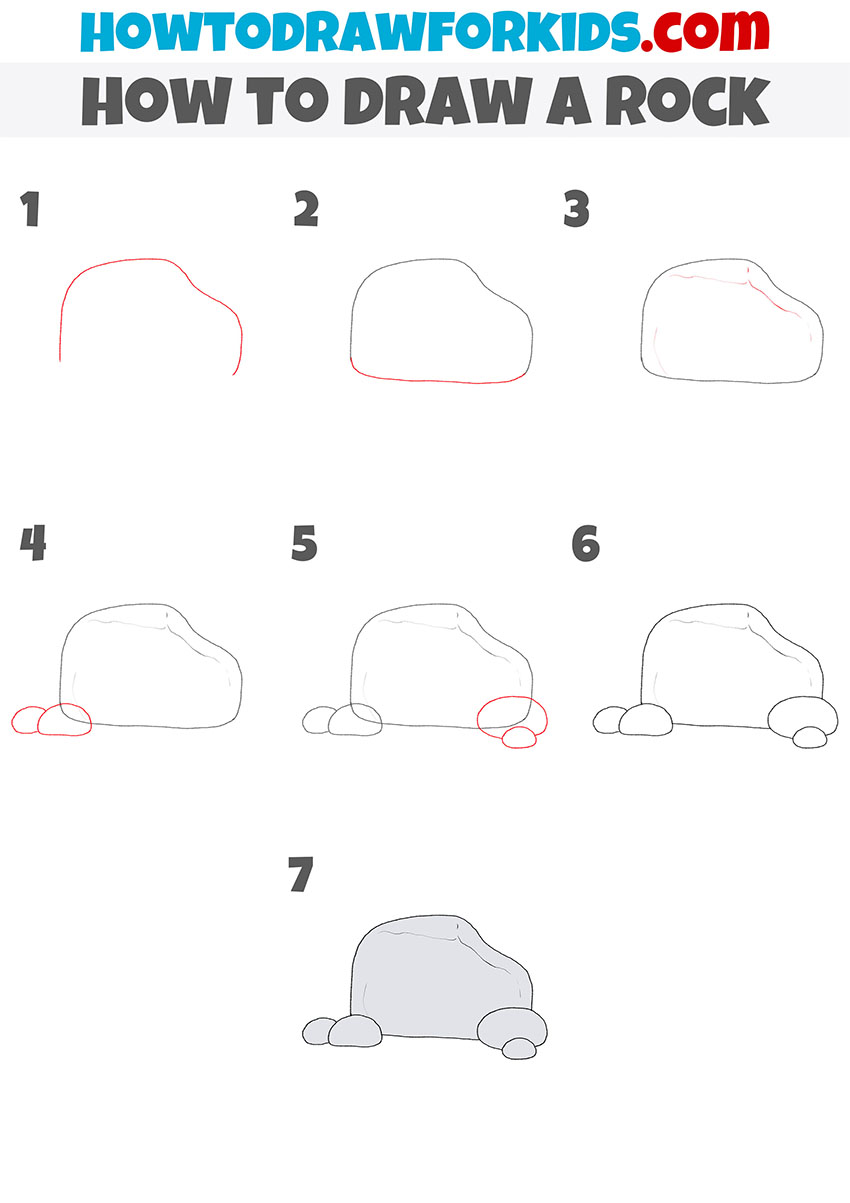
I am glad to offer you this useful drawing lesson in which you can learn how to draw a rock step by step easily and quickly.
This lesson will definitely be useful for you, because, having learned how to draw a rock with it, you will be able to depict this element in many of your drawings in the future. For example, you can draw a rock if you want to draw a natural landscape, mountains, seascape, or cave.
You won’t have any trouble following this tutorial, as I’ve designed it specifically for beginner artists and kids. When you draw a stone with these instructions, you will first draw a large stone and then add some smaller rocks around it to complete your drawing.
Materials
- Pencil
- Paper
- Eraser
- Coloring supplies
Time needed: 20 minutes
How to Draw a Rock
- Draw the top outline of the rock.
This step will be very simple, all you need to do is draw one curved line.

- Add the bottom outline of the rock.
Connect the ends of the previously drawn curved line with a small line as shown.

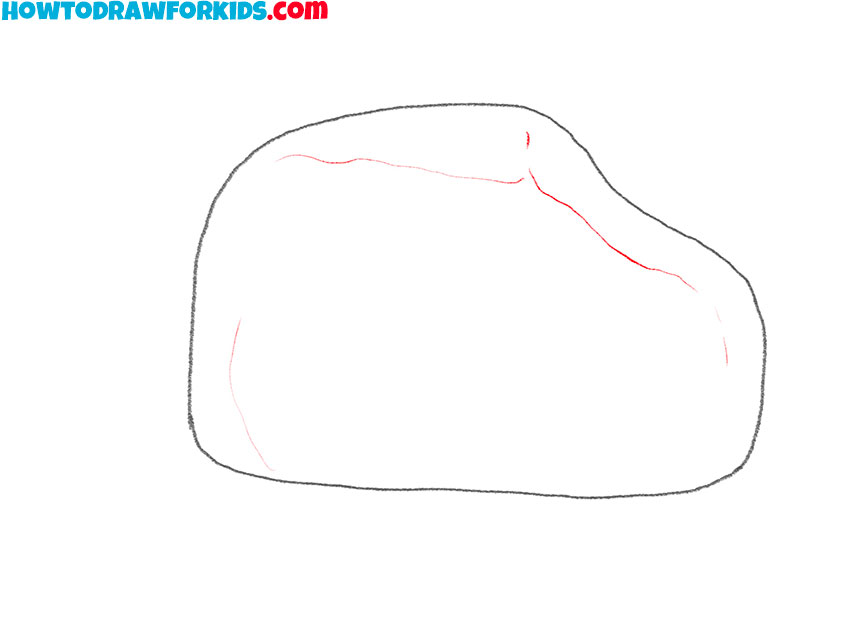
- Sketch out the relief.
Add several thin, curved lines of varying lengths to depict the relief of the rock.
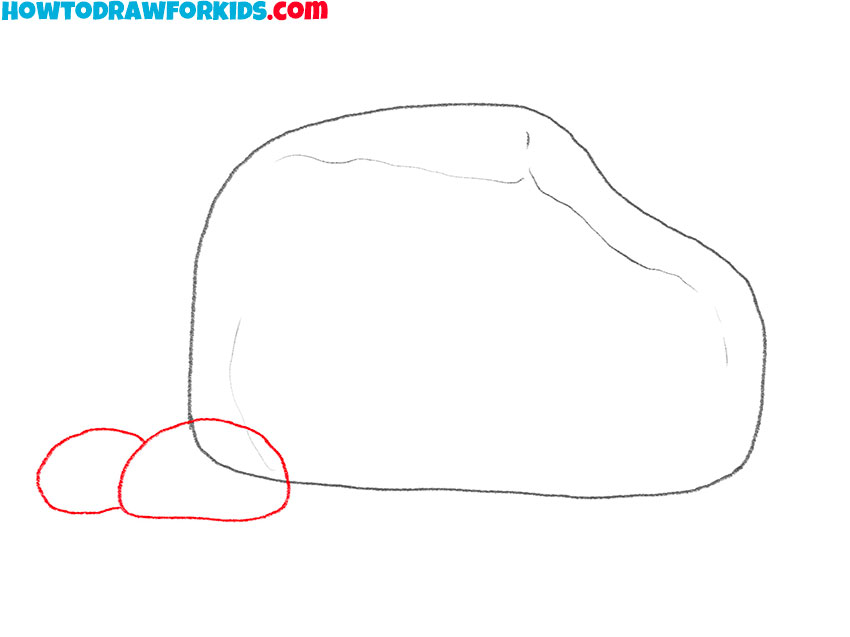
- Draw two stones on the left side.
Beside the large stone, add two small stones at the bottom using curved lines.
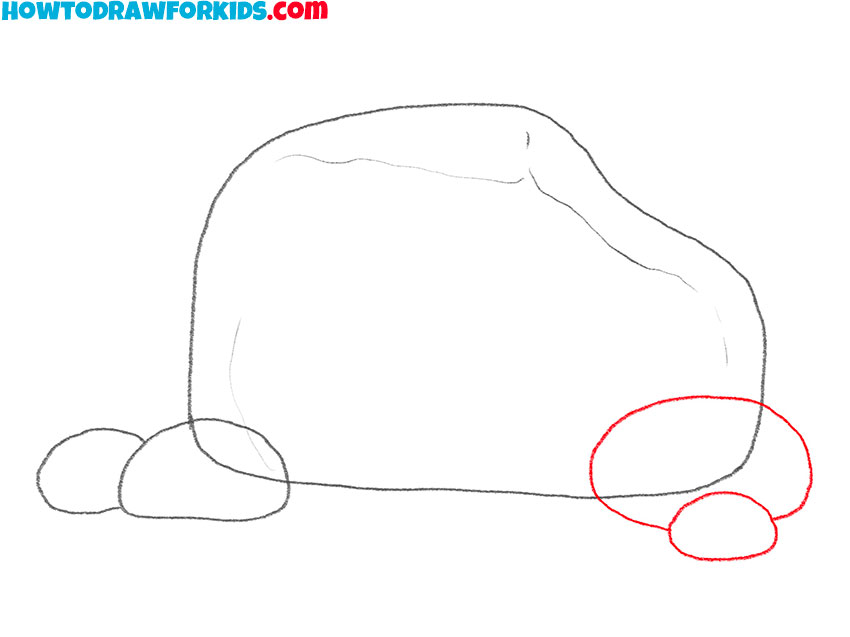
- Add two stones on the right side.
Now depict two more small stones of different sizes, as shown in the picture.
- Correct inaccuracies.
Use the eraser to remove any unnecessary guidelines.

- Color the rock.
To color this drawing, you should only use the gray color.

For your convenience, I have prepared a PDF file that contains all the useful information from this lesson, as well as additional practice materials to help you develop your artistic abilities. You can download this file right now so as not to lose it in the future, and also return to this lesson even without an internet connection.

