How to Draw a Scorpion
Join me as I teach you how to draw a scorpion with precision and style. My lesson breaks down complex shapes into simple steps, making it ideal for aspiring artists. Learn to sketch, outline, and shade a scorpion, bringing this intriguing creature to life on your canvas.
Calling all young artists! I’m excited to share this kid-friendly tutorial on how to draw a simple and cute scorpion. I’ve designed this lesson to be easy, enjoyable, and perfect for children. We’ll use basic shapes and fun techniques to create a charming scorpion drawing. This is a fantastic way for kids to develop their artistic skills while having tons of fun.
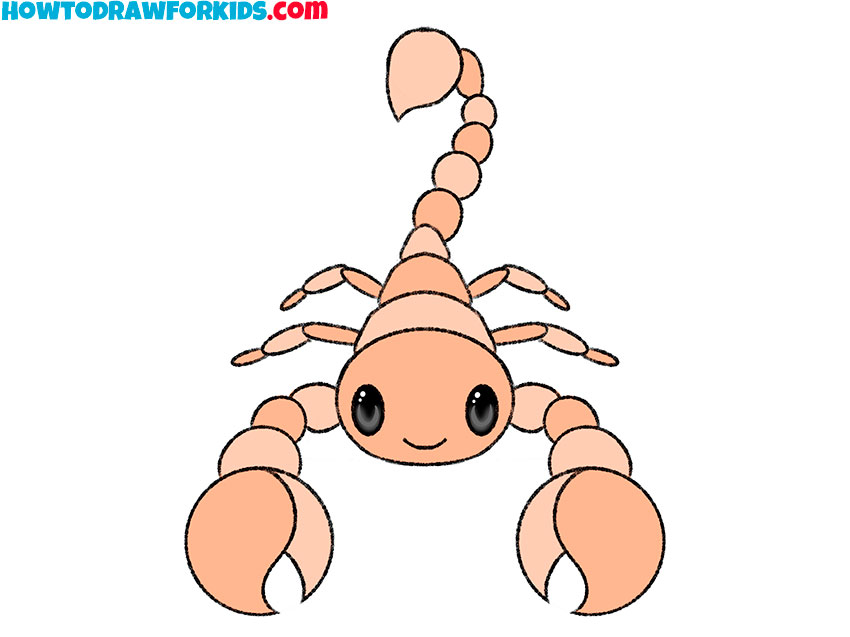
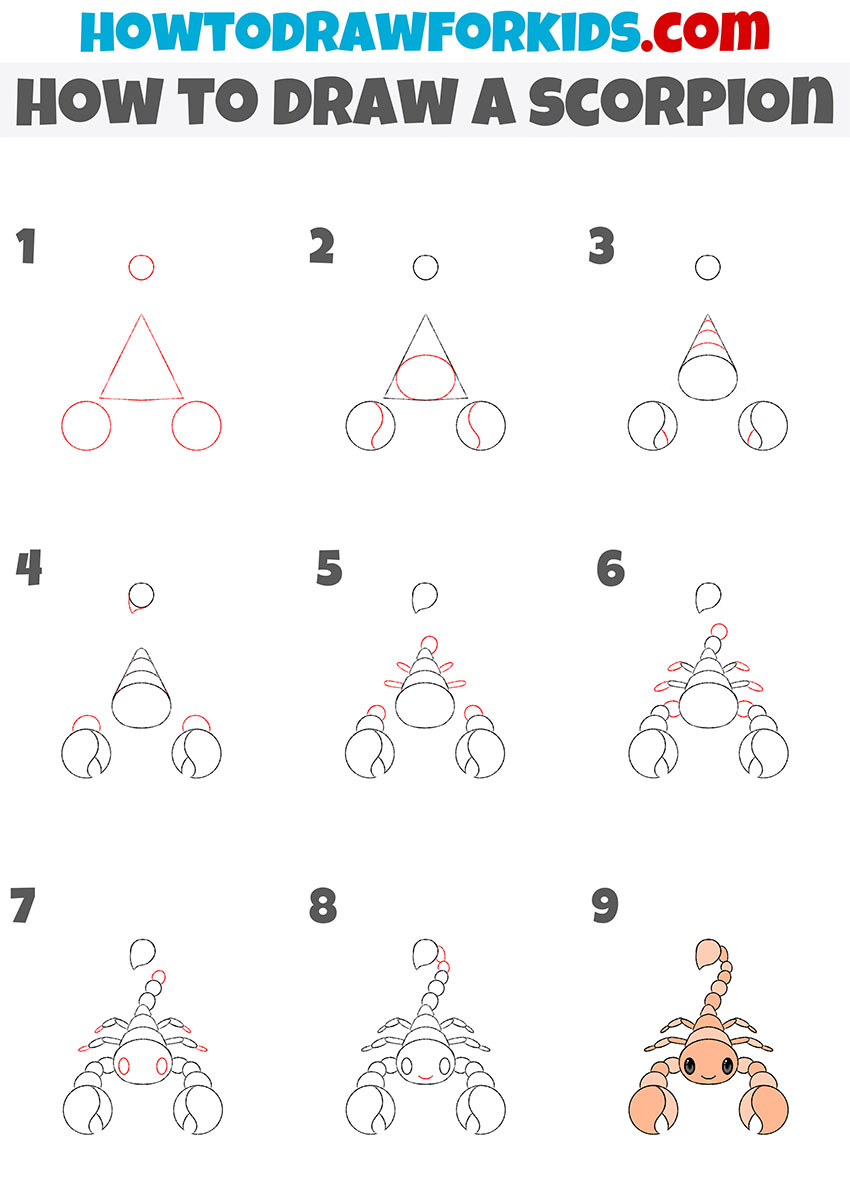
Table of Contents
- Basic information
- Steps on how to draw a scorpion
- Additional content
- Alternative drawing technique
- FAQs on scorpion drawing
- Conclusion
Basic Information on How to Draw a Scorpion
Get ready to embark on an exciting drawing on how to draw a scorpion adventure as I show you how to bring the intriguing scorpion to life on your very own sketch pad.
Scorpions are fascinating creatures, known for their curved tails and palps, and today, you’ll learn how to draw one through simple, easy-to-follow steps in this scorpion drawing tutorial.
We’ll begin with basic shapes to form the body and then add the detail that captures the unique features of a scorpion. I’ll guide you in adding the segmented tail, the palps, and those captivating details that make a scorpion so distinctive.
By the end of our session, you’ll have a cool scorpion drawing to share with your friends and family. So grab your pencils, and let’s start this artistic journey into the desert to discover the scorpion’s secrets!
Materials
- Pencil
- Paper
- Eraser
- Coloring supplies
Steps on How to Draw a Scorpion
Time needed: 30 minutes
How to Draw a Scorpion
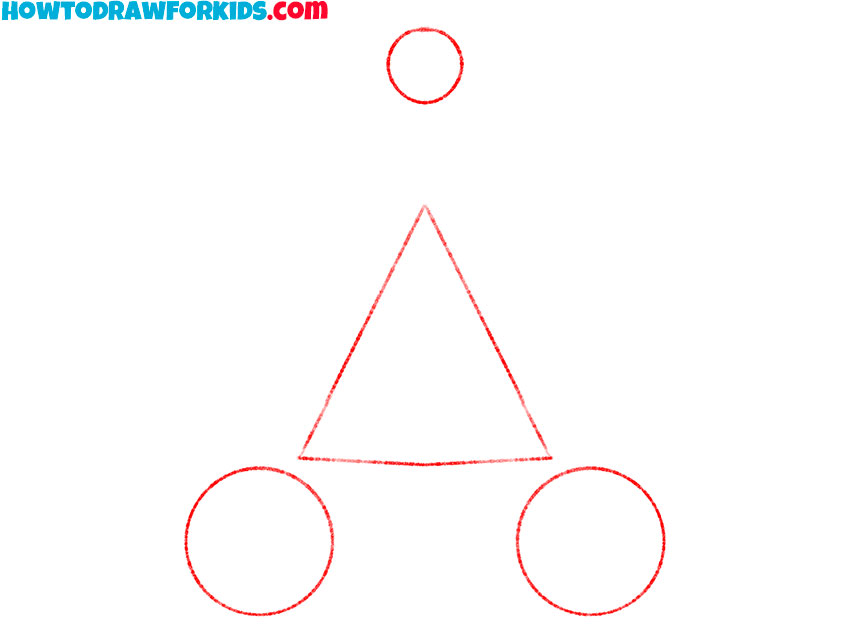
- Prepare the base.
Draw the scorpion body using a triangle for the main segment. For the palps and the tail, sketch circles; these will serve as the foundation for later details.
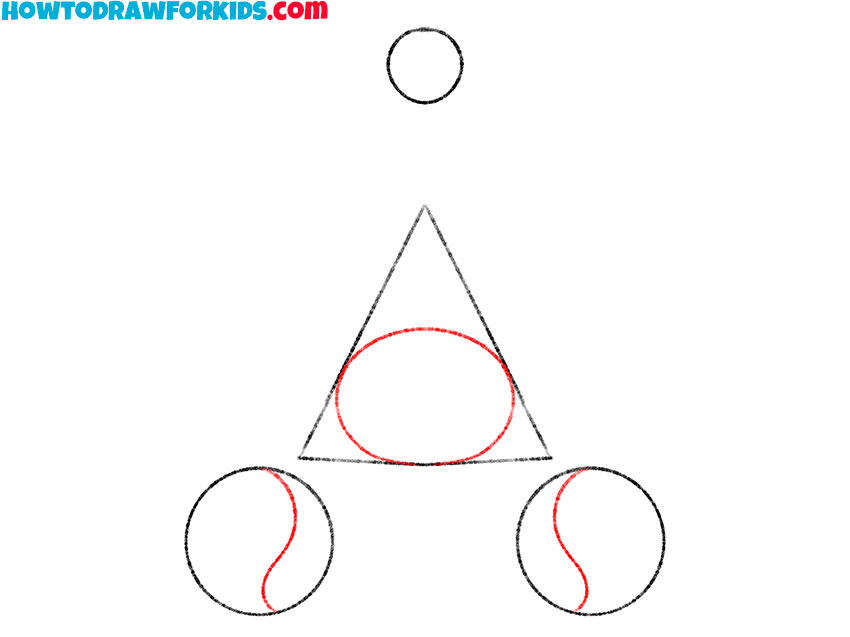
- Give the body and palps the desired shape.
Inside the triangular shape insert an oval to define the main torso segment. Then, in each of the lower circles, draw curved lines to establish the basic structure of the palps.
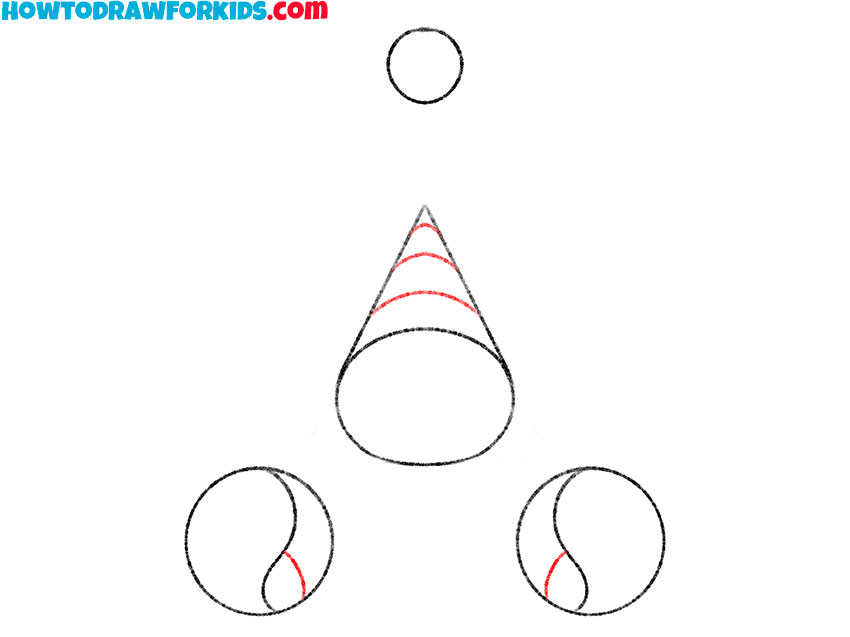
- Detail the palps and abdomen.
On each palp, add small curved lines. Then, within the triangular shape draw horizontal curved lines to delineate the scorpion abdominal segments.
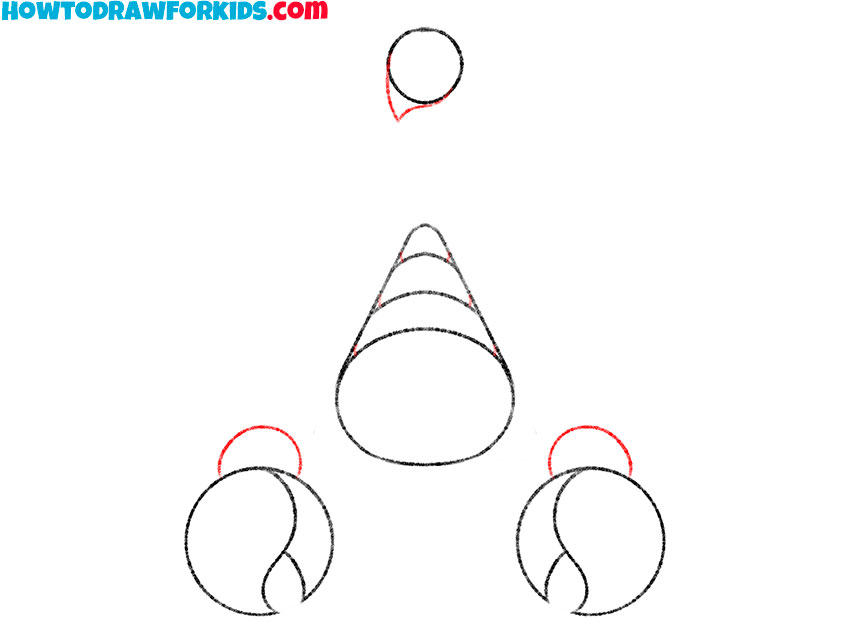
- Add the palps segments and the tip of the tail.
Draw arcs on top of the circles for the scorpion palps. Then, add a curved line to the circle above the body to complete the tail. Detail the abdomen and remove any unnecessary lines on the palps.
- Continue detailing the scorpion drawing.
Add semicircular shapes to the ends of each palp, ensuring they mirror each other for symmetry. On the body, draw a series of small, oval shapes to represent the scorpion segmented abdomen.
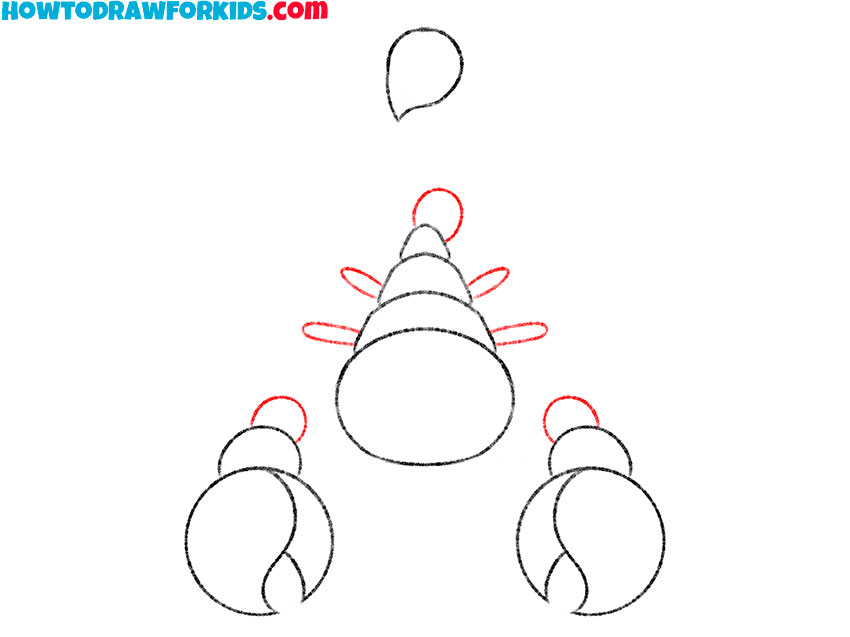
- Sketch elements of the palps and tail.
Use curved lines to draw additional segments on the scorpion palp and tail, enhancing the detail and segmented look characteristic of the scorpion limbs and tail.
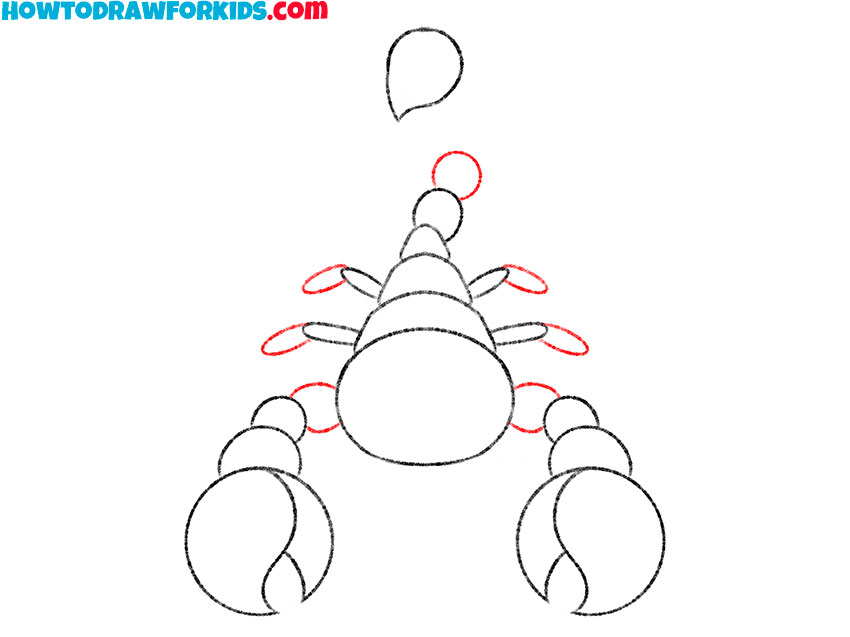
- Depict the eyes and segments on the palp.
Draw the oval-shaped eyes on the scorpion head. Then, add small segments at the end of each palp and the tail to illustrate the articulated joints and stinger.
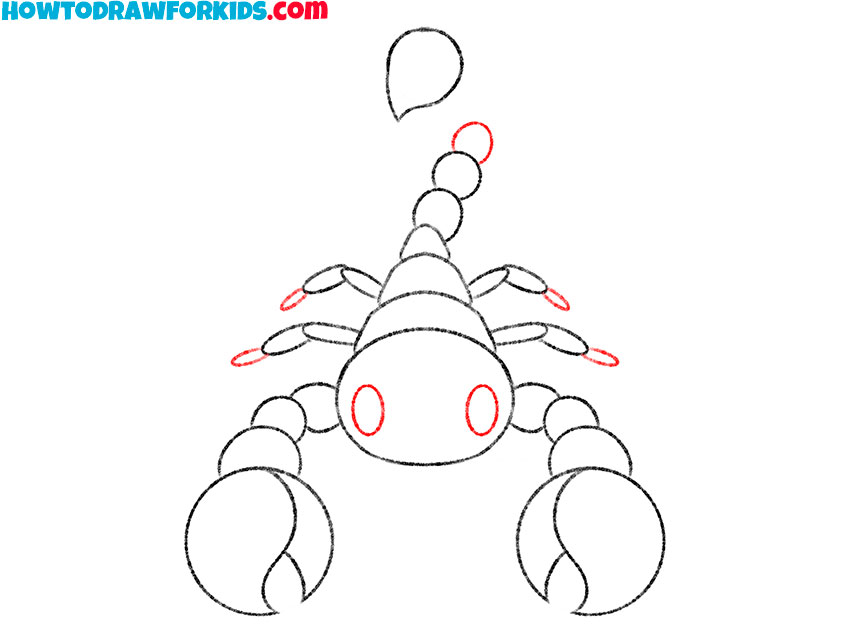
- Finish your sketching.
With a curved line, create a smiling mouth on the scorpion face for a friendly appearance. Then, enhance the tail by adding two more segments, using curved lines.
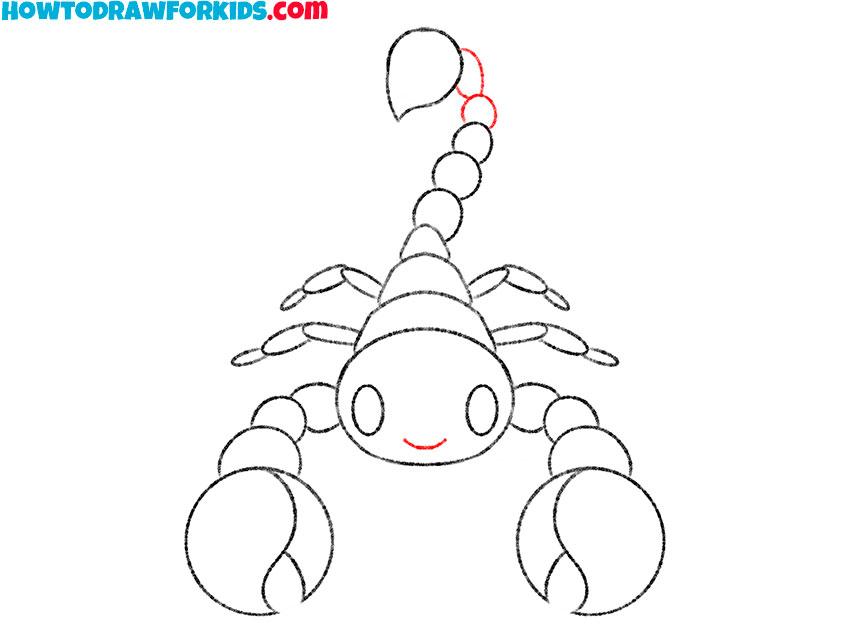
- Color the scorpion drawing.
Color the eyes in black. Then, for the body, apply varying shades of beige. Take your time and complete this step carefully.

Additional Content
I’ve put together a PDF file with a concise version of this scorpion drawing lesson. This file is absolutely free and provides a handy guide for drawing a scorpion step-by-step.
Additionally, once you’ve downloaded the file, you can use it to draw anytime, regardless of whether you have internet access or not. It’s really convenient for practicing your drawing skills anywhere, anytime.
Alternative Way to Learn How to Draw a Scorpion
I’m offering another scorpion drawing lesson for beginners, allowing you to choose the instructional style that suits you best. Experimenting with both will not only help you discover your preferred technique but also enhance your artistic skills.
How to Draw a Scorpion Easily
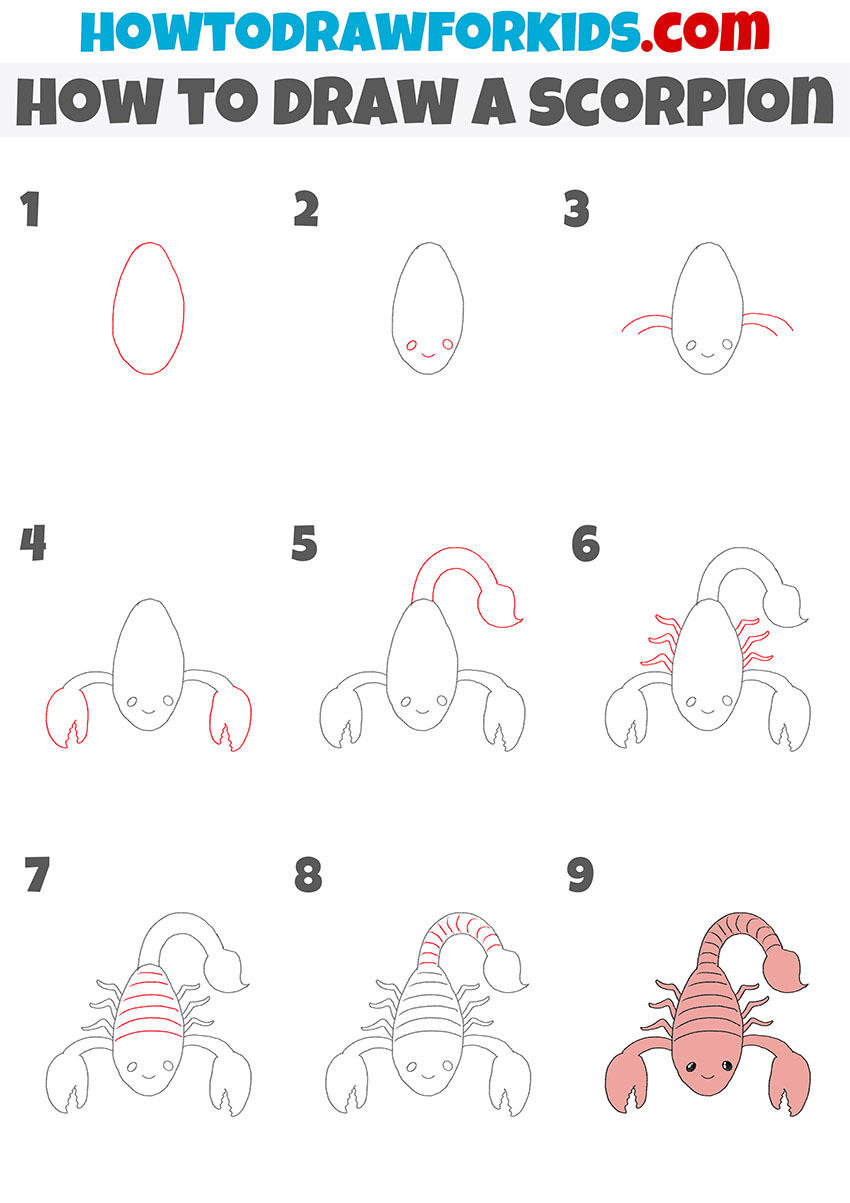
This scorpion drawing method begins with an oval shape, creating a more fluid and natural foundation for the scorpion’s body. Here, a more organic approach is suggested, which from the start can provide a more intuitive sense of the scorpion’s shape.
This scorpion drawing tutorial may seem less complex as it quickly moves to define the scorpion’s form, rather than constructing it from geometric shapes. It may be preferable for those seeking a more straightforward progression in their drawing.
FAQs on Scorpion Drawing
As you embark on your creative journey in scorpion drawing here are some frequently asked questions designed to address common concerns and provide helpful tips to enhance your drawing experience.
- Why do we start with geometric shapes when drawing a scorpion? Starting with geometric shapes helps to establish basic proportions and guides the overall layout before adding detail.
- Can I start drawing from the tail instead of the body? Feel free to begin where you’re most comfortable. The tail could be a good starting point for some artists.
- What’s the best way to get the curves of the scorpion’s body right? Use light strokes to sketch the curves and adjust as needed before solidifying your lines. Practice drawing smooth, curved lines on a separate piece of paper if necessary.
- How can I make sure the palps look symmetrical? You can draw a central line to serve as a guide or fold your paper in half to compare both sides of the palps.
- How can I add more character to my scorpion drawing? Experiment with different expressions, angles, or positions to make your scorpion unique.
- What can I do if my drawing looks too stiff? Try to loosen up your hand movements and sketch with flowing lines. Practice drawing with your whole arm instead of just your wrist.
- How important is it to follow the drawing steps in order? The steps are a guideline. With practice, you’ll find the order that works best for you and might even develop your own method.
- How can I create the illusion of the scorpion standing on a surface? Add a shadow beneath the scorpion and draw it slightly curved to match the surface it’s standing on. My article on light and shadows will be useful for you.
- Are there exercises to improve my drawing of circular shapes for the body parts? Yes, practicing drawing circles and ovals freehand or using tools like a compass can improve your technique and confidence.
Remember, these FAQs are meant to guide you through common challenges you might face while learning to draw a scorpion.
Conclusion
As we conclude our scorpion drawing lesson, I hope you’ve found the steps easy to follow and the process enjoyable. Remember, practice is the key to improvement, so don’t hesitate to revisit this tutorial or explore the myriad of other drawing lessons available on my website.
For regular updates and more creative inspiration, be sure to follow me on social media.

