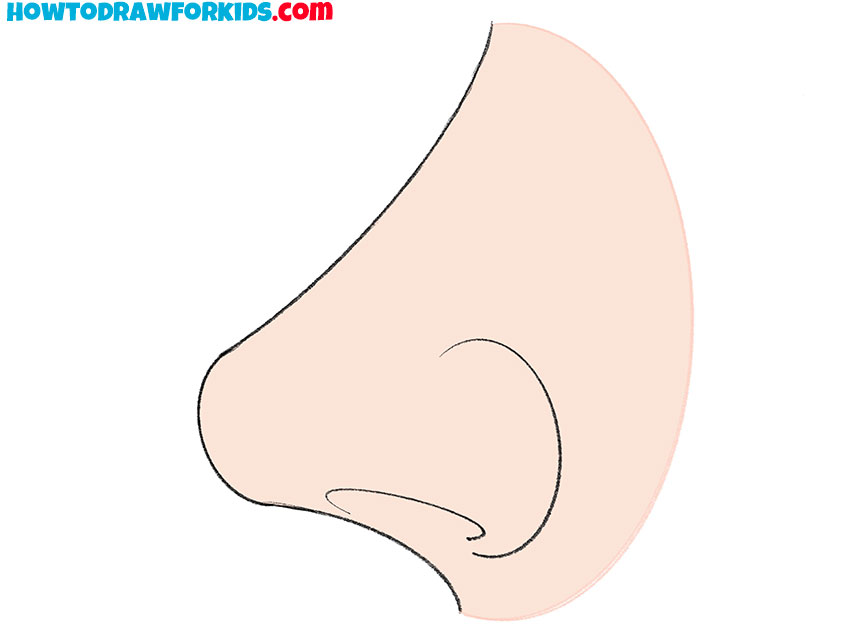
How to Draw a Nose From the Side
The journey to master how to draw a nose from the side is filled with discovery. I’ve designed this lesson to demystify the process, equipping you with a straightforward method to accurately render the side view of a nose. We’ll explore the unique profile and how to capture its essence, making your drawings resonate with realism.

How to Draw a Nose From the Side: Basic Information
Welcome to a artistic journey where I will guide you on how to draw a nose from the side. This angle presents unique challenges, capturing the essence of profile portraiture. The side view of a nose involves understanding the interplay of light and shadow, the curvature of the nostrils, and the subtle definition of the bridge.
As the creator of this lesson, my goal is to simplify the process, enabling you to confidently draw a nose from the side with ease and accuracy. Through my tailored technique, I will walk you through each stage, focusing on the anatomy and proportion that give the side profile its realistic appearance.
Finally, as you draw a nose from the side, remember that the devil is in the details. The nostril’s curve, the bridge’s slope, and the tip’s form are critical in bringing your sketch to life. So, grab your pencils, and let’s embark on this creative endeavor together, transforming simple lines into a nose that leaps off the page.
Nose From the Side Drawing Tutorial
Materials
- Pencil
- Paper
- Eraser
- Coloring supplies
Time needed: 15 minutes
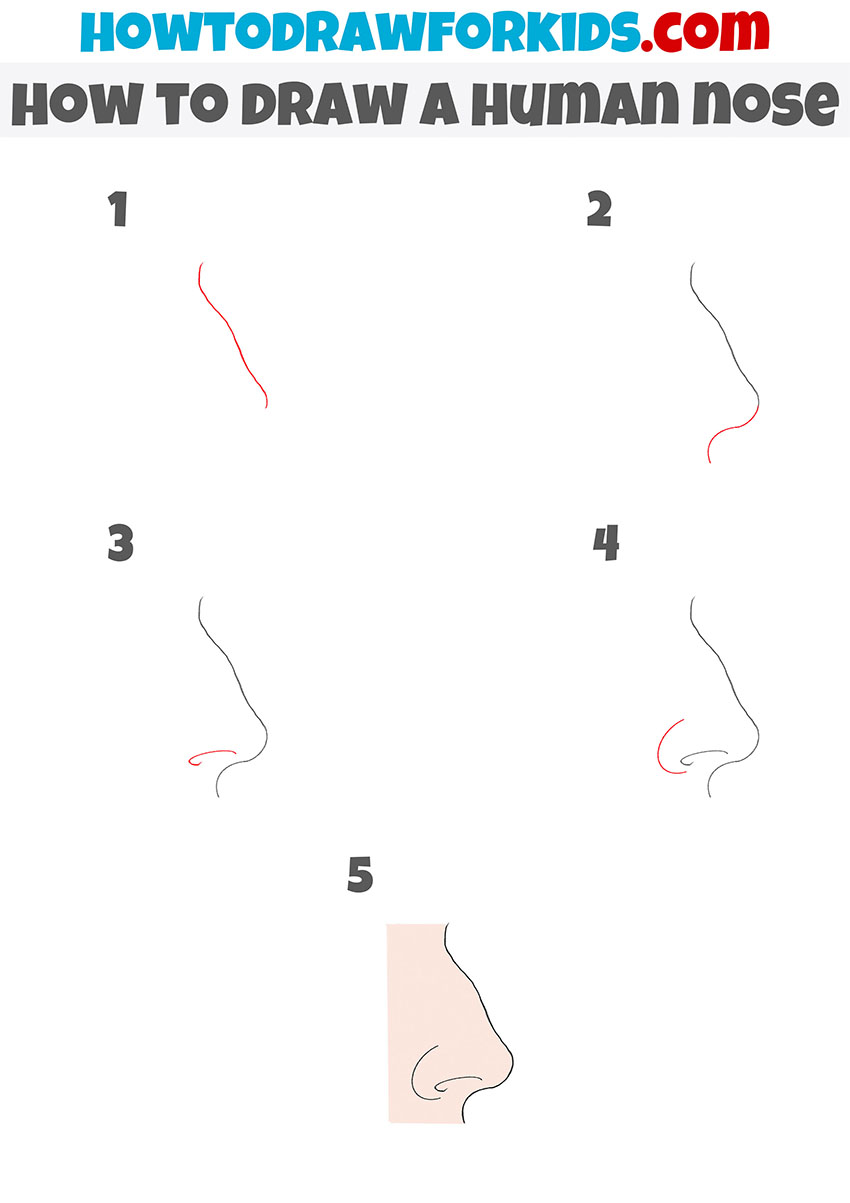
How to Draw a Nose From the Side
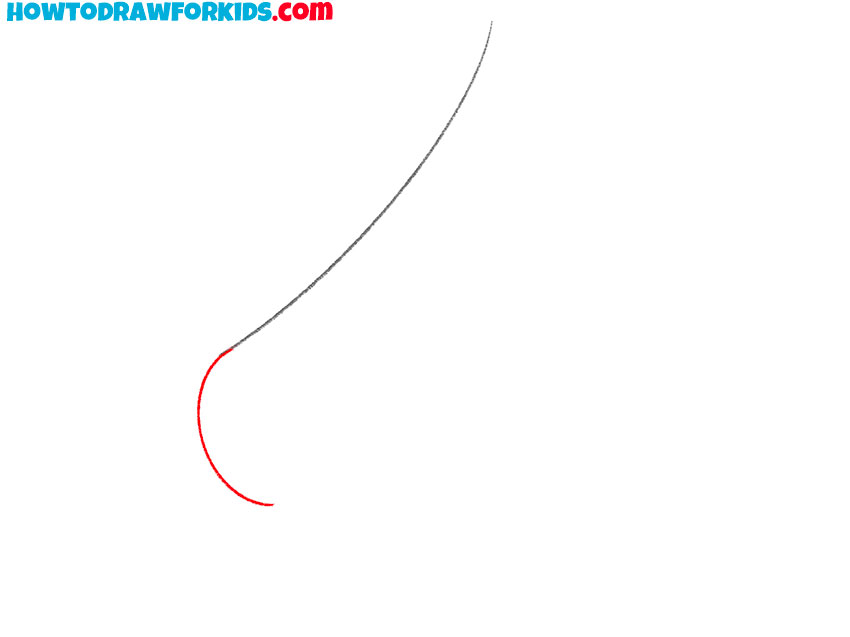
- Draw the top of the nose.
Depict a smooth line diagonally.

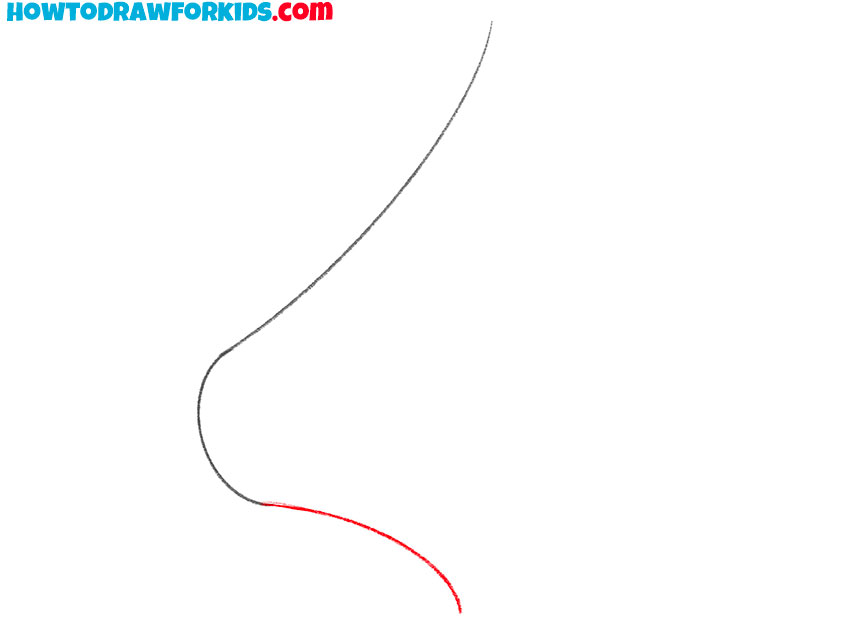
- Depict the tip of the nose.
Continue the line and add the rounded tip of the nose.
- Add the bottom of the nose.
Draw a smooth line down from the tip of the nose.
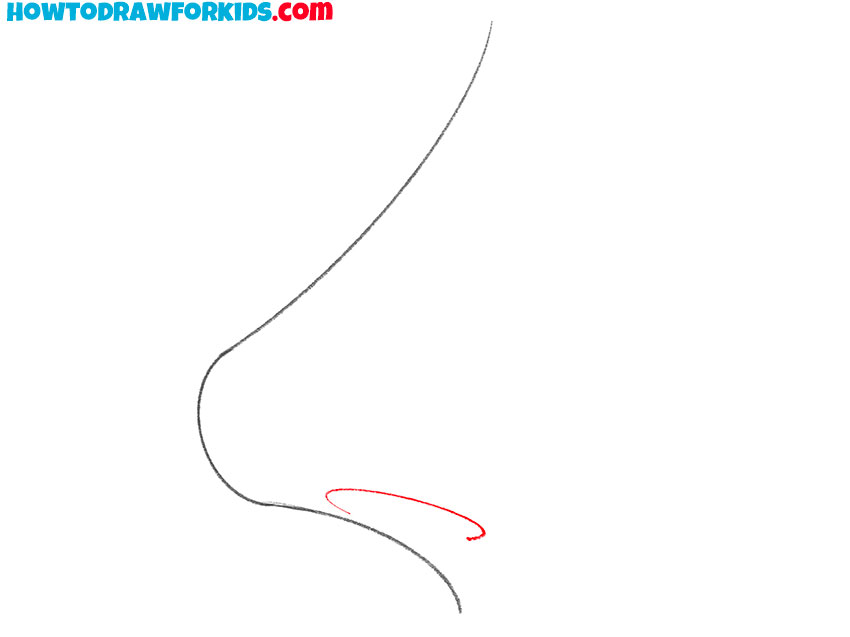
- Sketch out the nasal opening.
Depict a smooth rounded line at the bottom of the nose.
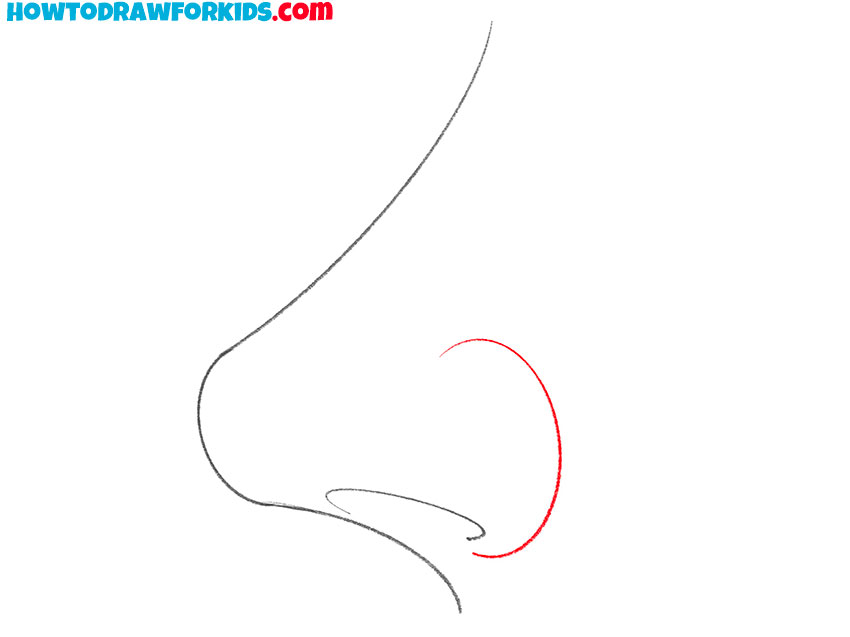
- Draw the nostril.
On the side, draw a rounded line of approximately the same shape as in the example.
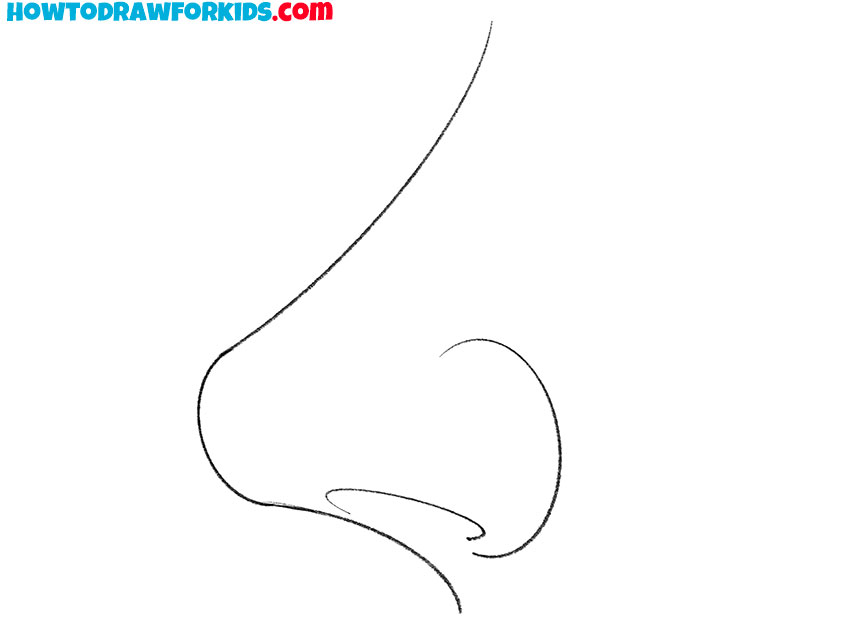
- Correct inaccuracies.
At this stage, trace the outline of the nose.
- Color the nose from the side.
Use any color for the drawing.
Additional Content
To supplement the step-by-step guide, I’ve crafted a free PDF file that encapsulates the essence of this lesson on drawing a nose from the side. This abbreviated guide is perfect for on-the-go practice and is accessible without the need for an internet connection, offering the freedom to develop your skills anytime, anywhere.
I understand the importance of having reliable and easily reachable art resources. That’s why I’ve made this PDF available for you to download. It’s a resource designed to provide quick, portable access to the key elements of the lesson, ensuring you can continue to refine your drawing technique wherever you may be.
This PDF is not just a learning tool; it’s a companion for your artistic journey. With this download, you have the power of practice in your hands, allowing you to revisit the fundamental aspects of drawing a nose from the side whenever you wish, without any barriers.
Alternative Drawing Techniques
To elevate your artistic expertise, I’ve created a suite of alternative techniques to draw a nose from the side. These varied approaches aim to enhance your practice, developing your skills to see the nose’s subtle complexities. By exploring these additional methods, you’ll gain a deeper understanding and greater versatility in your drawings.
As you delve into these alternative techniques, you’ll be challenged to refine your perception and improve your hand-eye coordination. This practice is designed to solidify your foundational skills and expand your artistic range, ensuring that each nose you draw is not only accurate but also filled with character and life.
How to Draw a Nose from the Side: Experimenting with Shape
This drawing method for a side-profile nose starts with a simple curve that defines the bridge. As we progress through the steps, we subtly alter the form to introduce a gentle bump, adding character and realism to the profile. This feature is a nod to the natural variations found in human noses, giving the drawing a unique touch.
In the second phase of the sketch, we refine the initial lines, shaping the nostril and the tip to complement the bridge’s curvature. This addition of the bump not only suggests a more realistic depiction but also infuses personality into the drawing. It’s these small details that can transform a flat sketch into a vivid portrayal.
Finalizing the drawing, we smooth out the transitions, ensuring that the nose’s bump flows organically into the rest of the facial features. This method is about capturing the essence of a distinctive nose, with the bump serving as a focal point that brings depth and interest to the side view.
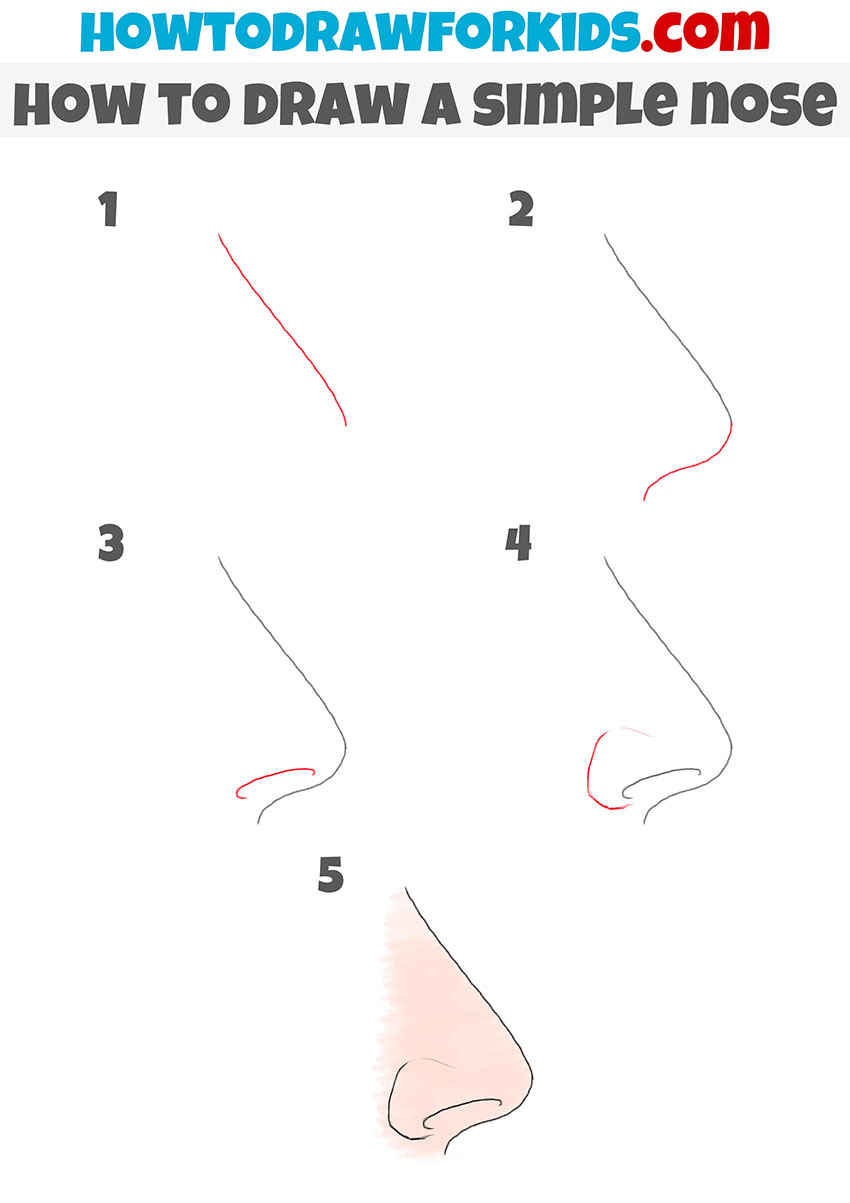
Nose Drawing Tutorial: More Practice
So, let’s keep practicing! This additional method for sketching a nose in profile offers a simple, five-step approach. Starting with a basic slant line for the bridge, it creates a foundation. This initial line is crucial as it defines the angle and length of the nose without any complex details.
Progressing to steps two and three, the method introduces the nostril and the tip of the nose with just a couple of gentle curves. This simplicity is key, as it avoids overwhelming the learner with intricate anatomy, focusing instead on the basic elements that suggest the nose’s shape and orientation.
By the fourth and fifth steps, the drawing gains definition. The nostril is enclosed, and the nose’s base is outlined, completing the profile with minimal lines. There’s no shading or intricate detail, making this method highly approachable for those just starting to understand the fundamentals of drawing facial features from the side.
Answering Your Nose Drawing Questions
As we conclude our lesson on the side profile of a nose, questions may linger in the air, like soft pencil marks on paper. Each query is a vital part of the learning process, representing a keen desire to understand and a passion to refine one’s skill. Here, we gather the most common inquiries:
- How do I ensure the nose fits the face proportionally when drawing from the side? Use the eye as a measuring stick; the nose should start in line with the inner corner of the eye and typically extend outward to about the length of one eye.
- What is the best way to represent the nostril in a side view without making it look too large or too small? Consider the overall size of the face and use light, feathery strokes to outline the nostril, making adjustments as needed to keep it proportional.
- How do I draw the nose bridge for different types of noses in a side profile? Study various nose types and practice drawing the bridge’s slope, noting how it can be straight, concave, or even slightly convex.
- When should I start to define the nostril and the nostril wing? Begin to define these features once the basic outer shape of the nose is in place, using the curvature of the tip as a guide for the nostril wing’s placement.
As we draw our session to a close, allow these FAQs to serve as beacons on your journey. Every question you ask, every answer you seek, they are the stepping stones to your growth as an artist. Keep these questions and their answers close, for they will light your way as you continue to draw, discover, and develop.
Conclusion
As we conclude this drawing lesson, your new skills are just beginning to take shape, much like the noses you’ve brought to life on paper. But why stop there? On my website, you can continue to grow, tackling exciting challenges like drawing a towering monster truck or the majestic pyramids of Egypt.
Don’t let any chapter go unread – join my social media family to catch every announcement and release of new content. And your voice is the most precious tool in my kit; leave your comments, share your desires for what lessons lie ahead, and together, we will paint the future of this creative journey, one lesson at a time.