How to Draw a Snowy Owl
In continuation of bird drawing themes, today’s tutorial is devoted to a winter subject as we learn how to draw a snowy owl.
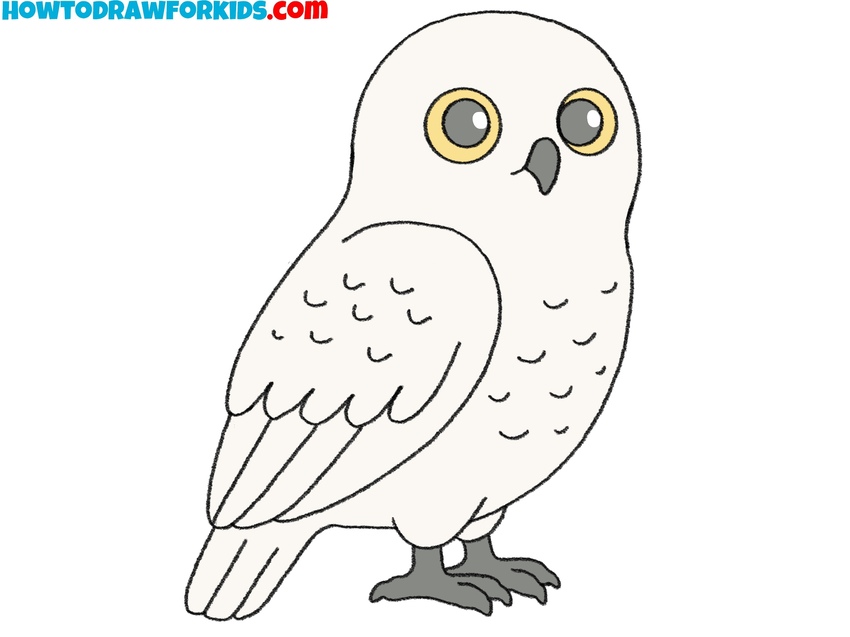
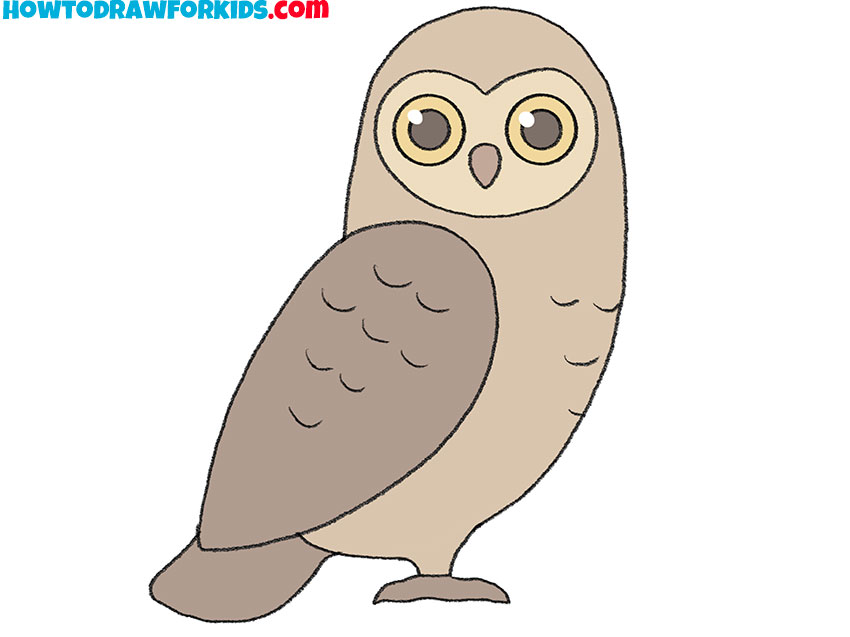
I want to show you how to draw a snowy owl. This is a very beautiful bird that lives in the tundra. The main difference between the snowy owl is the lighter color of the plumage, so this bird is also called the snowy owl.
Thanks to the warm fluffy plumage, the owl is adapted to live in the coldest places. This is a bird of prey that has excellent eyesight and successfully hunts small animals.
As you can see in the picture, the polar owl has a round head that smoothly passes into the body, beautiful round eyes, and a small beak. The owl is turned to us on one side, so we see only one wing.
To successfully complete this lesson, you will need the ability to draw smooth rounded lines. If you are careful and accurate at every stage of drawing, then you will get a beautiful snowy owl.
Materials
- Pencil
- Paper
- Eraser
- Coloring supplies
Time needed: 25 minutes
How to Draw a Snowy Owl
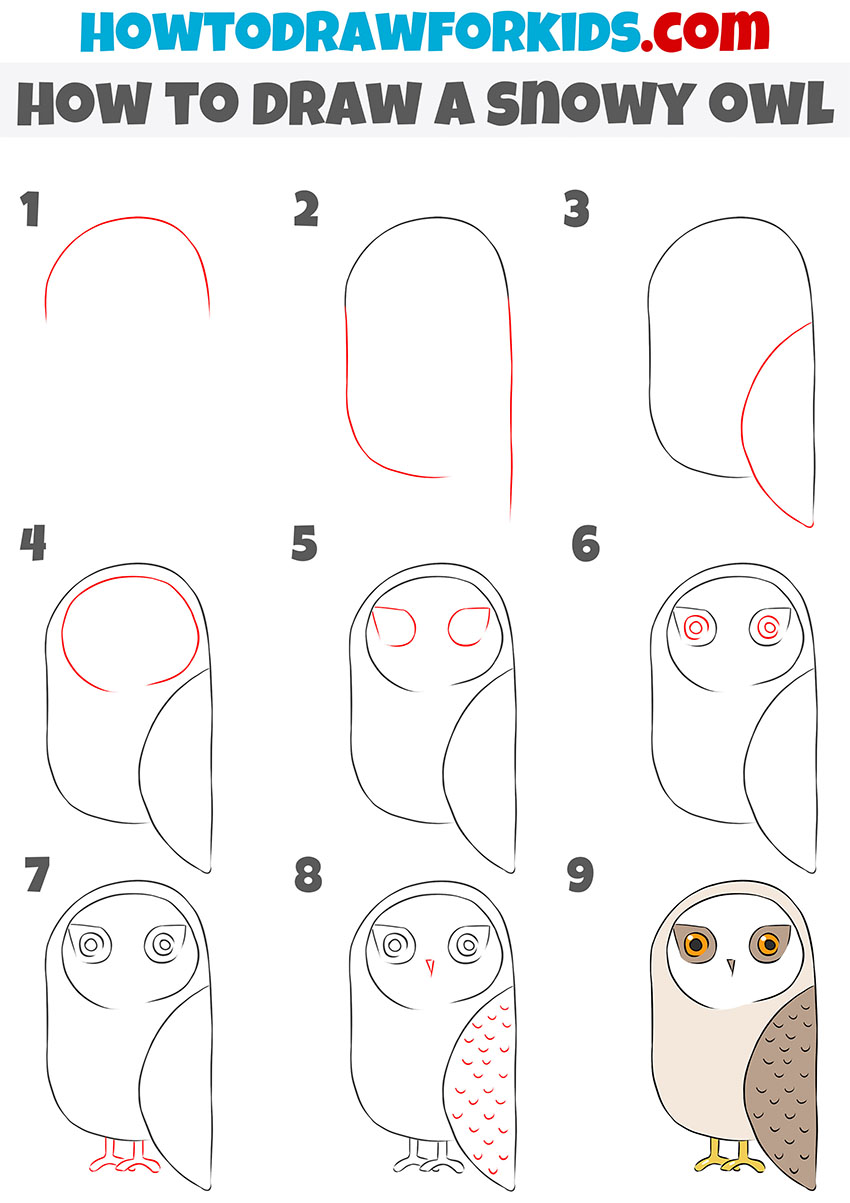
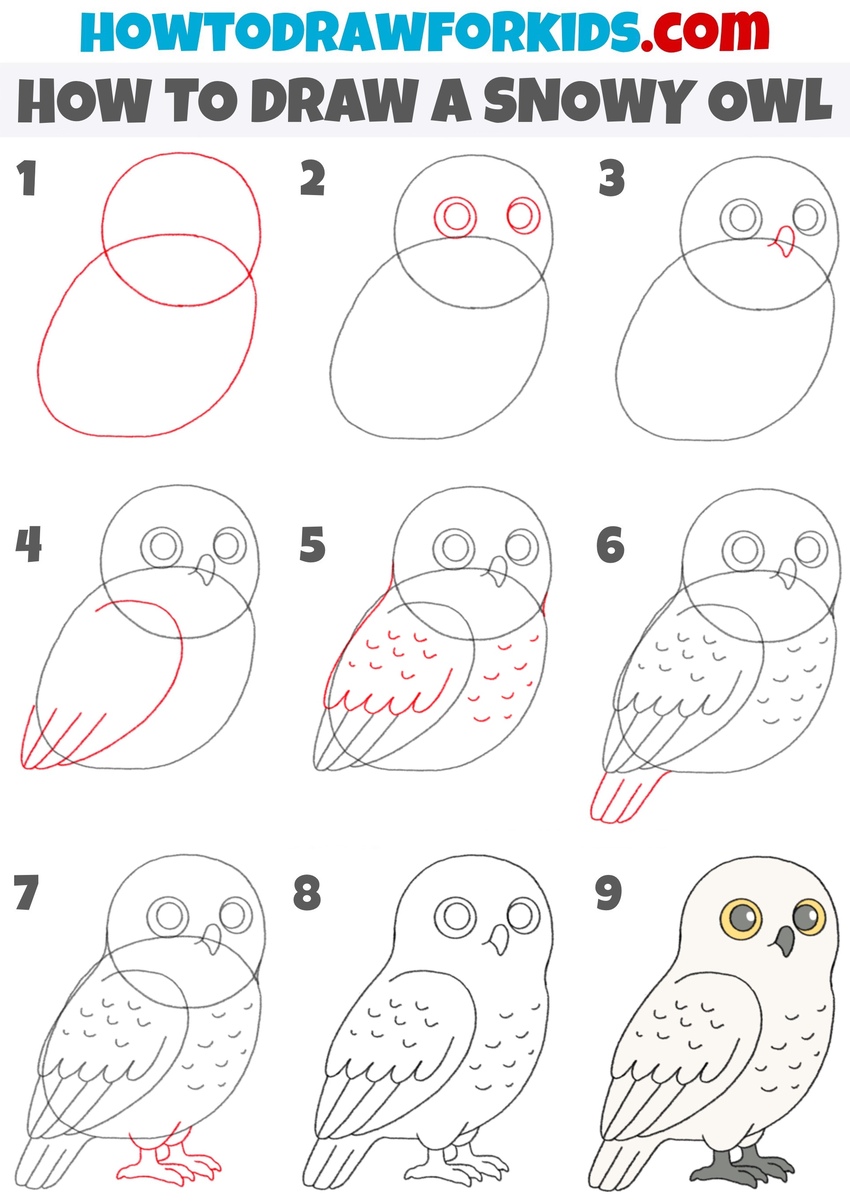
- Sketch the overlapping head and body shapes.
To begin, outline the two main shapes that will guide the owl’s proportions. Draw a medium-sized circle for the head, then overlap it with a larger oval below to form the body. The oval of the torso should intersect the oval of the head somewhere in the center so that these parts of the owl’s body are connected as naturally as possible.
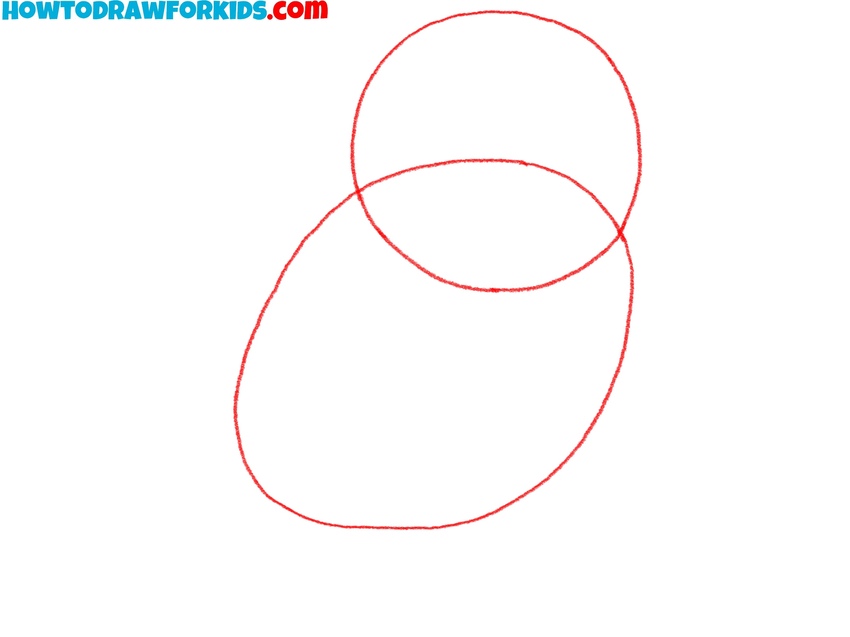
- Draw the owl’s large eyes and pupils.
Now, let’s draw the owl face in detail. Snowy owls are known for their large, forward-facing eyes, so now add two circles inside the head shape. Inside each circle, sketch a smaller circle to create the pupils. Try to make the eyes and pupils symmetrical.
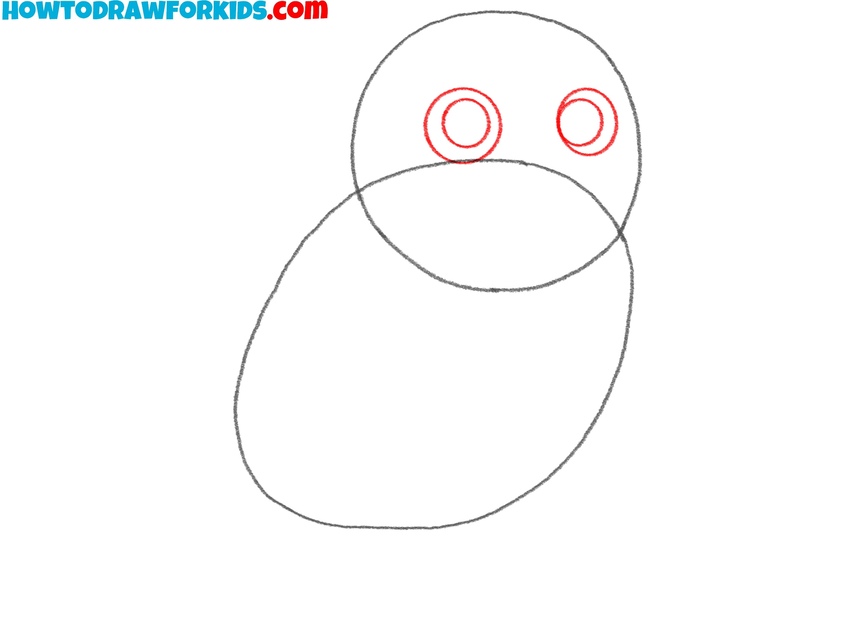
- Sketch the hooked beak between the eyes.
After drawing the eyes, sketch the small beak in the center, just below them. Snowy owls have short, curved beaks that point downward, so draw a small triangular shape with a rounded bottom edge.
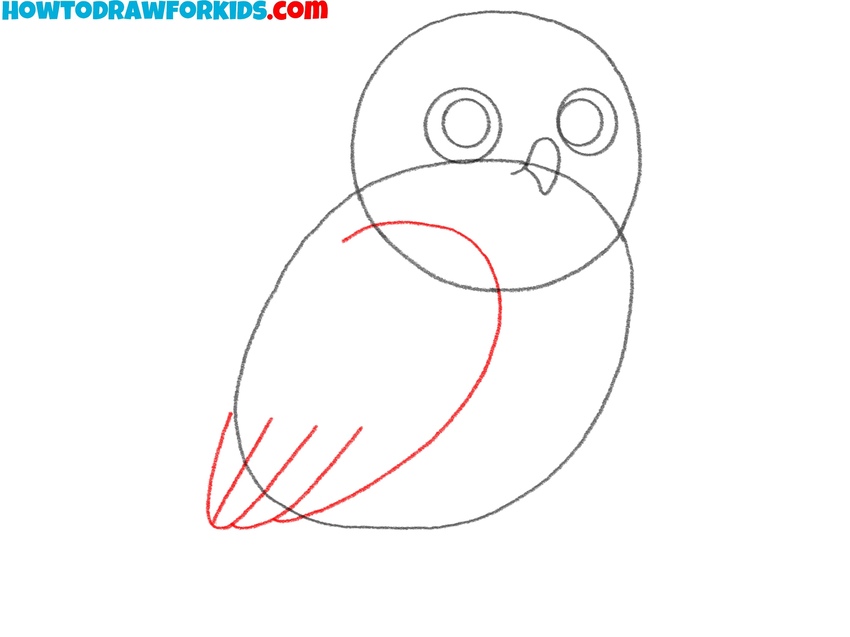
- Draw the owl’s long wing outlines.
Next, draw the wing folded in the side of the body. Starting from the side of the head and body outline, curve a line, ending near the base of the oval. Add several long feather-like shapes at the bottom to represent the tips of the wing. From this point, we can see only one wing.
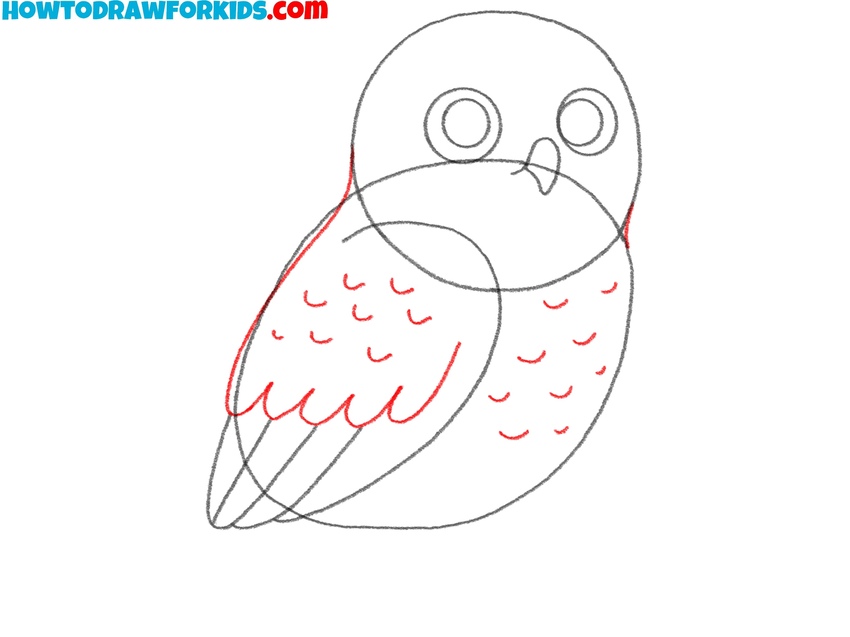
- Sketch the feather texture on the body.
To show the owl’s feathered texture, add rows of small curved marks across the upper body and part of the wings. These should look like short, rounded “V” shapes or scallops. On the wing tips, draw slightly longer curved lines to convey layered feathers.
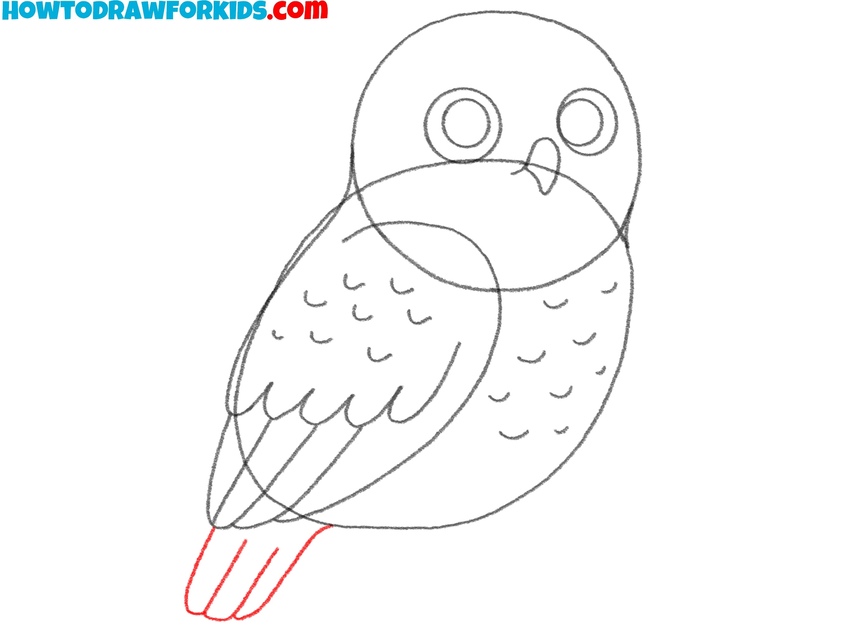
- Add the short tail feathers.
Continue the body down by sketching a short, rectangular tail at the bottom of the oval. Snowy owls have tails that are not too long, so keep it in mind, drawing this part. Add a few parallel lines across it to convey the feather structure.
- Illustrate the legs and talons.
First, draw the top parts of the snowy owl legs with a couple of curved lines. Then sketch two small, sturdy feet with three visible talons each. Use curved lines for the toes and small hooked shapes for the claws. Keep the proportions short and strong, since owl feet are compact but powerful.

- Erase any unneeded sketch marks.
Now, to finalize the linework, carefully remove the overlapping parts of the original head circle and body oval, leaving only the connected outline. Erase any guidelines around the wings and tail. Once the unnecessary lines are gone, trace back over the final outline to make it bold and dark.

- Fill the body with snowy tones.
To finish, fill the owl with its characteristic snowy tones. Take light gray or off-white and paint the body and wings. The feather details can be shaded slightly darker, but avoid heavy coloring since snowy owls are mostly white. Color the eyes bright yellow, and fill the pupils with black while leaving a small white highlight.

Bonus: Easy Snowy Owl Drawing Tutorial
Outline a tall curved shape for the owl’s body. Then, sketch a straight line down the side to complete the outline. Add a large curved wing on one side of the body to define the folded position.
After that, sketch a rounded oval near the top to mark the facial disc. Inside it, place two circular shapes for the eyes, and then add smaller circles to show the pupils. Draw a small pointed beak between the eyes, and sketch short legs with simple claws at the base.
For extra detail, include a series of small curved lines on the wing to convey feathers. Finally, clean up unnecessary marks, and add color, using pale beige or white for the body, darker tones for the wings, and bright yellow for the feet.