How to Draw Flames
Get ready to add some heat to your drawings with my how to draw flames tutorial. I suggest four unique methods, each tailored to help you create realistic and captivating fire effects. Perfect for aspiring artists, this guide provides easy-to-follow instructions for stunning flame illustrations.
Elevate your artistic expression by mastering the skill to draw flames. My expert guide provides four dynamic techniques to capture the essence of fire in your artwork. My in-depth tutorial is designed for artists seeking to infuse their creations with the energy of real flames.
How to Draw Flames: Basic Information
Today, we’re going to learn how to draw flames that really pop off the page. With this guide, we’ll turn simple lines into a blazing masterpiece. Get ready, because I’m about to show you how to make your drawings super hot!
Each stroke will teach you the flow and dance of fire. We’ll start with gentle curves and end with vibrant, leaping flames. My easy steps will guide you through, making what seems complex quite simple. You’re on your way to creating a fiery spectacle that shines bright!
By the end of this guide, adding the perfect draw flames to any scene will be a breeze. Let your creativity soar, and set your drawings ablaze! Are you ready to light up your sketchbook? Let’s fan the flames of your imagination and craft some sizzling scenes!
Flames Drawing Tutorial
Materials
- Pencil
- Paper
- Eraser
- Coloring supplies
Time needed: 30 minutes
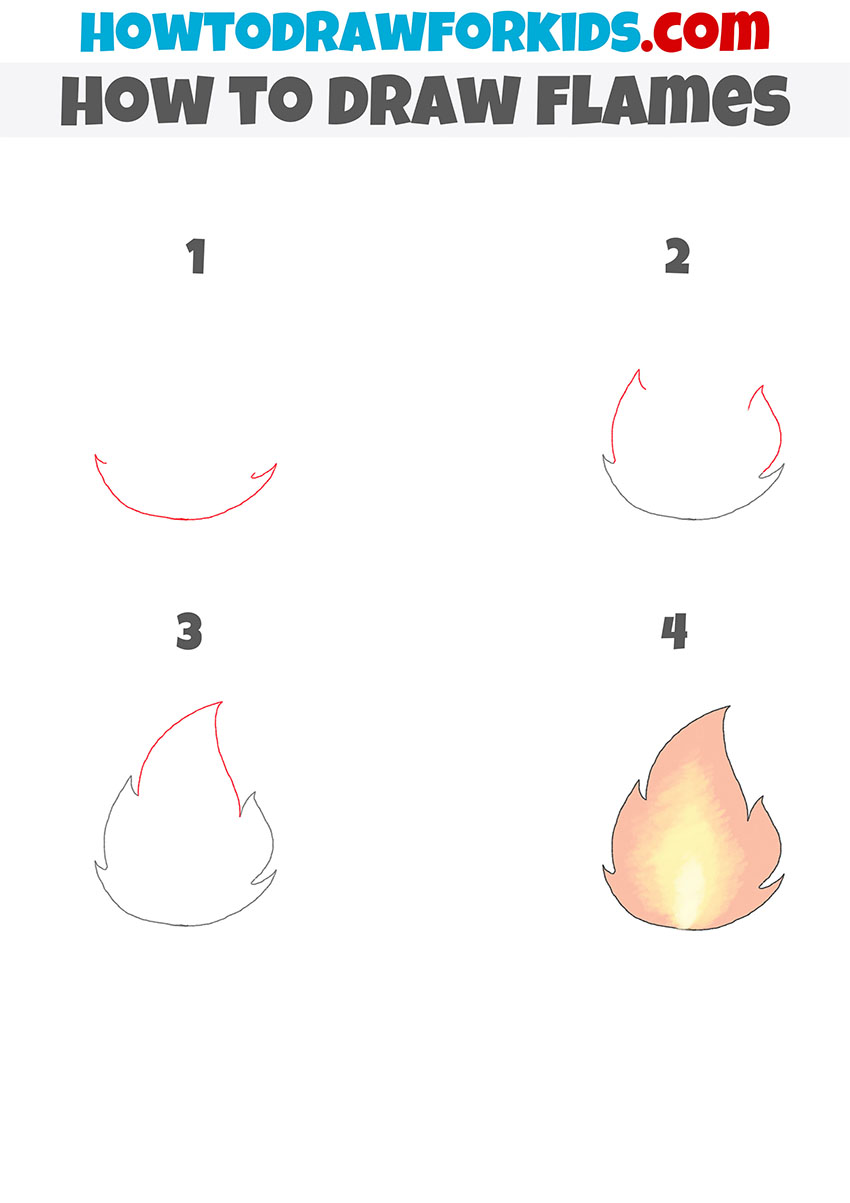
How to Draw Flames
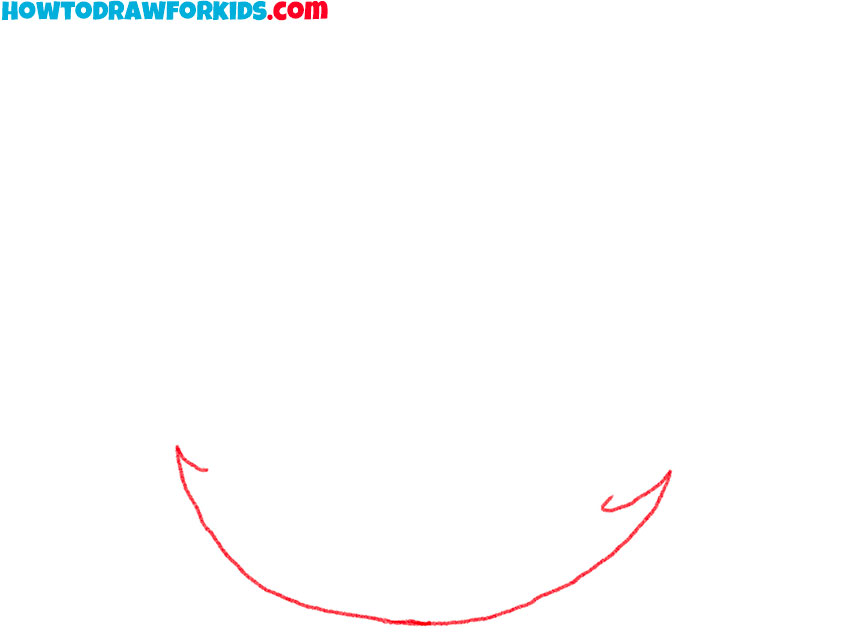
- Draw the bottom outline of the flames.
Depict a semicircular line and add the small flames on the sides.
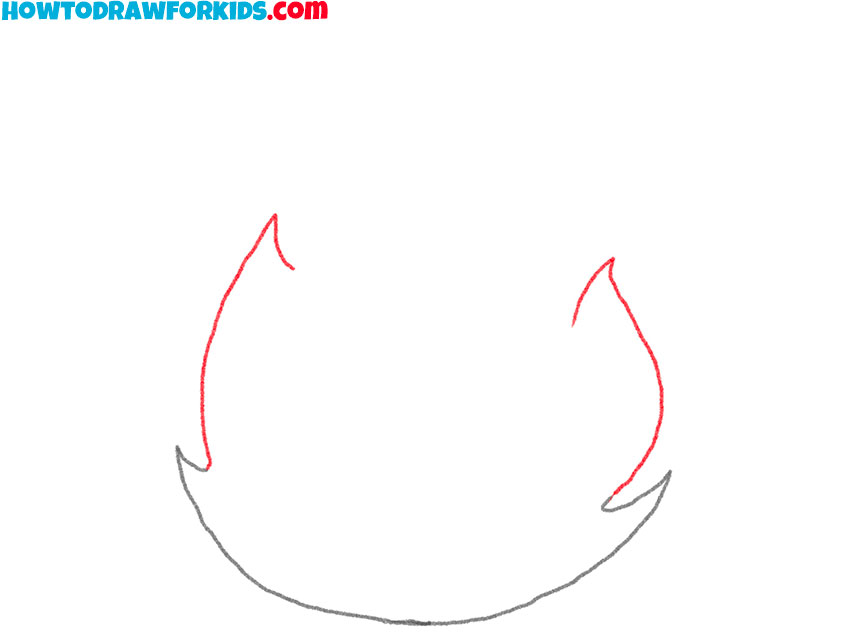
- Depict the middle part of the flame.
Continue the lines and add the rest of the flames on the sides.
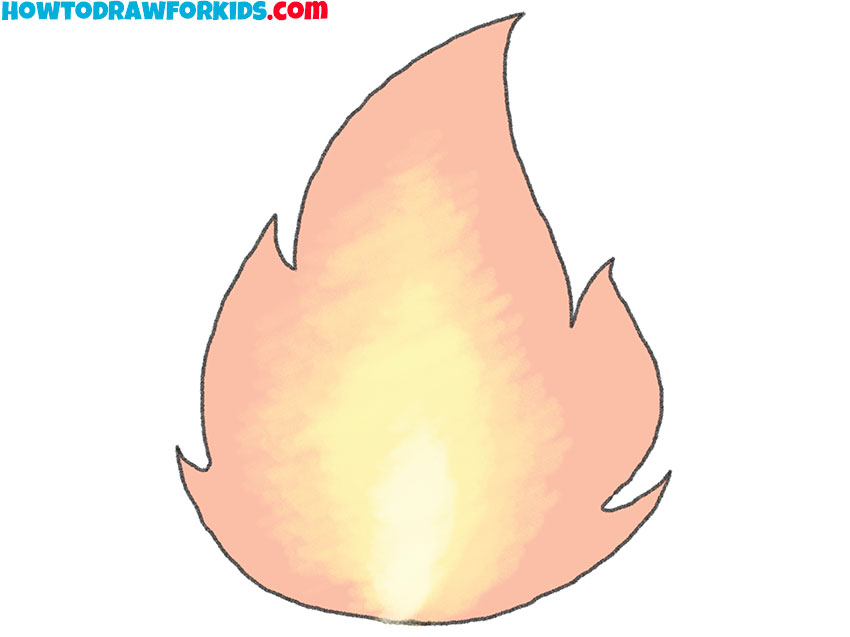
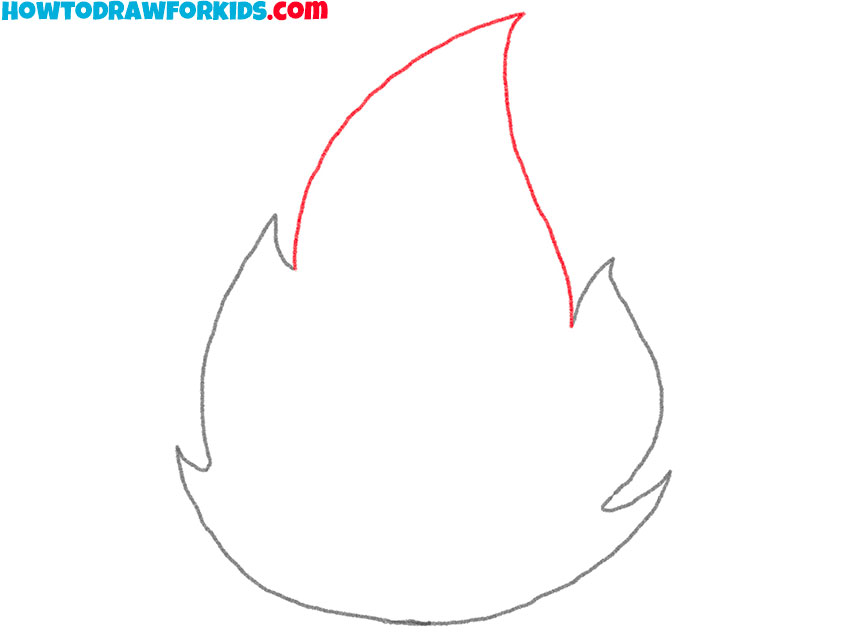
- Add the top of the flames.
With the help of smooth lines, draw a pointed outline.
- Color the flames.
You will need yellow, orange, and red.
Additional Content
I’m excited to share that I’ve created a special free PDF file for this drawing lesson. It’s a handy, condensed version of the full tutorial, perfect for practicing how to depict flames on the go.
You can download it easily and then use it offline, making it super convenient for those times when you don’t have internet access. Whether you’re at the park, on a road trip, or just in your cozy corner at home, this PDF will be your go-to guide for fiery drawings!
Alternative Drawing Techniques
So, I’ve developed several alternative techniques for drawing flames, aimed at giving you more opportunities to practice and enhance your artistic abilities. While these methods won’t have a significant difference between them, each one offers a slightly different approach to help strengthen your skills.
This variety ensures that you can experiment and find the style that suits you best, while consistently building your proficiency in capturing the dynamic and captivating essence of flames.
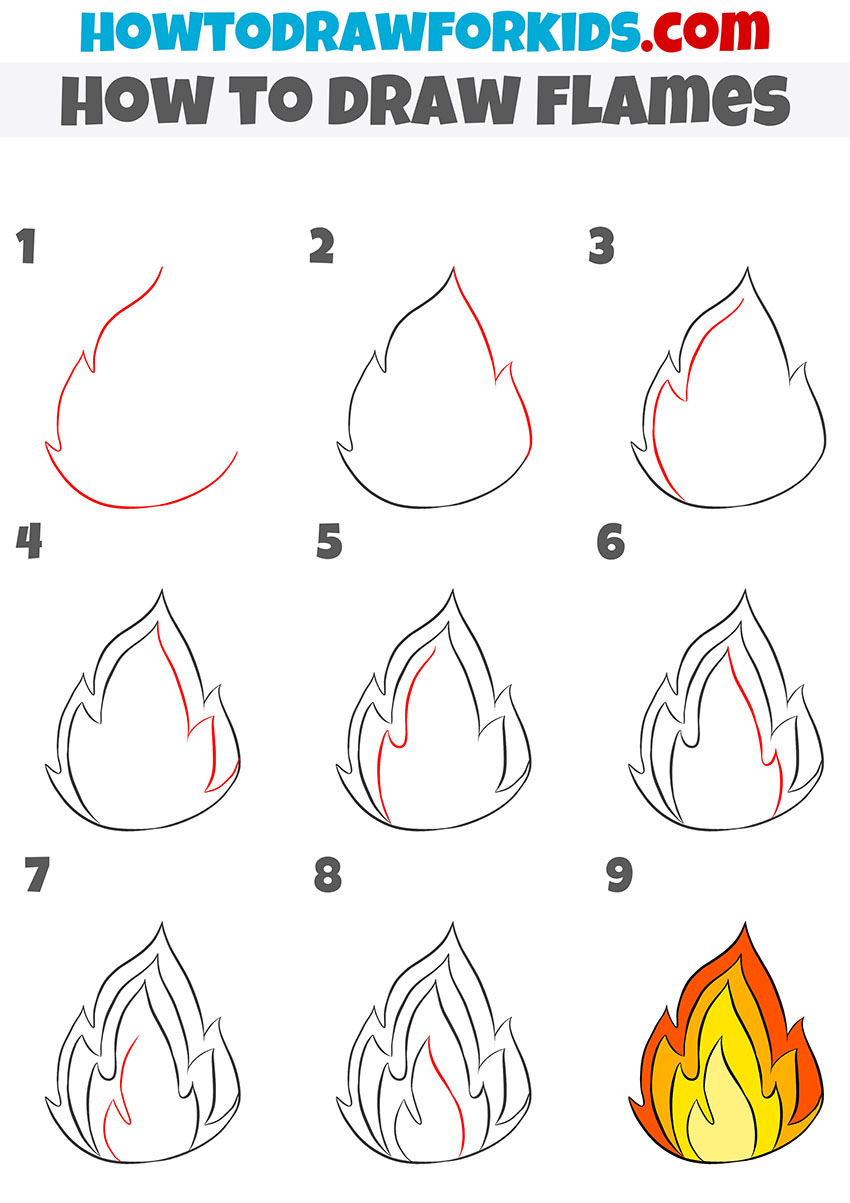
Flames Step by Step Drawing
The drawing method depicted here is a step-by-step process to create stylized flames. It begins with a simple curved line for the base and progressively adds layers, each representing the flames’ tongues. As the steps advance, more detail is added to each flame tongue, creating a sense of movement and depth.
The final step involves adding color, transitioning from a bright yellow at the base to a deep red at the tips, giving the flame a vibrant and dynamic appearance. This method is excellent for beginners due to its simplicity and the clear progression from basic shapes to a completed, colorful flame.
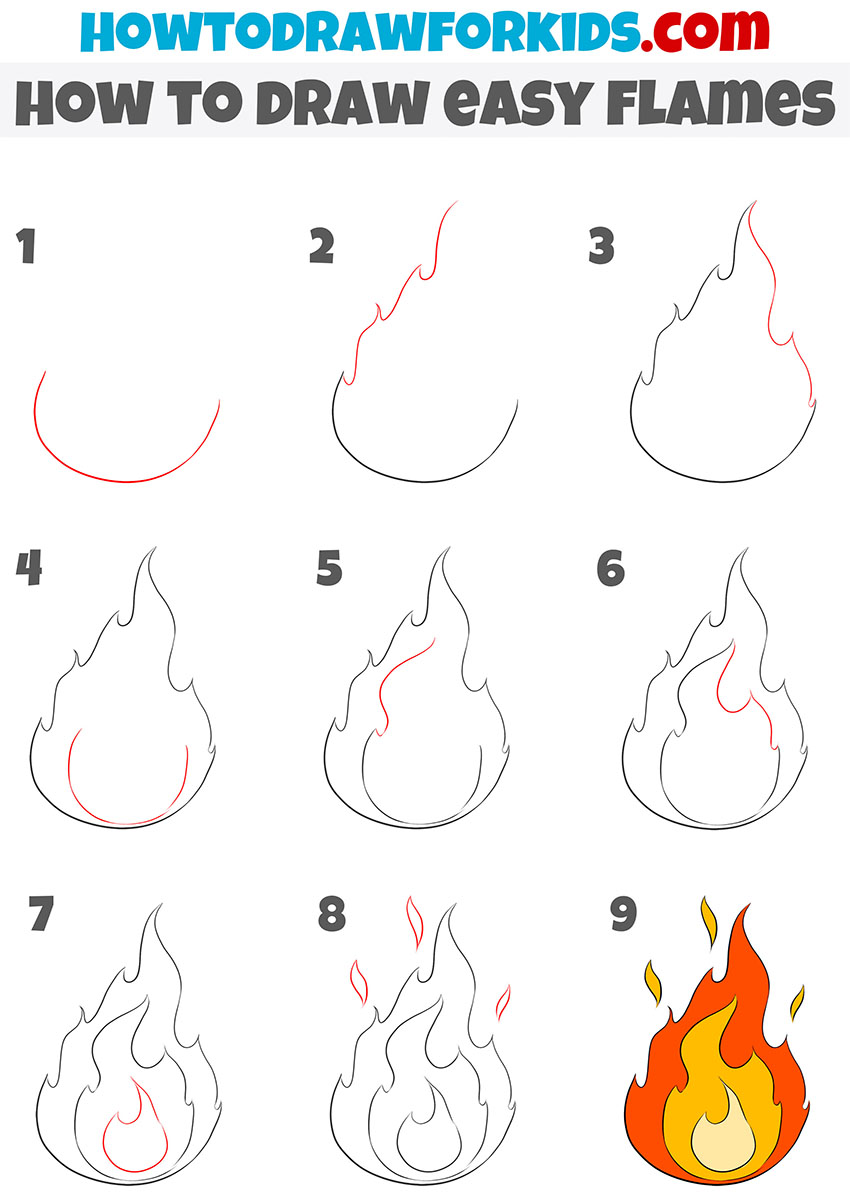
How to Draw Easy Flames
This method outlines flames with minimal tendrils, creating a simple, clean design. Start with a base curve, gradually adding key curves to form the flame’s outline by the seventh step.
The final steps add a few internal lines for detail and a basic color gradient—yellow at the base, transitioning to orange and edged with red—to give a soft, warm glow. It’s ideal for beginners or simple illustrations.
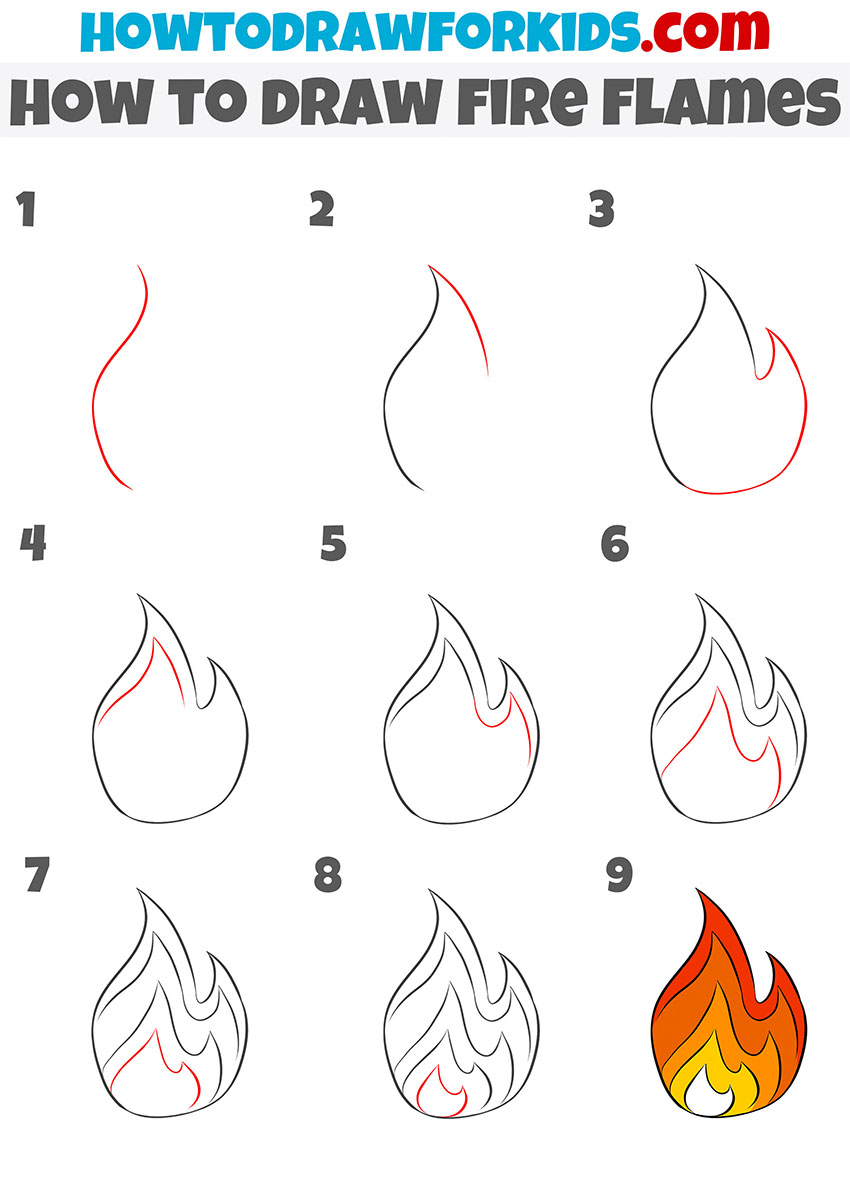
How to Draw Fire Flames
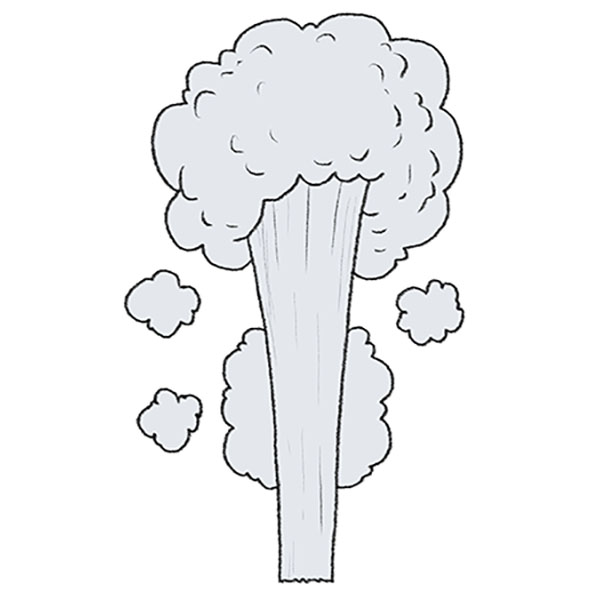
This drawing technique introduces a layered effect to create a more dynamic and voluminous flame. Start with a simple, broad curve to outline the base. Then, step by step, add more wavy lines on top, each one slightly smaller than the last, mimicking the natural flow of fire.
To finish, apply a gradient of warm colors – starting with yellow at the core, blending into orange, and then red at the tips, giving the flame a lifelike intensity. This method is excellent for those aiming to depict a vibrant, roaring fire.
Conclusion
As we cap off our lesson on drawing flames, I hope you feel a warm glow of accomplishment. You’ve just taken a step further in your artistic journey, and the skills you’ve learned today will add a spark to all your future artworks.
But don’t stop here! My website is a treasure trove of drawing lessons. From the cozy campfire to the majestic dragon, there’s so much more to explore and create. Stay in the loop with new lessons by following me on social media. Keep drawing, and let your creativity shine!