How to Draw a Tow Truck
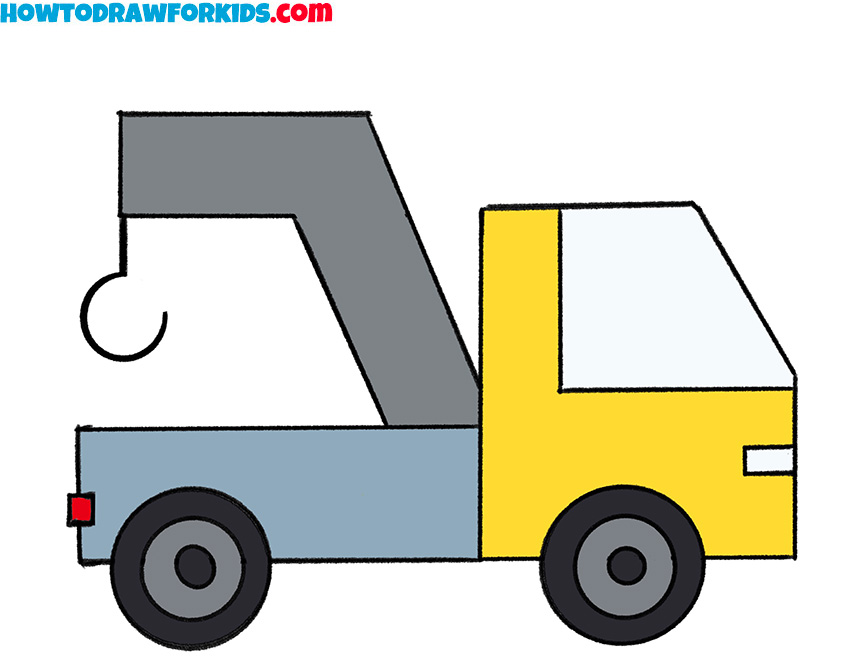
If you want to draw a tow truck step-by-step, then you are on the right way. I will show you how to do this in 6 simple steps.
How to Draw a Tow Truck: Introduction
Drawing cars is a difficult and painstaking task, and drawing such complex vehicles as tow trucks is even more so. But this lesson will show that it’s not so difficult, because here you will learn how to draw a tow truck in just six really simple steps.
But of course, even though we will draw a truck in a super simplified style, there are several important things that need to be kept in mind. For example, it is extremely important to convey the most important and recognizable parts in order to give your tow truck drawing a recognizable look.
So, you will need to, albeit in a simplified style, depict the general outlines of the truck, the characteristic shape of the cabin, and most importantly, the large tow arm with a hook in the back.
I recommend trying to draw a tow truck without using any additional tools. Drawing lines and details will help a young artist learn how to create straight lines on paper. So, if you are ready, scroll down the page, grab your favorite art tools, and start creating!
Tow Truck Drawing Tutorial
Materials
- Pencil
- Paper
- Eraser
- Coloring supplies
Time needed: 30 minutes
How to Draw a Tow Truck
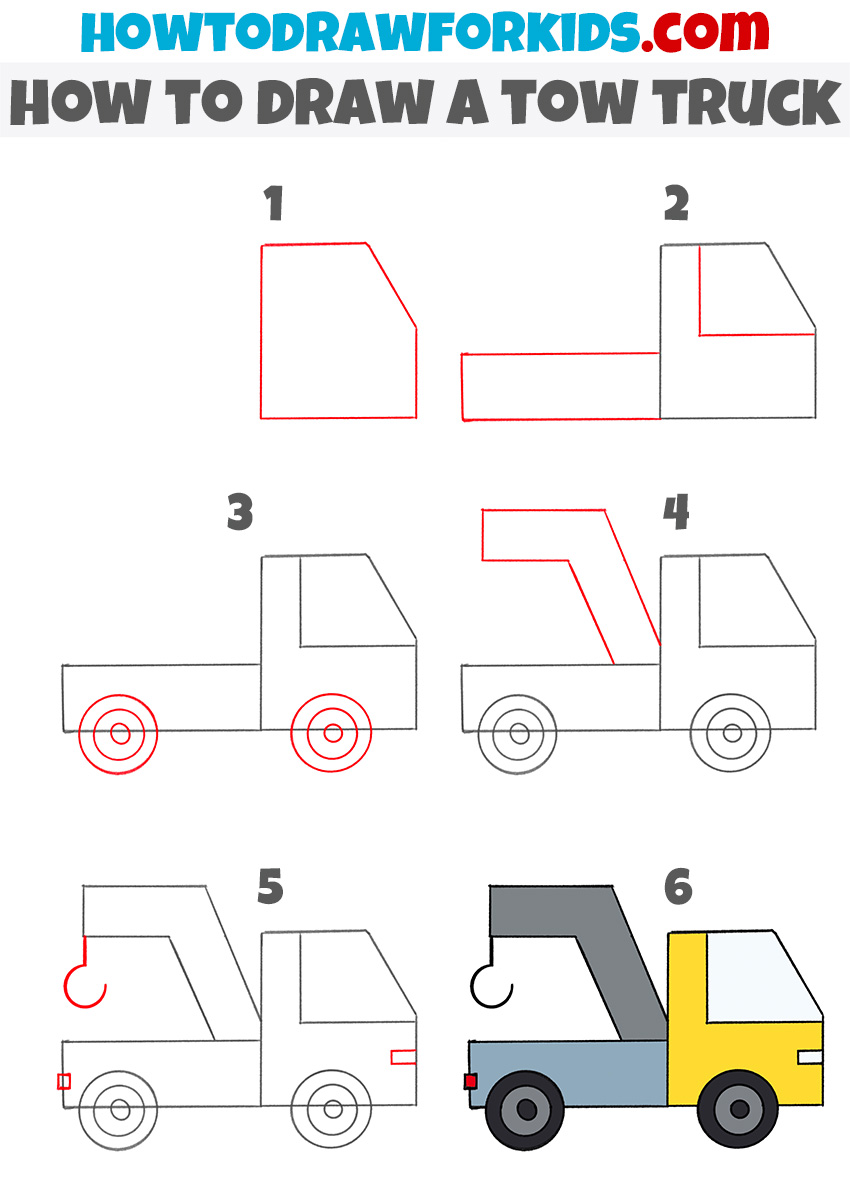
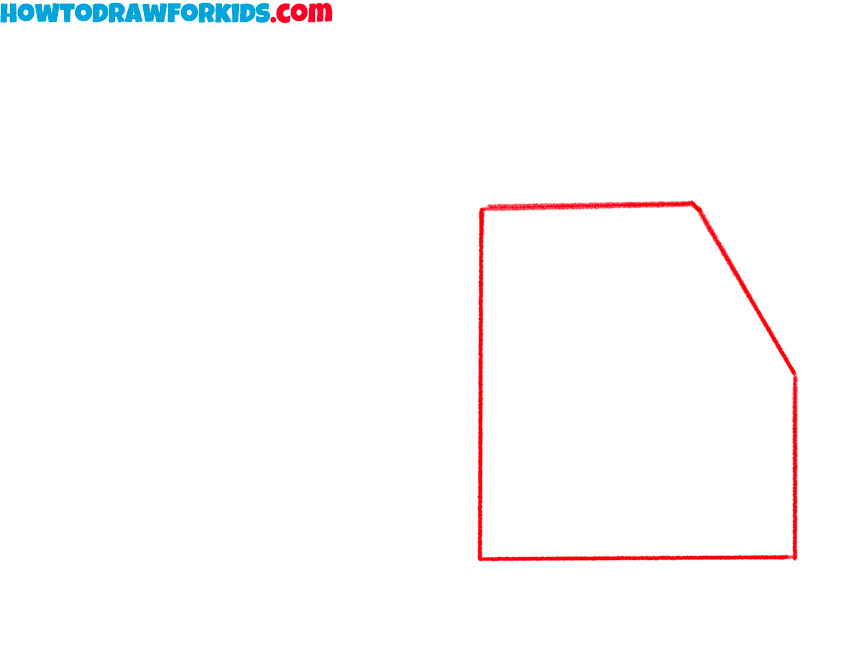
- Outline the cabin of the truck.
Start your tow truck drawing by creating the cab outline, which will form the driver’s compartment. Begin by drawing a tall geometric shape, consisting of five faces. To shape the windshield, slant the upper-right side of the rectangle inward at an angle.
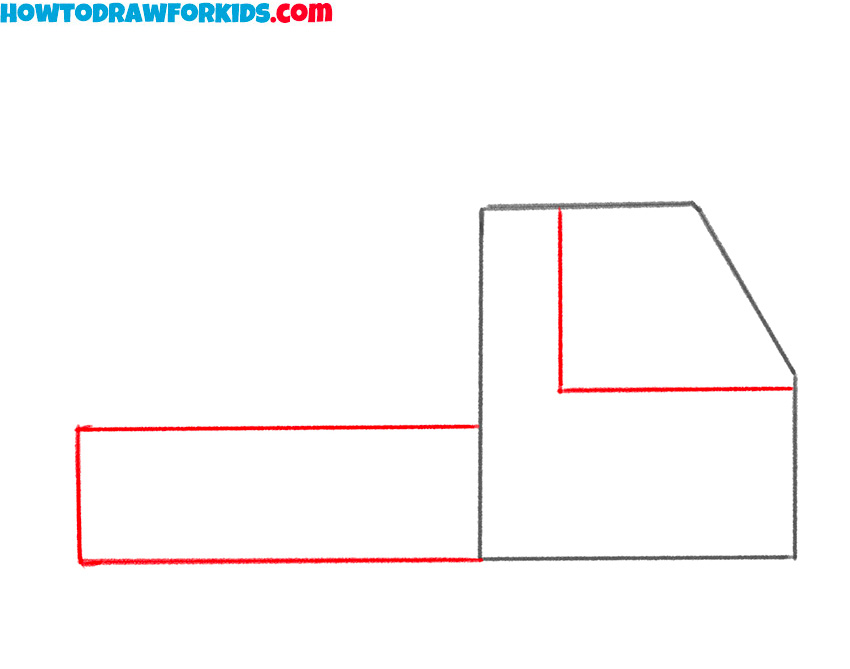
- Add the window and flatbed area.
Draw a horizontal rectangle that connects directly to the bottom edge of the cab. This rectangle should be long and flat, to represent the truck’s flatbed. Now using a two simple lines, draw the windows at the front of the truck cabin.
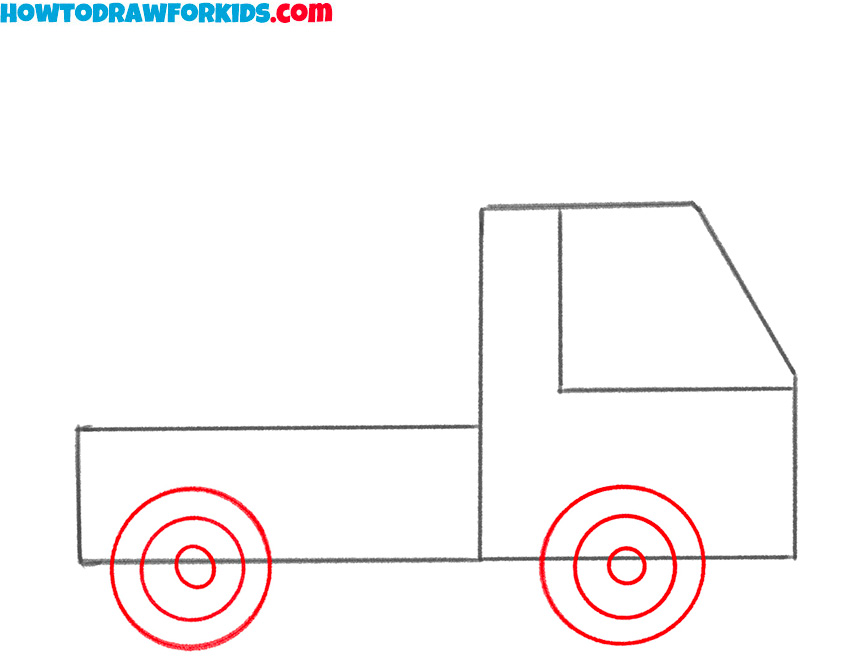
- Outline the wheels and rims.
Sketch two large circles underneath the flatbed and cab. These circles represent the tires. For a realistic look, draw the circles about one-third of the height of the body section. Inside each large circle, draw a smaller circle to depict the rims.
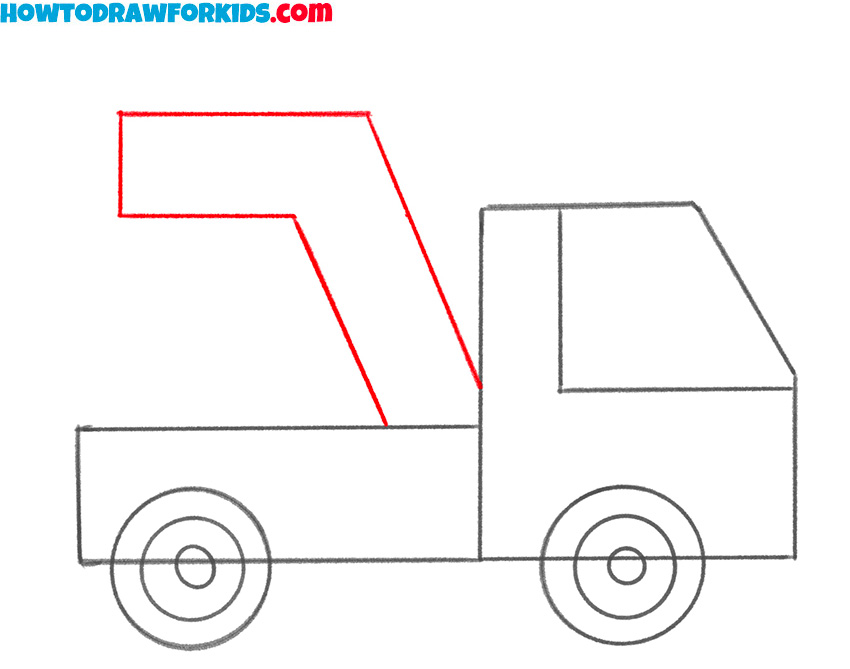
- Sketch the tow arm of the truck.
To transform your drawing into a tow truck, add the tow arm at the back of the truck. Draw a diagonal rectangle beginning from the rear section of the flatbed. Then, draw a smaller rectangular extension at the top of the arm, where the hook will be attached.
- Outline the hook and details.
At the end of the tow arm, draw a hook using a smooth, curved line that forms a “C” shape. To make your tow truck drawing look more realistic, add a small square at the rear to depict the rear light, and draw a narrow rectangle at the front to represent the headlight.
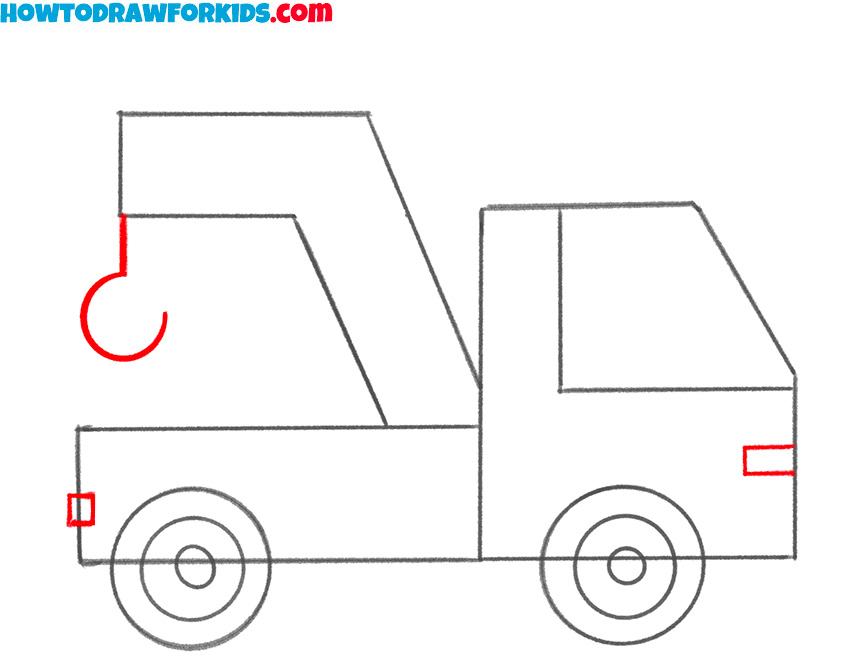
- Erase the guidelines and color the tow truck.
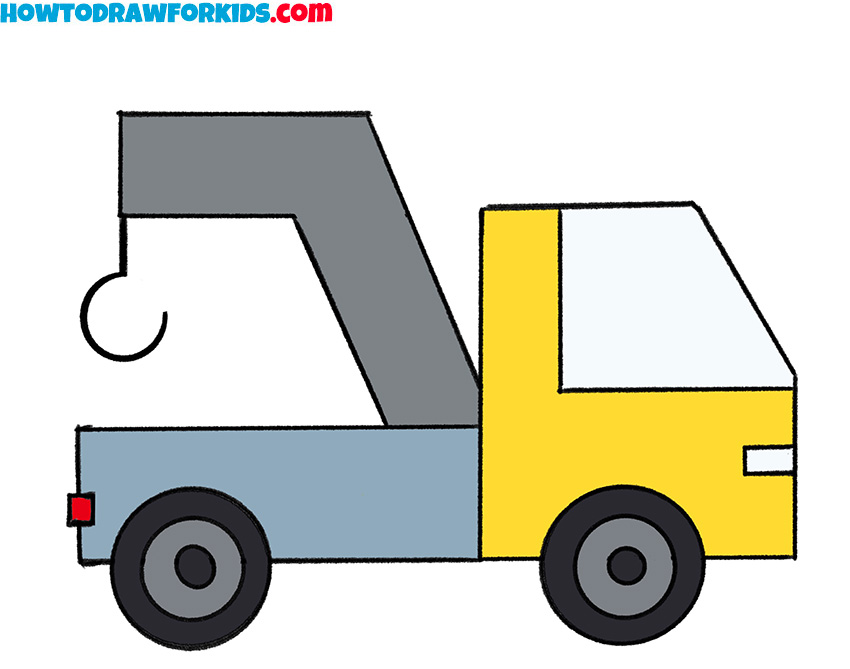
To give your truck drawing a more finished look, erase any unnecessary construction lines. Then, use yellow to fill in the cab. Color the flatbed section and the tow arm in blue and gray, respectively. Shade the wheels black, leaving the rims gray for a metallic effect. Add red accents to the rear lights for extra detail.
Additional Content
And as always, don’t forget that you can download the PDF file with additional materials. In this file, you will find the steps for this tutorial, a coloring page, a tracing worksheet, and a grid drawing worksheet.
Conclusion
I hope this lesson was useful to you and you learned how to draw a tow truck! Perhaps you like cars or other vehicles. If yes, then visit my tutorials on how to draw a car and my really simple guide on how to draw a helicopter step by step.
This is just a small selection of my drawing lessons for children and beginners. On my site, you can find a wide variety of lessons suitable for different preferences. Visit other sections to further develop your drawing skills.

