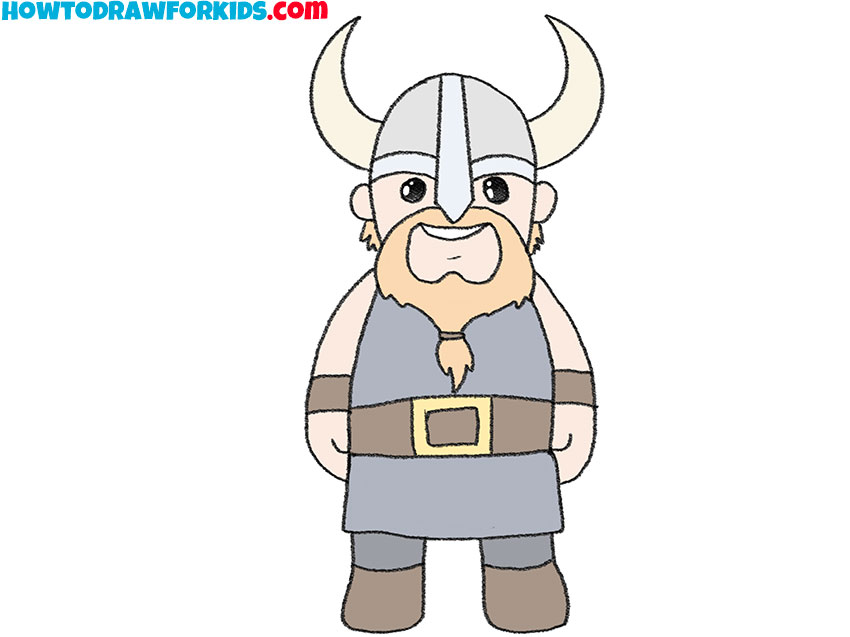
How to Draw a Viking
Are you interested in Vikings, medieval themes, and Scandinavian art? If so, welcome to my tutorial on how to draw a Viking for kids!
How to Draw a Viking: Basic Information
Today, we will move to the age of the Vikings, the Norse heroes known throughout history. In this tutorial, I’ll guide you through drawing a Viking in a simple and cartoonish style.
First, I will demonstrate how to draw a Viking in a very simple style, focusing on basic shapes and easy-to-follow steps. After we’ve mastered the basic Viking illustration, I’ll introduce some interesting techniques that will help you add more complexity and detail to your sketch.
These advanced methods will include tips on shading, adding textures, and refining features to create a more intricate and polished Viking drawing. By the end of this tutorial, you’ll have a well-rounded understanding of both simple and advanced drawing techniques for creating Viking art.
In addition, I will provide a PDF file that includes all the steps covered in this tutorial. You’ll find a detailed step-by-step guide, a coloring page, and a tracing worksheet to help you practice and train your skills.
Viking Drawing Tutorial
Materials
- Pencil
- Paper
- Eraser
- Coloring supplies
Time needed: 30 minutes
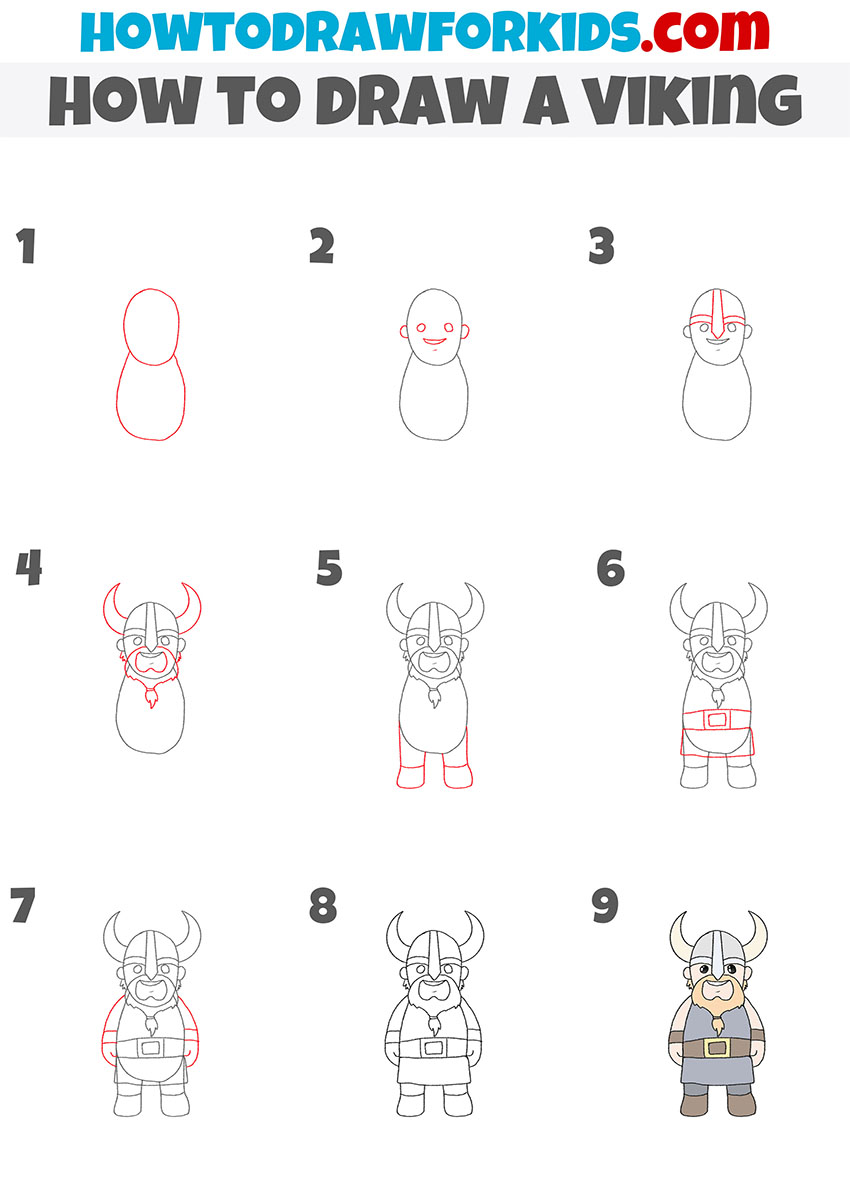
How to Draw a Viking Step-by-Step
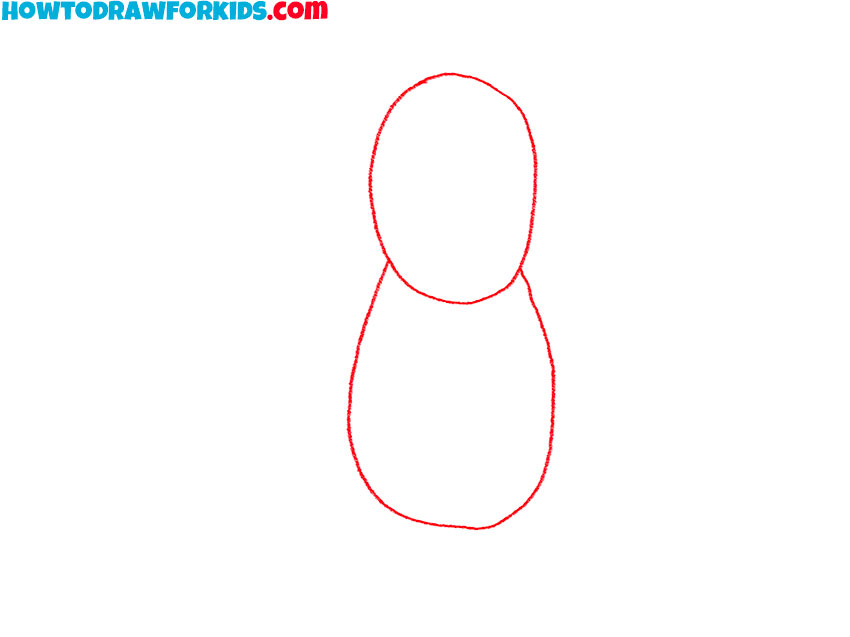
- Draw the basic shape of the Viking.
Draw two simple shapes: a rounded oval for the head and a larger, more elongated oval for the body. This will serve as the foundation for your Viking drawing, giving you a base to build upon. Focus on keeping the shapes smooth and light.
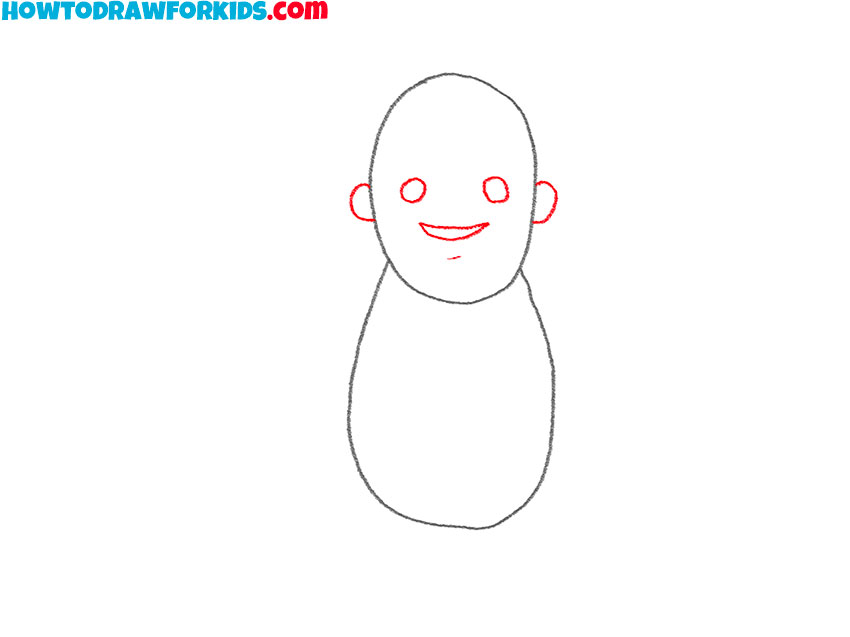
- Add the facial features of the Viking.
Draw the eyes of the Viking as two small circles, positioned towards the upper half of the head oval. Add a curved line for the mouth and small circles on each side of the head for the ears. Include a small, round nose between the eyes and mouth.
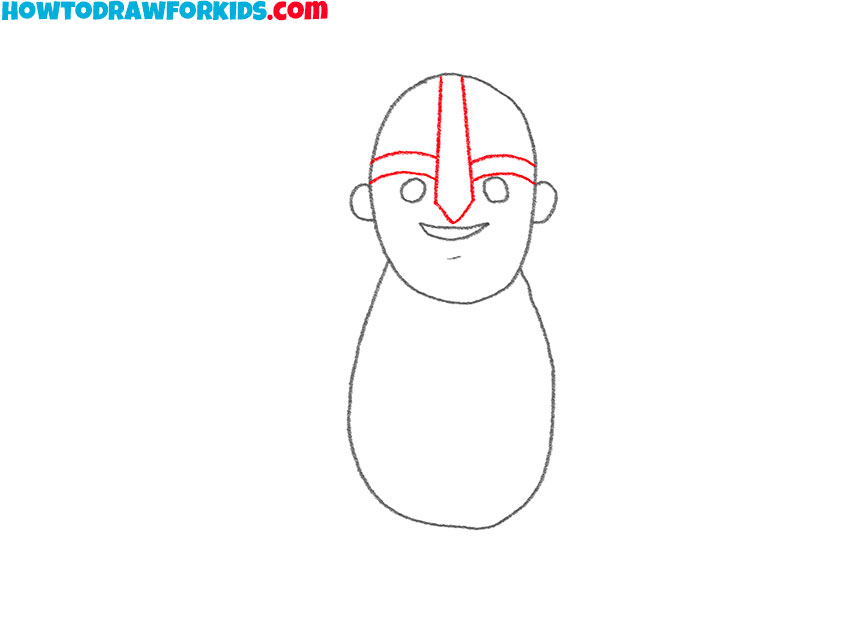
- Draw the helmet of the warrior.
Start by sketching a curved line across the forehead to represent the edges of the Viking’s helmet. Then, draw two lines extending from the top of the head down to the ears, creating a panelled look. Add a vertical line in the center for the helmet’s division.
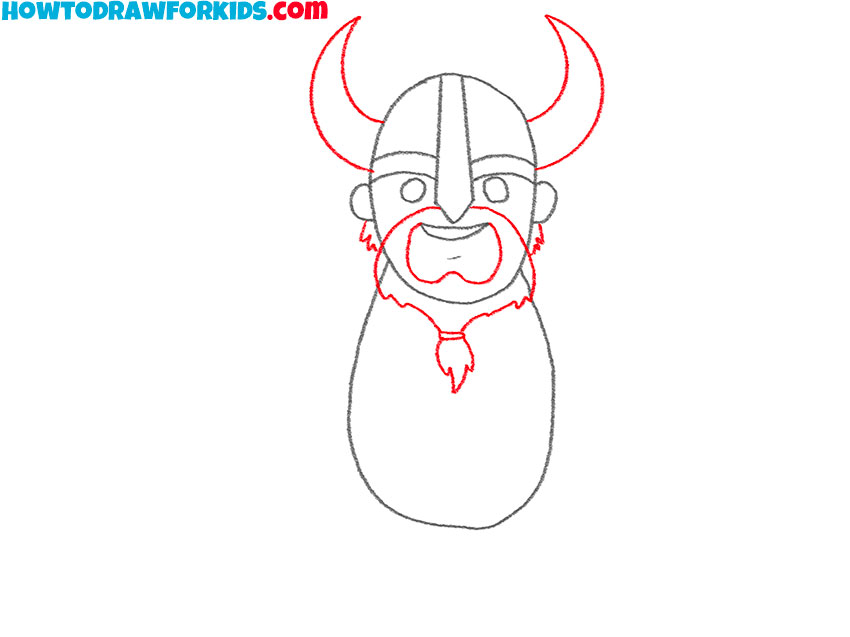
- Add the rest of the elements of the head.
On the head of the Viking, draw two curved lines extending from each side of the helmet to form the horns. Make sure they curve upwards and outwards to give a strong, bold look. For the beard, sketch a large, bushy shape extending from the chin down towards the body.
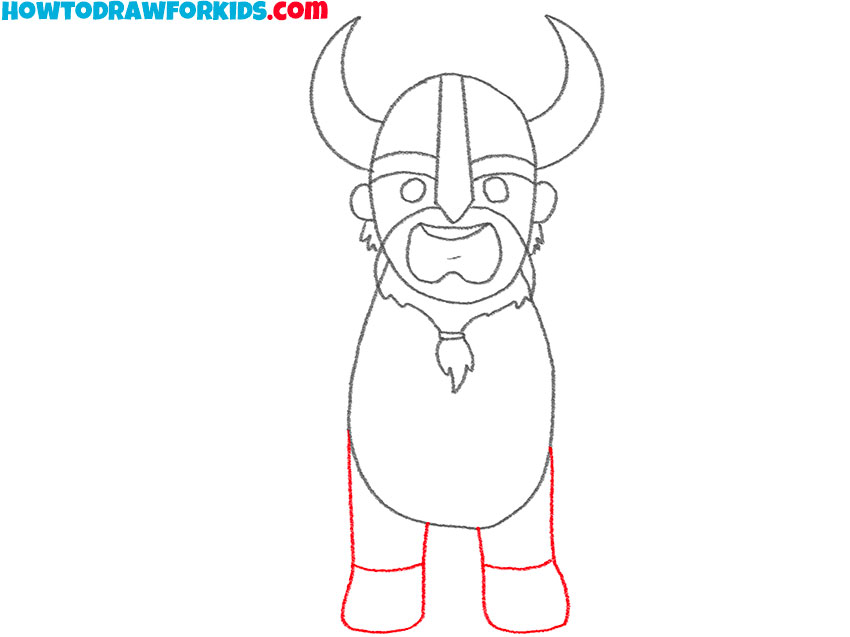
- Illustrate the Viking’s legs.
Now sketch two short, rectangular shapes extending from the bottom of the Viking’s body oval for the legs. Add simple shapes at the bottom of the legs for the feet. Ensure the legs are of equal length and width to keep your Viking drawing symmetrical.
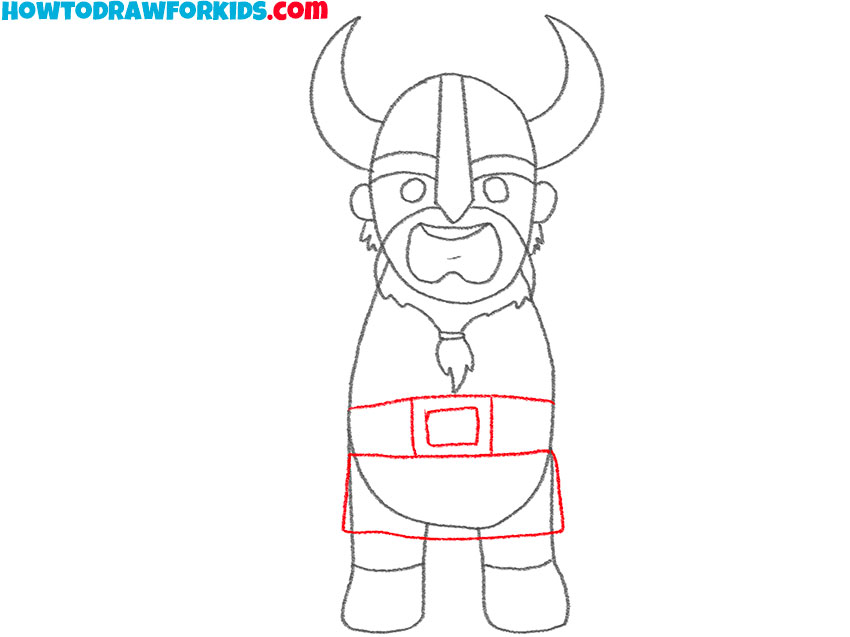
- Detail the clothes of the Scandinavian warrior.
Draw a horizontal line across the middle of the body to represent the belt. Add a square buckle in the center. Below the belt, draw a rectangular shape that flares out slightly to form the skirt. These elements add more detail to your Viking’s outfit, giving it a more authentic look.
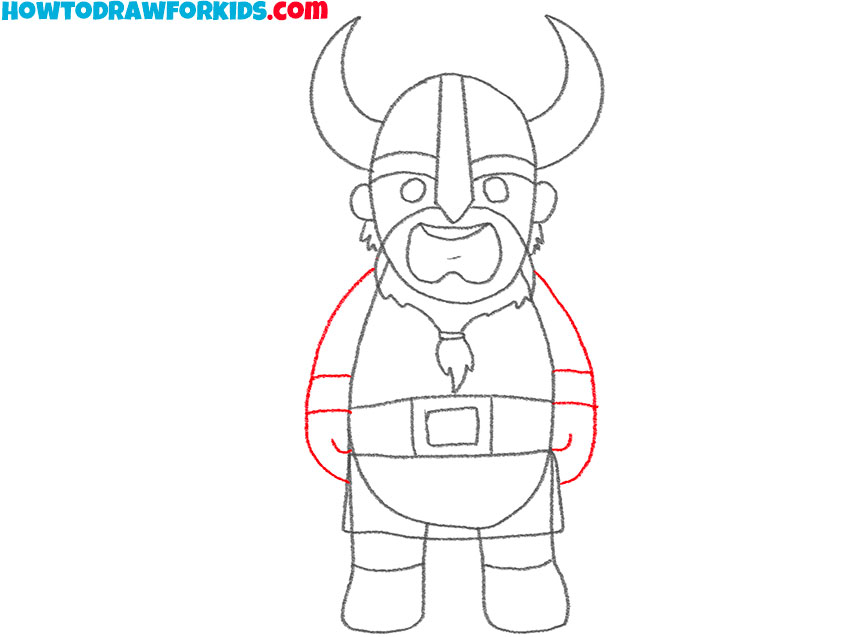
- Draw the arms of the warrior.
Sketch two simple shapes extending from the sides of the body for the arms. Include basic hand shapes at the ends. Keep the lines smooth and consistent to maintain the character’s kid-friendly appearance. In this step you can add details such as a sword or shield.
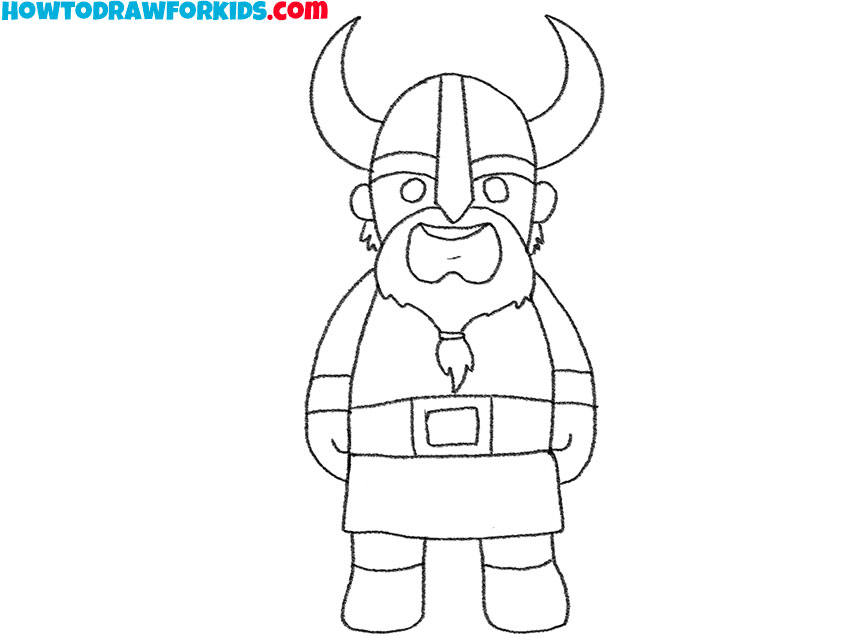
- Review the drawing and erase the guidelines.
Review your warrior’s figure for any inaccuracies, make corrections where necessary, and with precision, erase all superfluous lines to clean up your Viking drawing for a finished look. You can additionally add more definition to the facial features, such as eyebrows and pupils for the eyes.
- Add colors to the Viking drawing.
Use a palette of natural tones for the clothing, such as browns and greens for the belt and skirt. Color the helmet in a metallic gray or silver, and use shades of beige or tan for the skin. Add color to the beard and hair, choosing a natural shade like brown, red or blonde.

Additional Content
I’ve packed all the cool steps of thais Viking drawing lesson into a neat little PDF file just for you. It’s like a treasure map that you can download for absolutely zero gold coins. You can use it anytime, anywhere, even if the Internet trolls decide to take a day off. So grab this PDF and start drawing with me!
Draw the Viking in More Advanced Ways
Begin by incorporating additional elements to your Viking drawing, such as accessories like necklaces, bracelets, and decorative patterns on the clothing. Consider adding details to the Viking’s weapons, like intricate carvings on the handle of an axe or a sword.
Focus on refining the facial features to add some realism to your Viking sketch. Draw lines to indicate age or battle experience, such as wrinkles, scars, and facial hair details like individual strands in the beard and mustache.
Apply texture to metal parts such as helmet. You can draw a shield and weapons and give them a realistic appearance. Illustrate worn or engraved metal surfaces. Adding nicks and scratches can suggest that these items have seen battle.
Add texture to leather elements like belts, boots, and armor pieces. Draw small, irregular lines and creases to simulate the look of aged and worn leather. Consider adding stitching lines to show how the leather pieces are held together.
Introduce shadows to your Viking drawing to make it more realistic. Determine the direction of your light source and shade areas that would naturally be in shadow. Use varying degrees of pressure with your pencil to create soft and hard shadows, adding to the three-dimensionality of your Viking.
Create highlights on surfaces where light would naturally hit. For example, the edges of helmets, the tops of boots, and the raised parts of the face like the nose and cheeks should be lighter. You can achieve this by leaving these areas less shaded or using a white pencil or eraser to create bright spots.
Make your drawing more dynamic by placing the Viking in an action pose rather than a static stance. Illustrate the character in mid-swing with an axe, holding a shield in a defensive position, or even in a charging motion.
Conclusion
Congratulations on completing the Viking drawing lesson! My website is filled with a other drawing lessons that are waiting for you. From mystical creatures to historical figures, there’s always something new and exciting to learn and draw.
Don’t forget to join my community on social media. By following me, you’ll be the first to hear about new drawing lessons, get exclusive tips, and be a part of a group of aspiring artists.