How to Draw a Wavy Flag
Previously we practiced drawing a simple flag, but this time we’ll add movement and learn how to draw a wavy flag in motion.

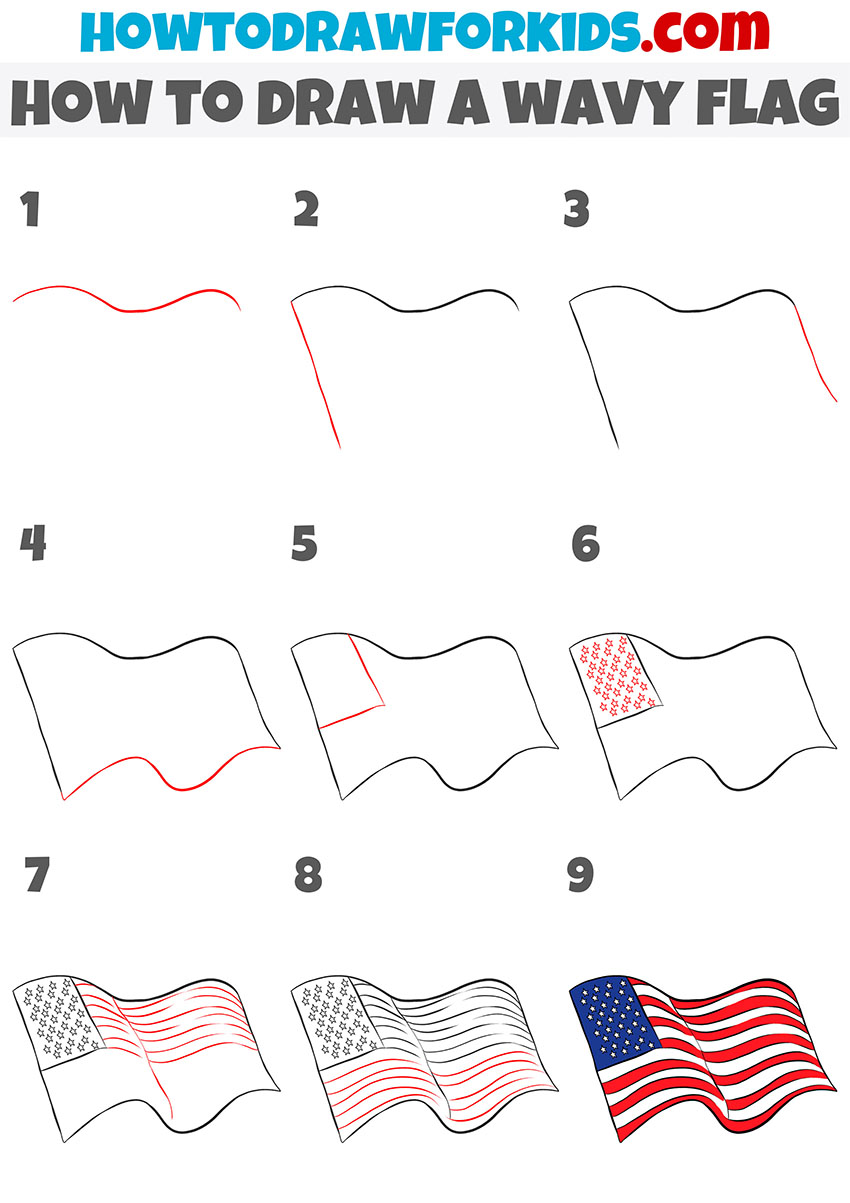
This lesson is quite simple and any novice artist or child can easily cope with it. With this easy step by step tutorial you will be able to draw a flag fluttering in the wind in just nine easy steps.
The US flag that you will draw with this lesson is the official state symbol of the United States of America. This flag has horizontal lines and a rectangle with stars inside.
This lesson will be very useful for you, because you will learn how to draw the outline of the flag and will be able to depict the flag of any other state in the future.
And also, by drawing this waving flag, you can better remember what the flag of the United States of America looks like. To learn more about sketching cloth, you can visit my fabric drawing tutorial first.
Materials
- Pencil
- Paper
- Eraser
- Coloring supplies
Time needed: 20 minutes
How to draw a wavy flag step by step
- Sketch the upper waving line of the flag.
To show the flag in motion, begin with the contour that will control every fold. Lightly draw a long, wavy line from left to right. Let the curve dip once near the middle and rise again toward the right, as if a breeze lifts the cloth. Keep the rhythm gentle and smooth, because sharp zigzags will look like paper, not fabric.

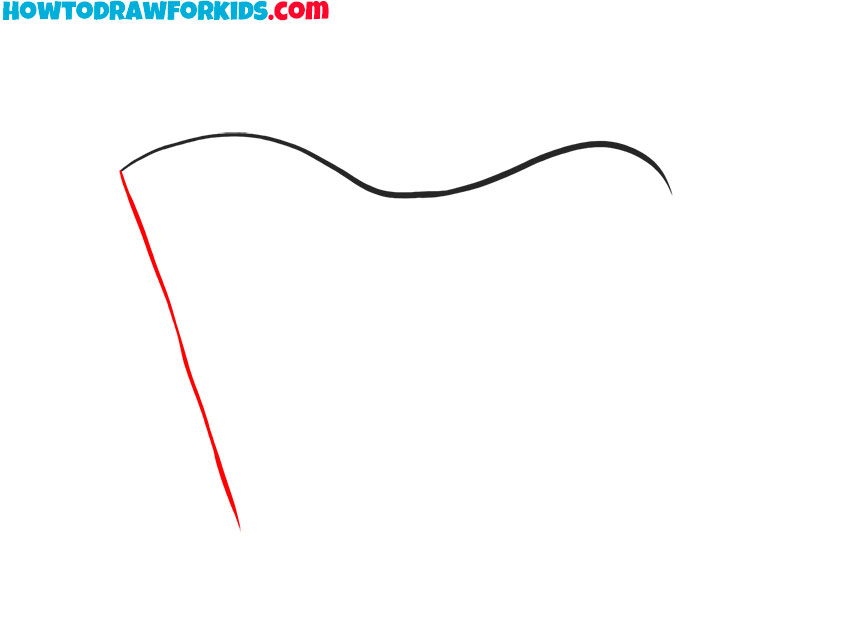
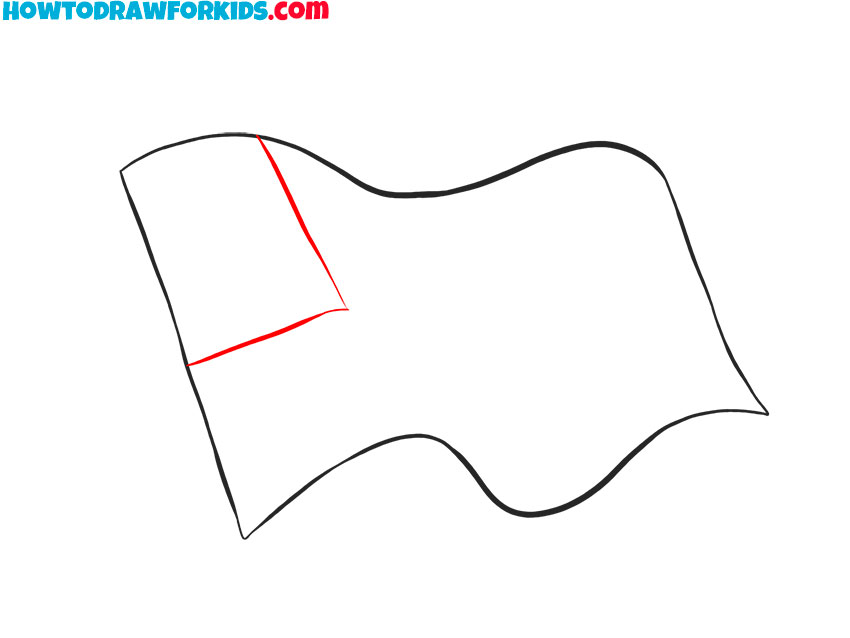
- Sketch the vertical border on the left.
You need ti sketch the second edge to start defining overall shape of the flag. From the far left of the top wave, sketch a long line downward and slightly diagonally, following the imagined pole side. Avoid drawing it perfectly vertical.
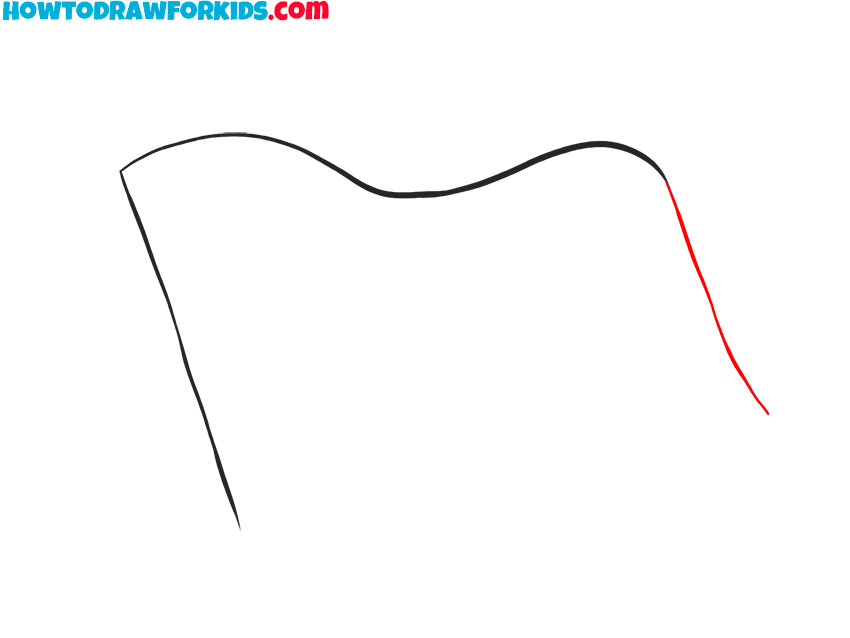
- Sketch the right edge of the flag.
From the far right of the top wave, draw a smooth side edge that angles down and to the right. Small differences help the flag feel natural. This simple line creates the right edge of the flag and helps define the boundaries of the canvas.
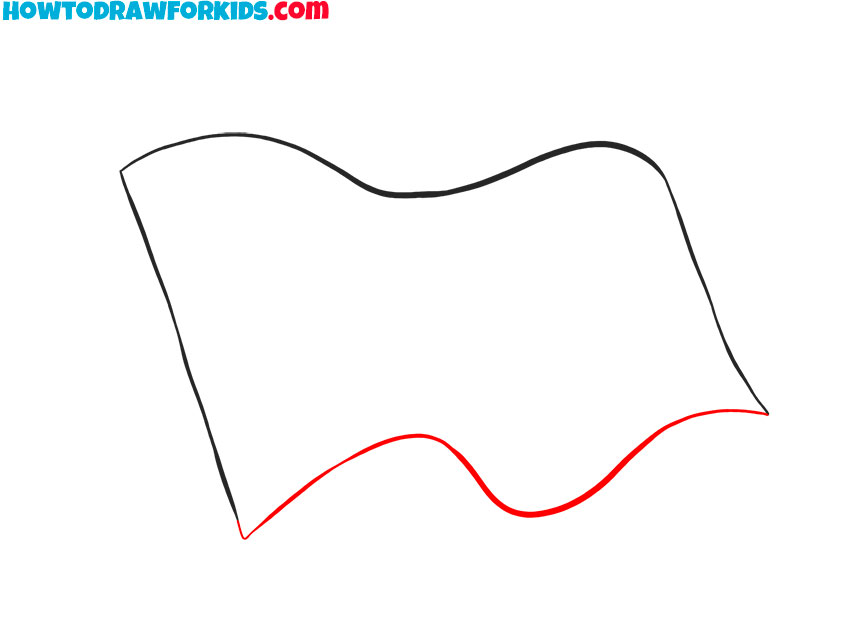
- Draw the bottom wavy edge of the flag.
To lock in the fabric shape, draw the bottom edge as a single continuous wave that echoes the top, but do not copy it exactly. Connect the left and right side edges cleanly. This hem can curve more dramatically than the top.
- Mark the canton area for the stars.
Now it’s time to give the waving flag its distinct and recognizable look. In my example, I’m drawing the American flag, but you can illustrate any other national or custom flag you like. Before stripes, mark the area for stars. On the upper left, sketch a tall rectangle that follows the flag’s folds. Its edges must inherit the same curvature as the flag. Keep the canton width about one-third of the flag’s length.
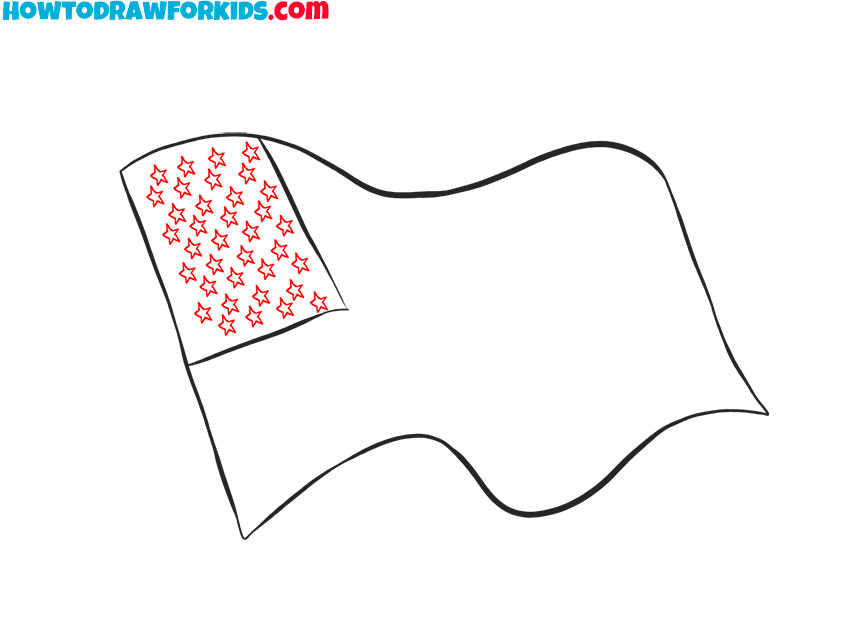
- Illustrate the stars inside the canton.
Now illustrate the star field with small, simple five-point marks. Follow the fabric; stars near a fold can squash slightly, and those on a rising curve may space farther apart. Work in neat rows but allow gentle compression where the canton dips.
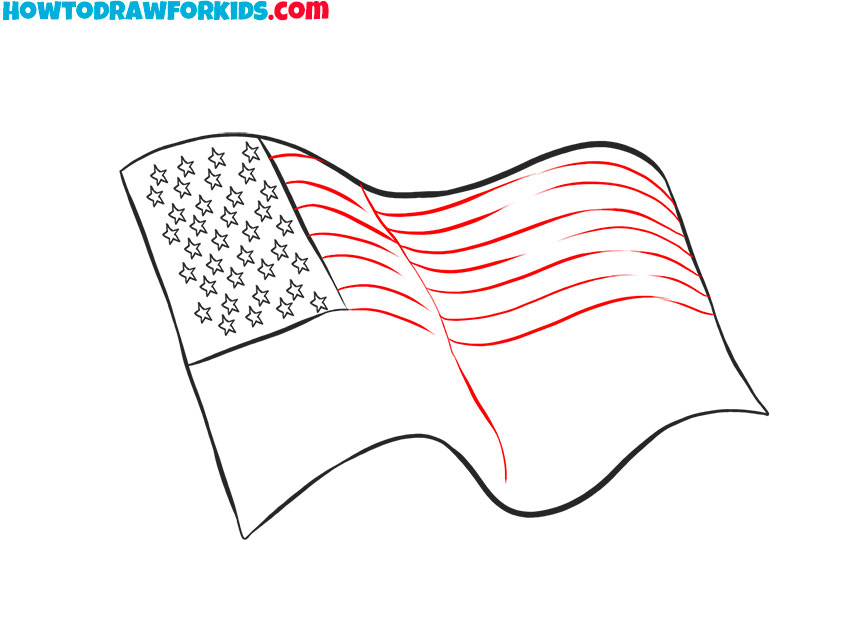
- Begin outlining the flag’s red and white lines.
Stripes describe the motion best, so use them to sell the wave. Starting at the canton’s side edge, draw long parallel lines that track the top wave. Keep spacing even, then let the lines dip lower in the central fold and rise on the far right. Continue these bands across the whole flag.
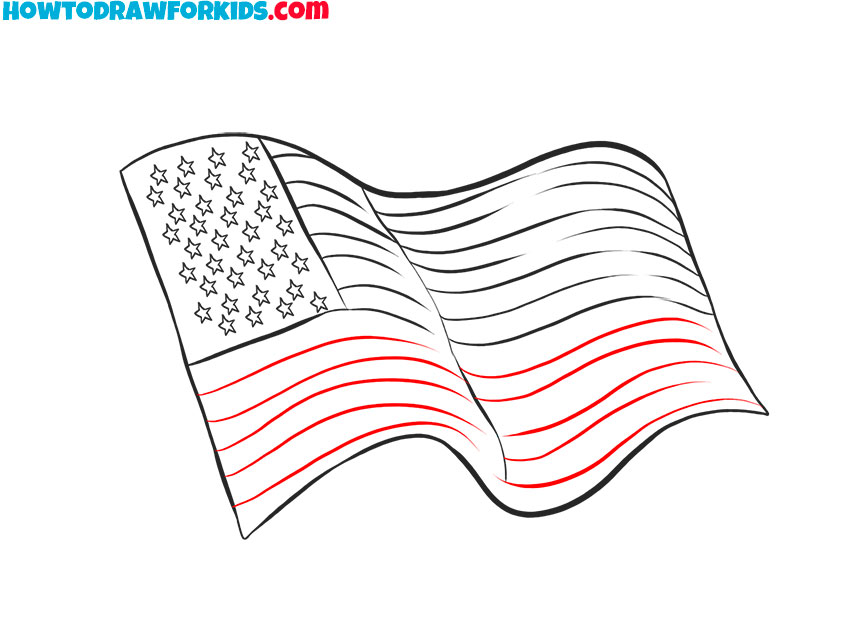
- Continue drawing the remaining stripes.
Continuing to add stripes, carefully draw lines at the bottom, following the curve of the fabric and continuing the style from the previous step. Before coloring, remove guides and sharpen the edges with smooth and dark lines.
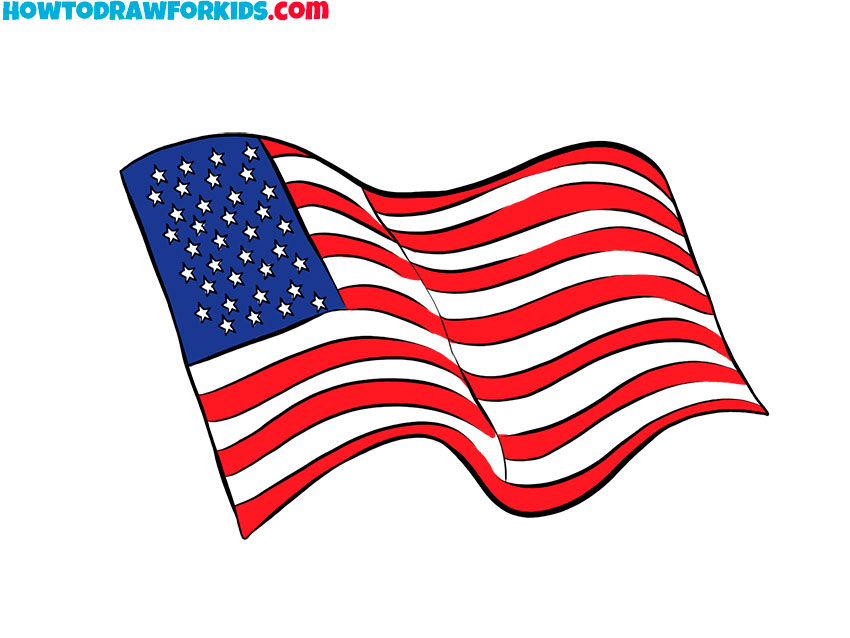
- Color the flag and finalize the drawing.
Complete the sketch by applying clear, flat colors that respect the folds. Fill the canton with a deep blue while leaving the star shapes white. Color alternating red stripes. I used the U.S. flag as a model, so I’ve colored it using blue, red, and white, but if you drew a different flag, then use the appropriate colors and tones.
Don’t forget to download the PDF file with a short version of this lesson, as well as additional useful materials. I have prepared this file for you so that you can return to this drawing lesson at any time convenient for you, even without an internet connection.