How to Draw a Wizard
So, if you want to learn how to draw a wizard step by step, this simple drawing lesson will guide you through the process. You’ll also find a bonus tutorial and a PDF file at the end of the page for convenient offline practice.
How to Draw a Wizard: Introduction
This character is very often seen in various cartoons and movies. And, This lesson will be as simple as possible and at the same time very useful, since you will once again practice drawing a human figure.
Wizards are an integral part of fairy tales and fantasy, along with knights and dangerous journeys. We have already learned how to draw a knight, and now you will complete a fascinating wizard drawing tutorial.
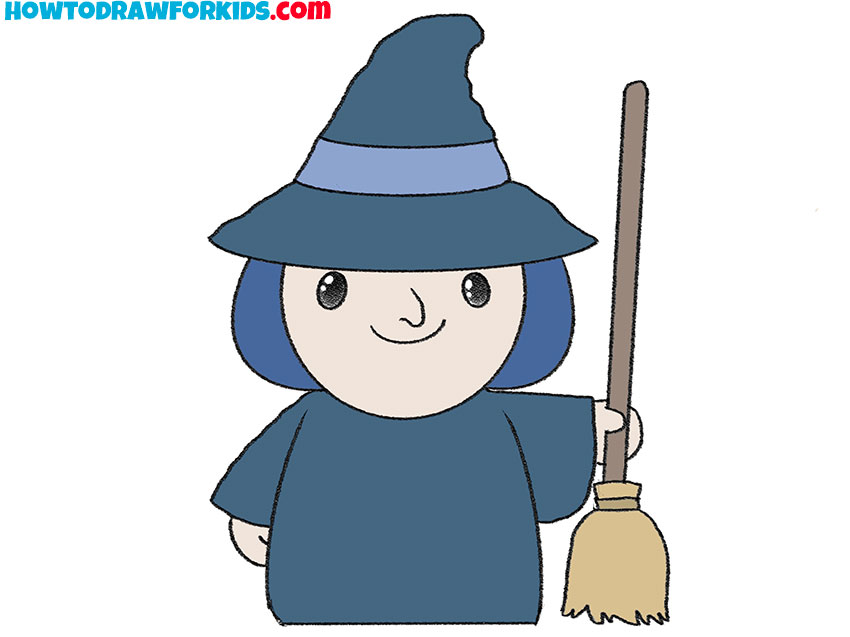
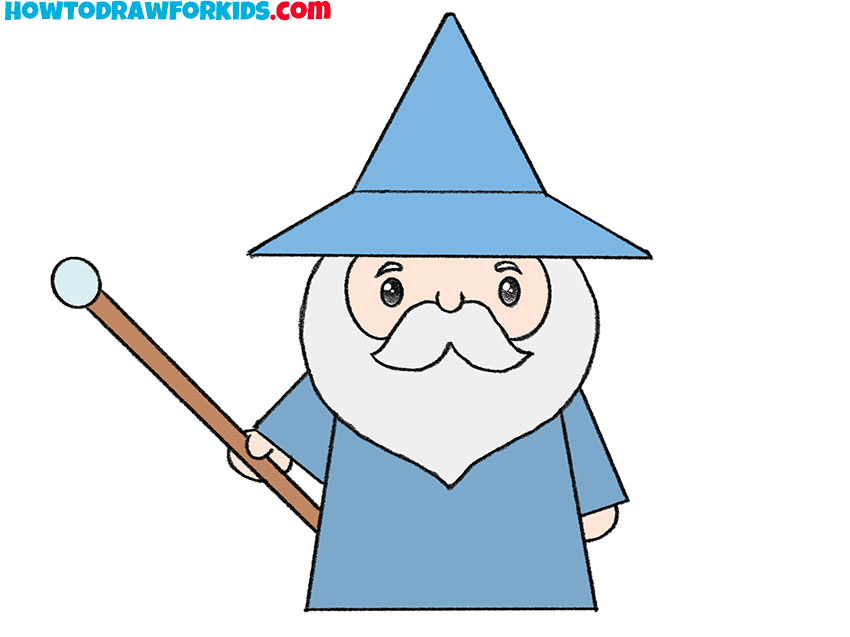
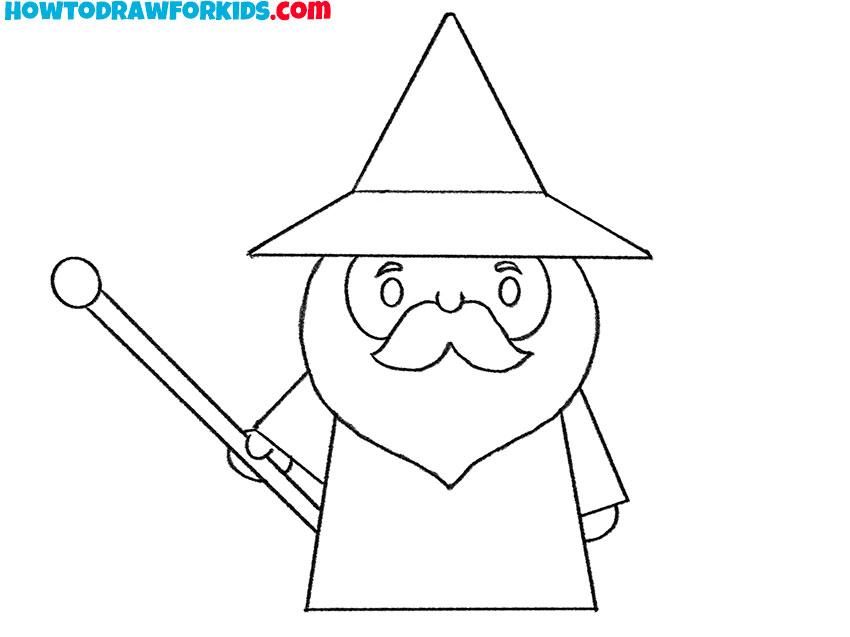
In this lesson you will draw a cartoon wizard step by step, who looks like an older man with a long beard, wearing special clothes and holding a staff in his hand. I’m sure you can easily do this lesson, even if you have very little drawing experience or if you are a child.
If you already want to start drawing the wizard, you should prepare the materials that you need to draw, and then you can get to work.
Wizard Drawing Tutorial
Materials
- Pencil
- Paper
- Eraser
- Coloring supplies
Time needed: 35 minutes
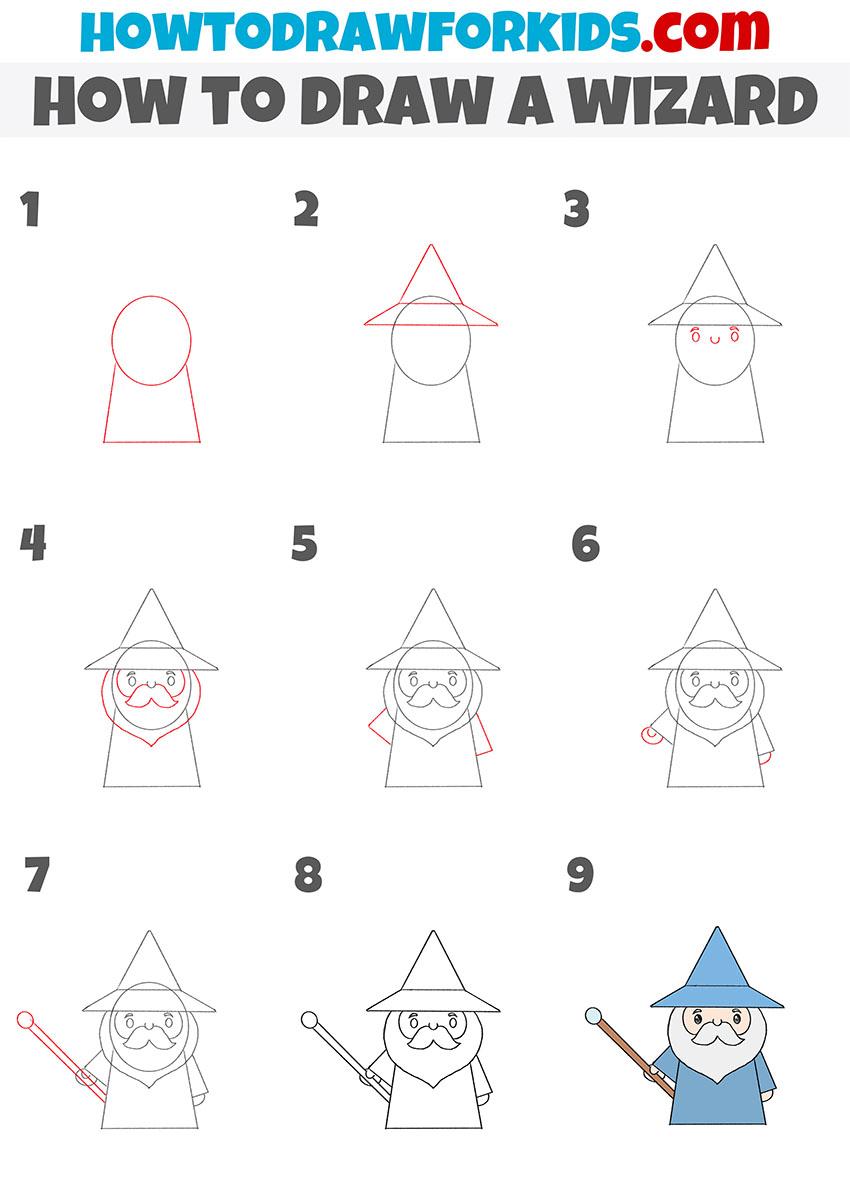
How to draw a wizard step by step
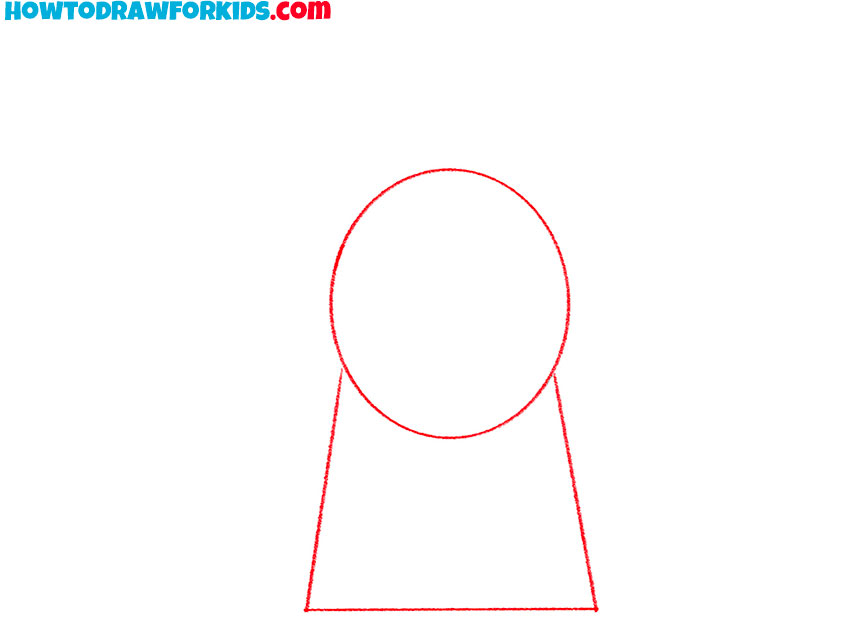
- Start with the head and robe outline.
To set up the proportions for a simple wizard drawing, begin by blocking in the largest shapes. This helps you see and set the overall size of the character and keeps the proportions correct before adding details. Sketch a neat circle for the head. Under the head, illustrate a slightly widening trapezoid—this will act as the robe and give the figure a recognizable silhouette.
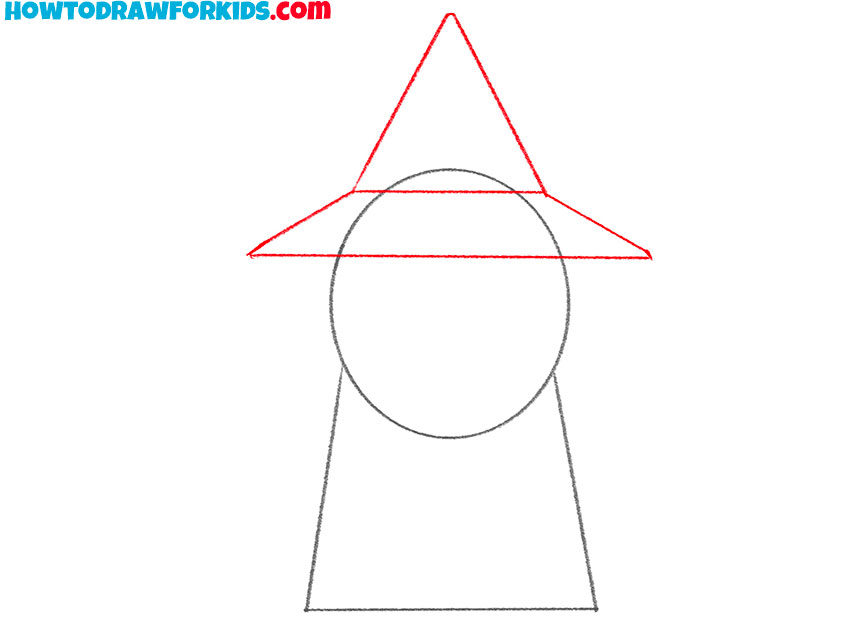
- Outline the wizard hat.
A wizard’s hat is one of the most recognizable elements. To draw a wizard hat, sketch a long triangular shape with a wider base resting across the top of the head circle. The triangle shouldn’t be perfectly symmetrical – wizard hats usually look better with a gentle lean or irregularity.
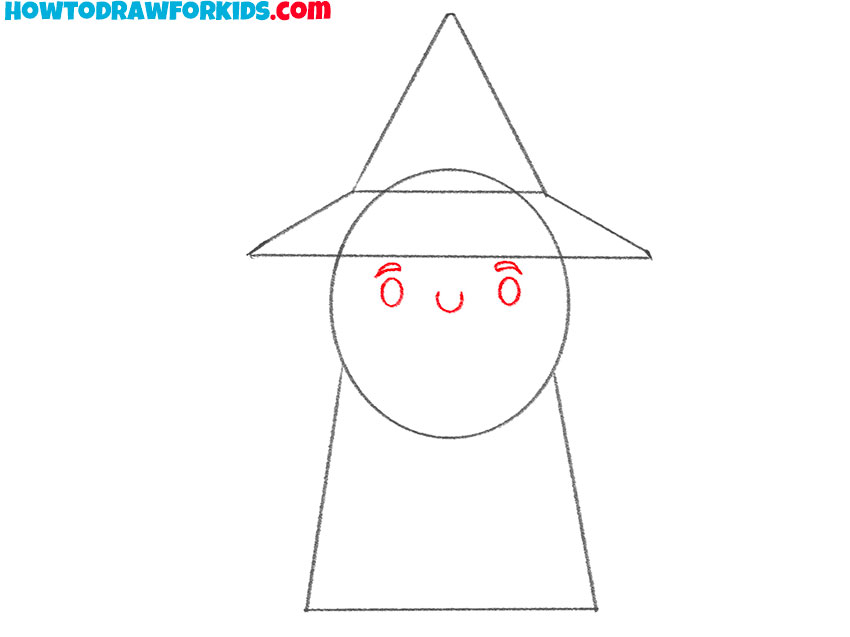
- Draw the wizard’s facial features.
Lightly draw the eyes as two small circles or ovals. Add small curved lines for the eyebrows above the eyes. For the nose, sketch a short vertical curve. Don’t sketch the mouth at this stage. Keep all facial features slightly below the midline of the head.
- Sketch the magic character’s beard.
Use a smooth curved outline around the lower half of the face, drawing the beard that tapers into a rounded point near the torso. Use long, sweeping strokes. Then, draw the mustache below the nose, using a simple mirrored shape.

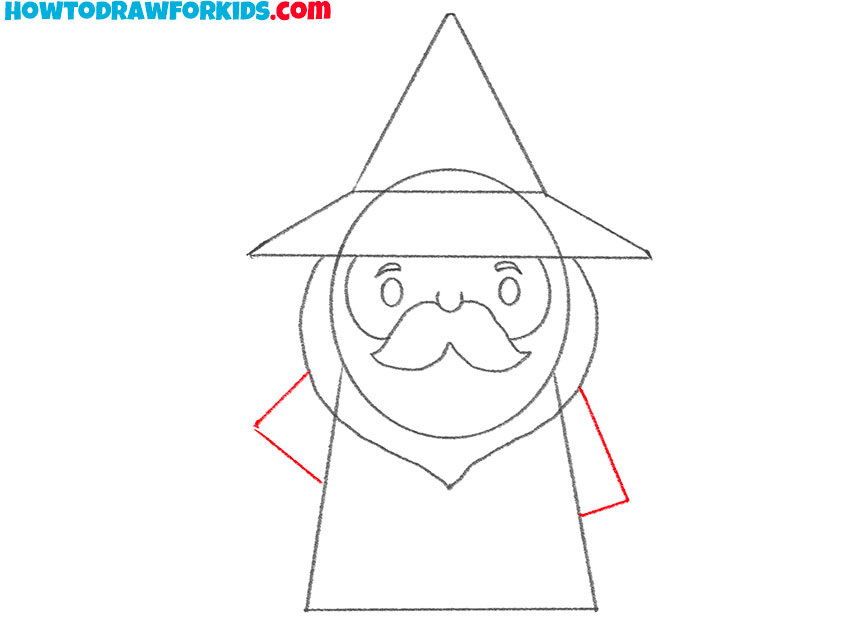
- Add the flared sleeves of the robe.
Now that the main outlines of the body are set, sketching the arms of the character. Start by drawing the sleeve as a simple trapezoid or tapered shape. The sleeve should flare at the wrist to represent the looseness of a wizard’s robe. Make one of the sleeves slightly raised to then draw a magic wand or a sorcerer’s staff in that hand.
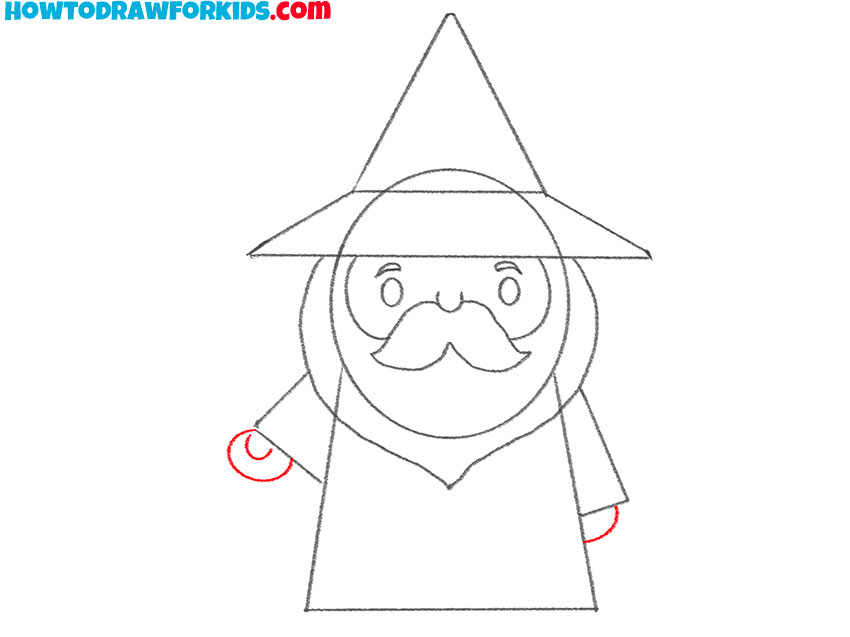
- Sketch the hands of the magic character.
In this simplified style, there’s no need to draw every detail too precisely, so draw the hands using very simple rounded shapes, indicating only the general outline and the thumb on the hand that will later hold the wizard’s staff. Try to keep the proportions consistent so both hands appear the same size.
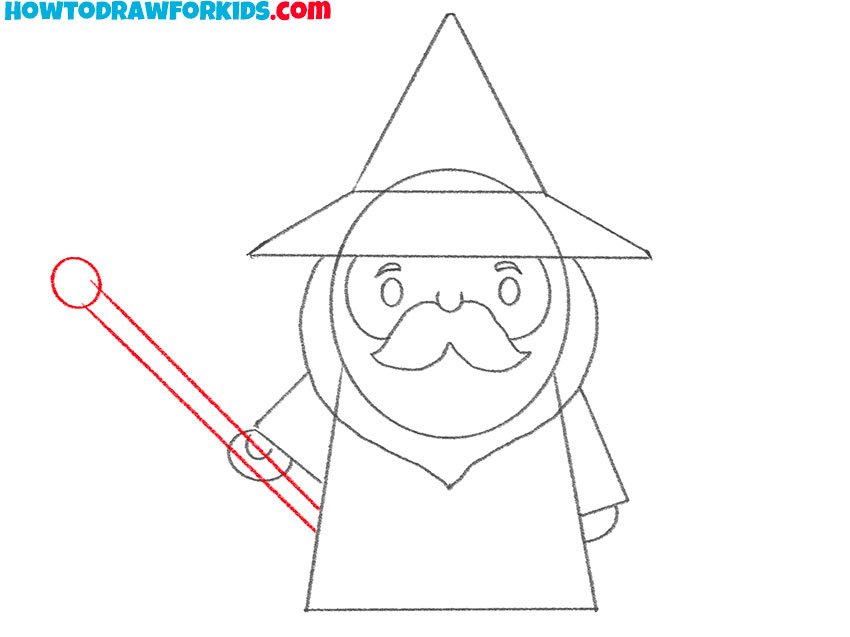
- Draw the wizard’s staff.
Begin by sketching a couple of long, straight lines extending from the wizard’s hand. Add the round top of the staff by drawing a simple circle. To illustrate a magical orb, you can make the circle smooth or give it a more irregular shape.
- Clean up the magic character drawing.
Now that all the important elements are in place, clean up the entire wizard drawing. Erase any construction lines that are still visible inside the head, body, hat, beard, or sleeves. Once everything is cleaned up, redraw the outer contours with steady, confident lines to finalize the wizard’s silhouette. You can also add subtle shape adjustments if needed.
- Add simple colors to the wizard.
A classic wizard look uses blues, grays, or deep purples for the robe and hat, but any palette works as long as it’s consistent. Color the hat and robe with the same main shade so they feel like one garment. Use a lighter tone for the beard and a soft skin tone for the face. Color the stuff handle a warm brown.

Additional Content
As always, I have prepared a short version of this lesson in PDF format for you in advance. The file contains a short instruction without text description, a coloring sheet, a tracing worksheet, and a grid drawing worksheet. You can download all these useful materials for free and use them at any convenient time.
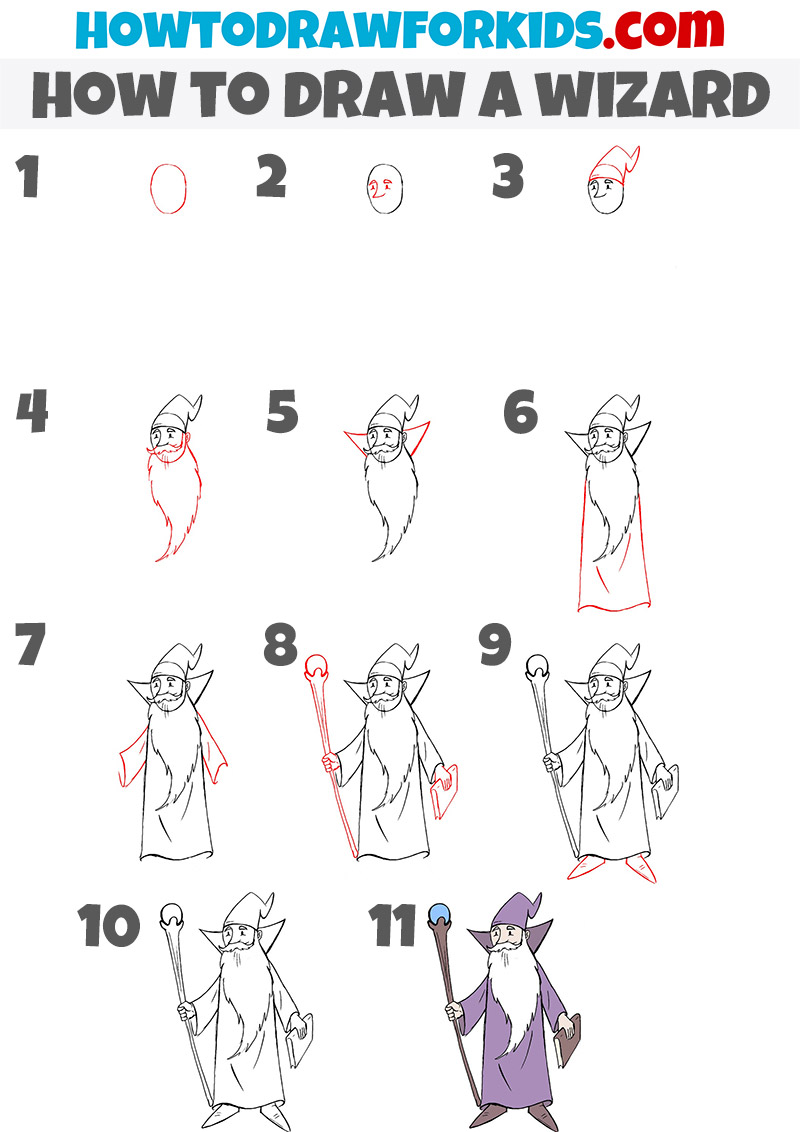
How to Draw a Wizard: Advanced Level
You have just completed a lesson on drawing a simple wizard. Additionally, I have prepared for you a method on how to sketch a slightly more detailed wizard. This tutorial won’t be difficult, you just need to follow the steps carefully.
Here the wizard’s body is hidden under long clothes, so you only have to sketch the outer contours of the cloak and then add the hands and feet.
Before starting the lesson, look carefully at the wizard drawing and determine the relationship of body parts. This will be the key to successful completion of the lesson.
Technical Nuances
The human body is one of the most difficult shapes to draw. Proportions are the first thing to learn when drawing bodies because they teach you to be anatomically correct.
On my website you will find useful articles and learn what proportions are and how to apply them in fine art.
Improve Your Wizard Drawing
Some suggestions on how you can improve your drawing:
- You can change wizard’s clothes. For example, add the patterns to clothing. These can be stars or ornament.
- Detail the beard and mustache by adding small strands using short strokes.
- You can also slightly change the shape of the staff and add curly elements to it.
The wizard can also assemble a squad consisting of hobbits, an elf-archer, and a gnome-warrior, and go on an unexpected journey to Mordor. The wizard is ready for epic battles with orcs and mummies in dungeons filled with treasure chests and barrels of unknown substances.
You can learn to draw all these creatures or things thanks to my drawing lessons on this site.
Conclusion
Don’t forget to follow me on social media if you haven’t already. Join us! You will find links at the end of the lesson. Do you like such simple drawing lessons? Write about it and about your wishes in the comments.