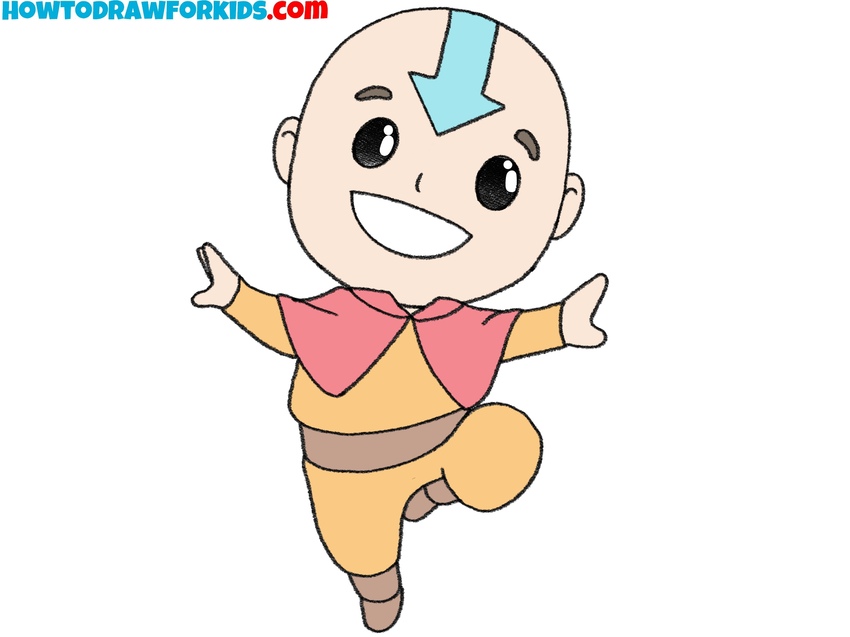
How to Draw Aang
The hero of this drawing tutorial has a very recognizable appearance, which we will repeat in this tutorial on how to draw Aang.
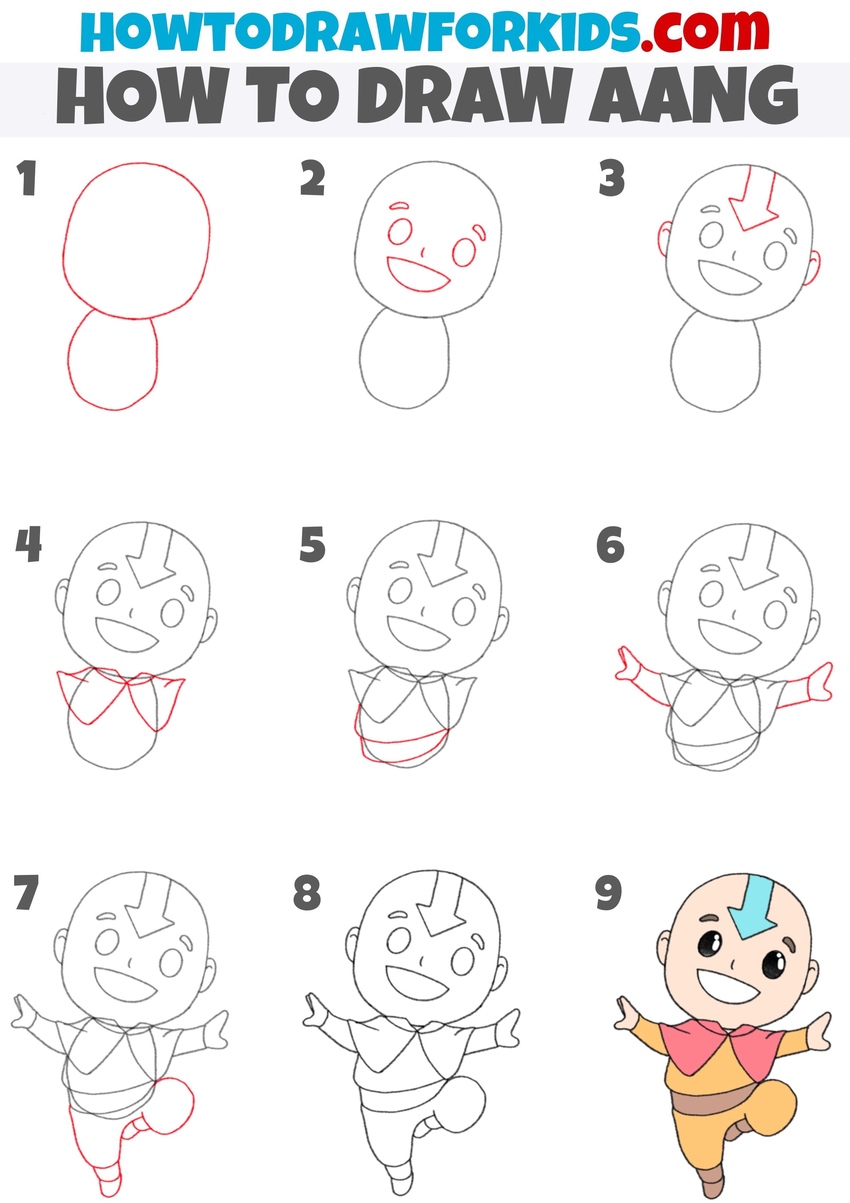
How to Draw Aang: Introduction
In this tutorial, I want to show you how to draw Aang. This is the hero of the animated series “Avatar: The Last Airbender”. This is a young man who was brought up in a monastery, he trained a lot and eventually mastered the martial arts. We also know that Aang had great strength and wielded magic.
Aang is a cheerful, slightly naive young man, he has a good sense of humor. At the same time, he is very responsible and always ready to help. Aang knows how to find a way to the heart of any person. Apparently, that’s why he has many friends.
You see that Aang has an unusual appearance. There is no hair on the head, but there is a tattoo in the form of an arrow. Traditionally, monks wore yellow-orange robes. You see such clothes on a young man. Additionally, a red cape complements his image.
In this tutorial, the character is presented in a cartoon style. This style is characterized by certain proportions when the head is larger than the body, and the arms and legs are very short. You can easily depict this in your drawing.
Aang Drawing Tutorial
Materials
- Pencil
- Paper
- Eraser
- Coloring supplies
Time needed: 35 minutes
How to Draw Aang
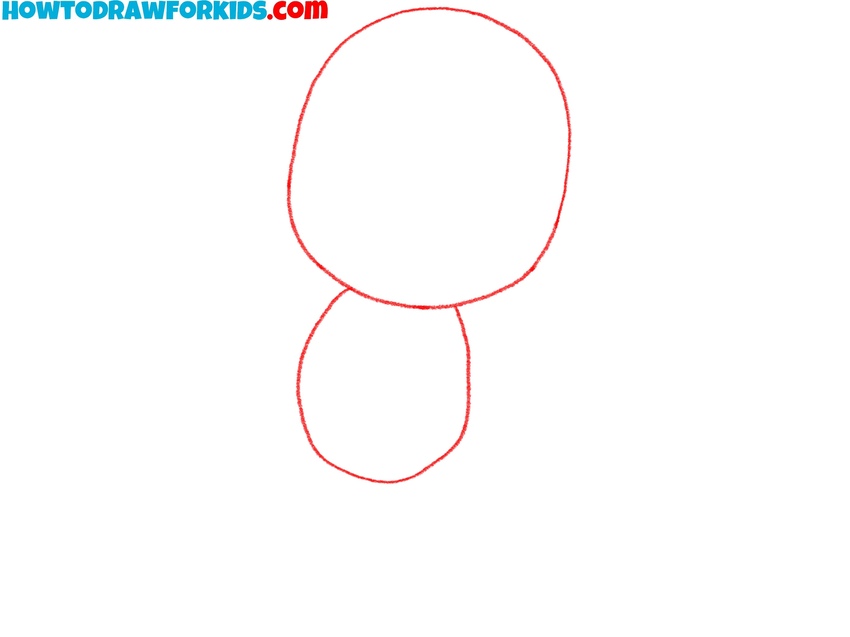
- Set the proportions with ovals.
To set up the overall proportions of the character, use very light lines and draw two simple shapes: one large oval for the head and a smaller oval below it for the torso. Notice that Aang’s head is much larger compared to his small torso, which conveys a childlike look in this version.
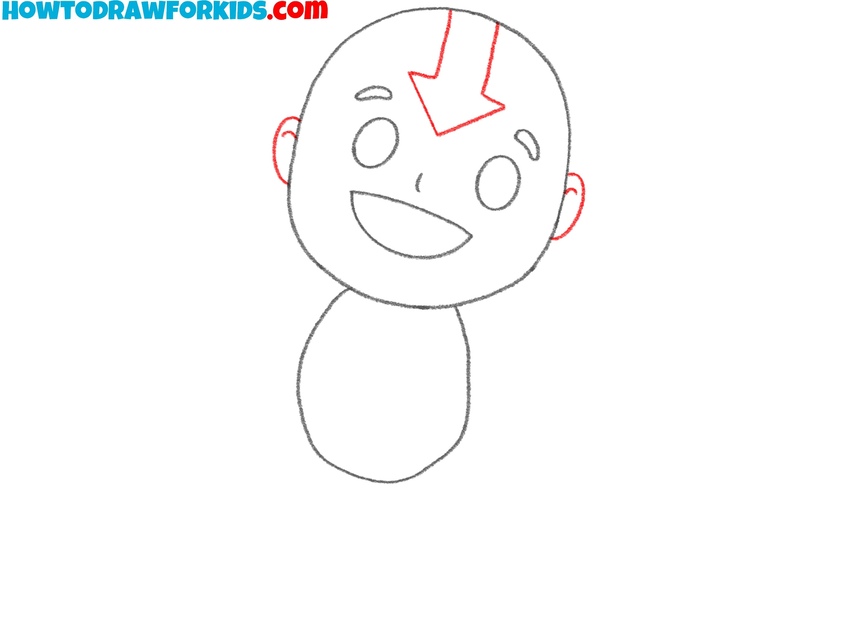
- Draw Aang’s eyes, nose, and mouth.
Now, place large circular eyes on the upper half of the head shape. Add small curved eyebrows above them and sketch a wide, smiling mouth lower down. The nose can be kept very simple, just a tiny curved line or a dot-like mark, as the style here is cartoonish.

- Sketch the arrow tattoo and ears.
Now that the face is complete, draw Aang’s most iconic feature: the large arrow tattoo on his forehead. Draw it starting near the hairline, pointing downward toward his face. The arrow should have straight edges. Next, sketch simple semicircular ears on both sides of the head, placed roughly level with the eyes.
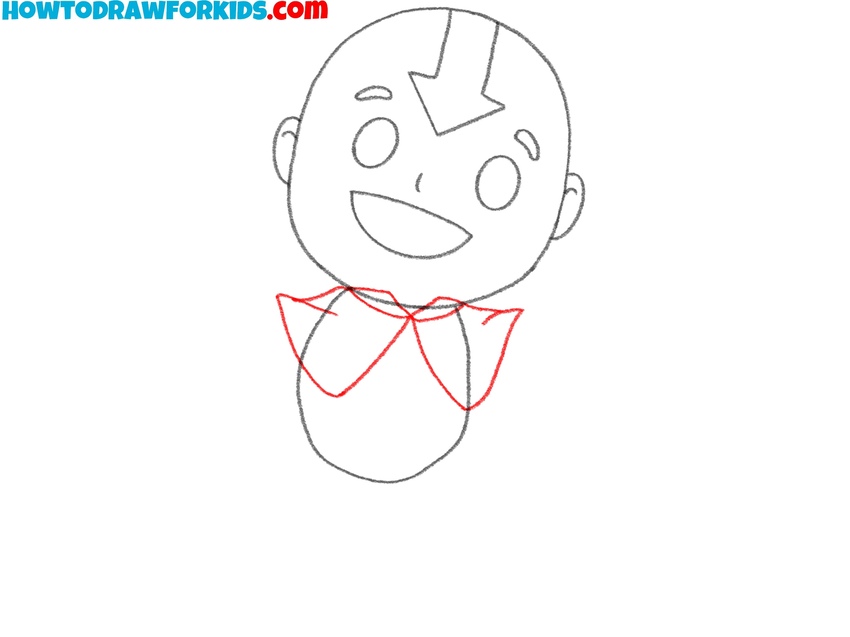
- Add the collar of the robe.
With the head complete, move down to the outfit. Draw the collar and shoulder area of Aang’s robe, which wraps around his neck. This part should appear wide, extending past the torso shape on both sides. This helps convey the recognizable look of his Air Nomad clothing.
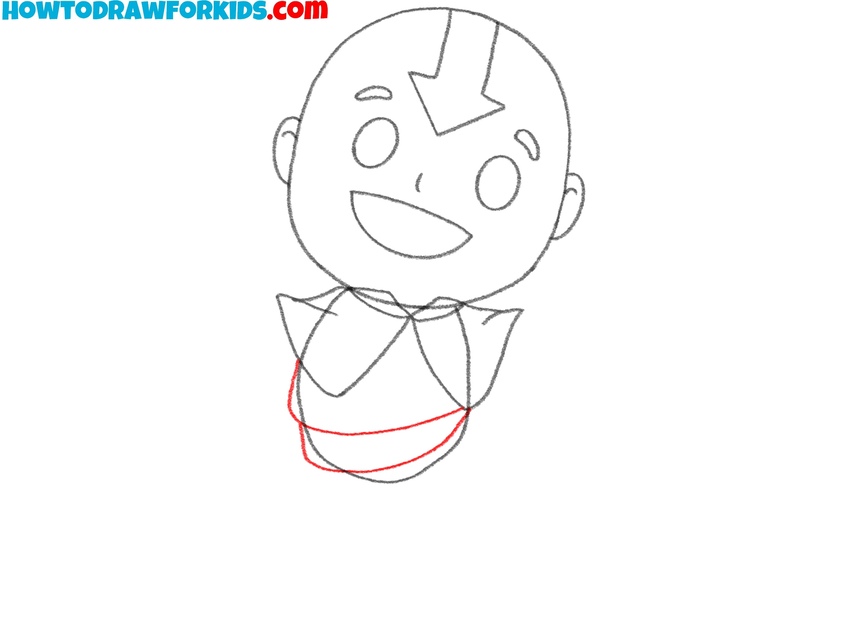
- Sketch the lower section of the robe.
Now illustrate the second layer of Aang’s robe that overlaps beneath the collar. First, sketch the sides of the top part of the clothes with smooth shapes. Then, draw the belt as a couple of smooth and slightly curved lines on the lower part of the torso.
- Draw the extended arms.
With the clothing is drawn, sketch Aang’s arms. Both arms should spread away from the top of the torso. Keep the arms fairly short and simple, ending in very simple hand shapes that can later be refined into fingers. A good way to keep proportions right is to measure each arm against the size of the torso.

- Add the legs and shoes.
To finish the main parts of the body, draw Ang’s legs, sketching one leg bent upward as if Aang is in motion. To draw the legs, first sketch the thighs as rounded drapes extending from the robe, then add the lower legs with smaller ovals or cylinder. Finish by sketching a feet at the bottom.

- Erase all unnecessary marks.
After creating the main parts, refine the outlines across the entire drawing, smooth out the arms, robe, and legs. Lightly erase any guidelines from earlier steps to clean up the figure. This is also the stage to check proportions one last time.

- Add iconic colors to the skin, robe, and arrow.
Now, when everything related to the linework is finished, let’s finalize the drawing. Fill the robe with an orange or red for the upper layer and a yellow for the lower sections. Color the belt and boots in a darker shade. Aang’s skin should be a light peach tone, while the iconic arrow tattoo on his head is bright blue.

Bonus: Easy Aang Drawing Tutorial
This version is even more simplified than the first one, and to draw Aang in this style, outline a large oval for the head and add two rounded shapes below to create the beginning of the clothing.
Add small details for the scarf and continue downward with simple curved lines to form the torso. Sketch the arms in small curved lines close to the body, then refine the clothing with a few folds. Sketch one raised leg and the second one leg in the same way but in a different pose.
Draw large circular eyes with smaller pupils inside, and add a wide smiling mouth. Complete the look by sketching the bold arrow on his forehead and painting the avatar in iconic colors.

Conclusion
If you want to continue boosting your skills in this style, the anime character drawing tutorial will help you practice. The cartoon character drawing tutorial is another good choice, where you can work on simplified people and compare different approaches to building characters.
Practicing several different characters will help you understand the variations in style, keeping the main construction steps the same. Adding background elements like rocks, fire, or clouds can also strengthen the drawing and match the setting of the character.
Share your finished work once you complete it. Writing your thoughts about which parts were easy and which were more challenging will help track your growth.