How to Draw an Axolotl
Many of you may think at first sight this animal isn’t real, but in this lesson we will clear that up and learn how to draw an axolotl.
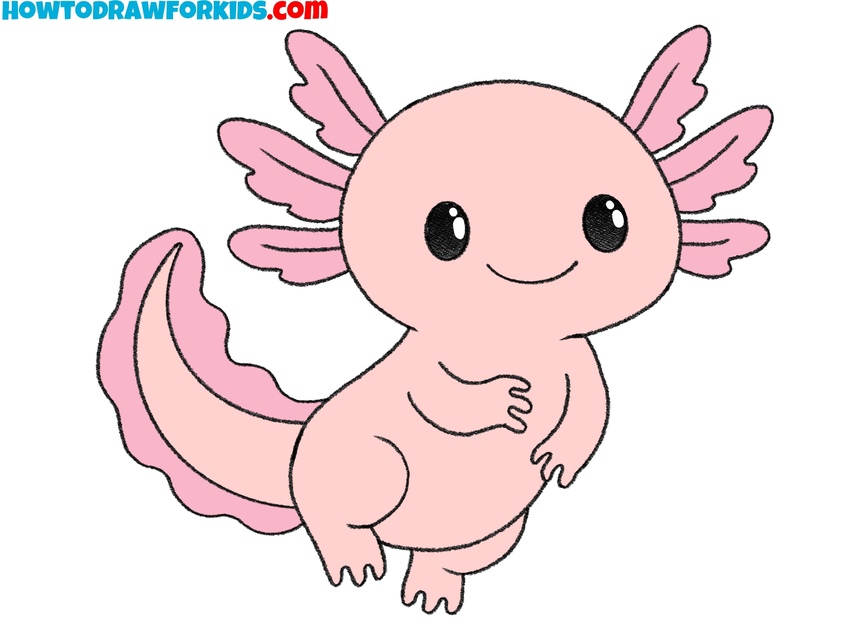

In this tutorial, I will show you how to draw an axolotl. Undoubtedly, this lesson will be very exciting, because the axolotl is one of the most amazing creatures on our planet.
This is a cute inhabitant of water bodies, which is very similar to a cartoon character. The axolotl is a larva, but it is a rather large animal that can fit in the palm of a person.
This step-by-step guide will help you draw an axolotl quickly and easily. The lesson consists of several simple steps, in each of which you will draw a separate part of the axolotl’s body.
As you can see, the axolotl has a wide head, a narrow body that smoothly passes into the tail, the toes are widely spaced, and there are three pairs of external gills on the head.
Materials
- Pencil
- Paper
- Eraser
- Coloring supplies
Time needed: 20 minutes
How to Draw an Axolotl
- Sketch the simple animal’s oval head.
To start the sketch, draw the basic form of the axolotl’s head. Create this part of the body as a wide oval. You can adjust this shape depending on what kind of look you want to reproduce.

- Sketch two eyes and a smile.
With the head shape is ready, begin defining the creature by adding its face. Draw the eyes of the axolotl as two circles, placing them near the center of the oval. Between and slightly below the eyes, sketch a small curved line to form the mouth.

- Sketch three gills on each side.
The next feature to add is one of the axolotl’s most recognizable traits: the feathery external gills. These should be drawn on both sides of the head, spreading like small clusters of leaves or feathers. You can experiment by making them longer or shorter, depending on whether you want the drawing to look closer to a natural axolotl or more like a simplified cartoon version.

- Draw the body of the axolotl.
With the head and gills complete, move on to the body, which should be shaped as a smooth oval. Draw the axolotl’s body shorter and wider if you want a cartoon look, or make it longer for a more lifelike version.

- Sketch the front arm with fingers.
The next part of the figure involves sketching the axolotl’s front limbs. Draw two small arms extending from the upper sides of the body, keeping them short and slightly curved. The arms should have a slight bent at the elbows to make the drawing look more realistic. Add three small fingers at the end of each arm.

- Sketch the legs and small toes.
Now that the front legs are drawn, draw the back legs of the axolotl. Create two rounded shapes, bending at the knees. Finish each with three small toes, similar in style to the fingers but drawn slightly thicker. The hind legs should be slightly thicker than the front limbs.

- Draw the axolotl’s long tail.
The axolotl’s tail is a defining part of its body, used for swimming, so adding it is very important. Extend a long, curved shape from the back of the body. Draw the axolotl’s tail wide at the base and tapering toward the tip. After that, draw a smooth wavy outline around the tail to complete the distinctive look.

- Darken and finalize the outline.
With all the main shapes in place, it’s time to clean up your axolotl drawing. Take a darker pencil or pen and the lines smooth and clear. At the same time, erase any unnecessary guidelines that were used to build the figure, such as parts of the head oval that crossed into the body.

- Add light pink tones to the body.
Coloring the drawing is where the axolotl will become a finished artwork. Take a soft pink across the body. The gills can be shaded with a slightly deeper pink or a reddish hue. Fill in the eyes with solid black or a very dark brown, leaving a tiny white highlight. Real axolotls can also appear in white, golden, or even dark gray morphs, so feel free to experiment with alternative palettes.

Bonus: Easy Axolotl Drawing Tutorial
Draw the basic body of the axolotl as a long oval with a tapered tail. Sketch the short legs with tiny toes underneath the body. Indicate the gills with wavy lines on each side of the head, drawn as repeated curly strokes.
Place two small circles for eyes and a short curved line for the mouth. Draw additional gill frills to complete the arrangement around the head.
Review proportions and paint the body using different tones of pink.


