How to Draw a Raccoon
Let’s go over two really simple ways to learn how to draw a raccoon, the cute striped animal with an iconic mask on its face.

How to Draw a Raccoon: Introduction
As I mentioned at the very beginning of the lesson, here you will find two simple methods that will guide you step by step on how to draw a raccoon in the most detailed way possible.
We will draw the characteristic outline of this animal, along with all the necessary but minimal details required to give the raccoon a highly recognizable appearance. At the same time, we will avoid excessive details while still illustrating its distinctive pattern.
Of course, we will also include the mask around its eyes, which is probably the most recognizable feature of this animal.
Like many of my other drawing lessons, this tutorial on how to draw a raccoon will be extremely useful for improving your ability to draw animals, along with lessons on drawing a cat and other creatures.
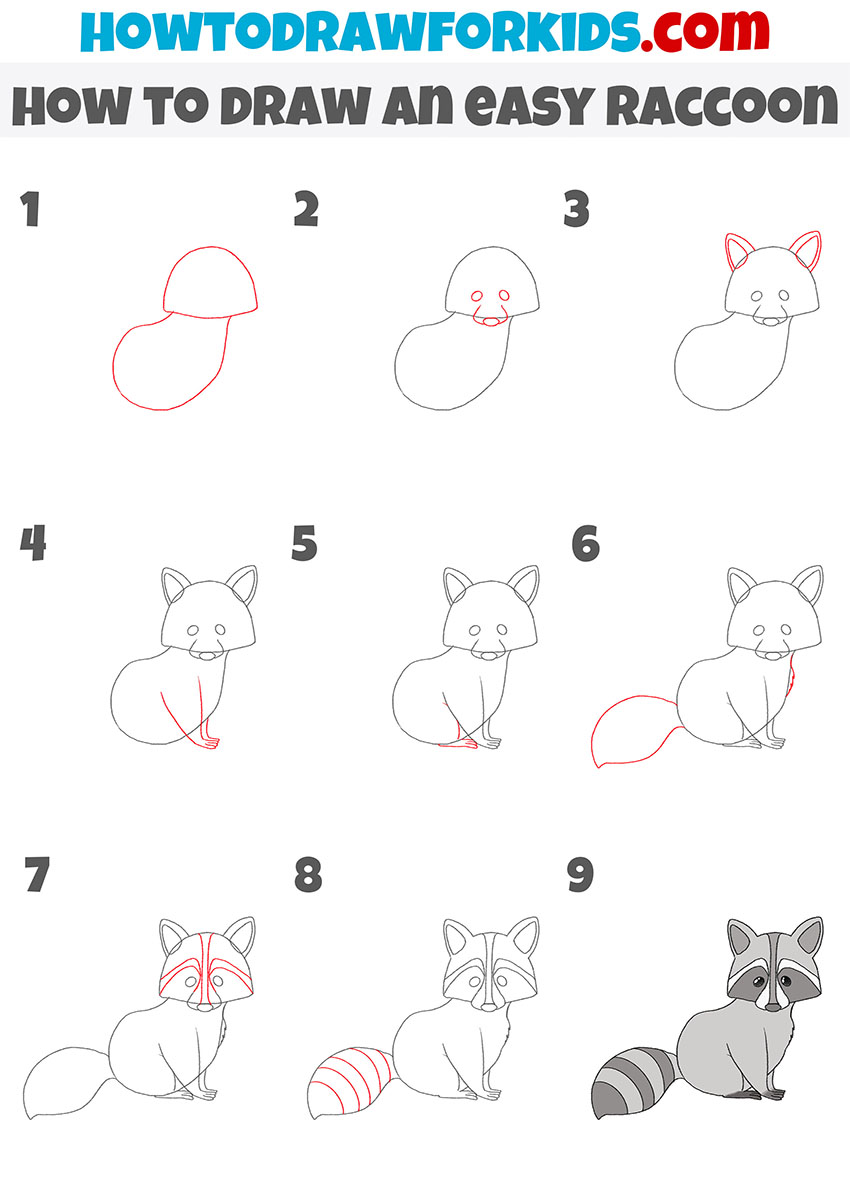
Raccoon Drawing Tutorial
Materials
- Pencil
- Paper
- Eraser
- Coloring supplies
Time needed: 30 minutes
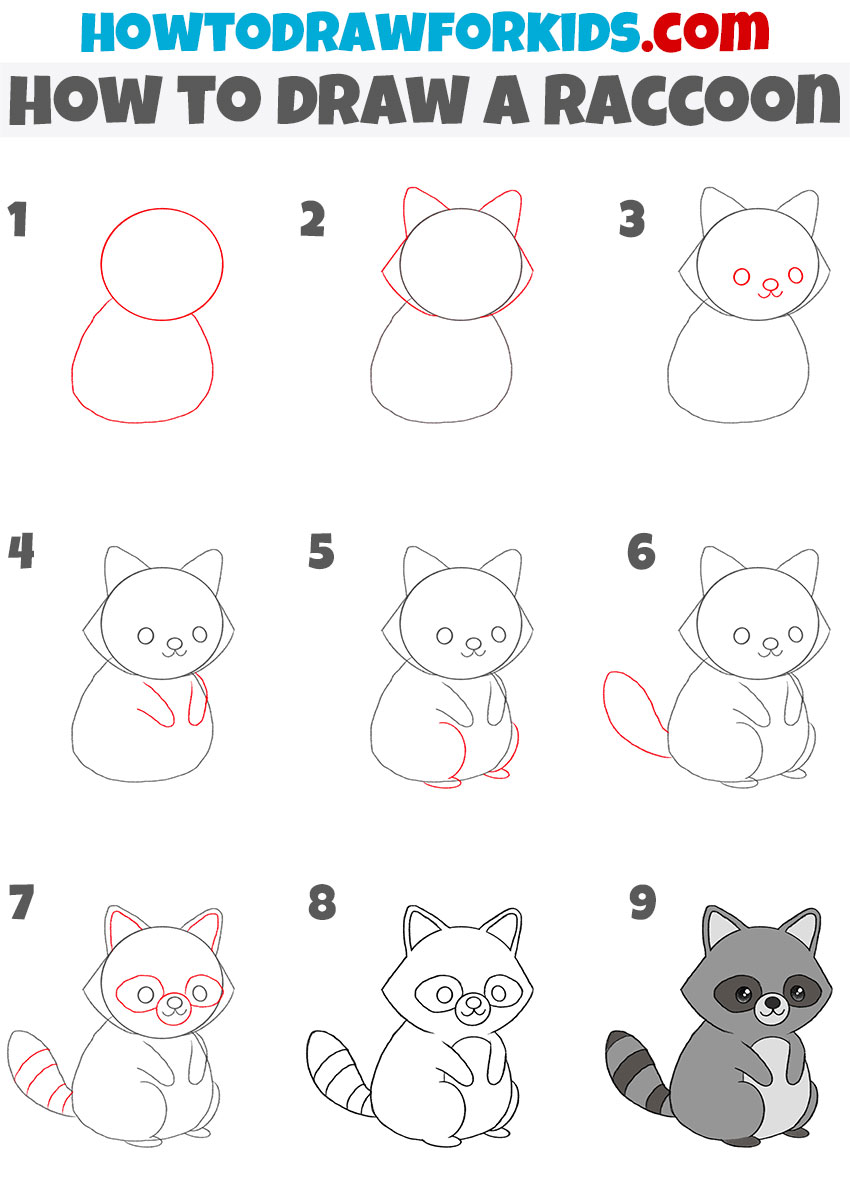
How to Draw a Raccoon
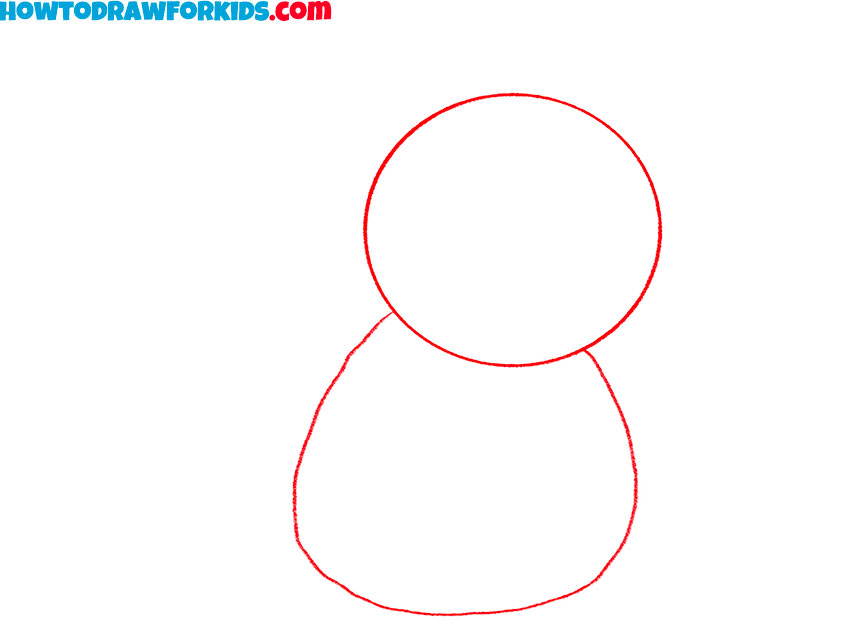
- Draw the raccoon’s base shapes.
To begin, outline the basic shape of the raccoon’s body. Draw a large circle at the top of your page – this will form the head. Then, slightly below it, sketch a rounded, pear-like shape for the body. Keep your lines light and sketchy at this stage, as you may need to adjust them later.
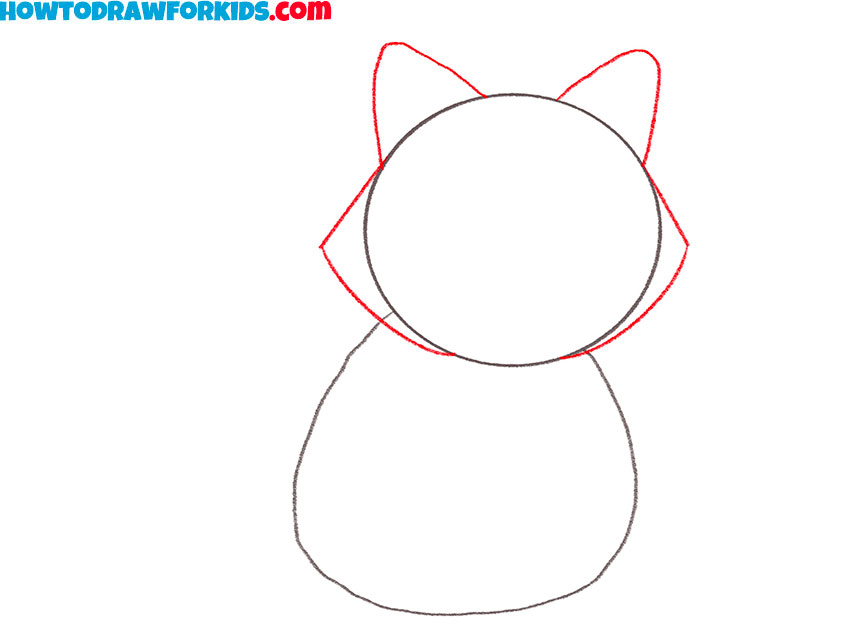
- Sketch the ears and cheeks.
Next, sketch two triangular ears on top of the raccoon’s head, ensuring they have smooth outlines. Then, draw triangular lines on both sides of the head to define the raccoon’s fluffy cheek fur. You can draw the cheeks with either smooth or jagged lines.
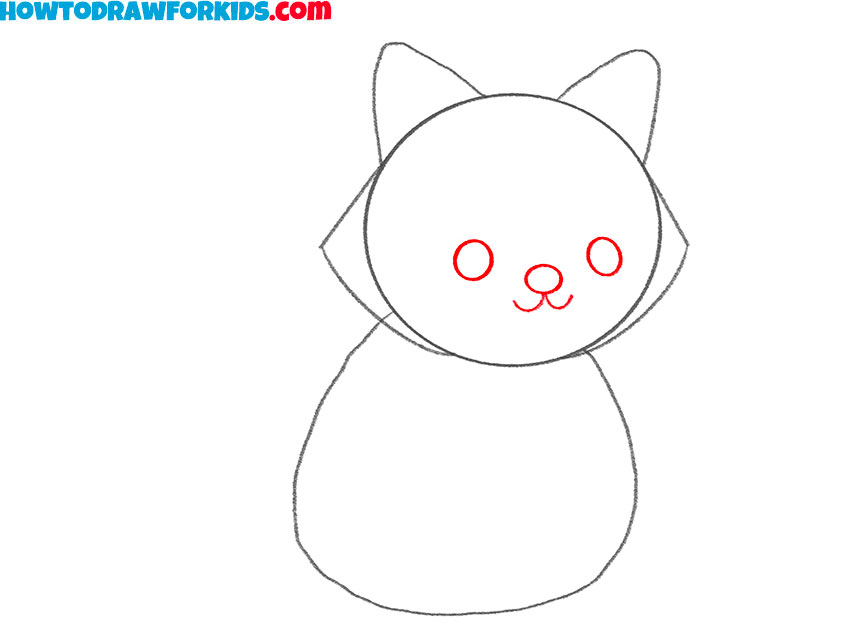
- Add the facial features.
First, sketch two small circles near the center of the head of the raccoon for the eyes. Just below the eyes, draw a tiny oval or triangle for the nose. From the bottom of the nose, sketch a couple of short, curved lines for the mouth of the raccoon.
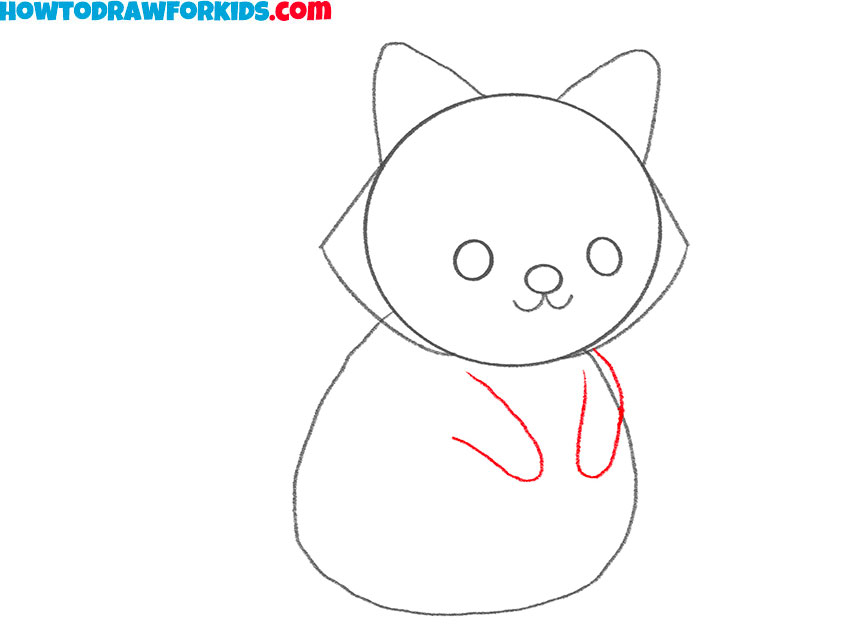
- Draw the raccoon’s arms.
Now, sketch two small, curved shapes extending from the upper part of the torso area. These lines will shape the raccoon’s short arms. Keep the paws simple and rounded for a soft, cute look. For a more realistic look, at the ends of the arms, you can draw small oval-like shapes to represent the paws.
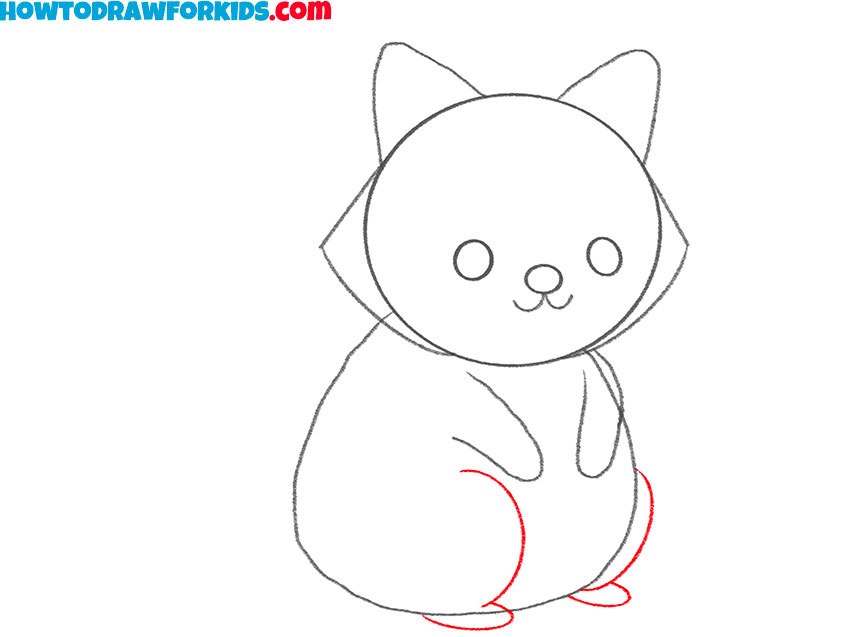
- Add the legs and feet.
Begin by sketching two curved lines along the bottom part of the body. At the base of each leg, draw small, rounded feet. Keep these feet small and simple, similar to the front paws. If you want to make the kegs more detailed, you can add small toes. The curves of the legs should smoothly blend into the body.
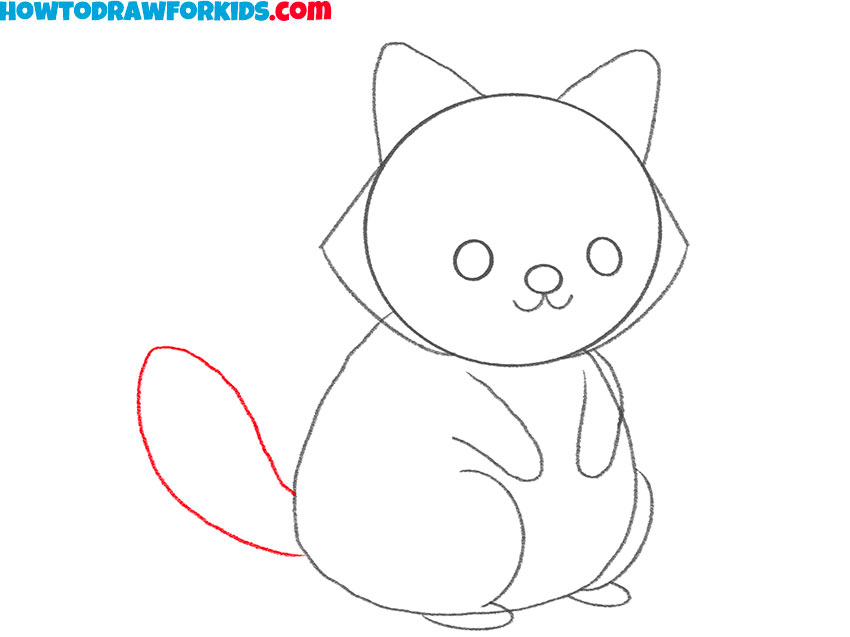
- Draw the tail of the raccoon.
A raccoon’s bushy tail is one of its most distinctive features, so this step is important. To draw raccoon’s tail, sketch a large, curved shape extending from the lower part of the raccoon’s body. The tail should be long and slightly oval in shape, with a gentle curve to give it a natural appearance.
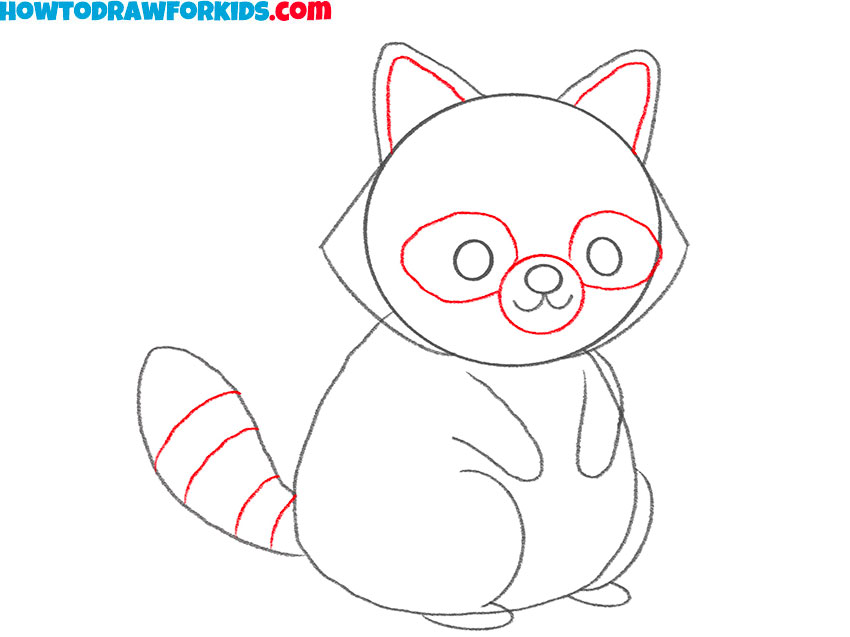
- Add the mask and stripes.
First, outline the characteristic mask around its eyes. Next, add stripes to the tail by drawing a few curved lines across its length. These lines should follow the tail’s contour. Also, draw a couple of curved lines inside the ears, to give them more finished look.
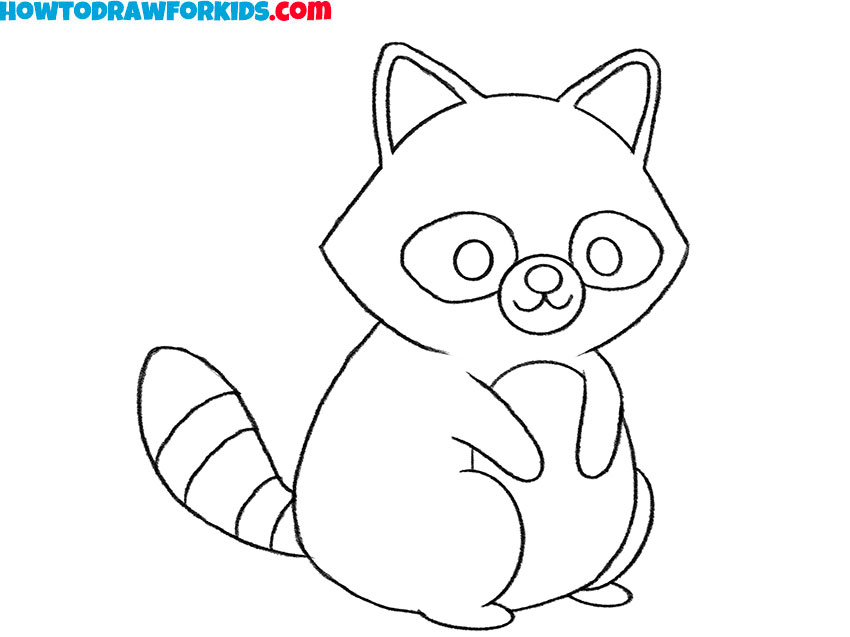
- Finalize the basic sketch.
If there are any unnecessary guidelines remaining, gently erase them to clean up the raccoon drawing. Focus on making the lines more defined, ensuring the overall shape of the raccoon looks finished. Check for any asymmetry or misplaced features and correct them accordingly.
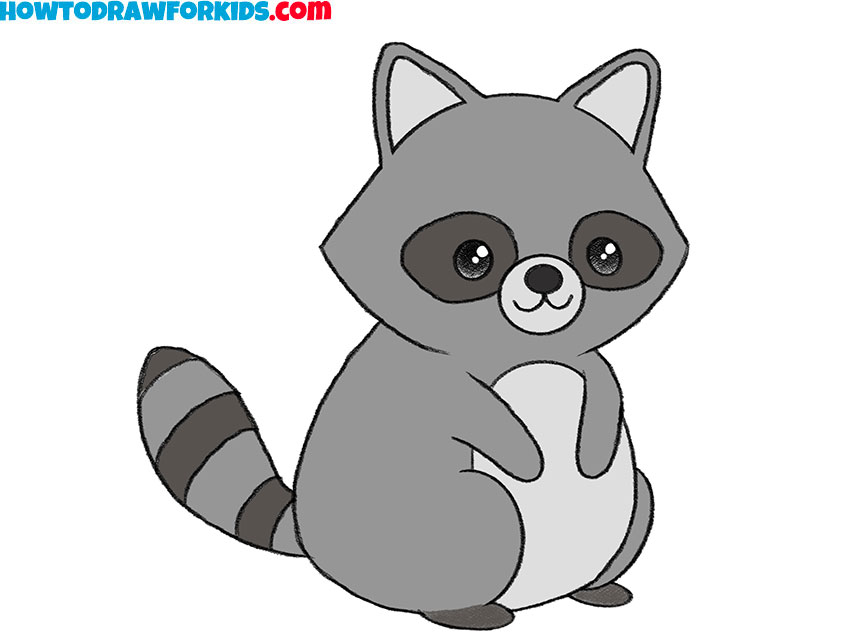
- Color the raccoon.
Use shades of gray for the raccoon’s fur, keeping the body a lighter gray while making the mask around the eyes and the tail stripes a darker shade. The eyes should remain black, with small white highlights. The inner part of the ears and the belly can be colored in a light gray.
Additional Content
To ensure that every aspiring artist has the opportunity to practice at their own pace, I’ve created a free PDF file that includes the most important parts of this raccoon drawing lesson. This compact version is specifically designed for offline use, allowing you to download it and enjoy drawing wherever you may be.
How to Draw a Raccoon: Extra Practice
This tutorial on how to draw a raccoon demonstrates a different design compared to the first method. The pose of the raccoon looks different, and the sequence of steps is also different. And as you can see, the patterns on the face and body have a different shape.
To learn how to draw a raccoon with this method, sketch the base using a rounded head and an elongated, curved body. Add small oval eyes, a triangular nose, and a short curved mouth. Draw triangular ears on top of the head. Define the front paws with simple lines extending downward. Then, add the hind leg slightly bent and resting. Attach a large, bushy tail extending outward.
Next, draw the characteristic raccoon face mask with smooth curved lines around the eyes and extending to the sides of the face. Add stripes on the tail using curved lines. Erase any unnecessary guidelines and refine the overall shape. Finally, color the raccoon, using shades of gray for the body, darker gray for the tail stripes and facial mask, and black for the eyes and nose.
Conclusion
As you have seen, the same animal can be drawn in two noticeably different ways, giving it a unique and interesting look. This means you can draw a hundred different raccoons, giving them a hundred different poses, patterns, and overall making each drawing as unique and distinct as possible.
However, as I mentioned at the beginning of this lesson, drawing a raccoon is not the only tutorial that can help you improve your animal drawing skills. I highly recommend checking out my dog drawing tutorial, as well as my simple yet very engaging fox drawing lesson. Even more so, I suggest exploring the Animals section, where you can choose your favorite animal and draw it in a simplified style.
Now, I’d love to hear your thoughts! Did you enjoy this lesson on how to draw a raccoon? Also, let me know which other drawing tutorials you have already tried on my website. Were you able to find the lesson for the animal you were looking for, or not? If you didn’t find a tutorial for the animal you want to draw, be sure to leave a comment under this article, letting me know which animal you’d like to see a tutorial for.
For the fastest updates on new lessons and access to the large amount of content I regularly publish, I strongly recommend following me on social media. There, you’ll also find plenty of additional materials, such as video tutorials on my YouTube channel and interesting collages on my Pinterest account.