How to Draw an Elk
Few creatures in the forest are as striking as today’s subject, because in this tutorial you will learn how to draw a moose in two methods.
How to Draw an Elk: Introduction
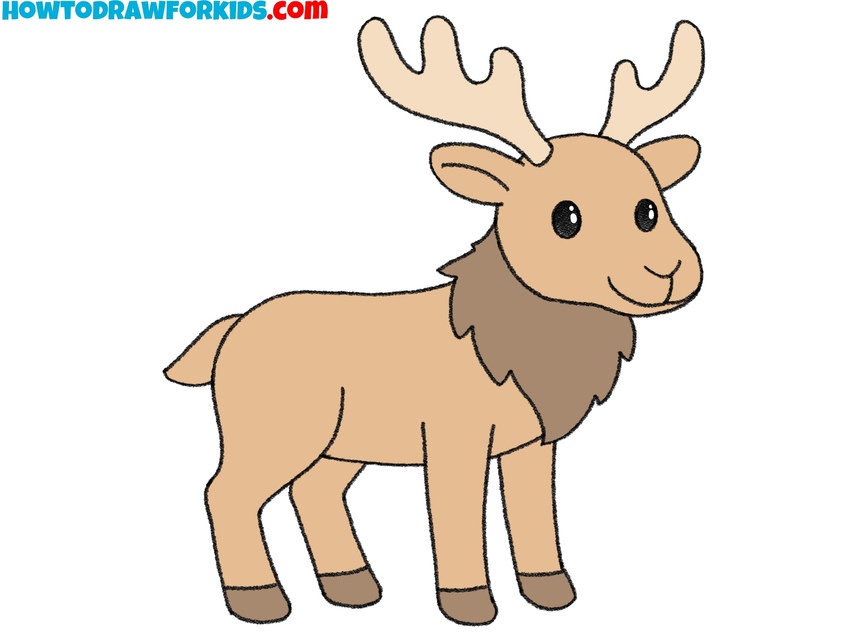
In this tutorial, I will show you how to draw an elk. This is a rather large cloven-hoofed animal. The elk is called the mighty and noble master of the forest.
The elk has a short body, powerful legs, a long head, and huge wide horns. The elk’s head has a special structure, the nose has a hump and the upper lip is larger than the lower one. In general, the elk has a funny and slightly awkward appearance.
In this illustration, the elk is made in a cartoon style. This tutorial is adapted for children and aspiring artists, so simple lines that are easy to repeat are used here. Be careful at every stage of your drawing, and you will get great results.
Elk Drawing Tutorial
Materials
- Pencil
- Paper
- Eraser
- Coloring supplies
Time needed: 30 minutes
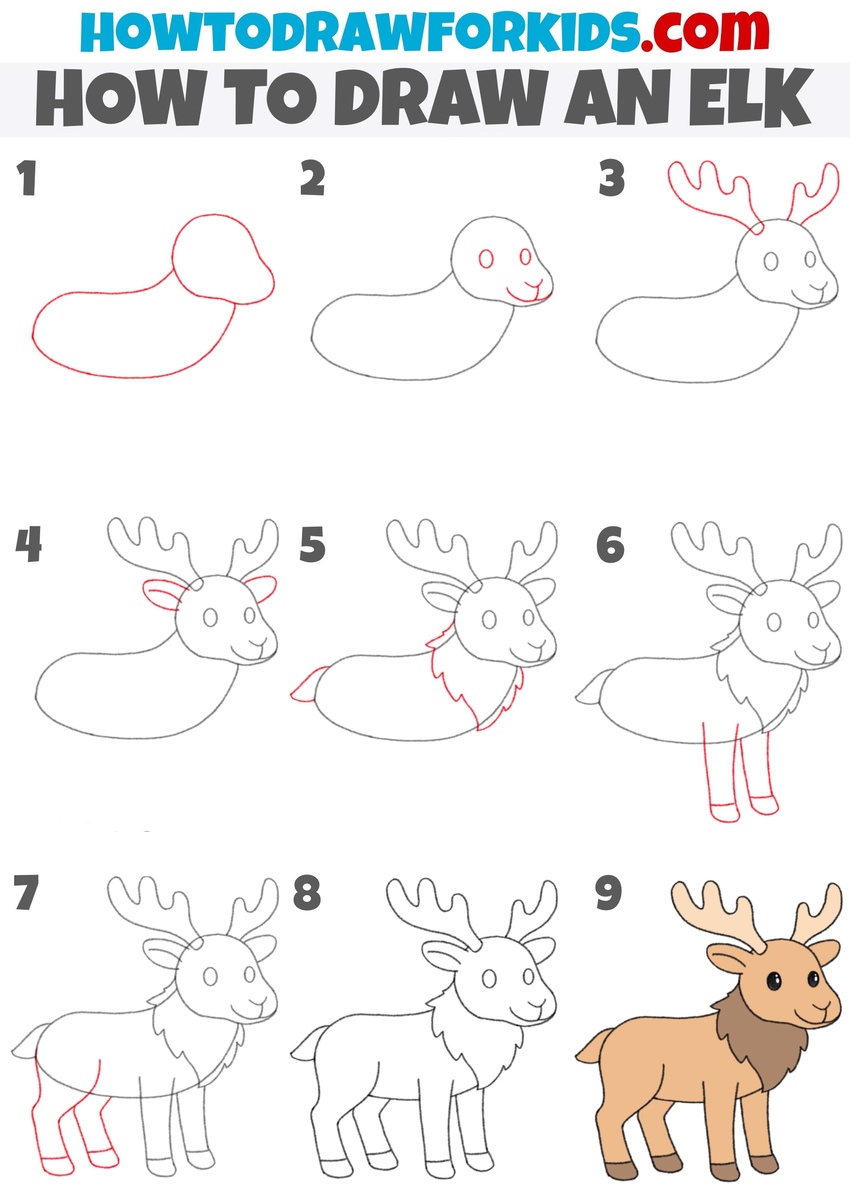
How to Draw an Elk
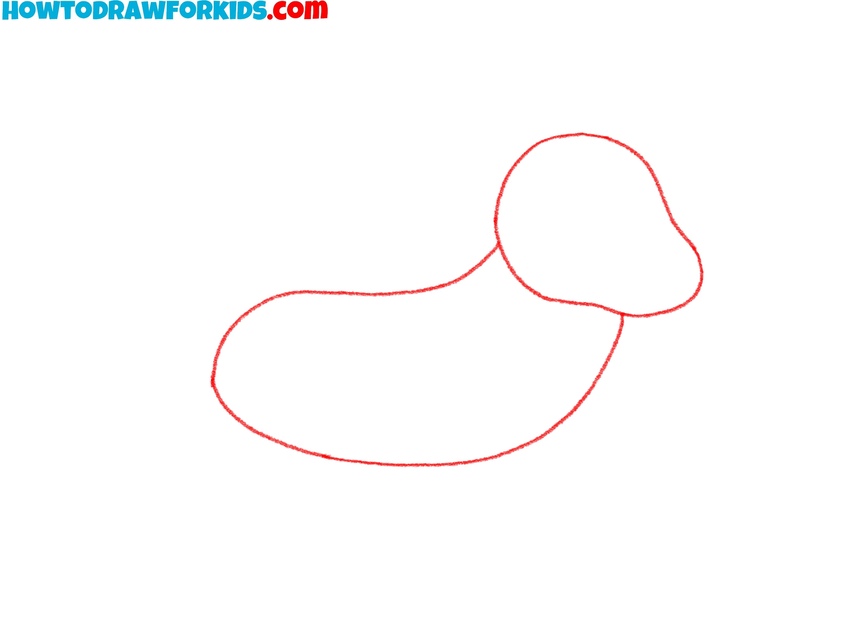
- Outline the simple forms of body and head.
To make sure the elk drawing has the right proportions, it’s best to begin with a simple outline of the head and body. Sketch a rounded head shape with a slight extension for the muzzle, then connect it to a large oval body. Keep all these lines light to have an opportunity to adjusted them later.
- Place the eyes, nose, and mouth
Placing the eyes and mouth early helps define face of the animal. Draw two small circles for the eyes and a curved line for the smiling mouth. Indicate the nose of the elk with a small oval. To make your elk drawing look cartoon and simplified, keep the features simple.

- Draw the elk’s branching antlers.
An elk’s antlers are one of its most recognizable features, so sketching them carefully is very important. From the top of the head, extend curved lines upward and branch them into rounded points. Draw the elk’s antlers symmetrical, but don’t make them too identical, because natural antlers often vary slightly.

- Add two ears beside antlers.
The head looks more complete once the ears are added, so draw two leaf-shaped ears on either side, just below the antlers. Tilt them to the sides for a natural and believable look. Sketch the inner details with short curved lines. Remember that elk ears are not too large compared to the antlers.

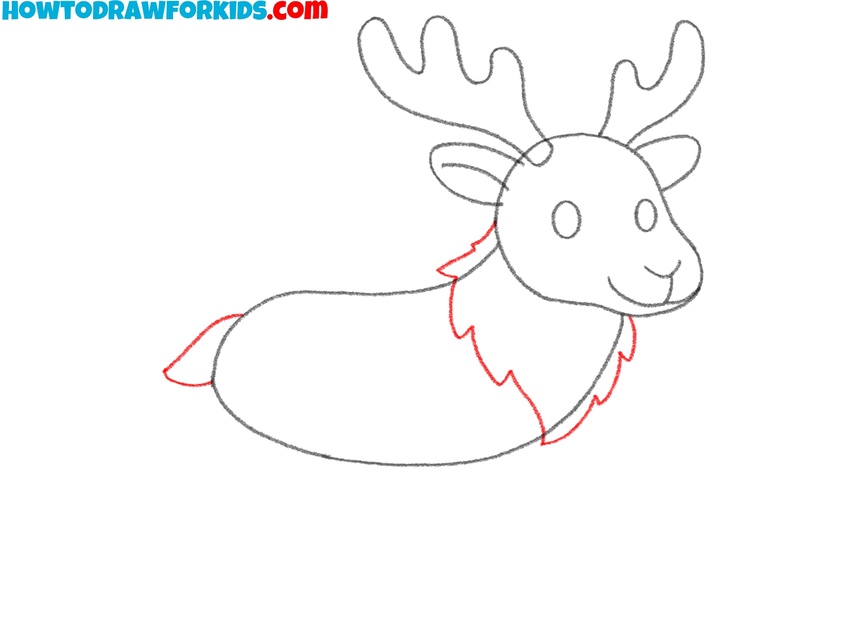
- Draw the short tail and neck fur.
To make the body more convincing and believable, sketch a short tail at the back and a mane at the base of the neck using zigzag lines. The mane makes the elk drawing recognizable compared to simpler deer drawings.
- Draw two straight front legs and hooves.
Now, draw two front legs, using straight but lines. End these legs in small rectangular hooves. Think of the legs as simple tubes that taper slightly. You can make the legs of your elk look more realistic, you can indicate the knees with thicker shapes.

- Draw the elk’s back legs and hooves.
At the back of the elk’s body, add the hind legs with curved lines illustrating the bend at the knee. Elk’s back legs are powerful, so make them slightly thicker than the front ones. At the bottom of each leg sketch a short horizontal line for the hooves.

- Erase the guidelines and adjust the lines.
Now that all the main features of your elk are in place, go over the drawing to connect and smooth the necessary and important lines of the artwork. After that, erase extra guide lines and adjust shapes where needed.

- Paint the body with natural colors.
To finish the elk drawing, apply light brown to the body, darker brown for the mane and hooves, and a lighter shade for the antlers. Using slightly different tones for these body parts will prevent the elk from looking flat. To make your elk drawing loom even more realistic, add shadows.

Bonus: Easy Elk Drawing Tutorial
This version demonstrates a much simpler and cartoon-like style. Unlike the more detailed main tutorial, the body and head here are reduced to very basic shapes, and the antlers are drawn in a simplified form that is really easy to repeat. The overall look is more minimal.
The process begins with constructing the elk from very simple ovals and rectangles. Sketch the body with a rounded shape and add an oval for the head.
Draw straight legs using rectangular forms. Illustrate the large antlers on both sides of the head, simplifying their branching structure into smooth, basic shapes. Add small details like the eyes, nose, and tail to make the drawing recognizable while keeping the features basic.
Once the outline is complete, refine the elk drawing by cleaning up unnecessary guidelines. Finish the tutorial by coloring the elk with dark brown tones for the body and lighter shades for the antlers.

Conclusion
Another lesson is over, and now you can draw an elk. You can improve your drawing and draw the environment for the elk. For example, you can draw trees or shrubs in the background.
For more practice, see the cow drawing tutorial to work with another large animal form, or visit my forest drawing tutorial to add natural surroundings.
You can also look at the deer drawing tutorial to compare a similar animal with lighter proportions. Share your results, write your feedback, and come back for new step-by-step lessons.