How to Draw Aquaman
This step-by-step tutorial shows how to draw Aquaman from the DC Universe in a simplified yet recognizable style.
How to Draw Aquaman: Introduction
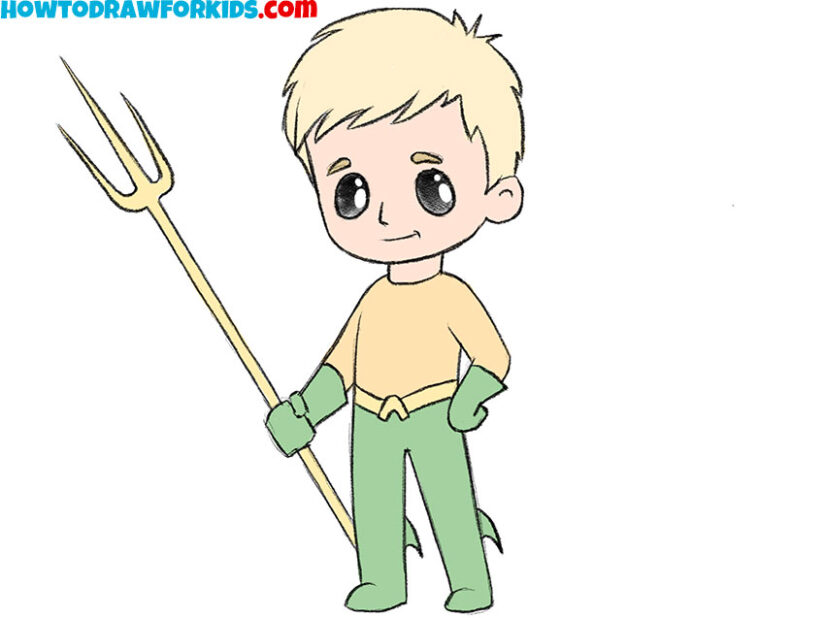
So, in this lesson, you’ll learn how to draw Aquaman – the well-known hero from the DC Universe. The tutorial focuses on a simplified version that keeps his main features and recognizable look.
Here, Aquaman is shown in a cartoon style with clear shapes and basic outlines. The simplified proportions make the character easier to draw while still keeping the trident, armor pattern, and confident pose that define him.
During this process, you’ll practice working with classic comic book characters and learn how to draw superheroes from DC Universe.
Aquaman Drawing Tutorial
Materials
- Pencil
- Paper
- Eraser
- Coloring supplies
Time needed: 35 minutes
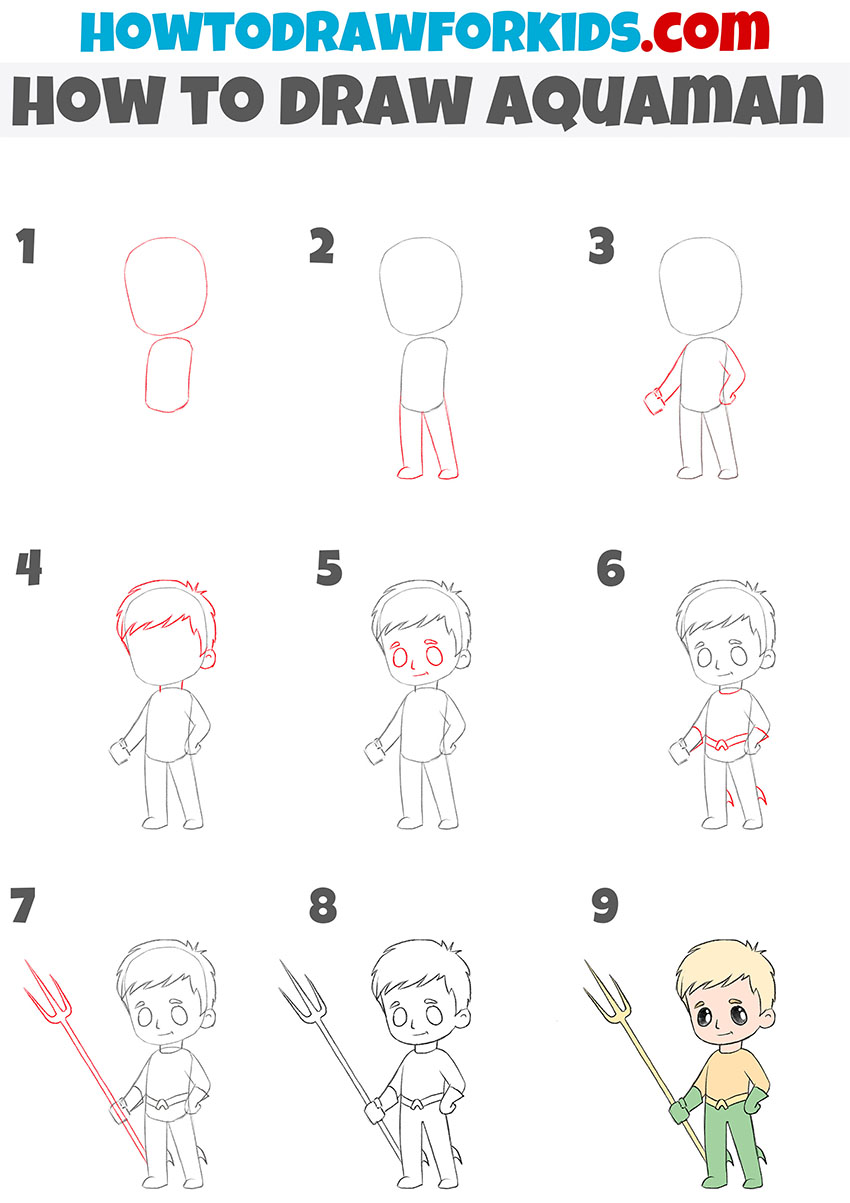
How to draw Aquaman step by step
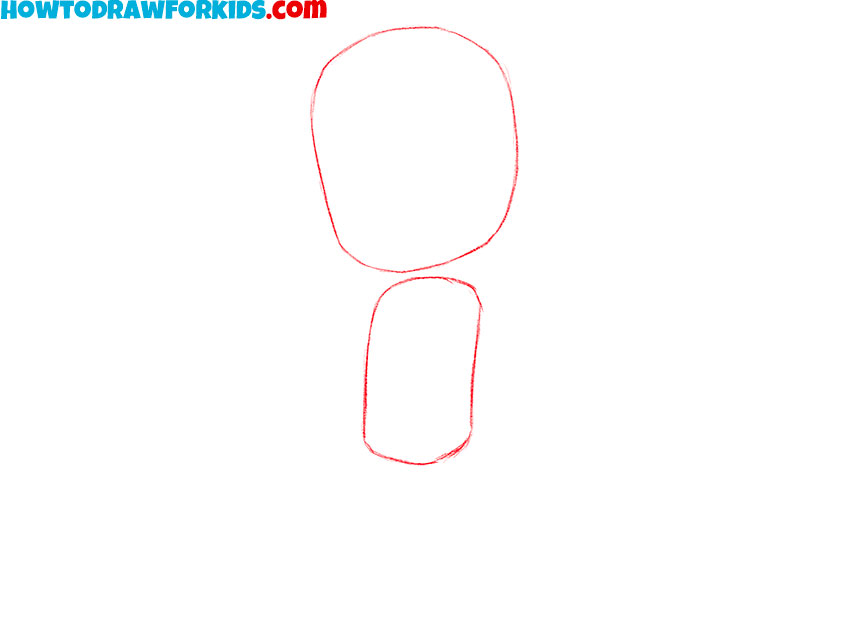
- Outline character’s head and chest shape.
Establish proportions first so later details sit correctly. Draw a large rounded head with smooth sides and bottom. Under it, sketch a small vertical oval for the torso; keep it narrower than the head. Center both shapes on the page and leave room below for legs. Do not add features yet.
- Draw the legs of Aquaman.
Now, from the lower edge, draw two straight legs of Aquaman, that angle apart in an easy stance. Each leg ends in a short, rounded boot shape. Keep the limbs simple tubes without joints for now. Ensure both feet sit on the same ground level.

- Sketch the arms and small hands.
From the right shoulder, draw a bent arm with the hand resting on the hip. From the left shoulder, sketch an arm angled down and forward with a small rectangular glove shape as if gripping an object. Avoid fingers for now; think of hands as simplified blocks.

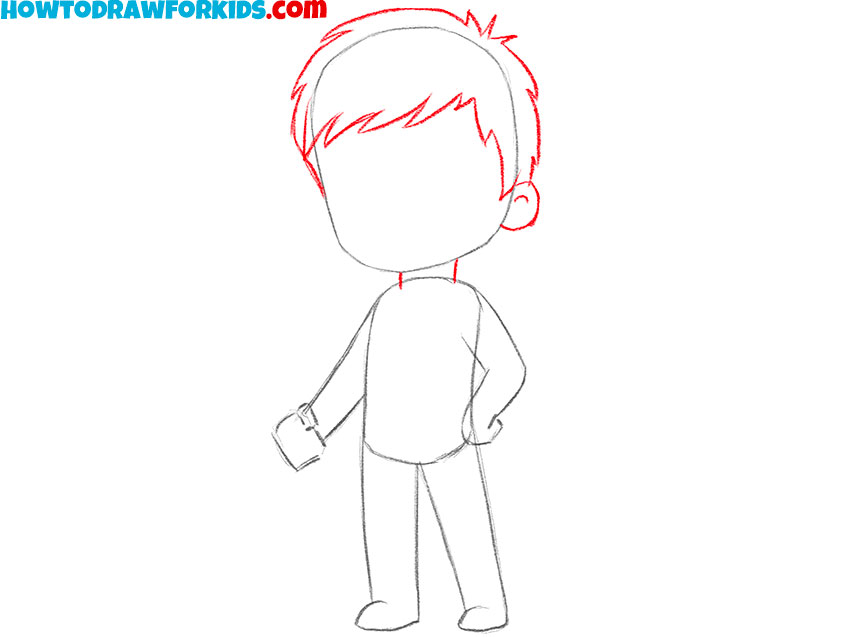
- Outline the character’s hairstyle and ear.
Around the head’s top, draw the hairstyle: a rounded cap with short, uneven bangs across the forehead and a tidy edge at the back. Add a small semicircle ear on the right side and a small curve inside. Do not draw facial features yet.
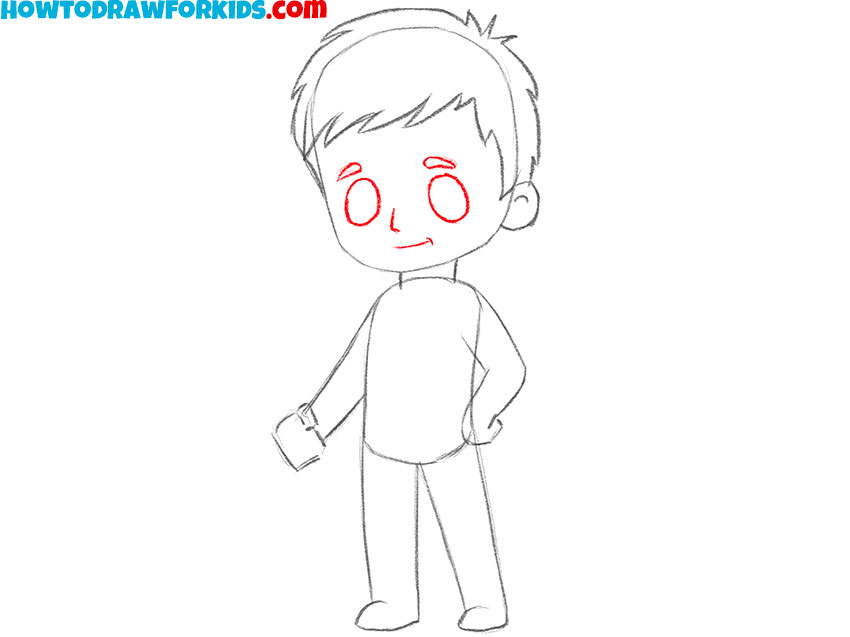
- Draw Aquaman’s facial features.
Now, draw the eyes as two large oval shapes low on the face. You can leave them as two simple ovals or indicate small pupils inside and leave highlights blank. Add a short curved line for the nose between the eyes and a small smile under it. Keep everything centered and symmetrical.
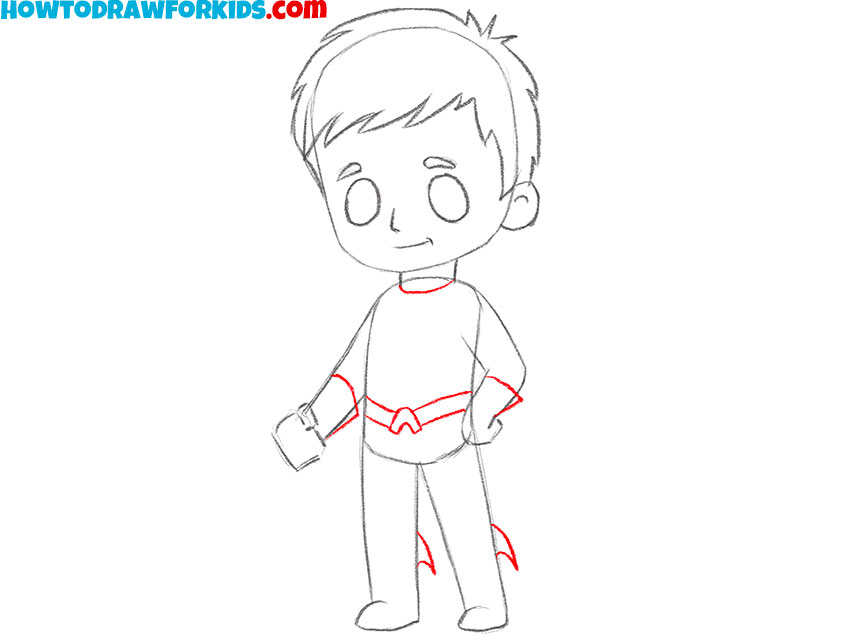
- Add the belt, collar, and costume lines.
Across the neck, sketch a thin collar band. On the torso, draw the belt: a shallow V shape at the center with two short side segments to form the classic Aquaman emblem area. On the legs, place small triangular fins at the outer lower legs. Sketch the upper edges of the gloves.
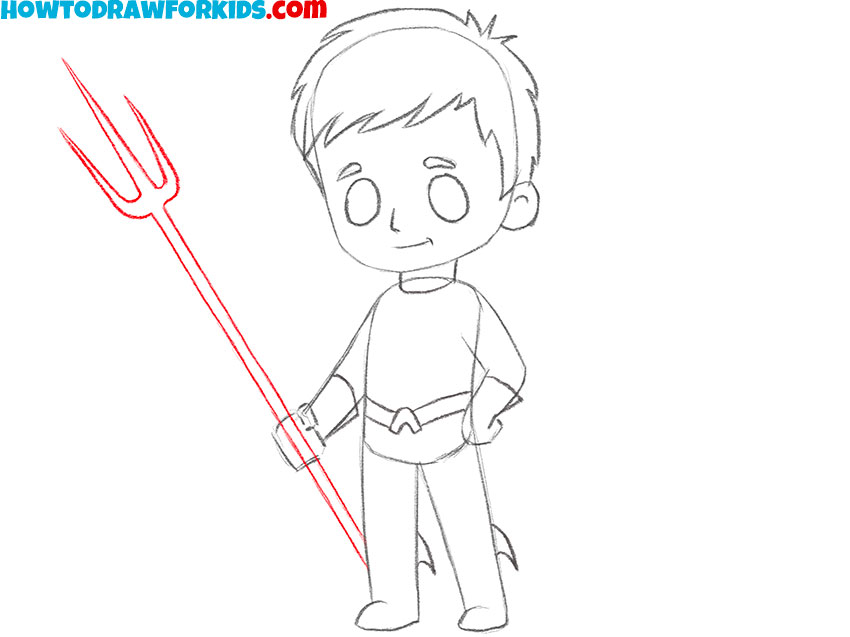
- Draw Aquaman’s trident.
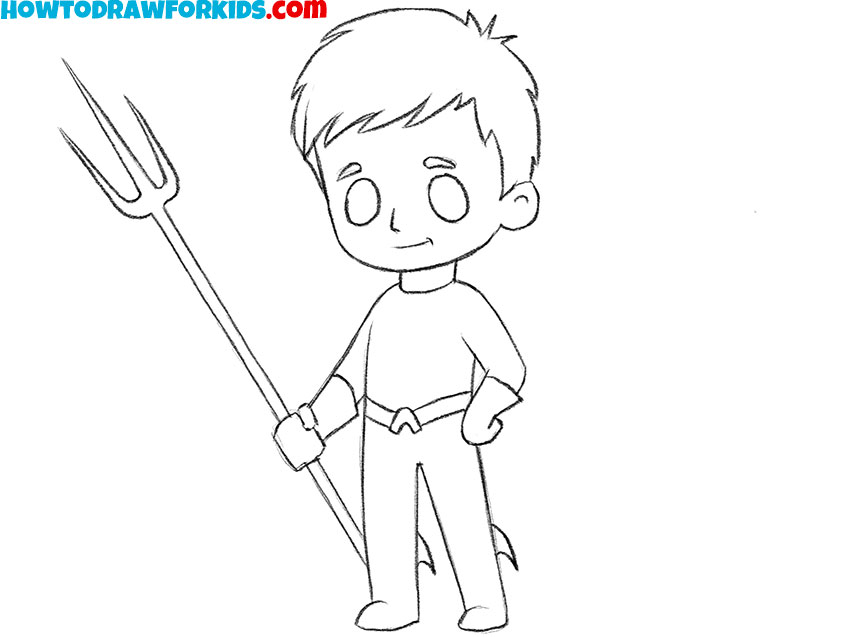
From the right glove, sketch a long, straight staff that leans diagonally upward past the head. At the top, draw a three-pronged spearhead: a tall center tine with two shorter side tines.
- Correct proportions and finalize contours.
Now, erase the original construction inside the head and torso, such as the extra oval edges and overlap where the arm crosses the body. Re-draw final contours with smooth, continuous strokes. After this pass, the drawing should show only clear, intentional outlines without scaffolding.
- Paint the figure with Aquaman’s standard palette.
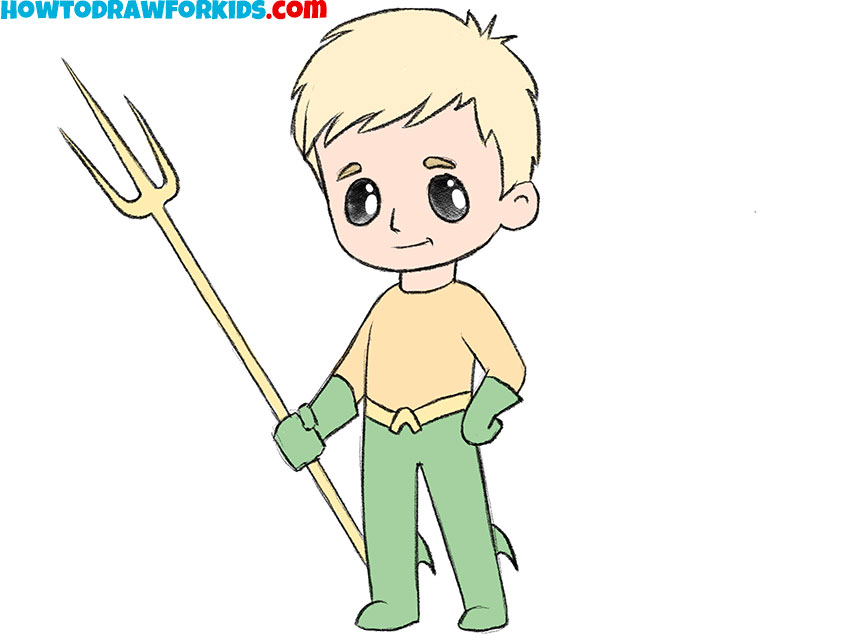
Color the hair of the comic book character light blond, the skin a warm peach, and the eyes dark with small white highlights. Paint the top outfit a muted orange-gold, the gloves a sea-green, and the pants a darker green to match Aquaman’s classic palette. Fill the belt and collar accents with a pale yellow-gold. Color the trident a warm brass tone.
How to Draw Aquaman: Video Tutorial
Conclusion
This Aquaman drawing lesson is one of many tutorials available on my website. You can also find guides on how to draw Superman, the most popular superhero, or how to sketch Batman, and other well-known characters from the DC Universe.
For more updates and new lessons, follow me on social media. I often post upcoming tutorials and related drawing topics there.
You can also leave your comments and suggestions below – they help shape future lessons and make the tutorials even more useful.

