

How to Draw Bread
In this lesson, I will show you in detail how to draw bread. This is a simple tutorial and yet very useful for any beginner.
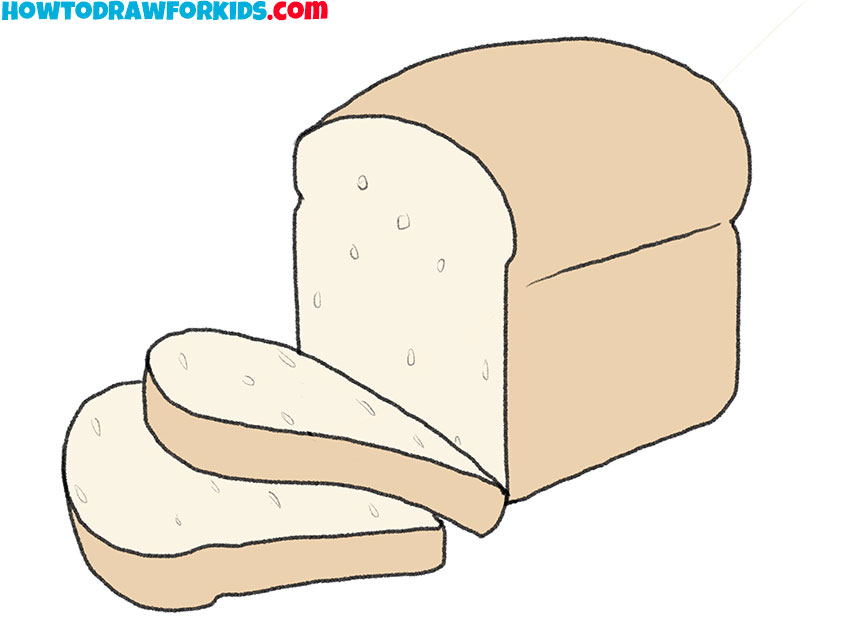
Let’s continue the topic of drawing food and in this lesson you will learn how to draw bread. This is the most popular bakery product. Bread requires flour, water, and yeast or sourdough.
There are many types of bread, in which, in addition to the main ingredients, various additives are used. Bread can have different shapes and different colors depending on what products are used in cooking.
In the picture, you see rectangular bread. Two pieces are cut off and lie freely side by side. To successfully complete the lesson, you will need your attention and accuracy. Take your time and try to draw all the lines correctly.
Bread Drawing Tutorial
Materials
- Pencil
- Paper
- Eraser
- Coloring supplies
Time needed: 25 minutes
How to Draw Bread
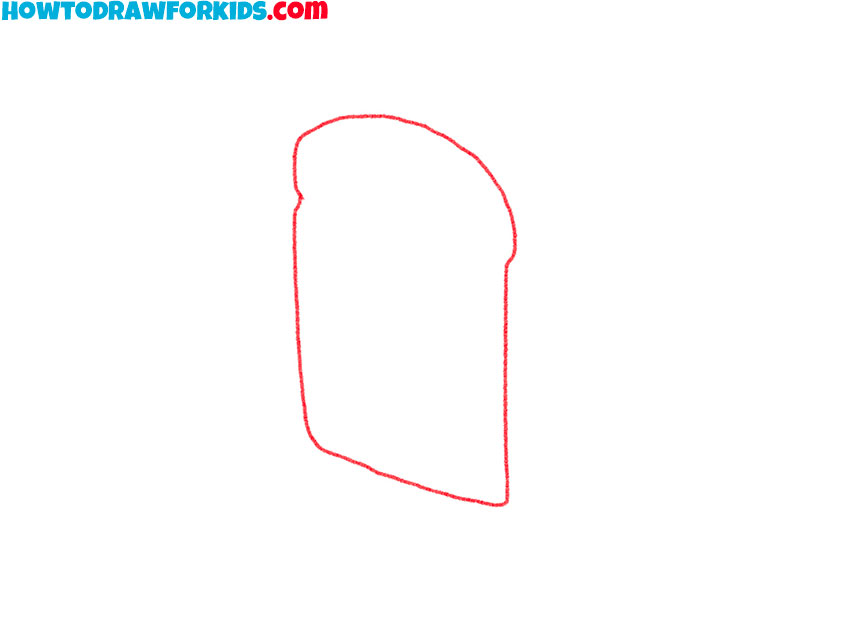
- Draw the side cut.
This step will require your attention. Try to draw the figure of the same shape as in the example.
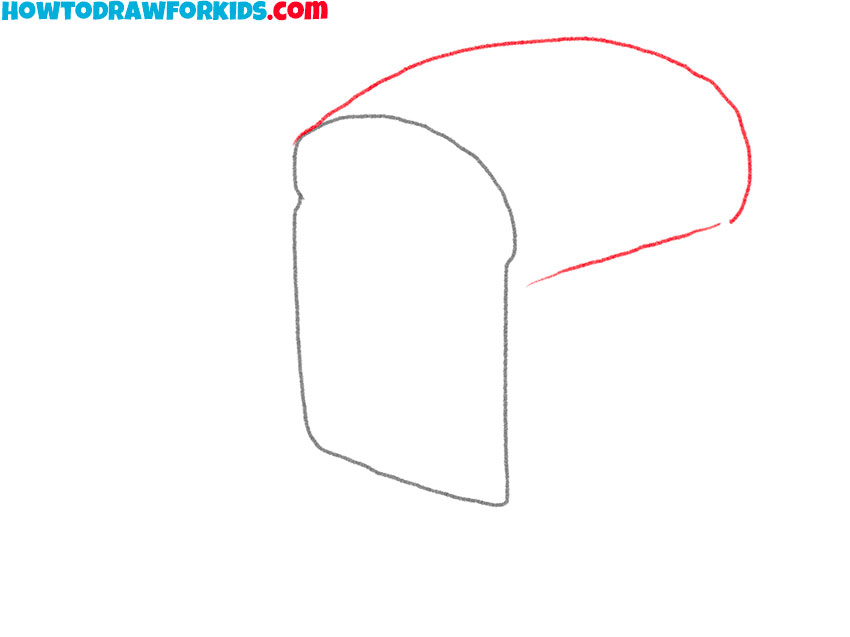
- Depict the top of the bread.
Draw one smooth rounded line at the top and one straight line on the side.
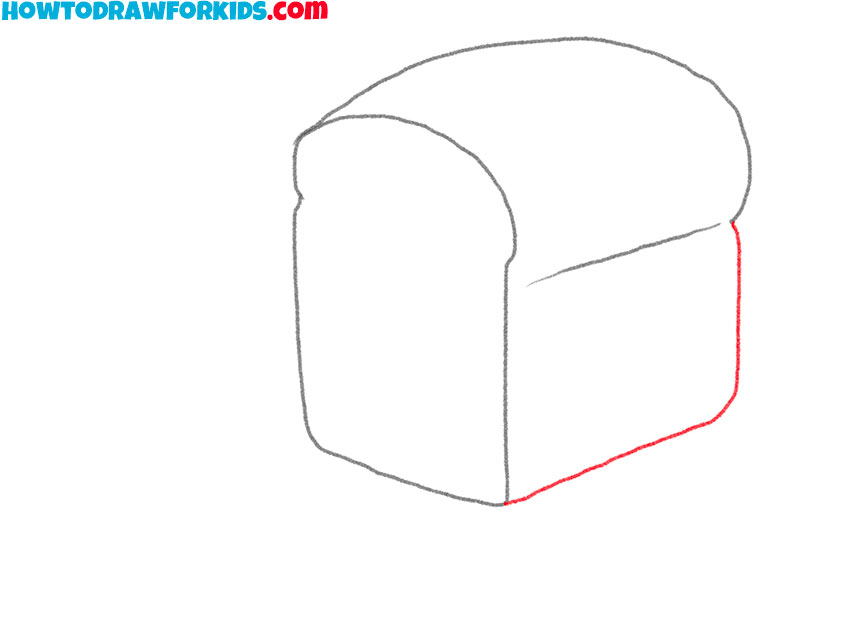
- Add the bottom of the bread.
Depict a curved line to make the closed path.
- Start drawing one piece of bread.
Draw a line that looks like an elongated drop to depict the top of the piece.
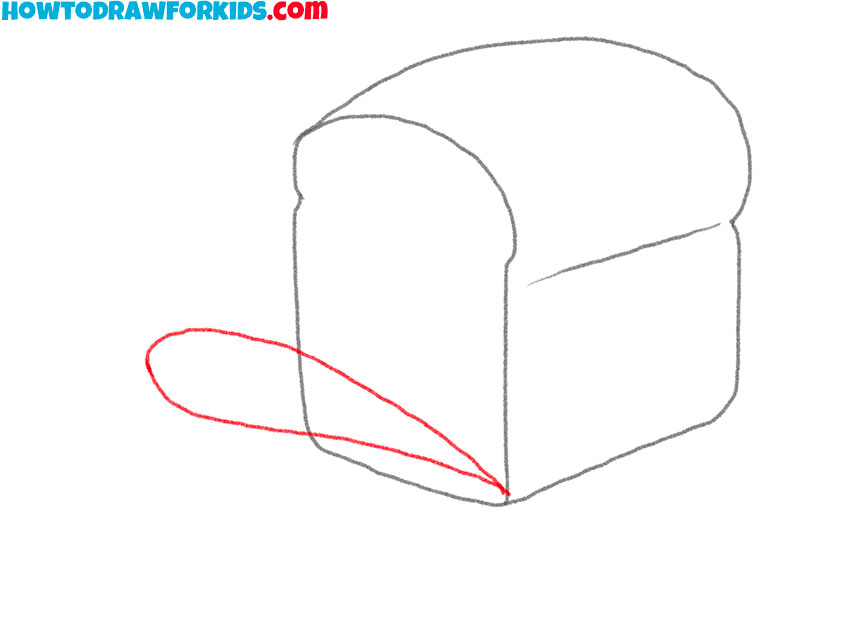
- Sketch out the bottom of the piece.
At this stage, add a smooth line at the bottom.
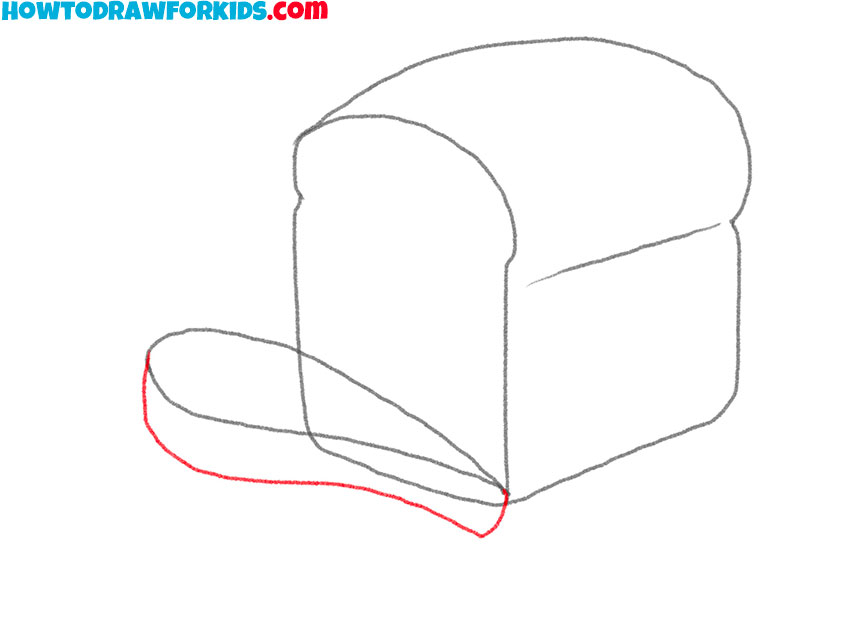
- Start drawing the second piece of bread.
At the bottom, depict a smooth curved line, the same shape as in the example.
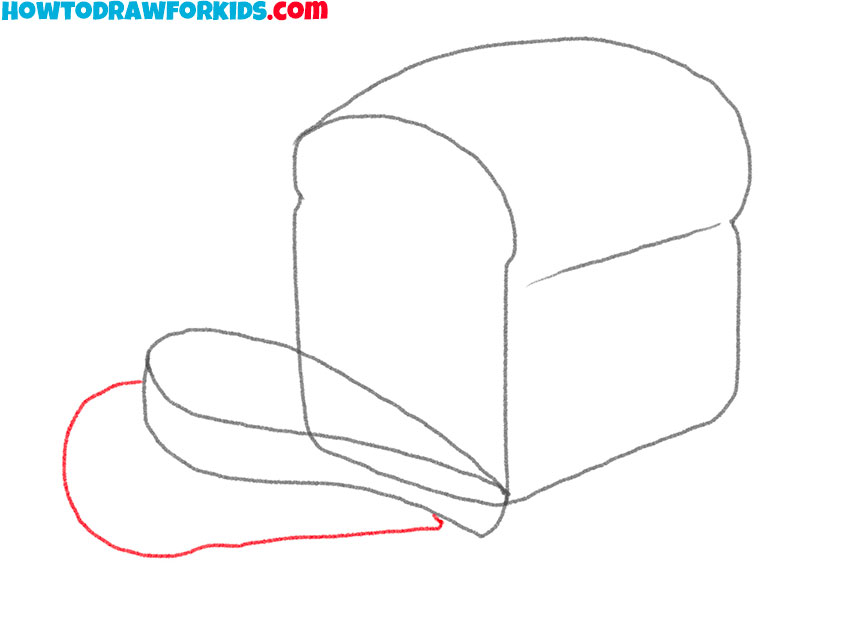
- Add the bottom outline of the piece.
Draw a smooth, curved line, just as you did for the first piece of bread.
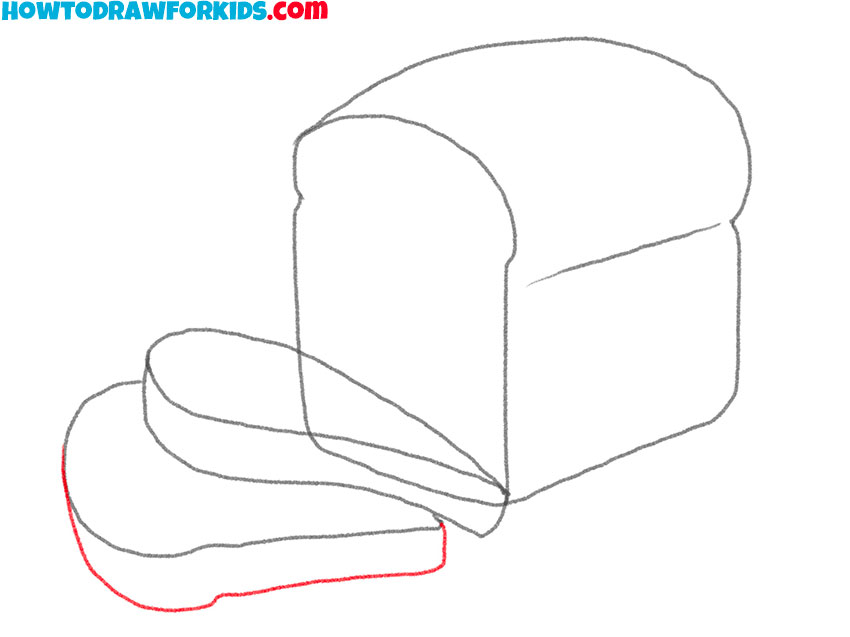
- Correct inaccuracies.
Carefully remove all unnecessary lines and use thin lines to depict the small holes in the cut.
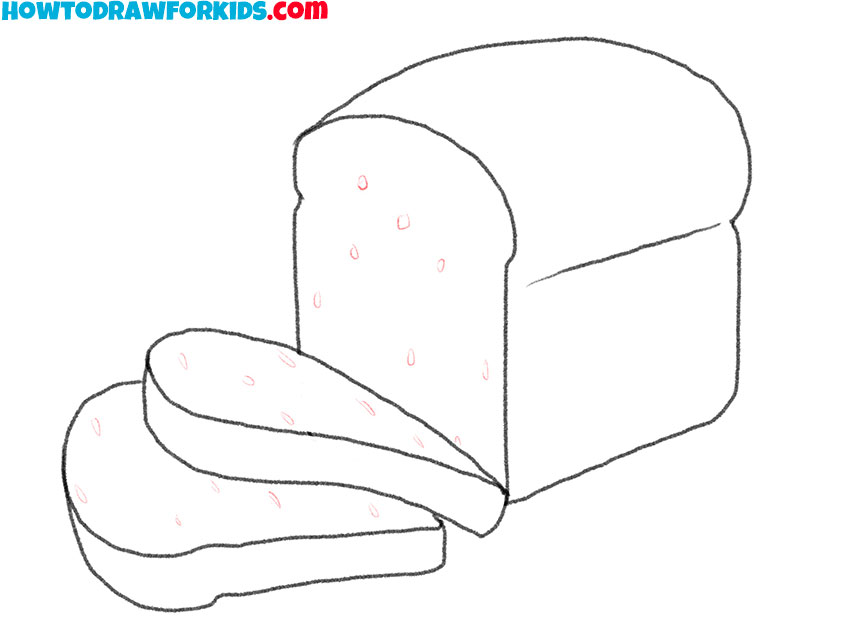
- Color the bread.
You will need two shades of beige.
Finally, I suggest you download the short version of the lesson as a PDF file. Thus, you can always return to the lesson, even if the Internet is not available to you.
How to Draw Bread for Kindergarten
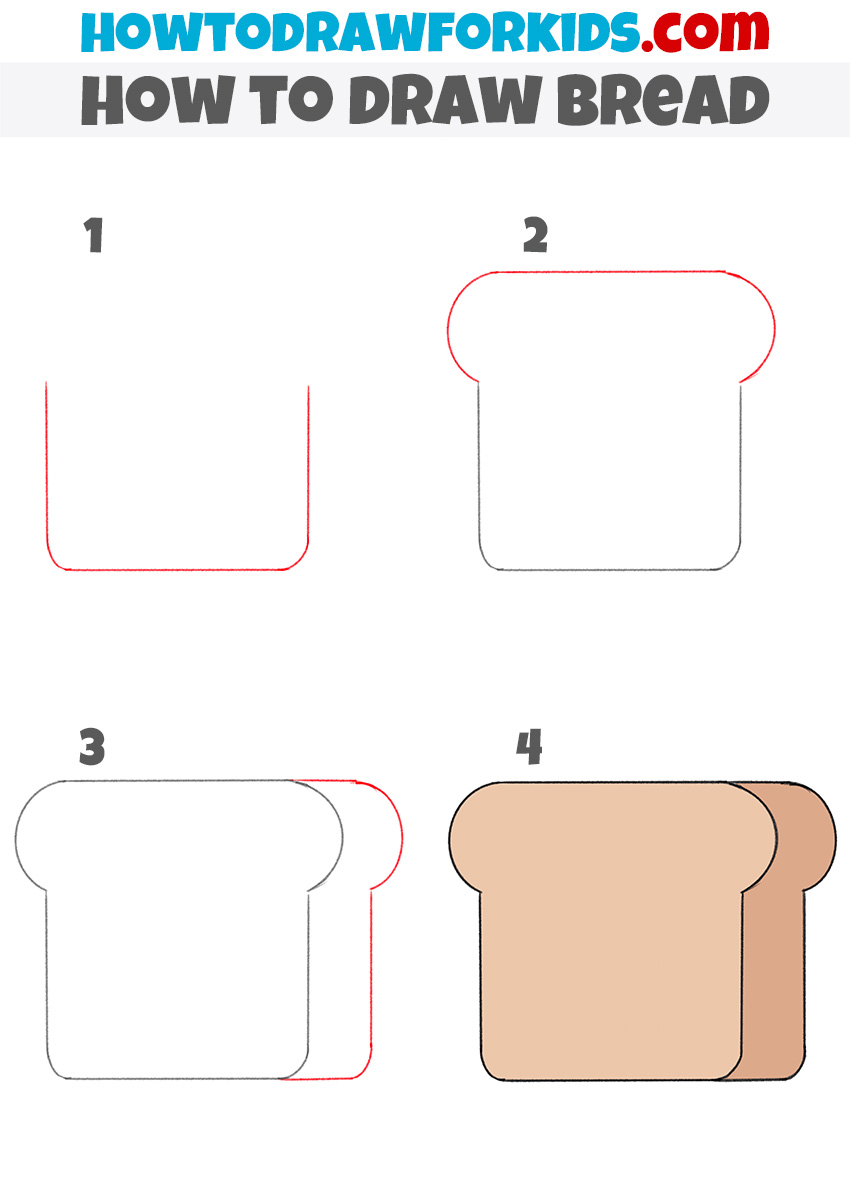
Now let’s try to draw a horse in an even simpler way. To do this, first outline the bottom of the loaf, then add the top half and back edge. After this, you can color your bread drawing in the color you want.


Umm idk what this reply is even about bro. Hold up… **scrolls up**
Ok. Sooooooo
I KNOW RIGHT